

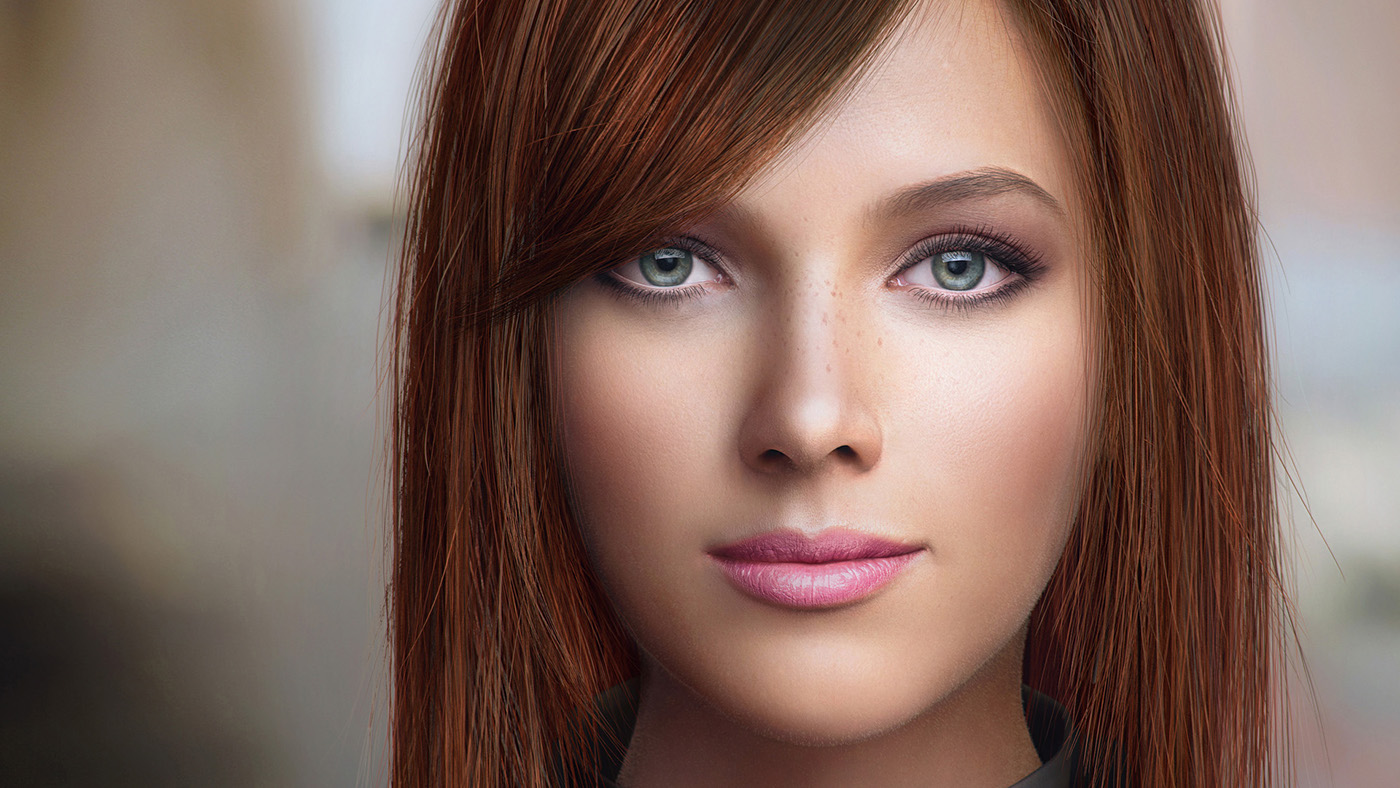
She will be the main character in my upcoming animation. Crawling out from the uncanny valley is pretty hard, especially when you are not a studio, but a poor artist. Because she will be fully animated i couldn't use a single photoshop paintover, yes my hand was shaking to paint just a tiny hair here and there, but i was able to resist :) Anyway, right now i'm satisfied with the outcome. A note about her hair: my pc can handle this with dynamics (so far), but we will see if i can go with more fine-detailed hair. Next task on my todo list: expressions and hair dynamics. Here are a few details about the process. No "making of" this time, i'll do that when i'm ready with the animation ;)
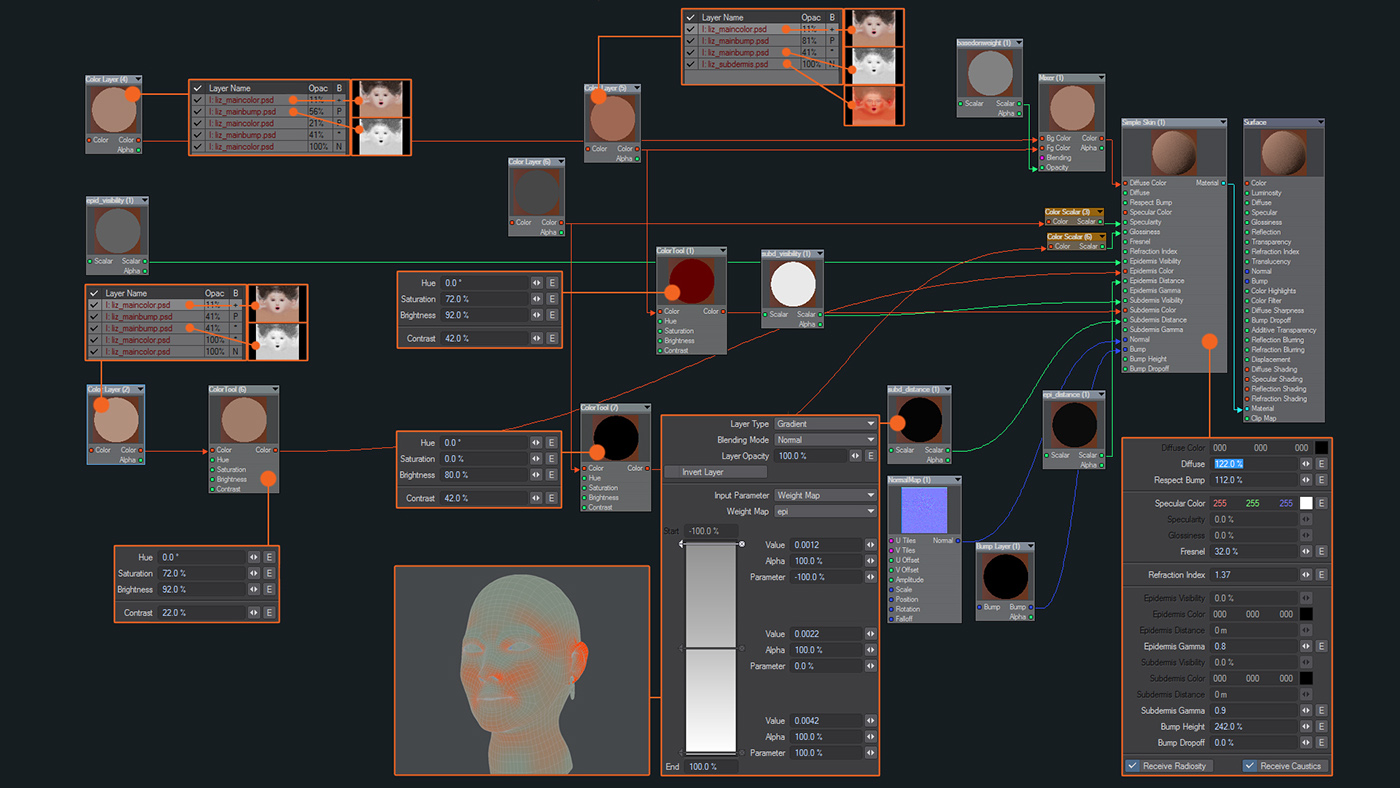
The skin's node setup (visibility and distance values are based on weightmaps, obviously different parts-different values)

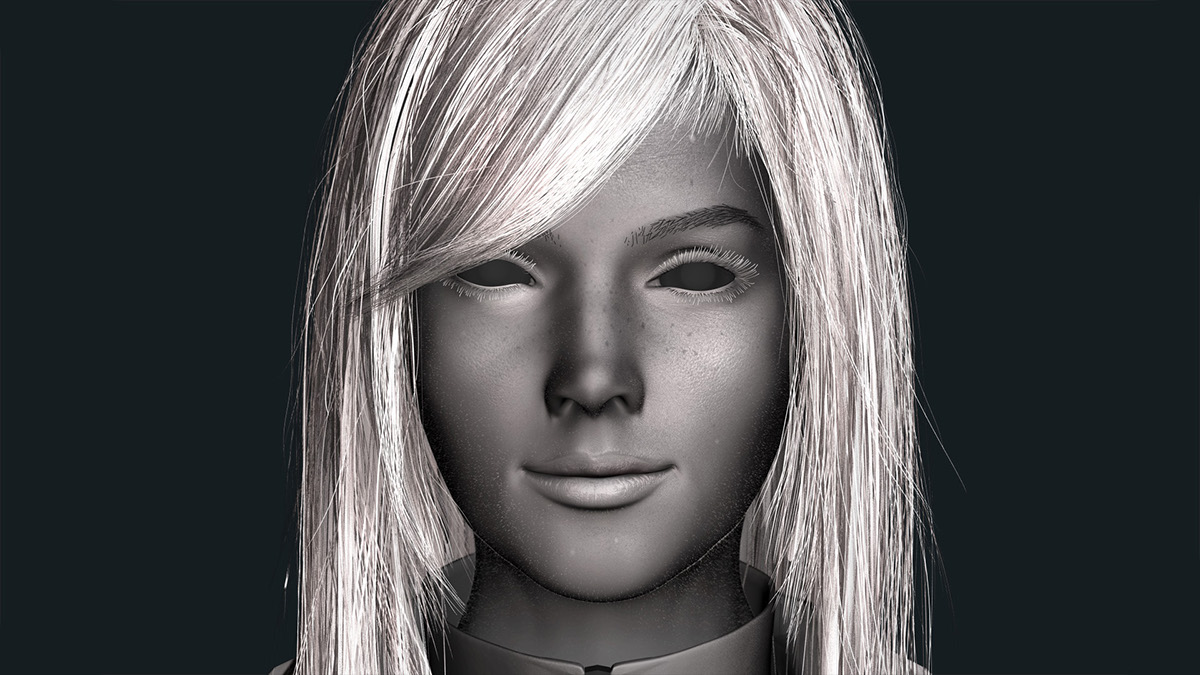
Skin basics: diffuse, subdermis, bump, normal. (50% scale) Oh one note: it is not just a "cut out a photo and map it onto the mesh"... mostly handpainted textures. Hehe, that is the reason it took months to texture her :D Of course there were parts that i was unable to fully paint, but i did my best.

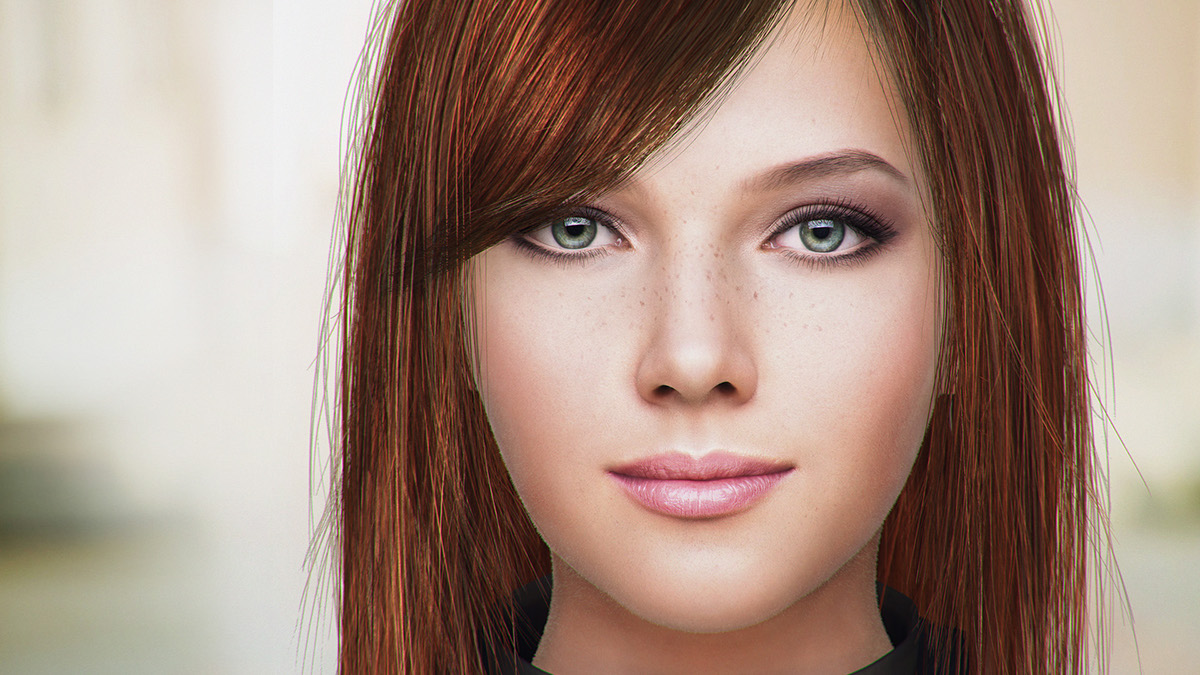
Playing with the buffers, i know... pretty. I had no choice, if i want animation i must use solutions that could work with animation... at this point no need to worry about anything, just hit render. I can't really explain what i did layer by layer. But for example a little specular added, shadows were easen up, raw rgb to smooth out this and that. Oh one more thing: i couldn't use masks because of the animation.
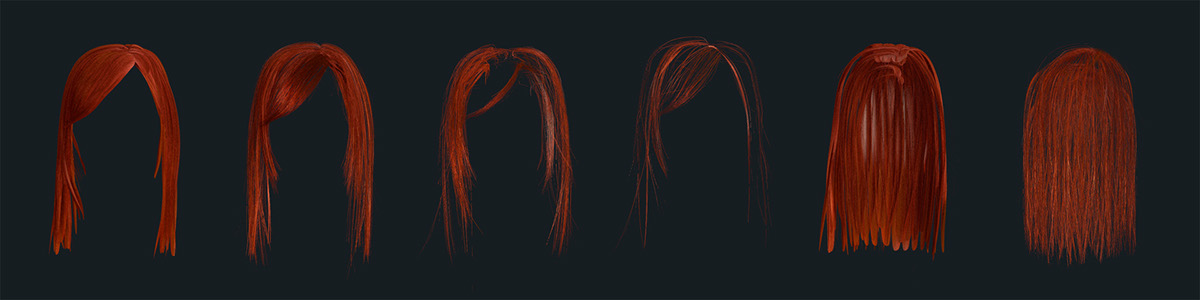
I created 8 different hair layers: from thick basic planes to fine loose hairs. My plan is to use bone dynamics for the hairs, but i have a couple options. We will see which choice will do the job.
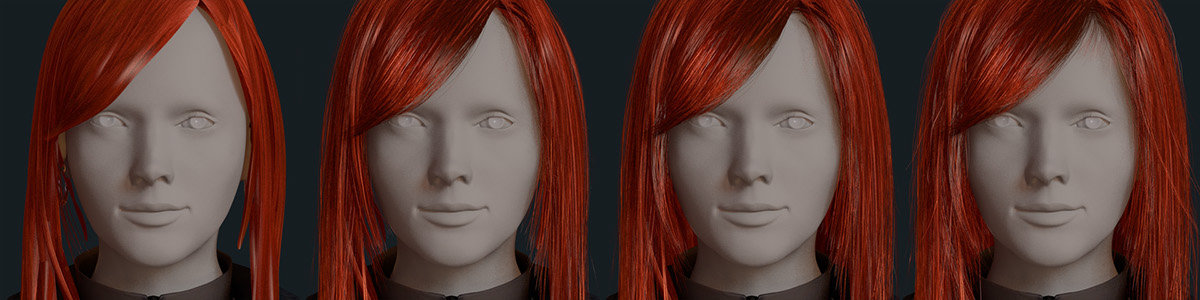
I know... 6 parts instead of 8, but i merged the fine hairs, so you guys can see it :D
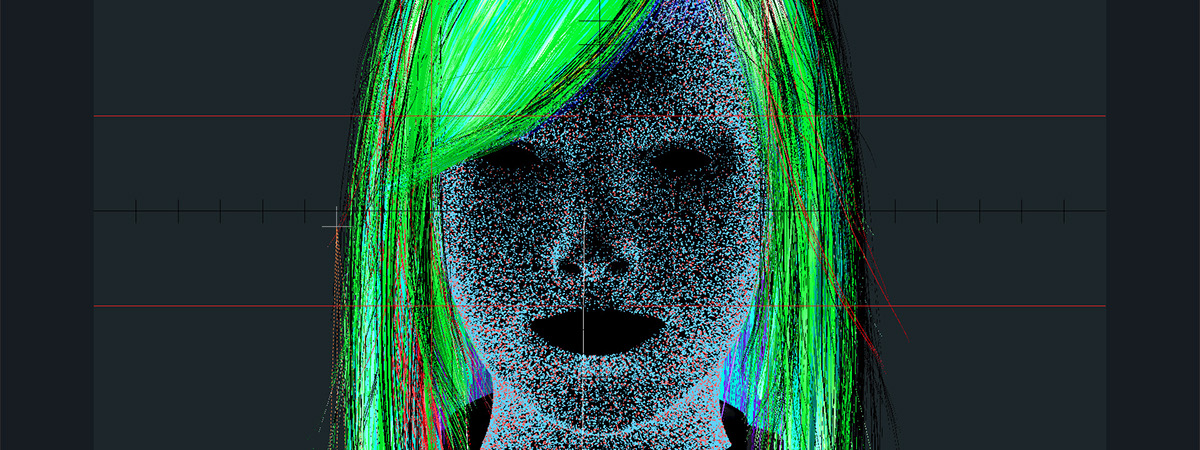
This is just a hair-backlit test, as you can see it is not 100% accurate. For example her fringe is a little bit lit even when the light is behind her. But I'm not worried, she will be in her armor (mostly) anyways. ( for the waverz: i used DP's backlit node ) Mkay, next:
Pretty huh? A couple of instances for the peach-fuzz. Also controlled by weightmaps.
Eyelashes and whatnot ;)
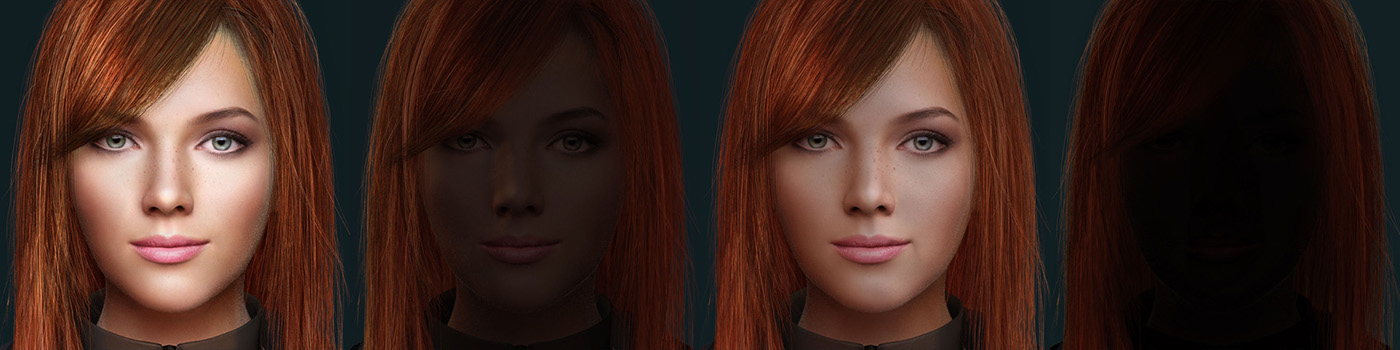
Early test render: nice, but flat. Thanx to my fellow LW friends/community i headed towards a different lighting setup. One key light + 2 subtle side lights + 1 specular booster light and one backlit/hairlight. ( important note to the waverz: GI/ environment lighting is IMPORTANT with the simple skin material, play with it and you will see! )
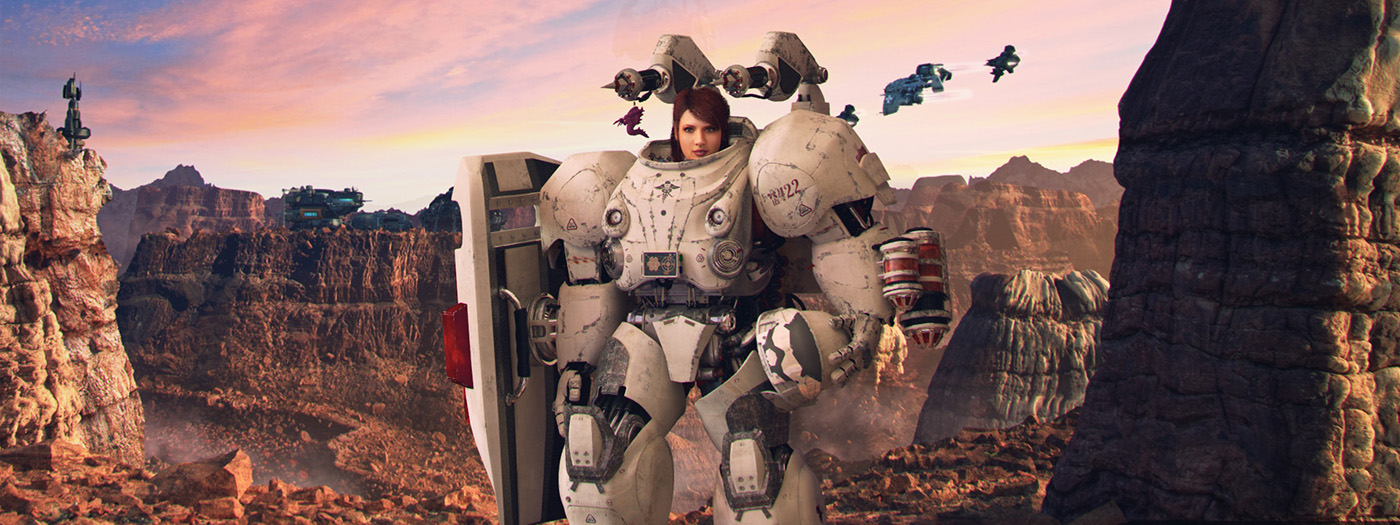
This is Liz 1.0 in her old medic armor (with fully working rig and with 36 working hydraulics), i'll redesign this one too, but here is the old one to get the idea where i am heading ;)
Nothing is carved into stone, probably there will be changes and compromises here and there, but i think i'm in the right direction. Next task: expressions and hair dynamics (but before that, i need to create some environment designs ;) )
Thanks for watching and thanks for the support everyone :)
All the best:
ekho
Thanks for watching and thanks for the support everyone :)
All the best:
ekho


