"Sardine": Mini-Longboard
Last summer a friend had given me his old skateboard, and I had spent a lot of time converting it into what is called a "shlongboard", a combination of a short board's size and a long board's handling characteristics. It worked well for a long time, but soon I began to notice cracks.
I decided to make what is known as a "mini", a board perfectly adapted for getting me to class on days where I'm not sure if it's going to rain or not. Instead of being undecided and playing it safe and leaving my board home, this mini is so small and unobtrusive that I can just carry it with me wherever I go!
It had long been a project idea, and now this cracking board was presenting itself to me. So, as I have done so many times before, I did a ton of planning and research, and went all out on this little guy. Cracks? Delamination? Nothing that aluminum, epoxy, and clamps can't handle.
I also found an interesting way to apply grip to the top of the board deck through my research. You can buy a little back of what is called "Tread-Tex" at the hardware store, which is supposed to act as a paint additive to give a rough surface. Longboarders online swore by putting this sand-like material in their polyurethane before coating the top of the board, so this was another experiment for me.
A lot of people ask me about the "brass knuckles" in the deck, but it really just acts as an artistic way to comfortably hold onto the board. People have tried it and love it, although it does lend some weakness to the board itself.
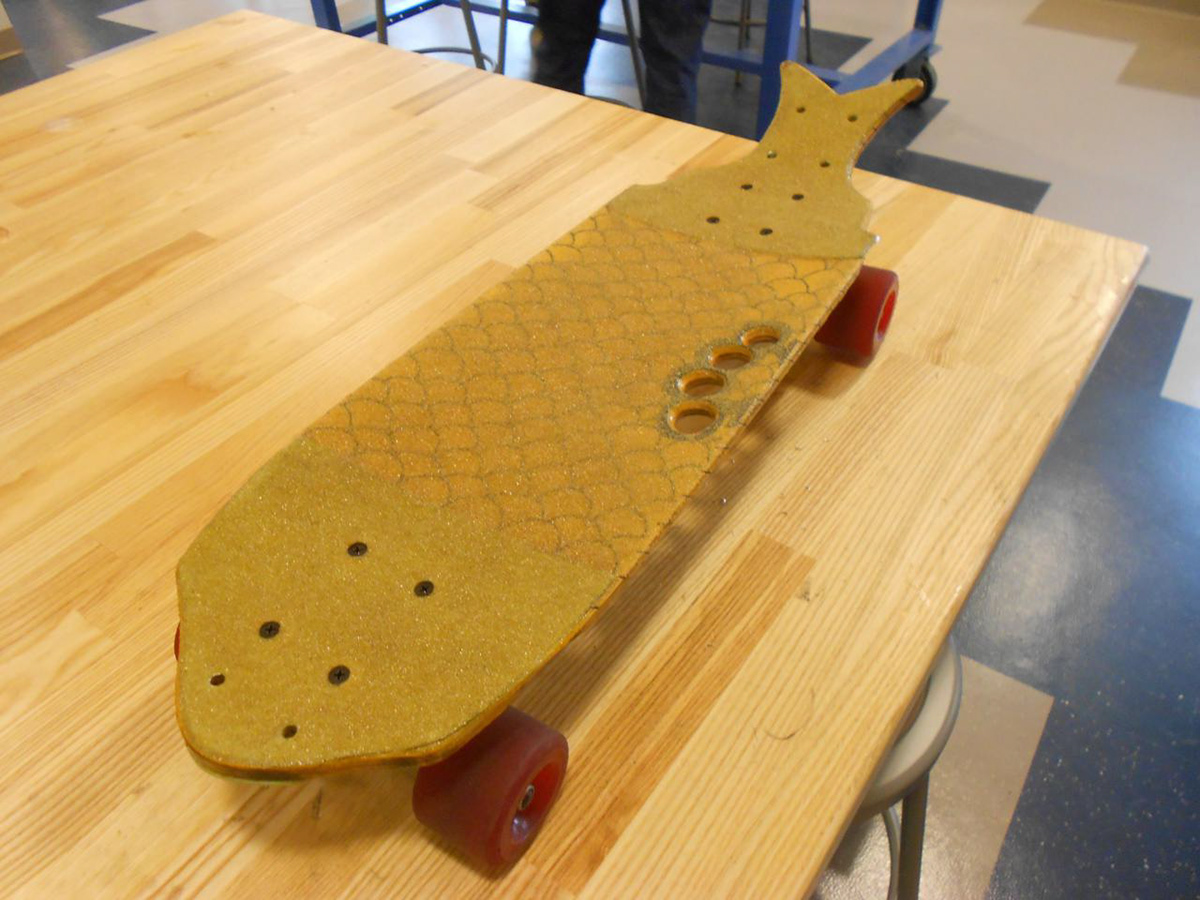
Finally, the board sort of fish-shaped after cutting it out on the bandsaw, so I ran with it. The see-through tread-tex grip lets you see the sharpied scales on the top of the deck, and the rear "kick tail" of the board has a swallow-tail cutout in it, lending to the fishy appearance.

After cutting out the shape of the board. These cracks are actually exaggerated as I used a razor to cut down to the propagation of the chasm so the epoxy could penetrate deeper.

This board really had some issues with it. It is apparent to me now that drilling so many mistake mounting holes in the original board wreaked havoc on its structural integrity.

After cutting a basic rectangular shape out of a thin bar of aluminum, I drilled the appropriate holes, filled the holes/cracks with flexible epoxy ('H2 Hold'), and bolted and clamped the material down. The plastic ruler is so I don't mar up the surface of the aluminum....the epoxy sets quickly so I grabbed the first thing I saw.

Both the front and rear aluminum panels are now installed on the bottom of the board near the problem areas. All appropriate holes are drilled for the truck mounting.
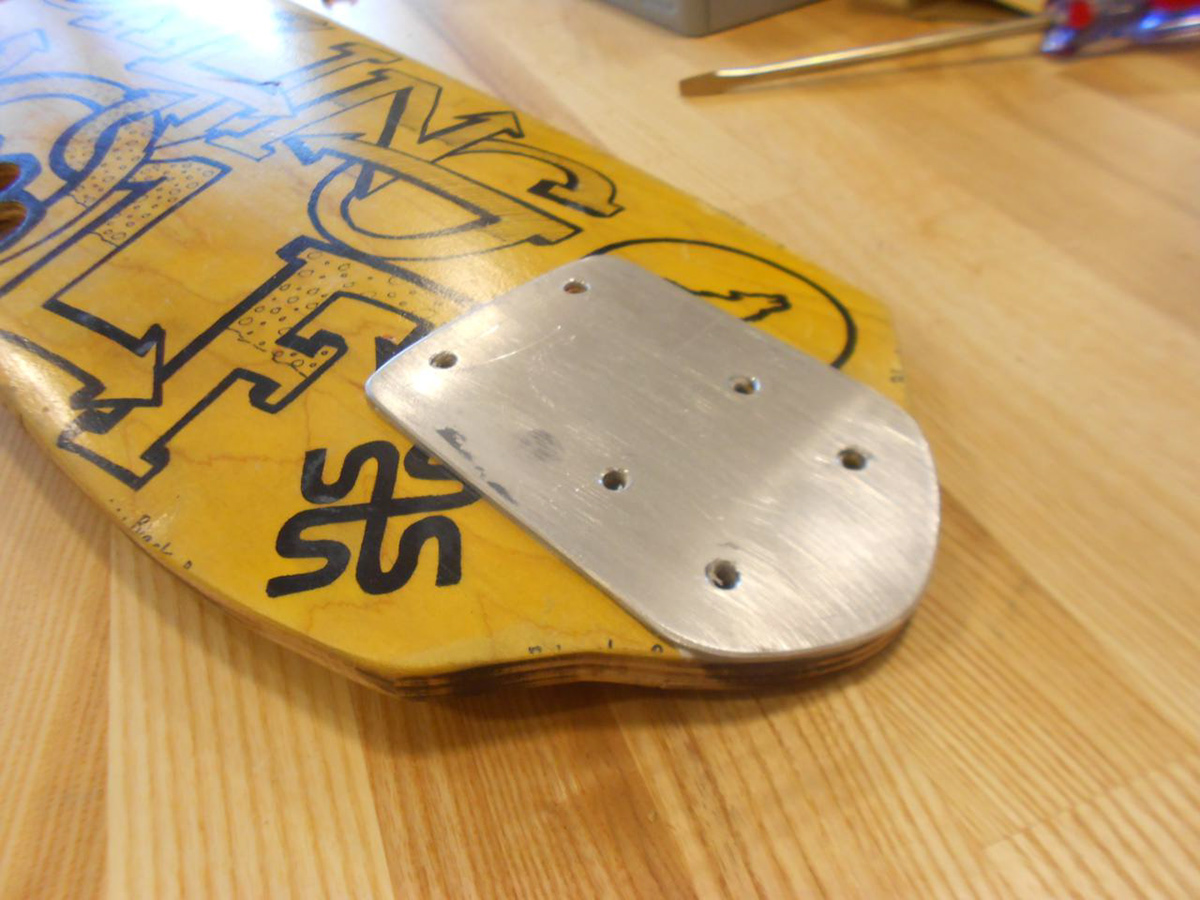
Close up view of the front aluminum panel. It extends slightly further than the nose of the wooden deck so that if I ram anything by accident, it hits the metal and not the soft board.

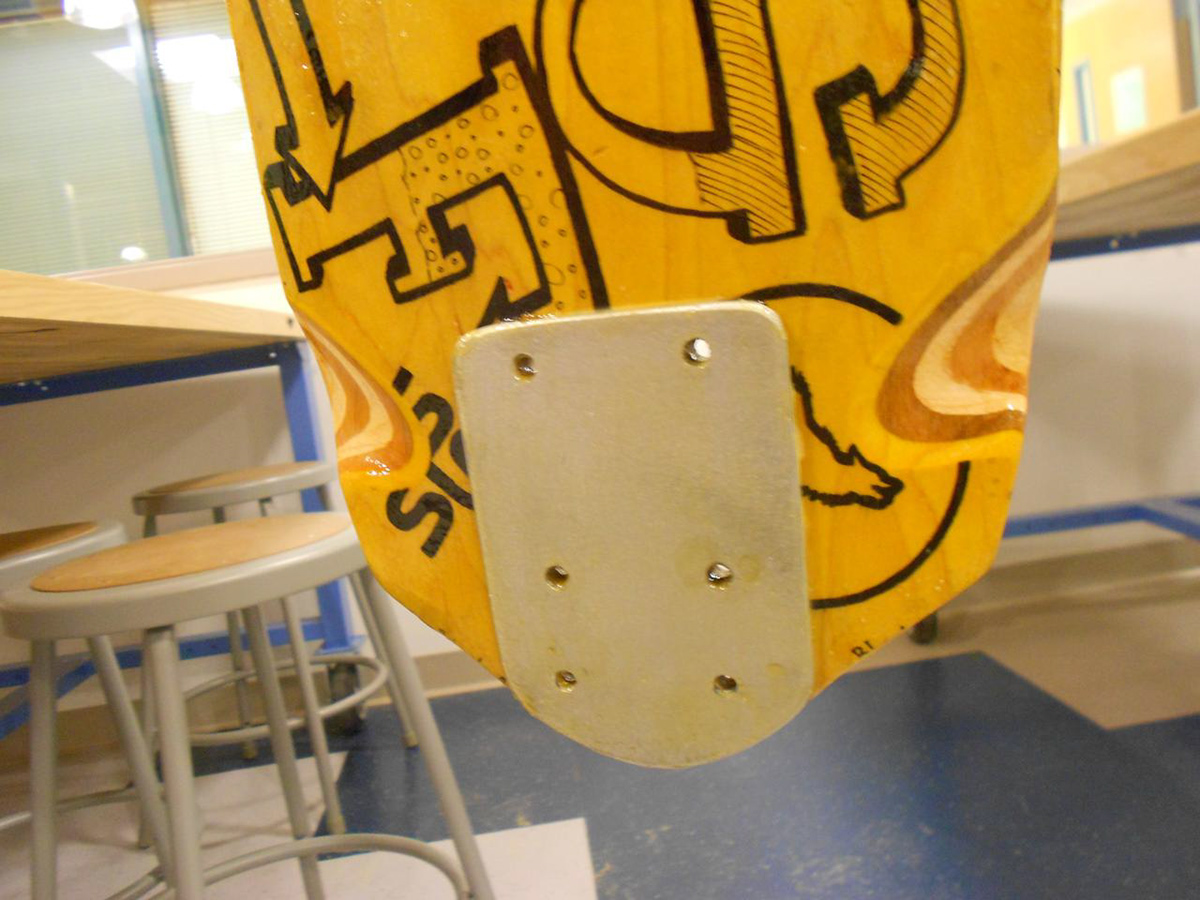
Close up of the tail aluminum panel. At the time I had scratched in, "Lil' Shredder", but it quickly got worn away.

Close up of the rear of the board showing the true shape of the tail.

The thinner top plates made out of aluminum sheet metal are sitting on top of the board making sure everything is shaped correctly and fits as desired before gluing and clamping.

Clamping the front and back top panels. I had to make sure to squish as much epoxy as possible down into the deep cracks in the board.

Close up of the clamping of the front of the board. The grey plastic is yet again to not mar up the aluminum's surface.

Close up of the clamped rear of the board. Although seemingly ridiculous, it is extremely necessary to create as much pressure as possible on the epoxied surface so it bonds correctly over a three-day period.

The finished tail top plate before drilling the holes.

Close up of the front top plate before the holes are drilled.

The board is finally structurally sound again, and is also beginning to pack on the pounds!

The top and bottom plate are now correspondingly drilled through, and I drew fish scaled on the top of the board with a Sharpie marker.

In addition to the scales, I also drew in the "brass knuckles" with the Sharpie to match the design on the bottom of the deck.

Close up of the drilled top plate and scales.

Close up of the front now-drilled top plate with an interesting surface finish I achieved using my orbital sander.

The first coat of oil-based polyurethane is applied and I sprinkled a generous layer of tread-tex on top.

Close up of the tread-tex on the back of the board.

Close up of the tread-tex on the polyurethane coated rear top plate.

Really close up of the tread-tex near the "brass knuckles". It really looks like salt!

Front of the tread-texed board.

Thinking ahead now and applying a coat of polyurethane to the top and bottom at the same time.

Another layer of polyurethane, and another layer of tread-tex.

Double tread-texed top of the board.

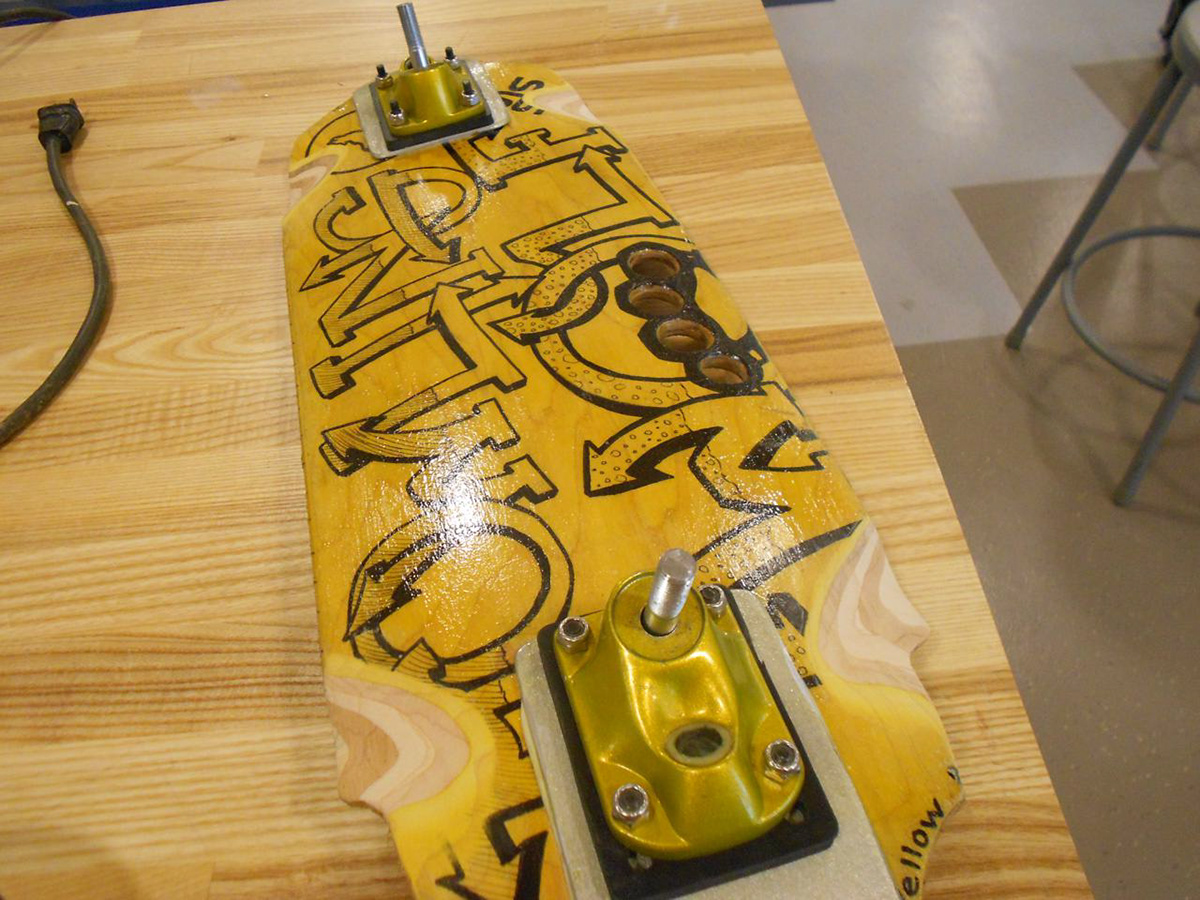
Threw the rest of the components on the board together after another coat of polyurethane to lock the tread-tex in.

Gotta keep safe and wear my helmet! Doesn't mean I can't have a little fun with it though.

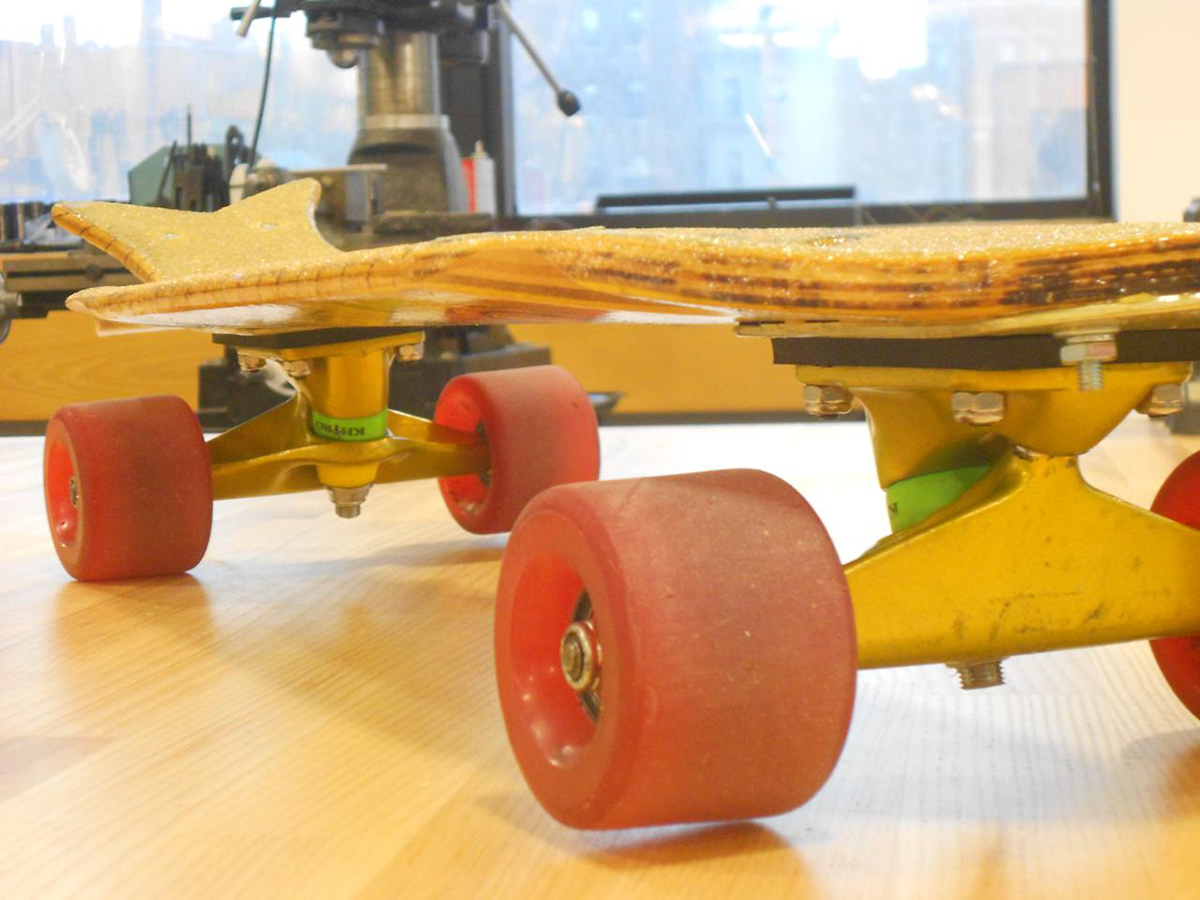
A side shot of the board. Notice the two yellow bushings on the gold trucks. Keep in mind these are the softest I own and a hardness rating of 85A.

Top view of the assembled board, alongside my absurd helmet.

Bottom of the assembled board. At this point I had tested it out and realized that I was getting severe wheel bite, so I started to file out some wheel wells as can be seen in the top left corner of the board.

The board is now partially disassembled again, as I needed to sand out four wheel wells to avoid any further wheel bite.

Close up of the rear wheel wells.

Close up of the front wheel wells. The zebra striping I accidentally achieved actually looks pretty cool!
Picture of the whole bottom of the board. The wheel wells look pretty spank after all.

Adding a final coat of polyurethane to lock moisture out of the exposed wheel wells.
At this point I have three coats of polyurethane on the bottom of the board, and four coats on the top.

The reassembled sardine mini longboard, this time with slightly harder bottom bushings, (the black ones are now 87A instead of 85A) and thinner riser/shock pads.

Rear of the assembled board. Still need the bolts/nuts/lockwashers to secure the aluminum panels properly.

Bottom of the reassembled board. Look at those wheel wells!!
Top of the reassembled board with another coat of polyurethane on the top. It actually noticeably locked in the tread-tex better, giving it one final extra coat.

Side of the board. Here you can blatantly see an interesting characteristic of the board itself. I think the previous owner of the deck left it outside in the rain because it has warped pretty badly. It's not really a worry as the trucks are squishy and combat any misshapen aspects of the deck.

After test riding the board, I realized I need still more stiffer bushings, and I also needed larger riser/shock pads to avoid getting wheel bite.
Yet again the funny warping characteristics of this board.
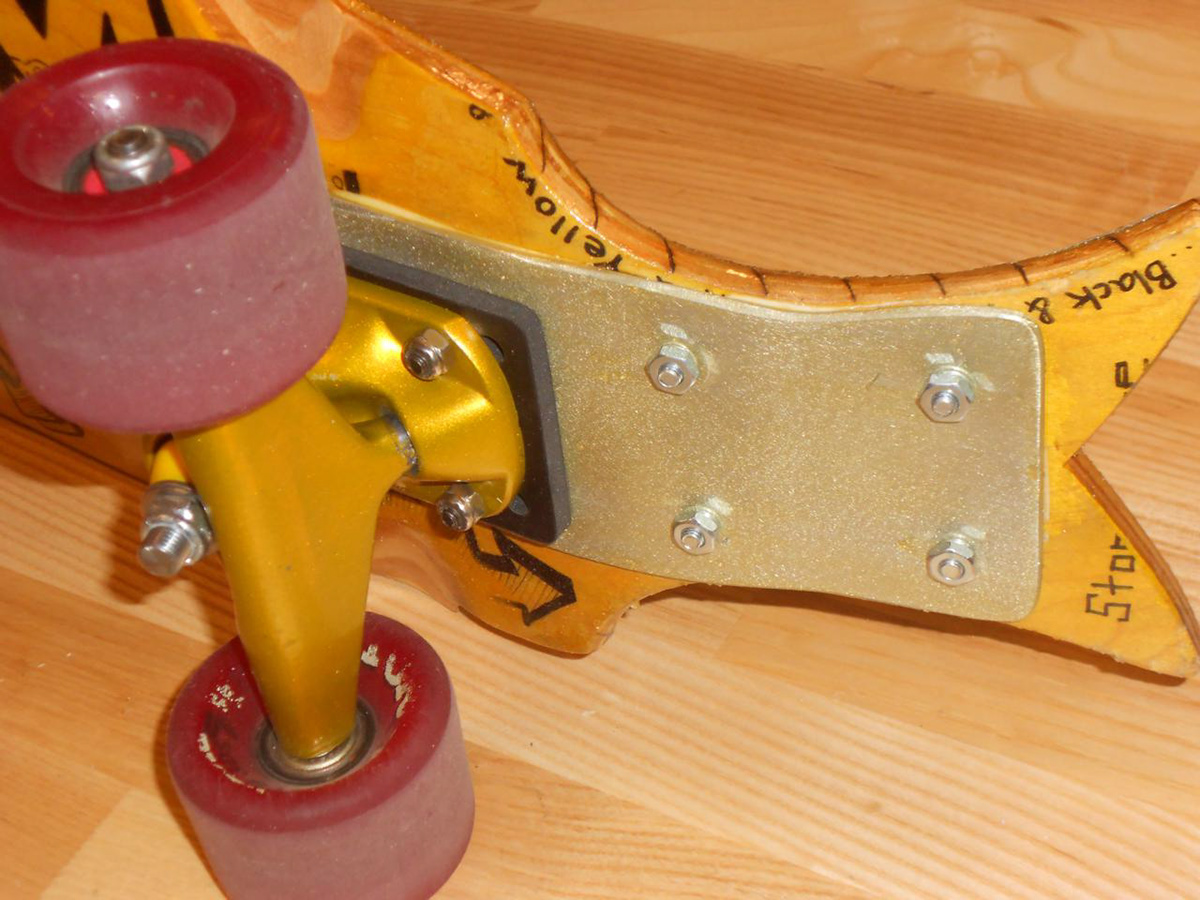
The rear plate finally bolted down securely.

The rear of the board with the thicker shock/riser pads back on and the green harder bushings (89A).

Close up of the front of the board. Look at that zebra stripe!

Rear wheel well and truck. Although the green bushings ruined the color scheme, they work great.

The entire bottom of the finished board.

Me standing on the final product. There obviously isn't much footspace, but that was the point of this board! Overall I find that there is actually plenty of room for you feet as long as you are careful.

The rear kicktail is worth its weight in gold I'm so glad I kept it in the design for this board. It allows me to hop down curbs, and makes up for the boards tiny stature.

Me holding my final sardine using the awesome "brass knuckle" grip. This thing was a ton of fun to make, I learned a lot along the way, and I can't wait to further test this little guy out!


