For a project assignment in our product design class, we had to choose a company to work with (given a list of contacts) and design and 3D print a promotional widget for use on a desktop that could be used as a promotional tool. Our team worked with General Dynamics, an extremely large company, but our focus was on the Armament and Technical Products division. Although there are virtually hundreds of objects we could have chosen to use in our widget design from General Dynamics, we decided to go with the Stryker.
The Stryker is very characteristic of General Dynamics, and we were told by our contact to focus on the special armor utilized on the Stryker that his division manufactures. To highlight the armor we made the front of the Stryker a lift-able hood that looks strong and safe when closed, but vulnerable when open. Inside the tank the user can place office supplies in the trays and compartments. The turret on top swivels 360 degrees, and is capable of semi-automatically firing up to four rounds of rubber bands. The original design also had the back door hold a 3" by 3" sticky-note pad. The following pictures are renderings from our first Solidworks model before revising some key aspects.
The Stryker is very characteristic of General Dynamics, and we were told by our contact to focus on the special armor utilized on the Stryker that his division manufactures. To highlight the armor we made the front of the Stryker a lift-able hood that looks strong and safe when closed, but vulnerable when open. Inside the tank the user can place office supplies in the trays and compartments. The turret on top swivels 360 degrees, and is capable of semi-automatically firing up to four rounds of rubber bands. The original design also had the back door hold a 3" by 3" sticky-note pad. The following pictures are renderings from our first Solidworks model before revising some key aspects.
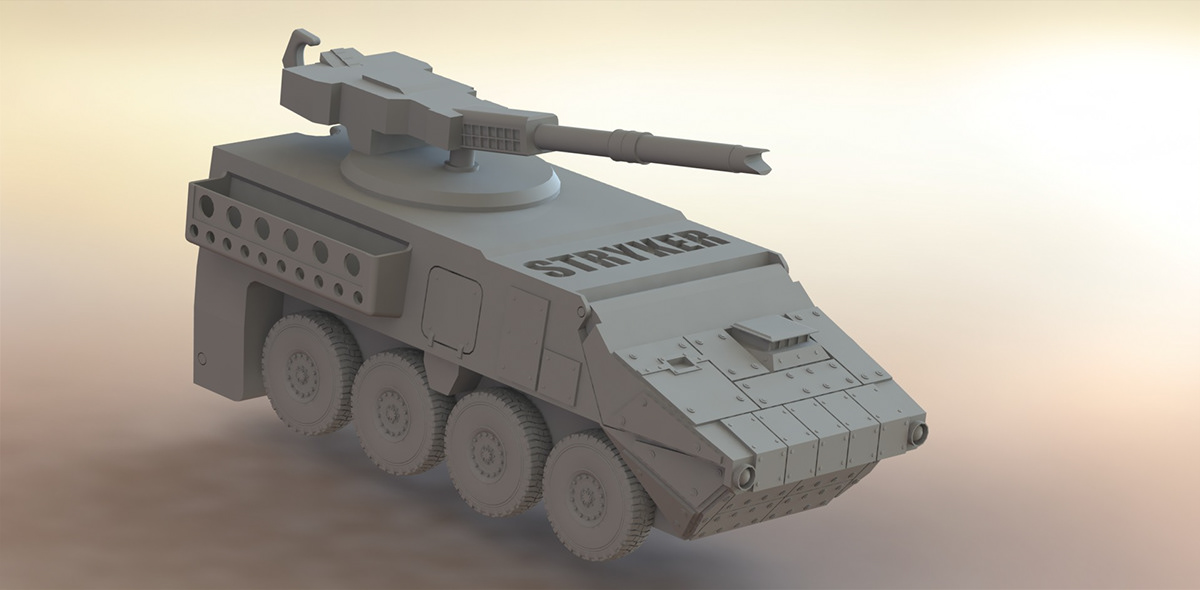
A good overall view of the Stryker, we can see that the front 'hood' lifts up, and the panniers on both side of the chassis allow the user to store small office supplies. At this point in time on the first design, the Stryker was 11" in length.

The front armor panels on the Stryker were a key design element that had to be taken into consideration with this project. Multiple front hood designs were combined from different Stryker models to create this final look.
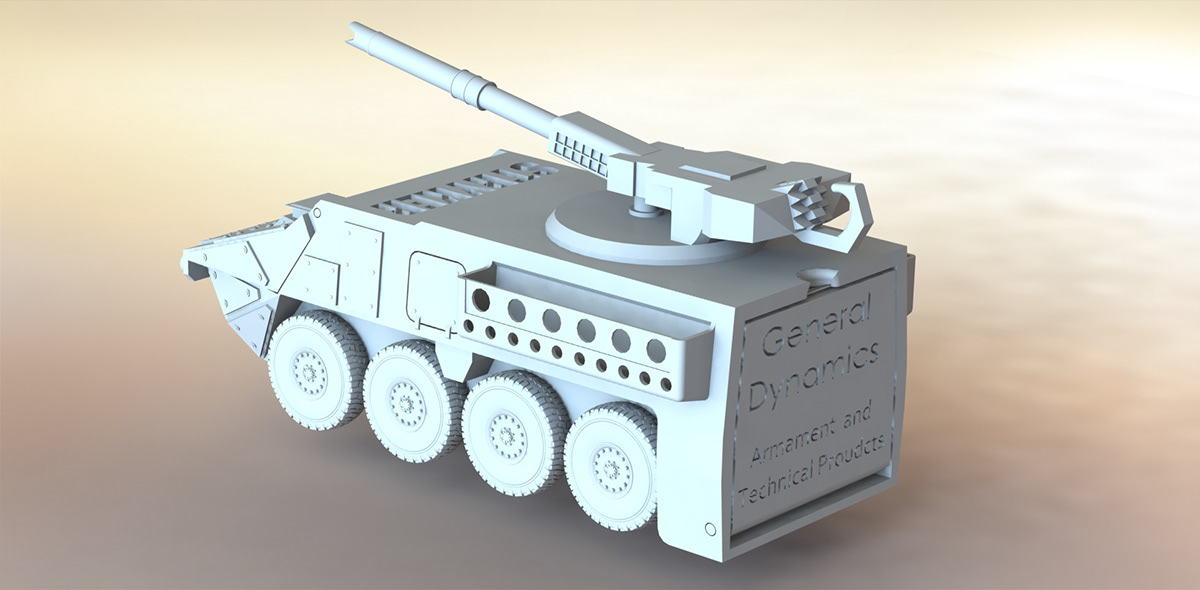
Here we can start to see the firing mechanism on the semi-automatic turret system on top of the Stryker chassis. The large back door also allows ample room for the company and division name.

A close up of the turret. The firing pin mechanism will all be printed as one unit and then later submerged in an acid bath to erode away unwanted plastic support material.

The internal structure of the Stryker. We can see the pin system that holds the turret in, and the space in back where the sticky-note pad would sit.

The user has multiple tray options for storing office supplies. The holes in the bottom are to allow a path for the melted support plastic material to flow out of, essentially hollowing out the Stryker chassis.
After submitting our first Stryker design to the person who was going to 3D print our widget, we quickly got an email reply saying that our design was so complex that it has caused the computer to crash while it was creating the printer G-code. We were told to simplify the design and scale it down as it would currently not fit on the allotted printer base. With hundreds of extrusions, cuts, and revolves, this Solidworks model that took us roughly 30 hours to create was not going to be redesigned easily. At this point we debated changing our design to a back up idea we had in case something like this happened, but we pushed onwards with our Stryker design. We had already invested too much time to simply give up.
Because the printer can only print down to .01", or "10 thousandths of an inch", all of our clearances for the pins, hinges, and doors had to be increased by an appropriate amount before scaling the entire Solidworks model down by 10%. We also realized the main issue the computer was having was with the complexity of the tire treads I had designed. This amount of detail was not necessary at all in fact, because one can buy small rubber tires for a cheap price. Thus we decided to completely do away with the wheels attached to the Chassis and we designed holes in which we would screw in a shaft for these rubber wheels.
With the reduced size, we also had to do away with the fold down post-it note pad in the back door simply because it would not fit any longer. However, this did allow us to design the rear end of the Stryker to look much more like the actual thing. We sent out the new designs to the 3D printer guru, and awaited anxiously. The next day we found out that the computer had no problem generating the printer run code this time, and that it would take approximately 30 hours to print!
The following renderings are from the second Solidworks design after taking the 3D printer and manufacturing constraints into consideration.

Although you can't see it, the Chassis of the Stryker was scaled down by 10%. The turret stayed at its original dimensions however, other than adjusting for the smaller connector pin size. We can also see how the rear of the Stryker is higher up and more angled in like the real thing.

The trays are lower down than before so the user can more easily access their office supplies from either the front or rear doors. You can also see that the shape of the rear door has changed as it doesn't need to hold a stick-it pad any longer and is more flush to the end of the trays.


The following pictures were taken during the 3D printing and manufacturing process all the way until we shipped the Stryker out to General Dynamics. The Solidworks renderings directly above were exactly what were printed, and as expected, we ran into a few catches...

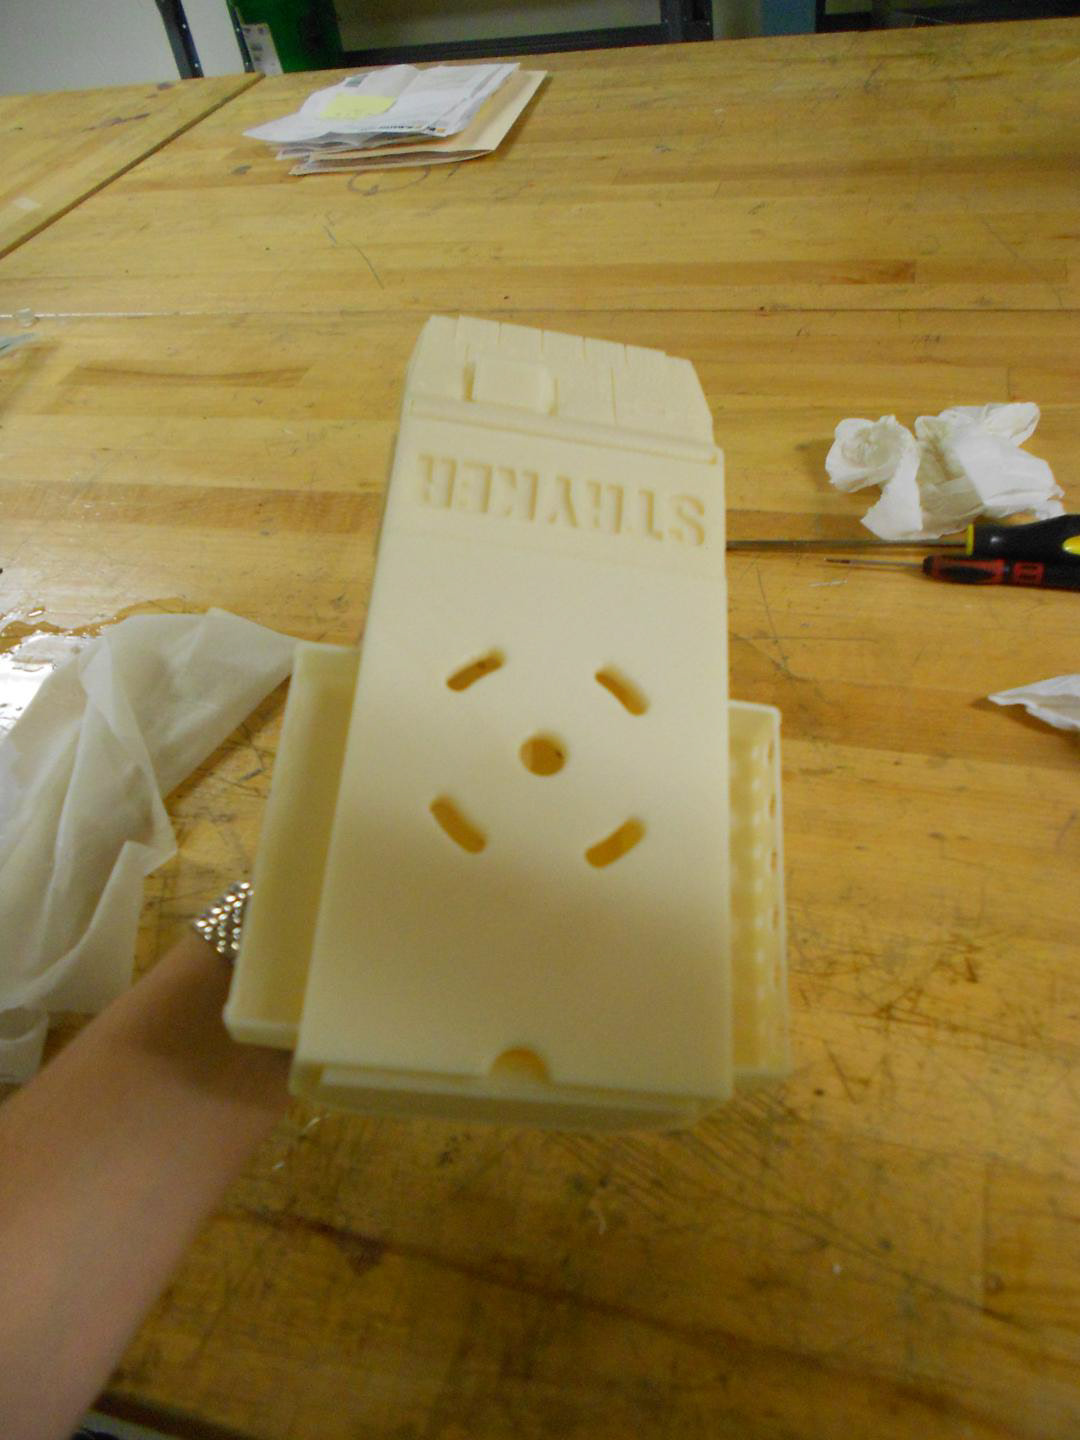
After 42 hours, the Stryker is now fully 3D printed, and is soaking in an acid bath at 70 degrees celsius to dissolve away the 3D printed support structure. This picture was taken after a few hours in the bath.

This photo was taken after the Stryker had been sitting in the acid bath for 5 more hours. As you can see, the support structure is starting to melt away and turn slimey, clouding up the bath. The stryker was then left in the bath overnight to dissolve the rest of the support.

The 3D printed turret gun. The firing mechanism was extremely jammed to begin with, and after considerable wiggling, the jammed support structure on the inner guide pins broke free and the mechanism was free to move.

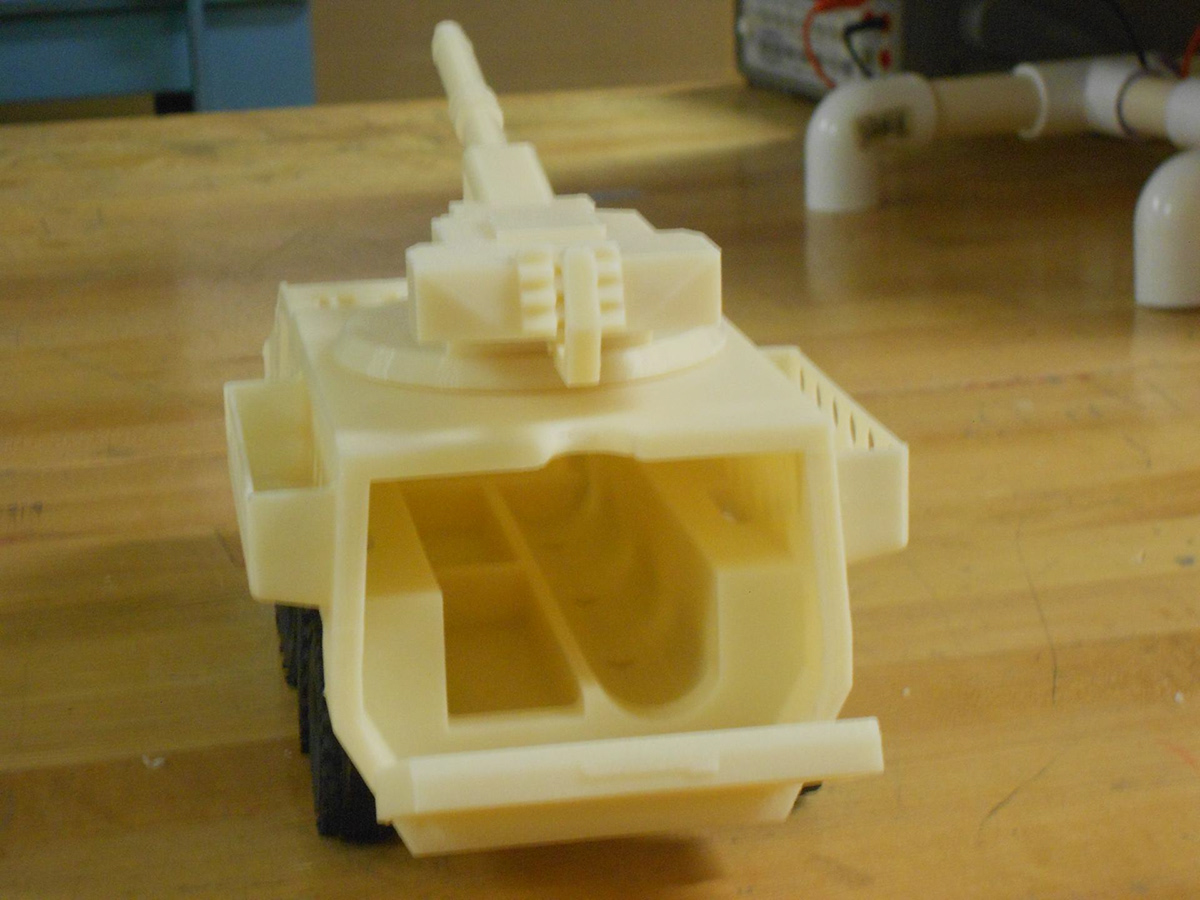
The front and inside of the Stryker chassis. The door was originally sealed shut and we had to pry it open with a razor blade. Thankfully the hinges held and nothing snapped.

The side of the Stryker chassis after screwing one of the wheels into the 8 guide holes that were included in the design.
The top of the Stryker where the turret gun will snap in and be able to rotate.

The rear door of the chassis required a lot of post-processing work. We hadn't realized that the altered shape of the rear door would inhibit motion, so some parts of the door and chassis had to be cut away to the best of our abilities. This is as far as the door would open.
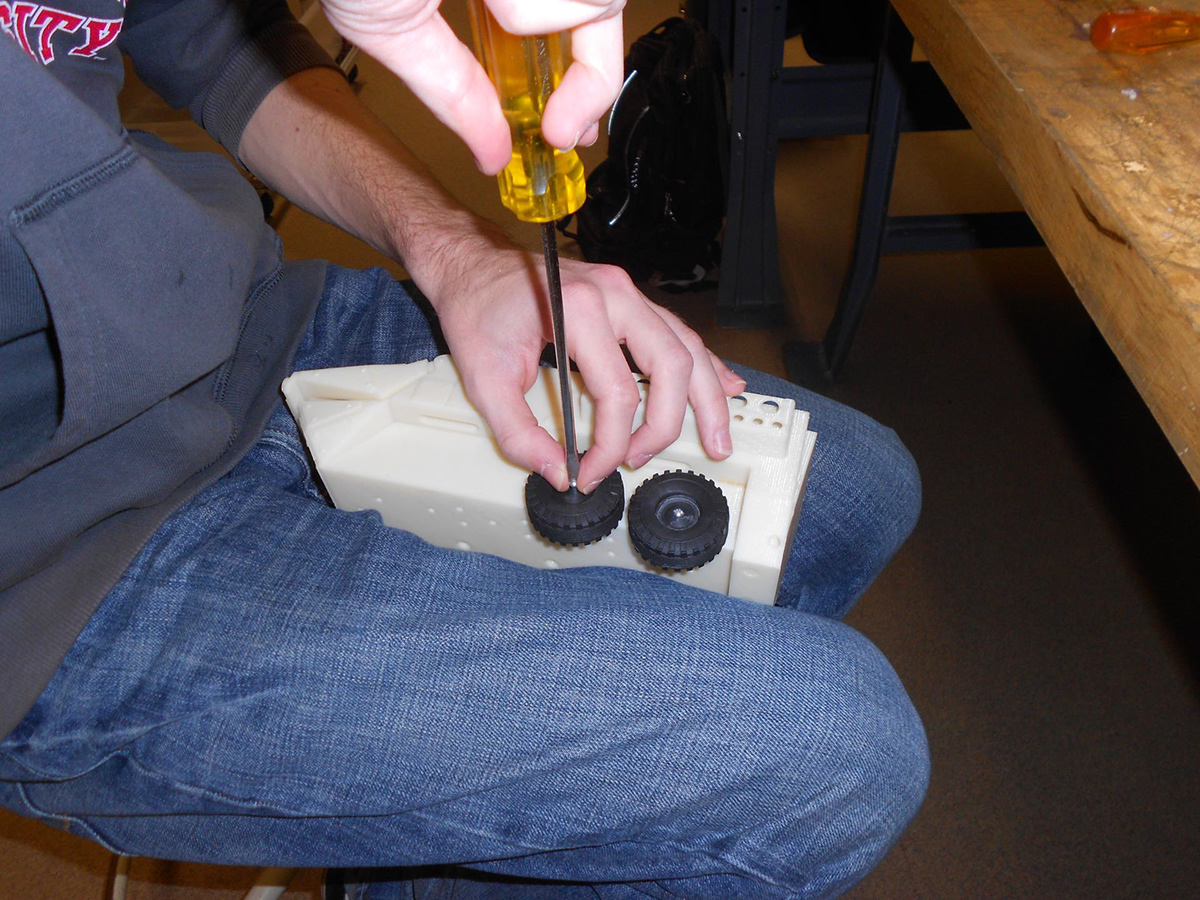
Here my partner Rob can be seen installing the 8 wheels on the chassis. Each wheels has its own bolt shaft which it rolls independently on.
We snap the turret gun on to the top of the Stryker chassis and show some of the features of the desktop widget.

The final assembled Stryker in all of its glory.

The rear end of the Stryker.

The opened front door of the chassis which allows considerable access to the inside compartments.
The rear door, even though this is as far as it goes down, still gives the user decent access to the inside office supply compartments.

The top of the Stryker.

The loaded turret gun which unfortunately only shoots one round, but still has a great intimidation and wow factor.
Loading the rubber band gun turret and firing off one round. Unfortunately the teeth were smaller than we expected and caused problems with the semi-automatically firing system.
Although we ran into numerous problems and overcame them as best as we could with sandpaper and exacto blades, there is considerable room for design improvement with our widget. Along with feedback from our General Dynamics contact whom we sent the widget to, our team went back to improve our design one last time, as is depicted in the following renderings and drawings:

The final iteration of the Stryker Design. You can immediately tell some things look different, like the raised armor on the side of the chassis, and the shape of the rubber band firing mechanism on the back of the turret.

The side of the final design of the Stryker. We increased the diameter of the hinge pins on the front door as was requested by our GE contact after the first hinge sheared off. The firing mechanism is now meant for only one shot, with a "pinch pulling" activation interface instead of the previously bulky "finger pull" mechanism.

The back end of the Stryker. With the further reduced size, we decided to get rid of the rear door altogether with all of the complications it caused. Now we have a font that is slightly closer to the true General Dynamics font face.

The internals of the Stryker. Now there are two compartments with one divider. The rear is for storing rubber bands for the turret, and the front compartment area is for small office items like paper clips or push pins.

Rendered for fun, this might be what the Stryker looks like sitting in a board room.


