Two new renderings from rendering tutorials - focussed as much on material development and tuning render settings for maximal effect and best rendertimes - I'm *very* happy with both of these.


These next three are the same model - the only thing varying between them all is lighting*.
Lighting is in fact a character (often unnoticed except unconsciously by the viewer) in every image, whether photograph, painting, drawing or render you see - it determines how warm, or cold, or clean, or intimate a setting feels.
The point here is that a good renderer has to think of lighting in the manner of both a painter and a photographer - lighting can massively change mood and tone, and in very poor scenarios, can cause the subject to read incorrectly. One of the things I really like about Modo is the sheer power and flexibility of the lighting solutions I have at my disposal, all the way from IBL (Image-Based Lighting) from HDR environment spheres & backplates to Global Illumination and luminous polygons down to more traditional photon-emitting lights... and I can mix them as I see fit.
* Yes, ok - the last image is cropped - this is primarily because it ended up too large for Behance upload.


This is an early result of learning how to use the Splash Kit tools... there will be more of these as time goes on.

This was a quick study in packaging design rendering, to show graphic artists and agencies how I can help them prototype not just the labeling but the packaging forms as well, and give a good tabletop shot as output.
Packaging design accomplished directly within Modo using the PACK kit (specific to packaging design tasks) and label design was accomplished in fifteen minutes in Adobe Illustrator - just to show how simple the workflow is, not as a serious graphic design effort.
Packaging design accomplished directly within Modo using the PACK kit (specific to packaging design tasks) and label design was accomplished in fifteen minutes in Adobe Illustrator - just to show how simple the workflow is, not as a serious graphic design effort.

Here's another quick packaging design exercise - a spray bottle of ecologically-oriented cleanser (forgive, if you would, the archi-pun I indulged in with the product name) - the plastic of the bottle and the spray head are formed from recycled resin, with no dye, leaving a partially translucent surface. As with the haircare bottles above, this is to demonstrate that with the tools at my disposal, I can help graphic designers with packing design projects, including those with non-standard, unique container types.
You design the overall profile, and I'll model it accurately (within the limits of the data provided of course!) and can accurately assess liquid volume as well - so if your design doesn't get to the required volume, we can tweak it until it does.
Again, in this exercise, I made no effort to design the label as a graphic design project - the label was less than 4 minutes in Illustrator - the entire mini-project less than a half-hour, including the non-standard container form.

These next three are of a model of the 2008 Ducati 848 - a bike of which I am *still* inordinately fond. I purchased a model from a common source of such models, and it had a fair number of glaring inaccuracies - as an-ex 848 owner I took it upon my self to address all these issues and make a correct 848 model. I then textured it appropriately, and did some environmental placement / ad type shots.


The next several images are examples of me playing with Modo's NPR (non photo real) materials systems, to get a more illustrative feel from models - this can be a good approach early in the architectural design process, to avoid people perceiving the design as being more final (and set in stone) than it really is - it also injects a human warmth into certain images, and allows viewers to read in a little more, and can thus be very helpful with neighborhood reviews.
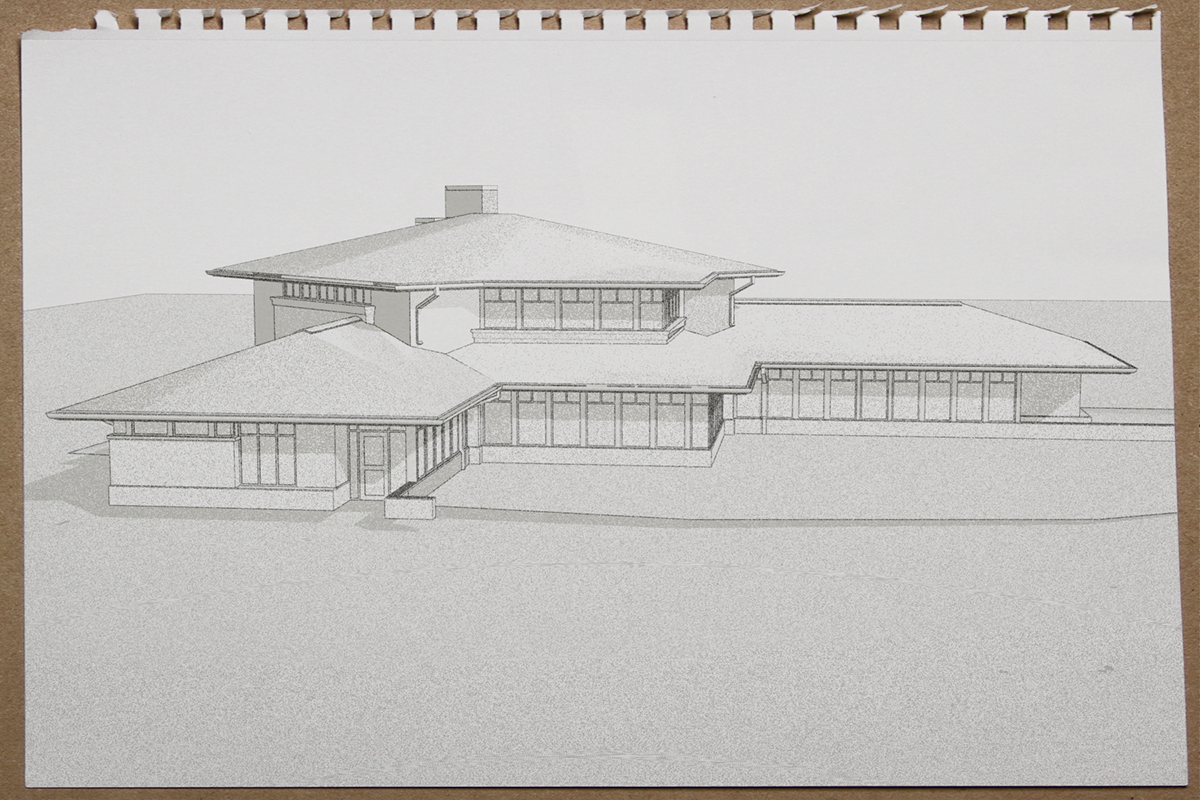


This was the result of an ongoing effort towards an optimized workflow - the point being to set a medium LOD (level of detail) versus fully photo real; to bring in geometry & low quality textures from SketchUp or ArchiCad models, and with certain specific materials tweaks, get them medium render ready in very short order.

These are more in my optimized lower LOD workflow series - took SketchUp models from the 3D Warehouse, evaluated the textures and replaced very few; tweaked a number of the textures to make them perform better, and rendered out.
I did not take the time to build up a realistic site with proper vegetation, grass and so on - I left the original Google Earth baseplane the model came with in place, as the emphasis here was on speed.
The one below this has a depth-driven fog (the fog is denser further from the camera) and a hint of sunrise light.

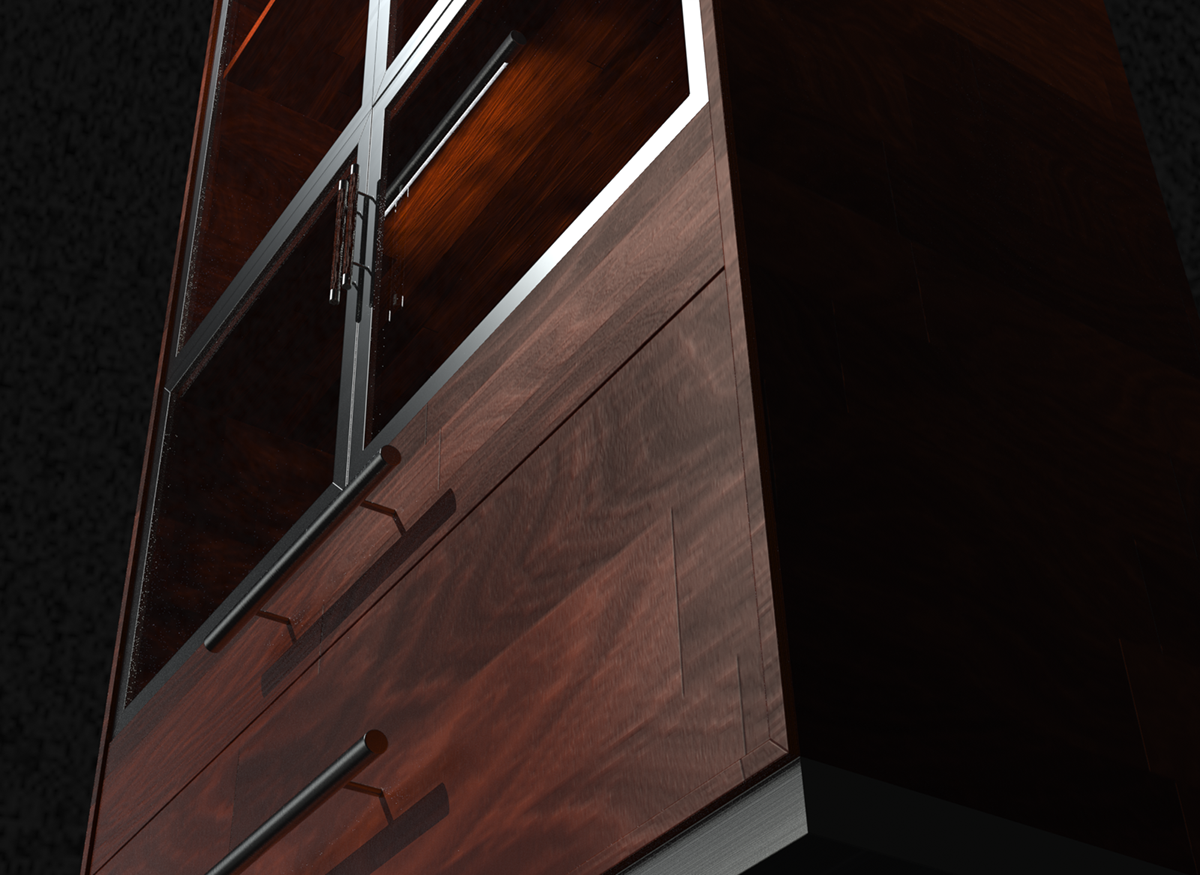
This is part of some explorations I'm doing to improve the light quality of my interiors renders.

I set myself some modeling challenges for modeling within Modo as well se setting up materiality and rendering - this cabinet is based on a cabinet in my home, but with far nicer wood, I must say. Inset lights, sleek contemporary hardware, and a black product studio shot - given I limited my modeling time to 20 monutes, and my render prep to 10, I feel that this result speaks well for how effective a tool Modo is.
An abstrct render - just for the sake of beauty, playing with sub-surface scatter and light-emitting materials.

And the point of these following images is pretty simple - me getting more comfortable with Modo as a modeling environment for architrectural design & visualization - I've been modeling assets and entourage natively in Modo for quite some time, but am only now really finding a good efficient architectural workflow for me within Modo, using a combination of its inbuilt tools and a plug-in I really like called mARCH.
Previous to this most of my architectural modeling was being done in ArchiCAD or SketchUp, as these are tools with which I am already quite expert; now I'm adding another tool to my kit.
Previous to this most of my architectural modeling was being done in ArchiCAD or SketchUp, as these are tools with which I am already quite expert; now I'm adding another tool to my kit.
I'll keep adding to this series of "quick builds" as I go forwards - might be worth checking back now and then to see new progress as time goes on.

These last two are examples of a very quick build, all in Modo, no BIM tool at all; I aimed for super-fast and efficient workflows - and in fact the actual render time was longer than the modeling time - both views from the same very simple model.
Neither are "final renders" in quality or in specific viewpoint and lighting, but they do convey well the quality of modeling and texturing possible in very short order with these tools.


These last three are more in my "quick build" series - modeled not in a BIM app at all, but directly in Modo, and with an overt emphaasis on speed - a very low LOD (Level Of Detail) but decent enough texturing and lighting to carry the image, and in this case, working straight from a *very* rough sketch - not even dimensioned.
These are thus concept models, and concept renders - the initial modeling took less than an aggregate hour, and as above, the renders took longer than the modeling - in this case I had a high Global Illumination bounce number and quality, to make the caustic light up from the pool work well on the walls and overhand above - those caustics are not being faked - that is, there is no "caustic map" applied to the lights - it's actual calculation of caustic light casting based on the rippled displacement of the water and the water's index of refraction.
Looks pretty good for a fast model from a fast sketch series.
Here's the quick and rough sketch first:

Late afternoon render - round sunset:

Later dusk or early evening render:


