

Scenery and Lighting Designs for
"A Man for All Seasons" by Robert Bolt
November 2011 Jewell Theatre Company
November 2011 Jewell Theatre Company
Jewell Theatre Company's fall play in 2011 was a special show for our company and it's director. Dr. Kim B. Harris who lead Jewell Theatre from 1979 to 2012 began his direction career with this show at a previous institution. Kim's policy on play production was to never repeat a show. Only one other time did he do this (upon my request when we produced The Madwoman of Chaillot by Jean Giradoux in April of 2003.) We began our production meeting with Kim showing me some images from his production in the mid 1970's. His design was great for the stage and the resources he had available.
We discussed how the setting could be expressionistic; it didn't have to represent the time period of the play. In other words, we didn't have to recreate Hampton Court on our stage! As usual though, I began by researching the architecture of Hampton court and the time period of King Henry VIII. I had visited Hampton Court in 2005 when I spent a semester teaching abroad in England, so my personal photographs came in handy.
As you will see from the images below, the set took on an elegant simplicity and helped the audience enter the world of the play without being overwhelming.
The designs were executed over an 8 week period by a crew of student workers with varying skills.
I'd like to thank Tina Campbell for her hard work on making and aquiring costumes for the play!
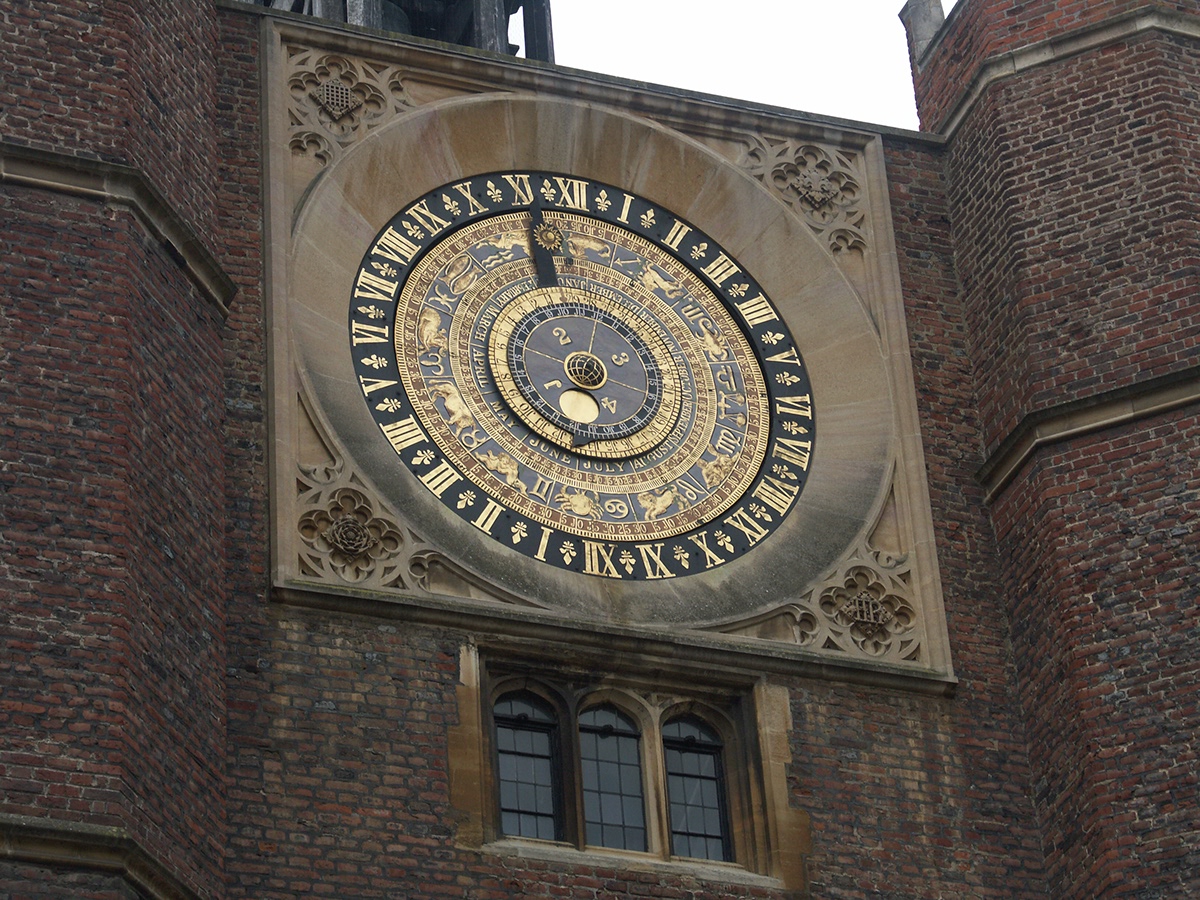
The image above is the clock tower of Hampton Court. I examined the Tudor Roses in the corners of the clock frame and the Tudor Arches of the windows. The arch shape kept coming back in my mind as I tried to make sense of the design.

This image of a Tudor fireplace became the inspiration for the main set elements. in fact I ended up scaling half of this drawing to the size of my model and used one half of the arch and it's supporting leg as the wings of the set. I staggered the leg/wings from the front to the back and then had to figure out how to add levels to the stage for the actors to work with.

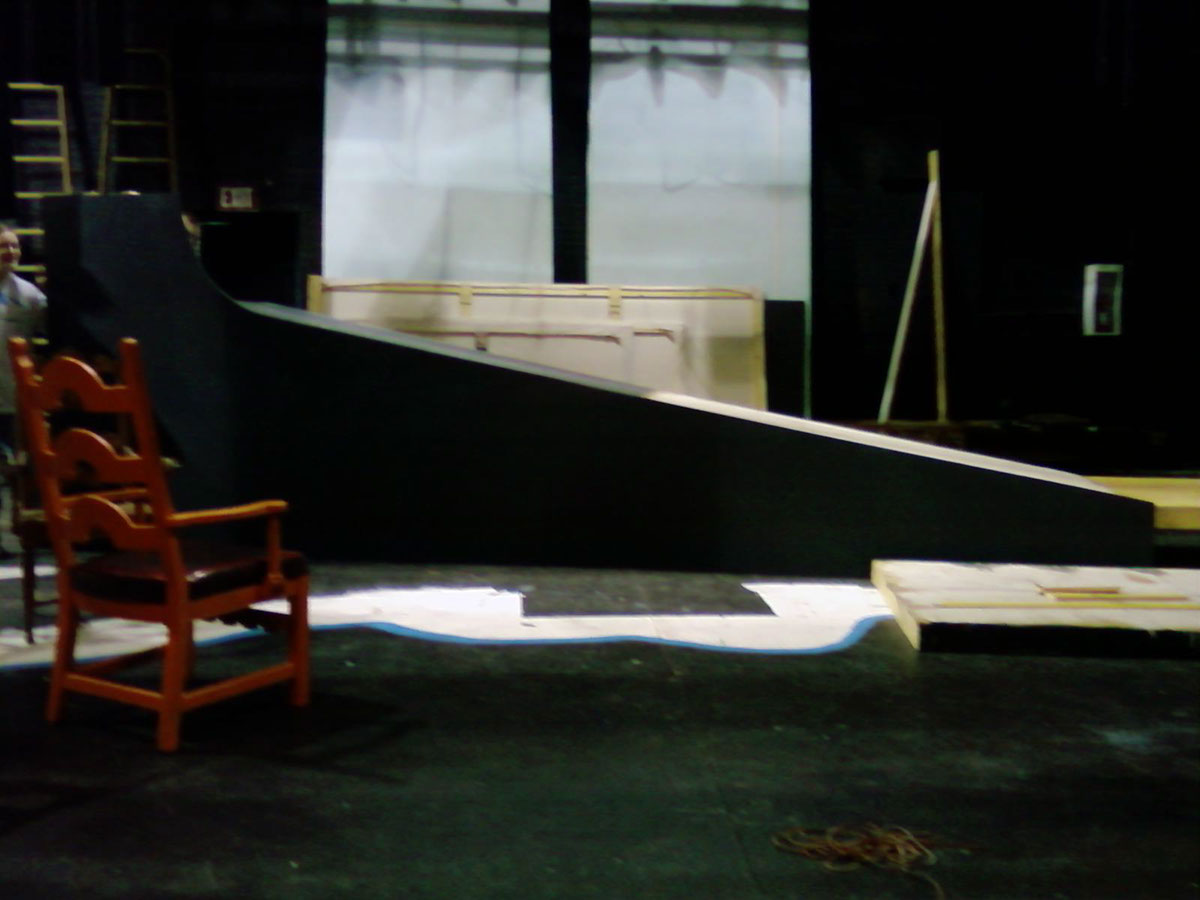
This photo is of the simple model for the set. It was while working on the model that I dropped one of the arch pieces on the floor and saw it from a different perspective- it was upside-down! AH-HA! The shape of the inverted arch became my ramp and allowed for us to keep the set simple. There were three upright arches staggered running parallel to the proscenium, but the ramp came in at an angle ending with a couple of steps to get down to stage level. The Gothic arch on the left was moved from its hinged position to a fully separate rolling unit used in the jail scene towards the latter half of the play. The white cyclorama was used with a black scrim to allow us to light the background with color to create mood or to leave it stark black for scenes.

This twisted images shows one of the arches being built. I decided i wanted the arches to appear heavy, yet brittle and thin. So we built the frame from 1x4's and 3/4" plywood.
We covered the frames with 1/4" lauan so they would be rigid. If we had just covered them with muslin or canvas there was a potential for the arches to seem floppy.

The next step was to cover the frames with muslin. I purchased 10' wide muslin from my vendor which allowed us to be economical in using the fabric for multiple arch units. This photo shows the units primed and the first coat of the deep navy blue going on.
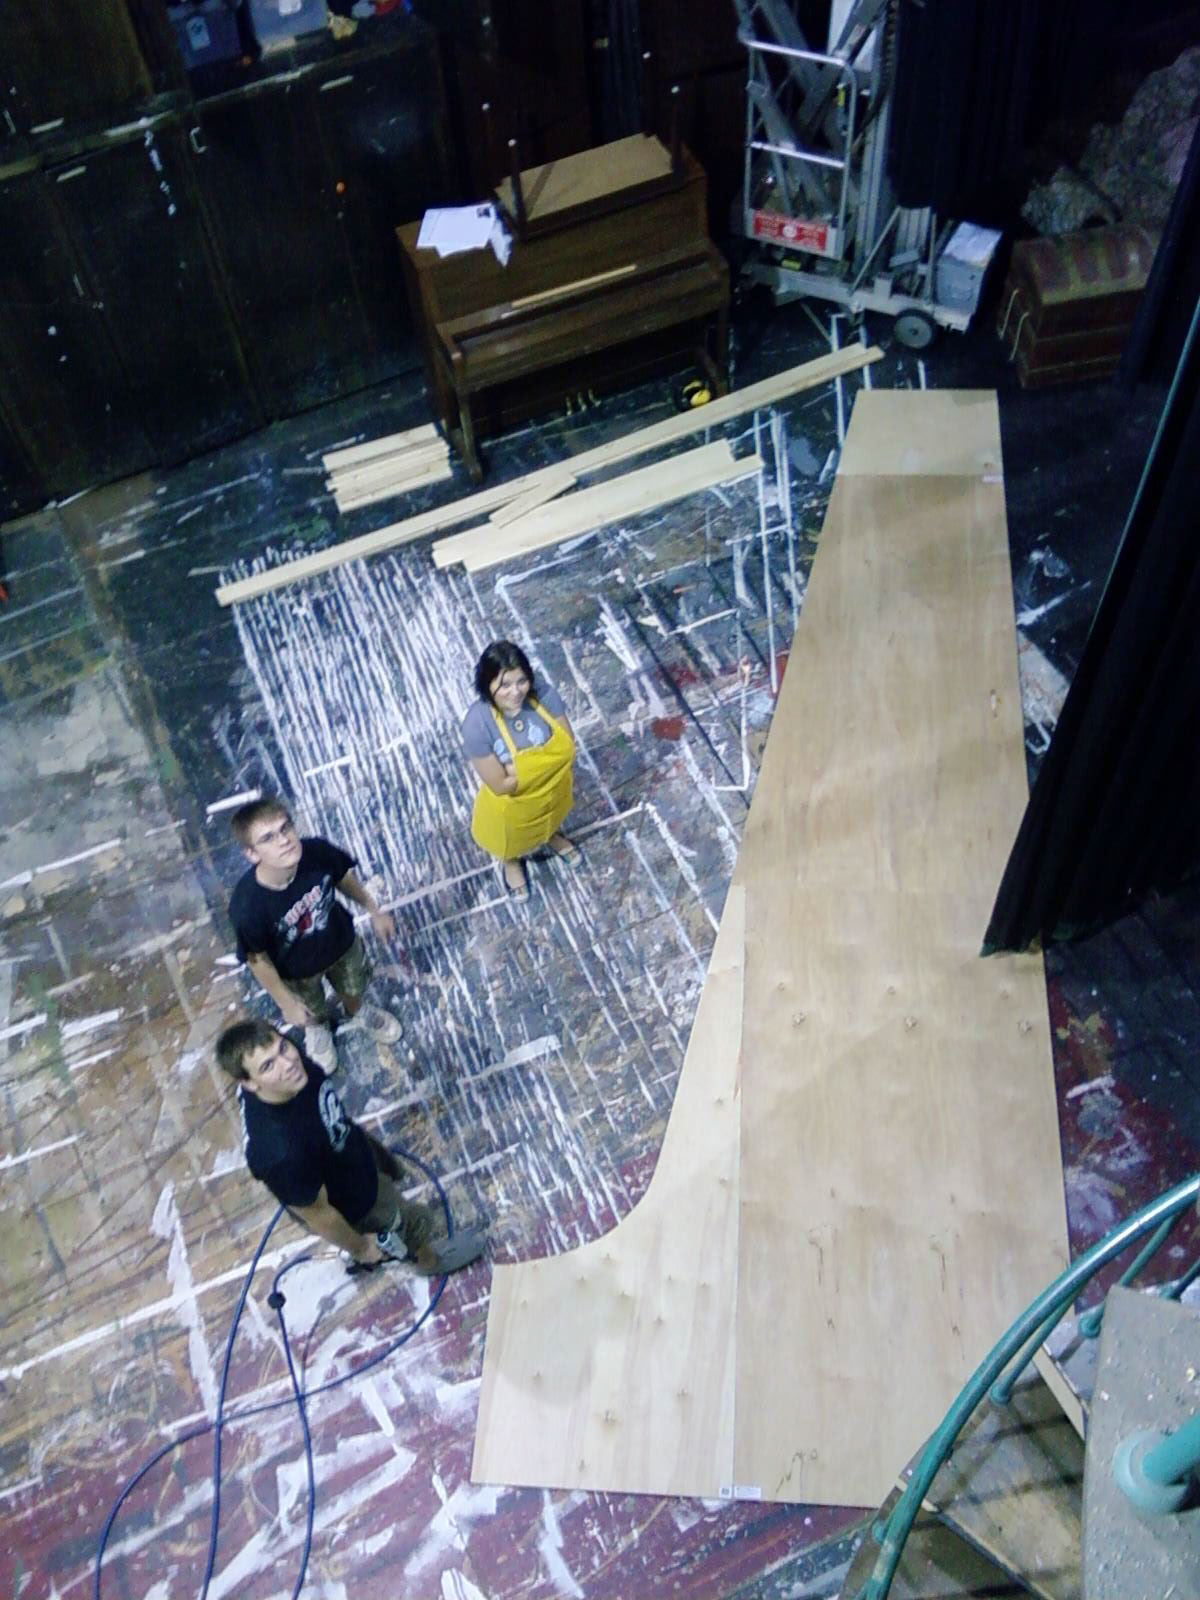
The first arch that was built was used as the ramp facing. It was important to get the ramp in place first so the cast could begin to work with it as soon as possible. This photo shows the unpainted unit set in place as a template for creating the ramp structure. The stock platforms used for the ramp were legged on knee walls with angled tops to allow it to match up to the edge of the facing arch.
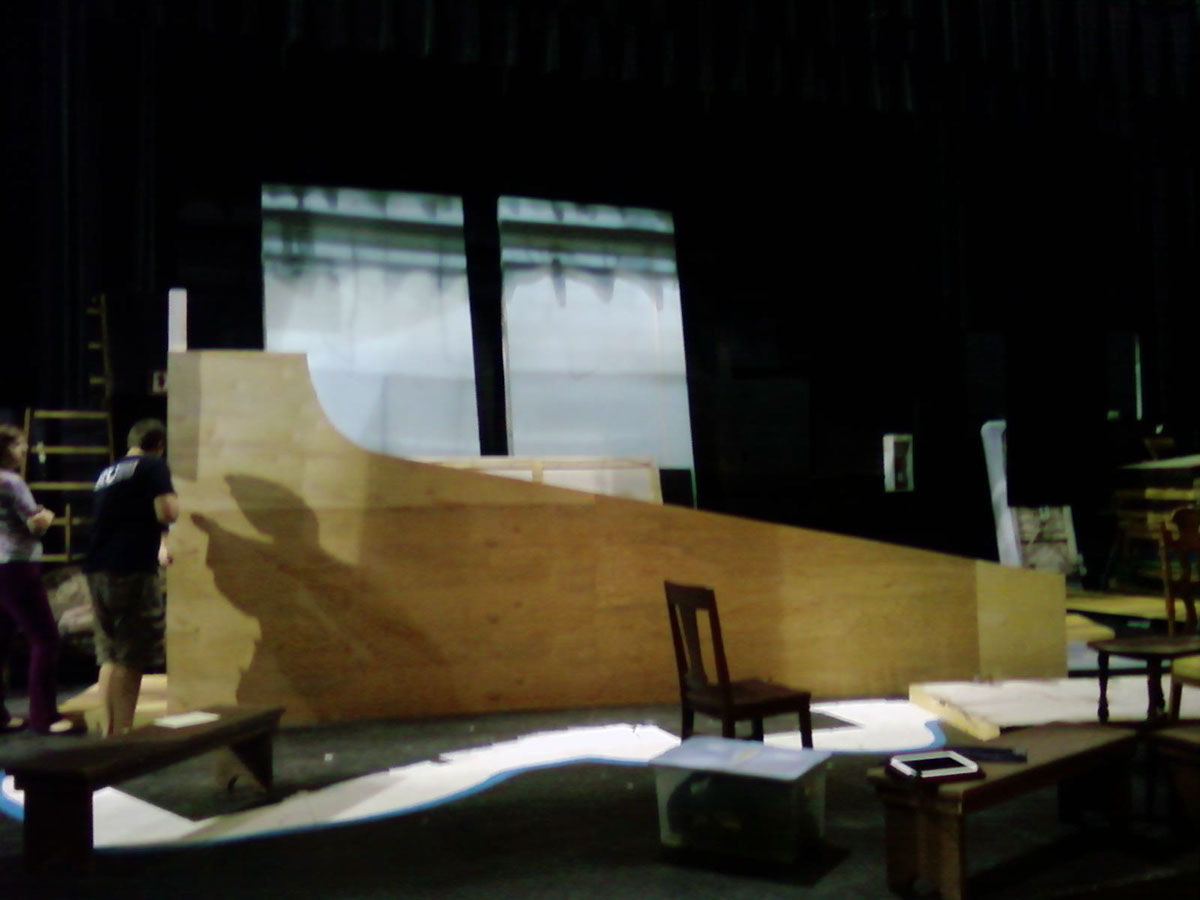
This photo shows the downstage arch unit installed on the back of the proscenium. We actually screwed it to the studs of the wall above the proscenium arch. The ramp (without facing arch) can be seen in the foreground.
The ramp design was adapted after use in a few rehearsal. We had to shorten it a little and make the lower platform bigger to accomodate a desk in Act 1.

Once all of the units were installed and the floor painted the set began to feel complete. This image shows the opening scene.

This shot from dress rehearsal shows the entrance of King Henry VIII on the scene.

Towards the end of the play we flew in a backdrop that I painted for another production to give the scene a more interior feeling.

This photo is from the end of the play before Thomas More's execution.
Overall, the unit set for the show simplified the technical requirements dictated by the script (the script notes are usually from the original production's design). Furniture was moved on and off by cast members (in character). The Common Man character did a lot of the changes while delivering his lines. The simple set and props didnt distract from the message of the play, but the use of the gentle curve of the Tudor Arches gave the design the nod to the time period the audience needed to stay engaged with the script.
The design could be used for any number of plays; perhaps an updated Shakespeare or some futuristic themed play. I kept the units in stock just in case!
The production photos were taken by college photographer Kyle Rivas. Click Here for more images from A Man for All Seasons.
This song was extremely inspirational during the design process of the show. Stevens masterfully layers instrumentation from classical to modern, yet keeping a traditional (classical) style of composition that captured the themes in Bolt's play.


