Hello all!
One of the more common questions I get from new Lightroom users is, "How do I create a banner from a photo?" A flip, "Use File: Export" doesn't cut it, because, when you choose a size for one of the dimensions of a photo, it either distorts the image or auto re-sizes the other dimension to prevent distortion:

If you resize both values, it will distort the image, or. . .

. . .if you choose to resize only one dimension, it will auto-resize the other to prevent distortion.
This tutorial will explain how to create a banner of a specific width and hieght without creating a distorted image while doing so.
But first. . .
Before we can get into the method of creating specific banner sizes, I need to go over the way Lightroom thinks about files. It's one of the main advantages of working in Lightroom and it will save you time and disk-space. If you know this already, then by all means skip ahead to "Let's create a banner."
Okay. On to how Lightroom does things (and therefore how you should):
Use RAW files.
Just trust me on this one. If your camera shoots in a RAW format (as opposed to JPEG), please use it. Furthermore, I recommend that you convert to DNG when you import from your camera. I will spare you the agruments about why, but you can go have a look at what DNG is on the Adobe site that explains it:
Lightroom changes nothing.
Herein lies the biggest rub. When you make an edit to an image in Lightroom, the original file is not changed. Instead, Lightroom writes a set of instructions that are applied to the image upon export. Why? Because it makes it possible to do two things germain to this tutorial:
1. Apply edits to an image and change your mind without having to duplicate the file and fill your hard drive with various versions of a large image file, and
2. Create Virtual Copies of your work. A Virtual Copy is different from a simple duplicate in that it really exists as a second set of instructions for the original file. Because these instructions are literally small enough to be measured in tens of kilobytes, it's a way to create many treatments of one image file without creating disk-filling duplicates. In this case, we are going to create many different banner sizes from one file without ever cropping the original—which would also be a bummer if you created a small banner and later needed a larger one. Before Lightroom came a long, I would create a duplicate of the file and then I truly had to HIDE the original from myself, so I didn't accidentally wreck it while thinking I was using a copy. Ah, the good old days.
Create a Virtual Copy.
To create a Virtual Copy, select the photo you want for your banner (usually from the filmstrip at the bottom of the Lightroom interface) and select Photo: Create Virtual Copy.
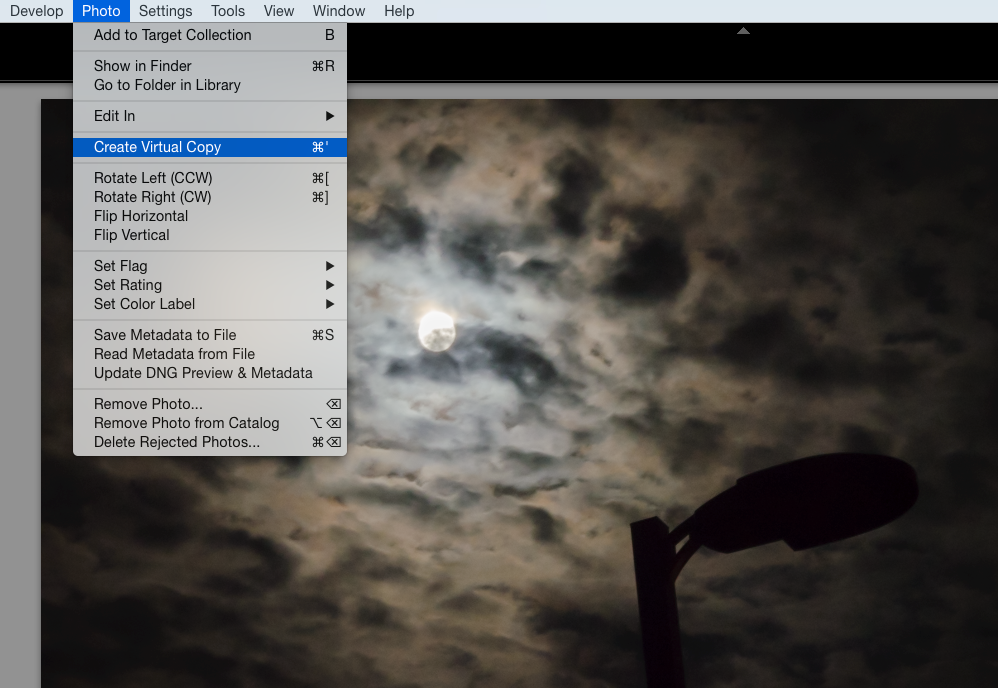
If you want to act like a pro user, learn the key-command equivalent: Command(Mac)/Alt(Win) ' (that's an apostrophe). I use it ALL THE TIME when editing various images in different ways.
When you do, you'll see two things that help you know what you have done:
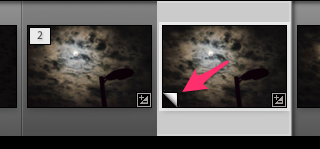
Lightroom adds a little page-peel effect at the bottom of a Virtual Copy, and. . .
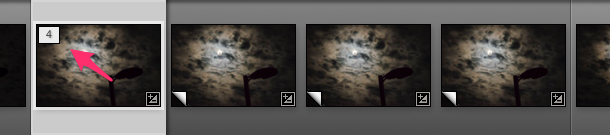
. . .adds a number to the original image to let you know how many copies in total you have. I created three copies so there are 4 total versions of this image.
To set up for creating a set of banners from the same image, my suggestion is to start with your image, create a single Virtual Copy, and then create your first banner. I'll explain why later. But first,
Let's create a banner. . .
Creating an actual banner is a two-step process: Crop to the proper Aspect Ratio and Export to the correct pixel-size.
Crop to the correct Aspect Ratio
If you take a rectangle—any rectangle—the height and width can be described as an Aspect Ratio. A square is 1:1, for example. If the square is 2356 inches by 2356 inches, it's still a 1:1. To reduce it, divide both sides by a common factor (in this case it's 2356) to get to 1:1. The Aspect Ratio of a square is 1:1. For a banner, you don't need to do any complex math, though. All you need are the actual banner dimensions for your banner and Lightroom will handle the Aspect Ratio for you.
In this example, we'll make a Facebook Cover Photo first. To get those dimensions, I searched the phrase "Facebook Cover Photo Dimensions" and got to the Facebook page:
851 x 315 are the values that they recommend, so we'll use them. For just about any web service that requires a banner or specific image size, you are likely to be able to find these dimensions in the same way.
To set the crop, you'll use the Crop tool from the Develop module.
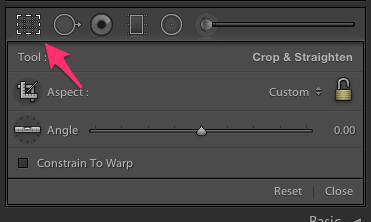
The crop tool is in the panel at the top of the Develop Module. Another great keyboard equivalent is the simple letter 'r.' When you tap an 'r,' Lightroom will toggle you in and out of the cropping tool.
Then, select Enter Custom. . .

Enter the pixel dimensions that you got from your search. Width goes in first. Then enter the Height.
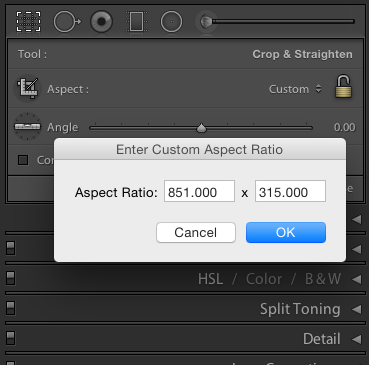
There are no units here. All you are doing is setting an Aspect Ratio. Lightroom will reduce that to the value (in this case, for you math newbies, it divided both values by 100):

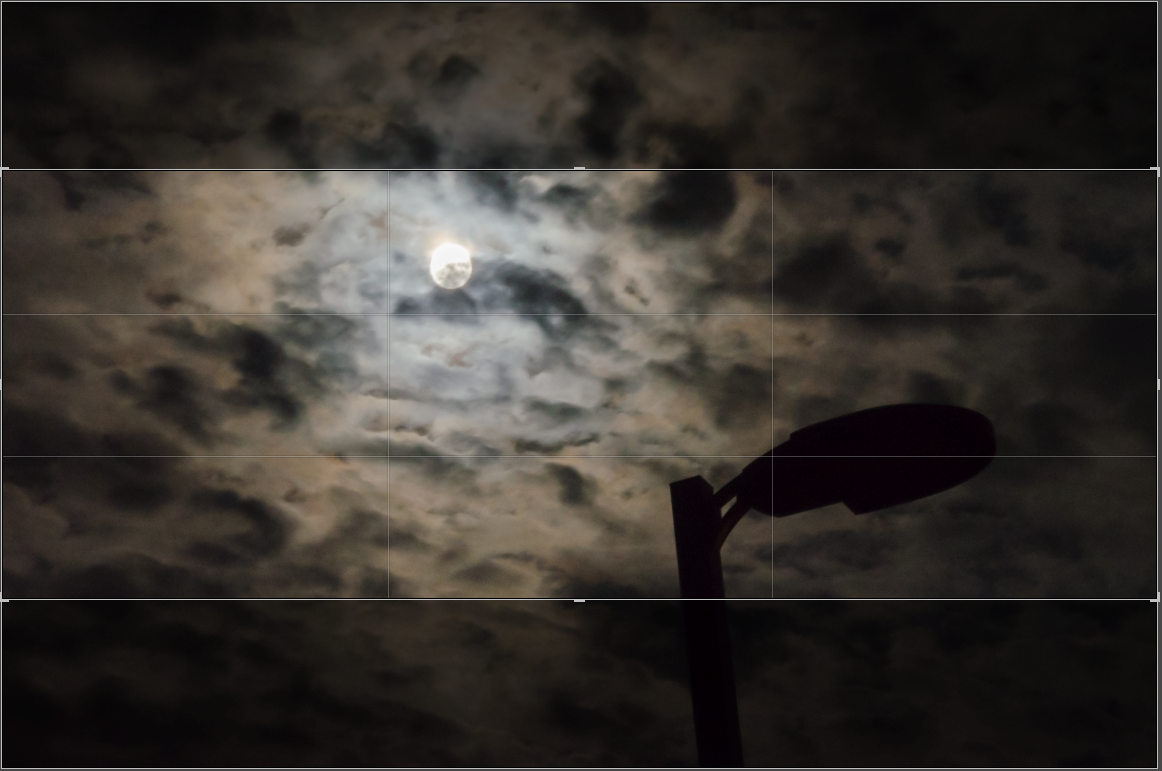
Once you do that, the rectanglular crop area will reset to the correct Aspect Ratio for your banner.
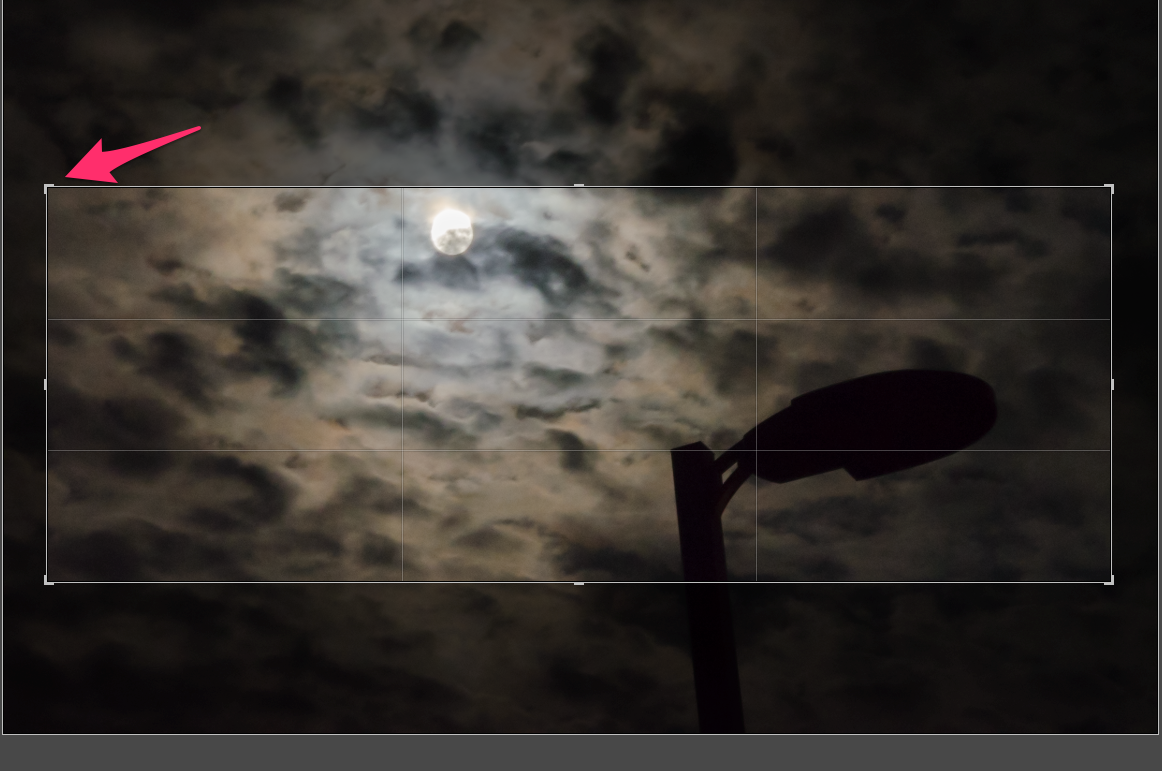
If you want to reset the crop to shrink it, you can grab any handle and resize it. The Aspect Ratio will remain. So go ahead and set your crop for the look you want.
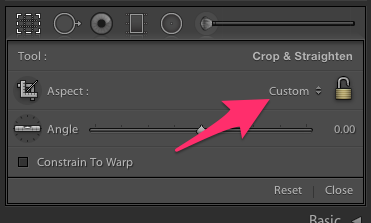
From now on, you can select that Aspect Ratio from the Crop tool's options and crop for a Facebook banner wihout even thinking about the pixels and aspects ratios you need.
By the way, if you want to create a crop area for a completely different use, you can just click on the small lock icon and adjust the crop area. Lightroom will refer to this as a Custom crop area. Just be sure to create a new virtual copy first.
At this point, if you want to create several banners from this same image, you can create your Virtual Copies with the first crop area in place. Why wait? Because the subsequent banners will start with the first banner's crop in place—making it easier to create a set of banners with a similar image within the crop area instead of starting from scratch each time.
Enter a new custom crop value and Lightroom will adjust the crop in the new virtul copy for you. Adjust it to taste.
Export your banner
The rest of the process is a snap. Select File:Export.

Set the Export dialog box to look the way I have it here:
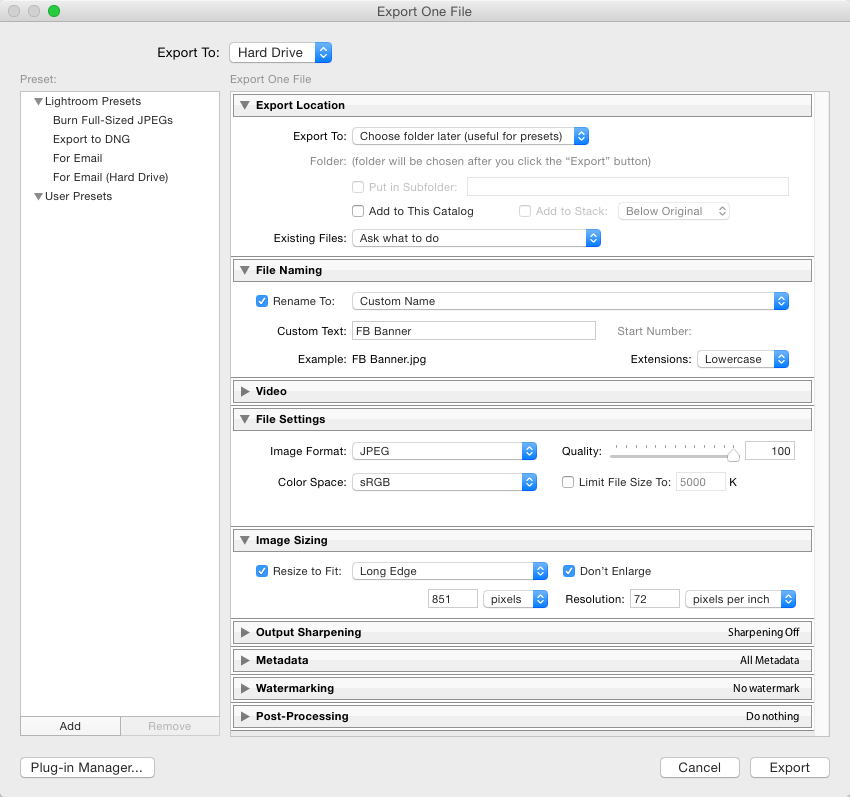
I usually select Choose folder later from the Export Location setting. If you are more organized than I am, then you can decide on a location and set that instead. The real trick here is to choose the Long Edge from the Image Sizing option and simply enter the longer pixel value that you need for your banner. The short edge will be the correct size, because the apect ratio of the crop you made will force it to that value.
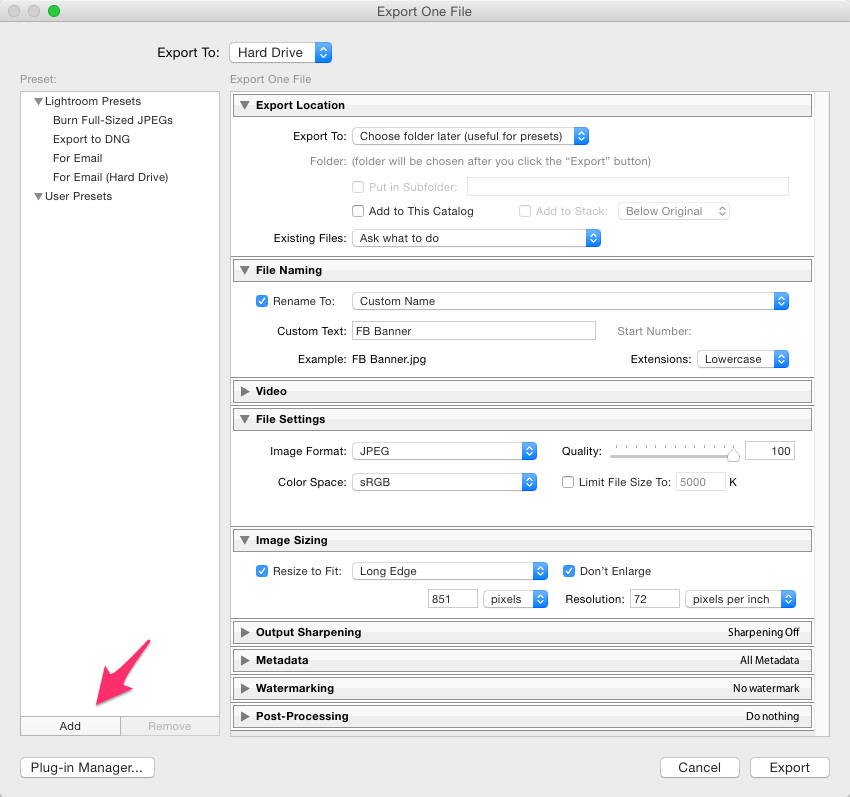
To make this process faster, I suggest a Preset. Before you apply this Export and generate your JPG (or PNG or GIF or whatever), click the Add a preset button in the lower-left.

This is my Facebook preset, so I'll name it accordingly.
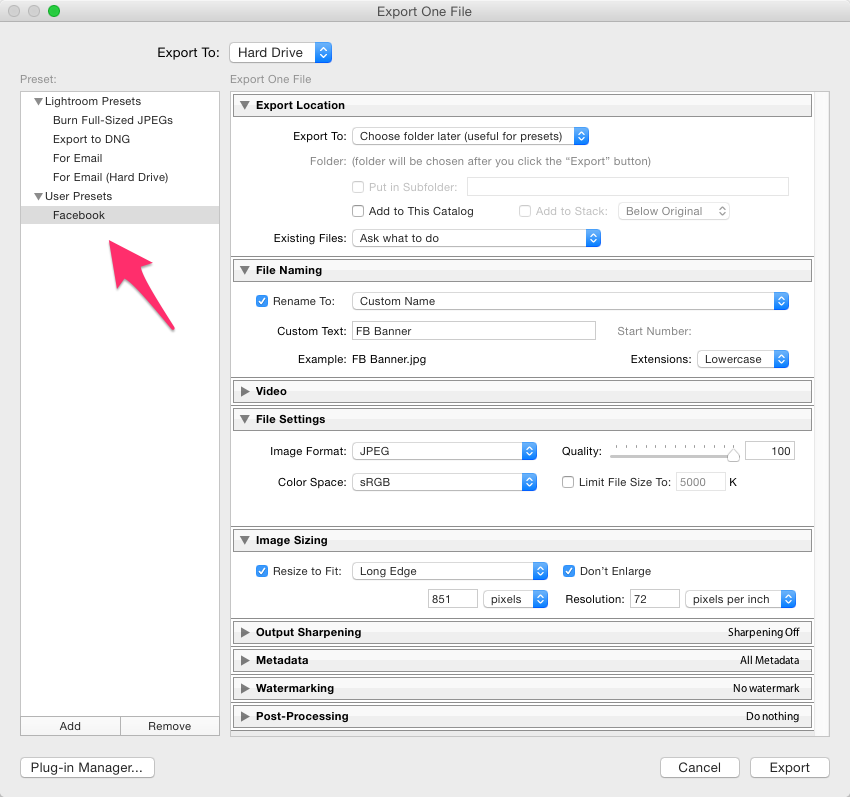
Note that it shows up in the left pane of the Export dialog box. However, you'll never need to click it again, because it will show up as a direct Export option from the file menu:

And that's it! You can set up several of these for all of the various banner sizes you might have for various social media and web sites for which you want to use your work.
One note to throw in.
You might wonder, "Why do this when Facebook has a cropping tool in the upload process?" For starters, this gives you finer control and allows you to save that banner—with the correct crop in place. Plus, you can create a series of cropped banners and see them together before you upload them to your site. So, it's about control and repeatability. If none of that matters—then use the built-in tool.
There you have it! Enjoy.


