Hello everyone! It has been way to long since I have uploaded to Behance and I really apologize for that. I was focusing on developing my main blog for a while, and it is quite time-consuming! I want to say that I do have a bit more time to write and will be posting a bit more often and possibly be using some of Behance's other features too 👀!
I want to go through some step-by-step Photoshop Elements (2020) Edits. I've done this on my main blog before, and you seemed to enjoy it. Since that post, I have been researching quite a lot on Photoshop Edits to make my edits a bit more complex and fun. Well, let's get into Photoshop!
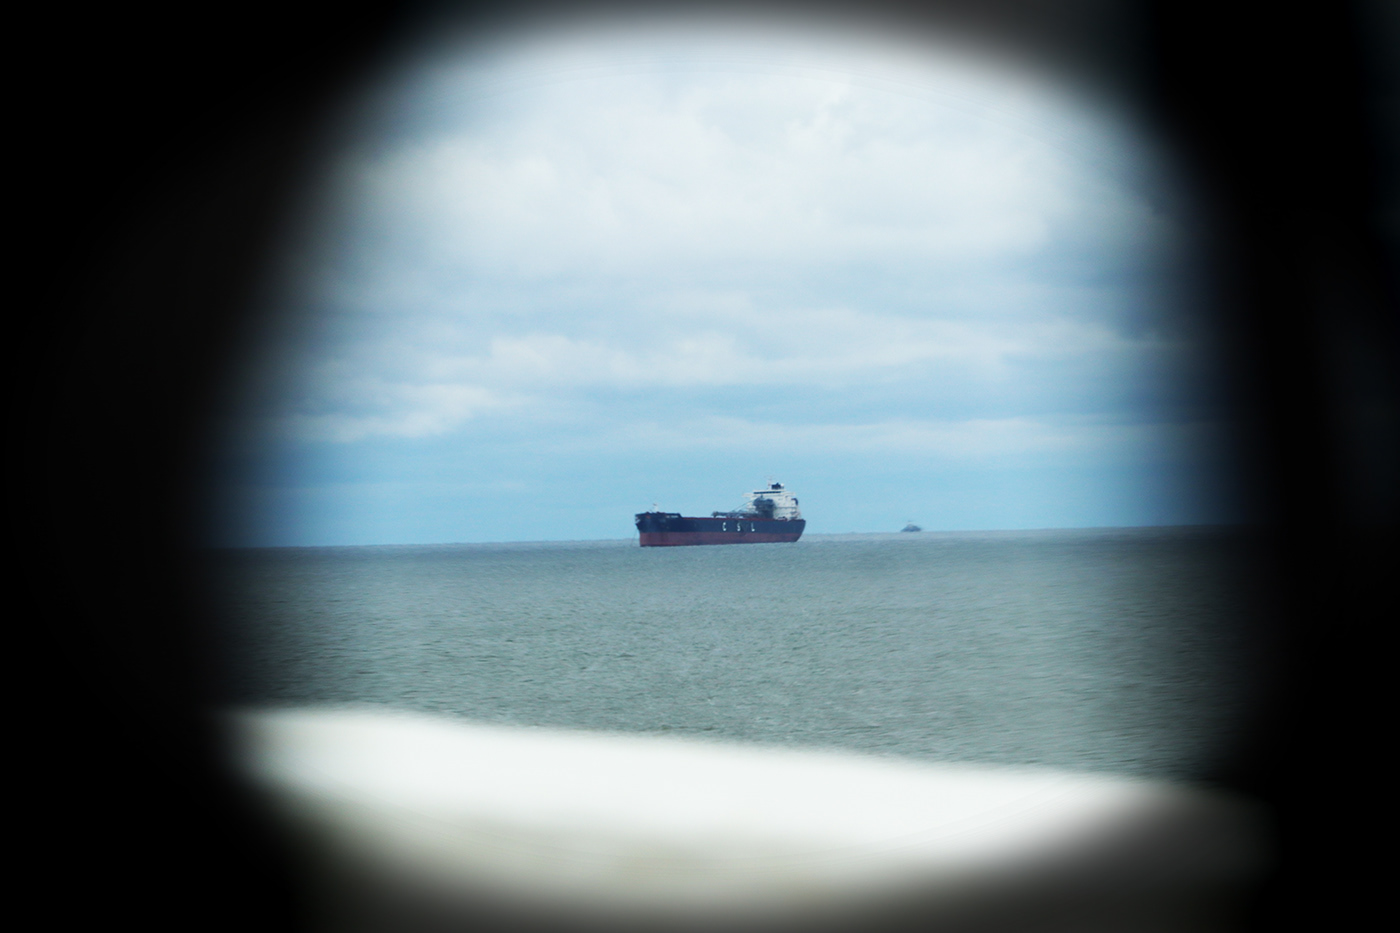
For this post, I picked out this photo to edit:
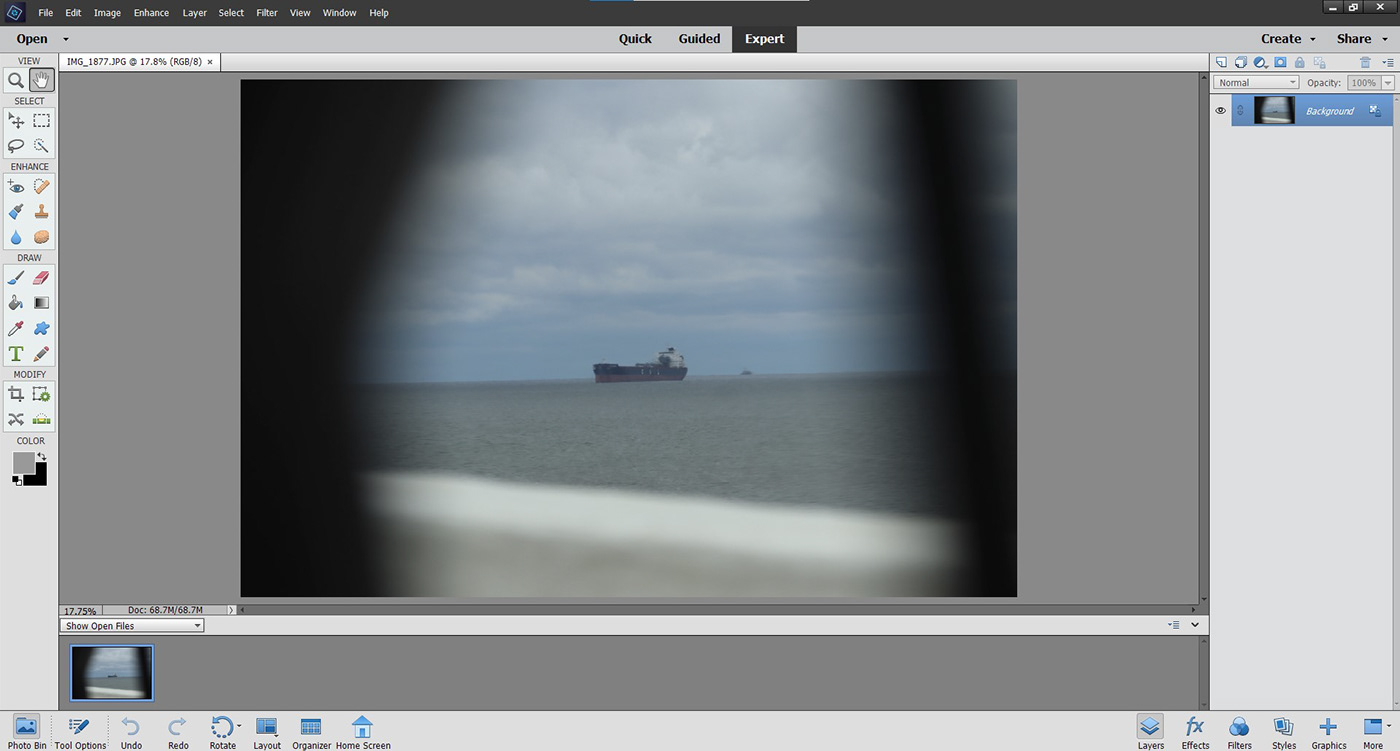
I took this photo on a trip and was going over the Bay Bridge in Maryland.
Before I even start editing, I like to look at photos and think about what I want to change about it. Here is my list:
- Improve colours
- Brighten the photo up
- Add some vignetting to make a full circle
- Improve detail
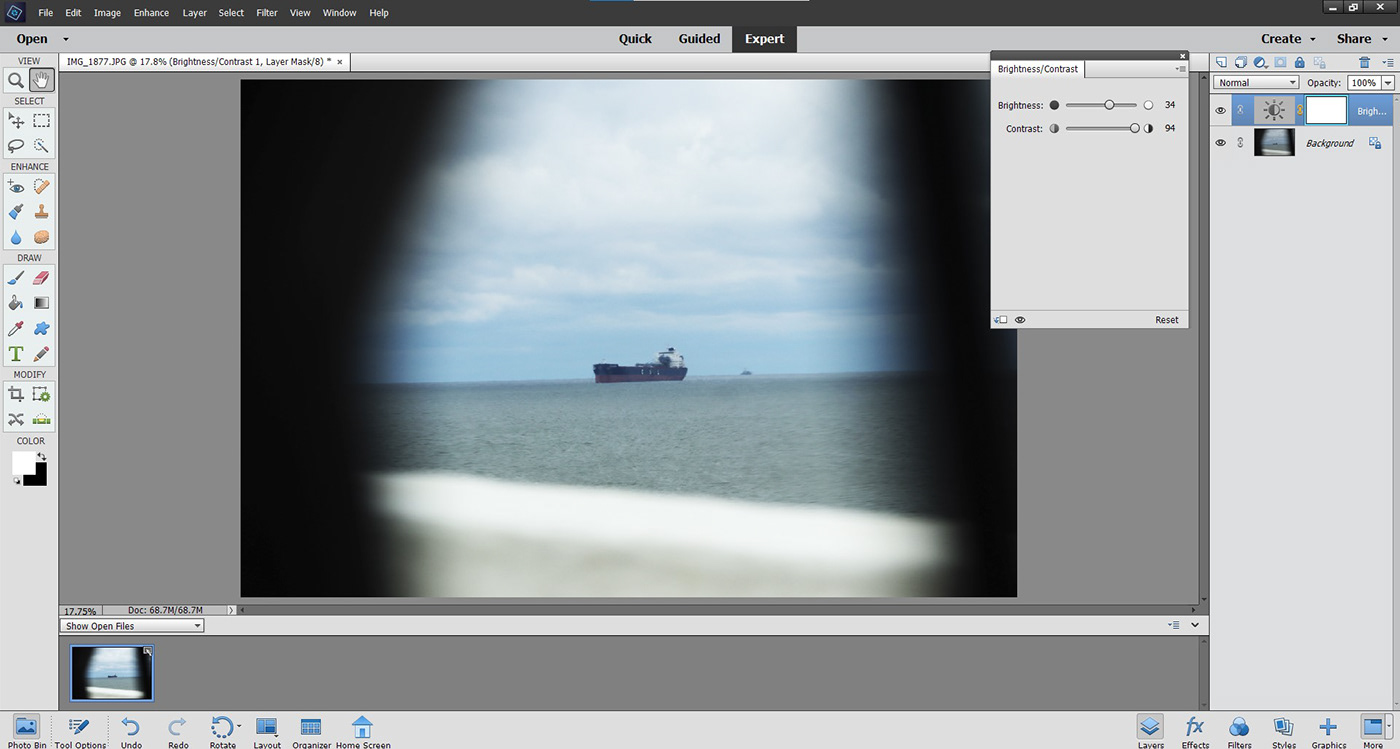
These edits are not too hard at all. I used to go to the "Enhance" in the top left corner to do all edits, but I no longer do that. Layer edits are much better for organization and give a better final result. I should go to the layer section and create a new layer.
If you don't know how, you just click where I have highlighted and click to what you want. I would like to start with Brightness/Contrast.

Now, I adjusted my photo to where I want it. I added a lot of contrast and a small bit of brightness. Below you can see the exact amount of Brightness and Contrast that I added.
Next, I added a Saturation layer. You go through the same process but just select "saturation/hue". I changed the Layer to only adjust color. This is also really easy to do, just click on where it says normal and go down and click "color".
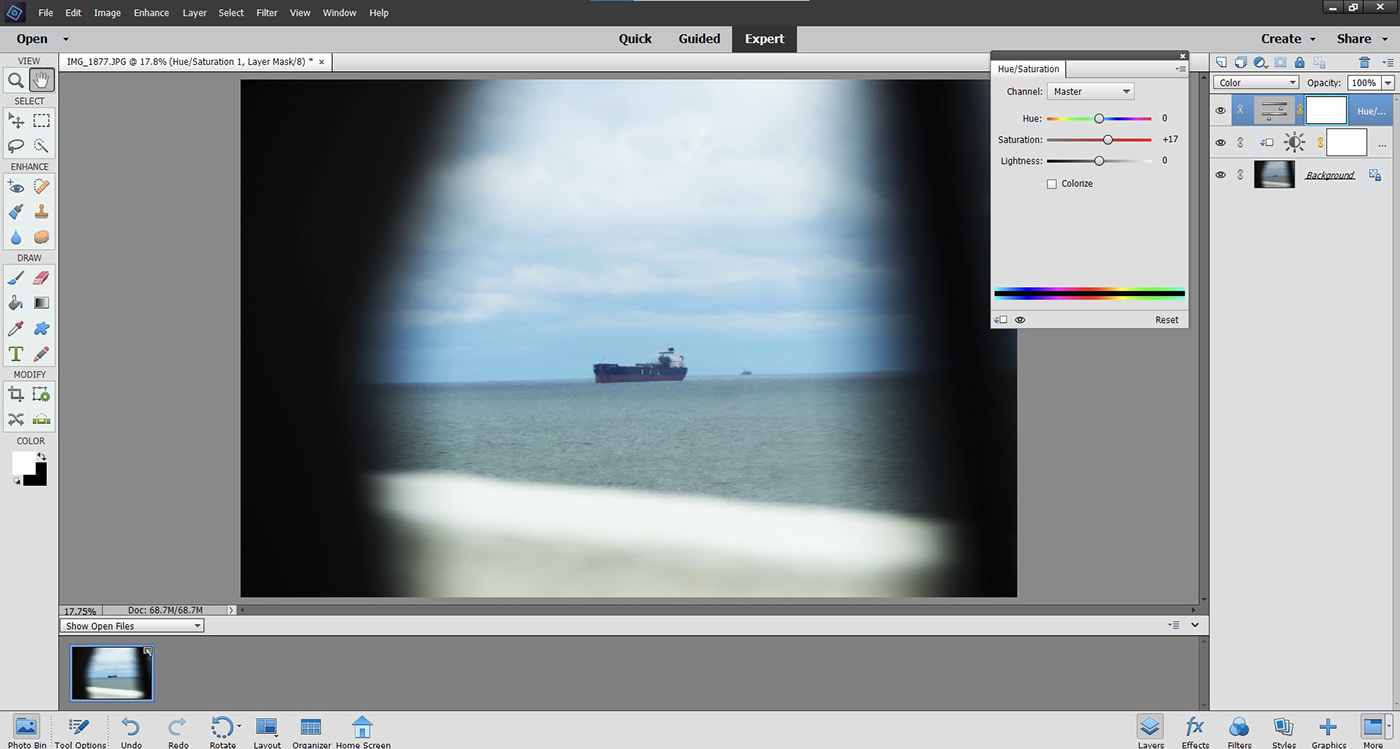
I think that I am seeing improvement to the photo! Yay! I have improved the colors and brightened up the photo, leaving us with two more tasks:
- Add Vignette
- Improve Detail
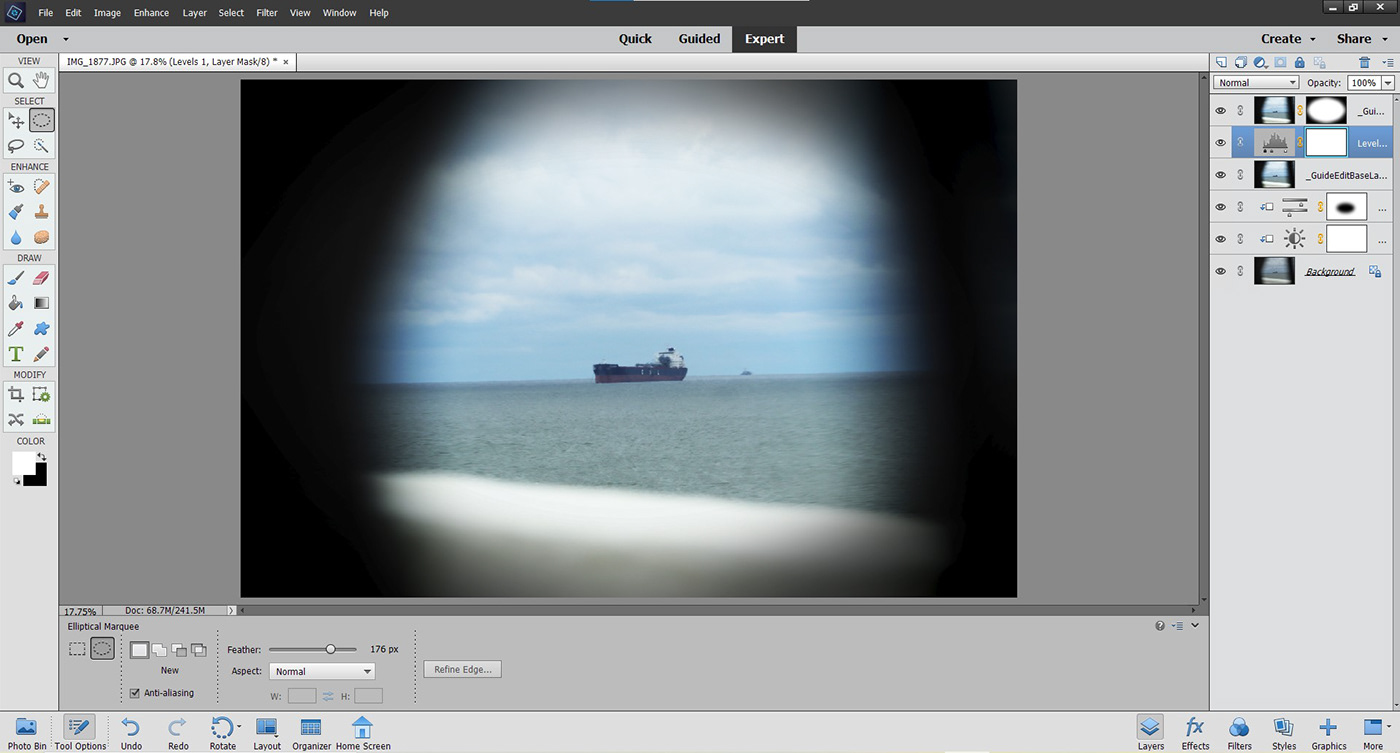
These two things are not hard. For Vignette, you can go through the guided or go through layering. The layering method is long and complex, and I personally take the guided shortcut.
I added the vignetting and have this right now:
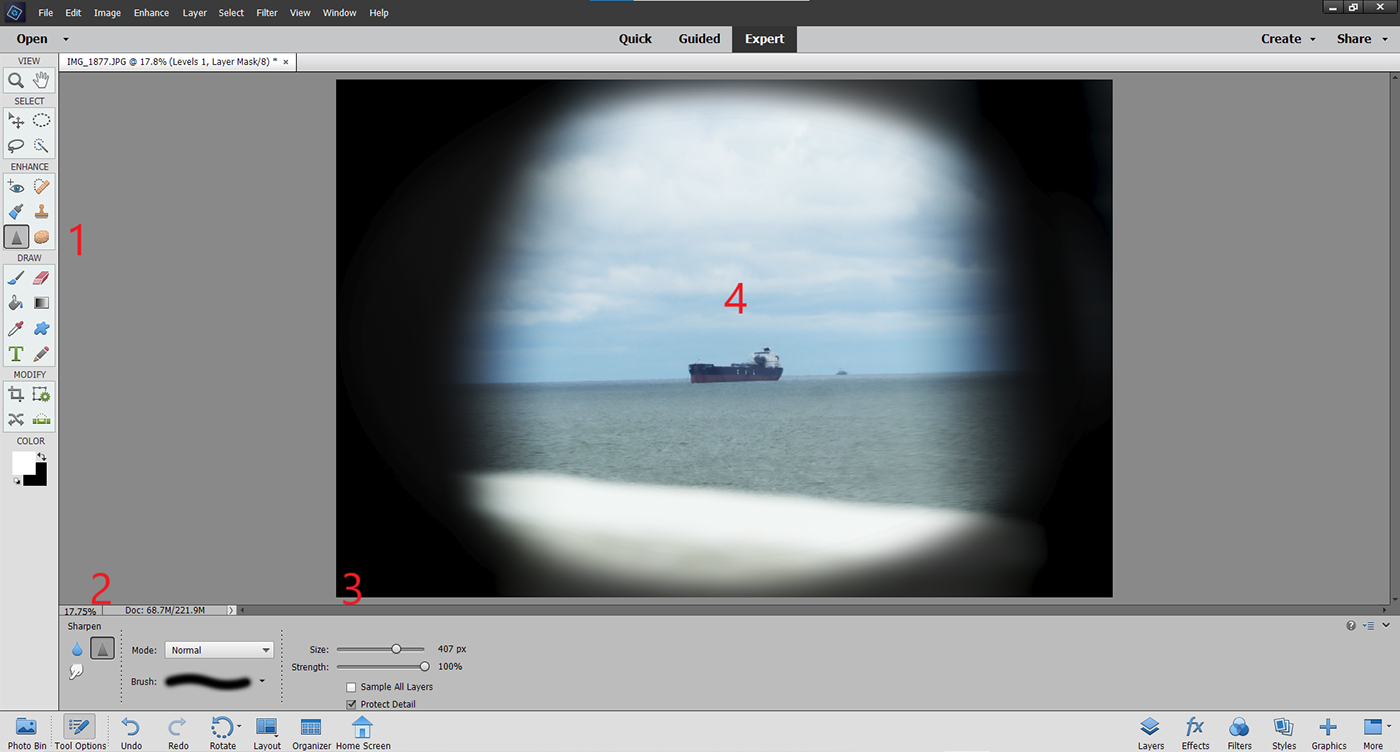
Now, improving detail. This is a bit more complex, and sometimes I find that it is just easier to do it through another editor. Since I am trying to keep this on Photoshop, I will go through the complex method. I find that the brush is the simplest, but it can be tedious if you don't have a mouse or touchscreen computer to do it on.
All that you do is select the water droplet or triangle tool (1), make sure that it is on sharpen (2), and set your desired size (and)(or) strength.
I kinda think that I could do more, but I will leave this edit here!
I really hope that you enjoyed this post! I have some more planned very soon! Be sure to check out my main blog (posts come on Fridays):
digitalwondersandsmiles.wordpress.com
digitalwondersandsmiles.wordpress.com
and my Medium.com Blog:
digitalwondersandsmiles.medium.com
digitalwondersandsmiles.medium.com
and social media: @digitalwondersandsmiles or @WondersSmiles
Thank you so very much for reading! Have a wonderful weekend!
-Digital Wonders & Smiles 😊📸
