Creative Cards - Four of Hearts
Case study
Case study
I was invited by Digital Abstracts to be part of their great Creative Cards project, which features an incredible list of renowed designers and artists from around the world.
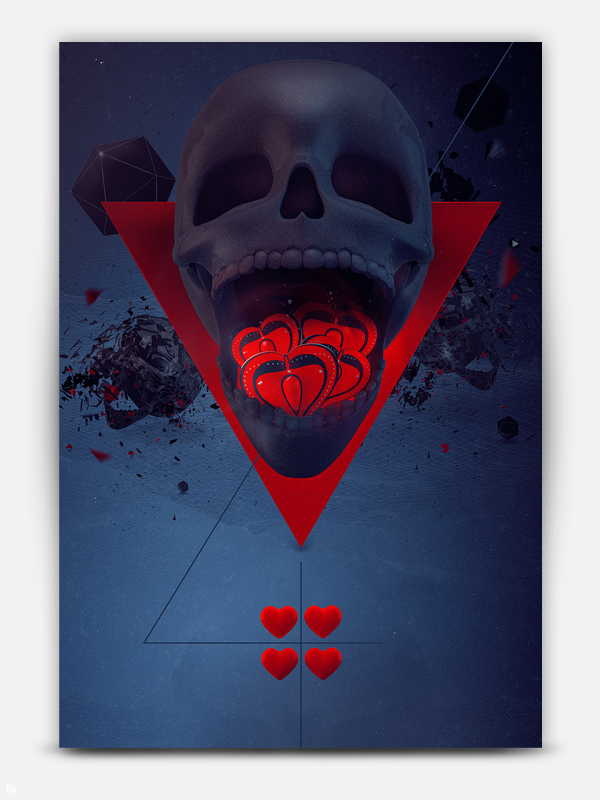
My mission was to create the Four of Hearts card. That's what came out.
My mission was to create the Four of Hearts card. That's what came out.

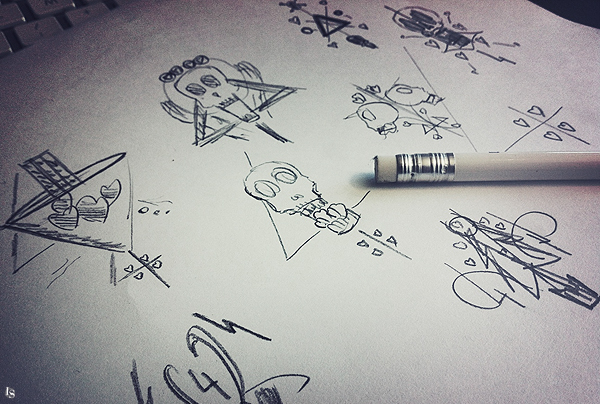
I always begin with a tiny rough to make up my mind on the direction I will take. In this step I decide the eye and balance of the illustration.
Intention was to use hearts that are looking like Poker Chips, remembering how ephemeral life, luck and time can be.
Technically, All the 3D parts were built and rendered in Cinema4D plugged with a V-Ray engine.
Technically, All the 3D parts were built and rendered in Cinema4D plugged with a V-Ray engine.

Let's face it, I am - and will always be - a fan of skulls. In all their shapes, and this since my early years! It has come so far that I now put a skull (should it be really tiny) in merely every artwork.
This work was another good occasion to use my 3D skills and reshape and old skull I originally built in 3D Studio Max. After some tests, I wanted to get it less glossy and more grainy.
I wanted to get this main skull full frontal, without compromising on any perspective that could lessen the power of the composition.
Below are the tests, the 3D mesh, and and upscaled image of the chosen texture.


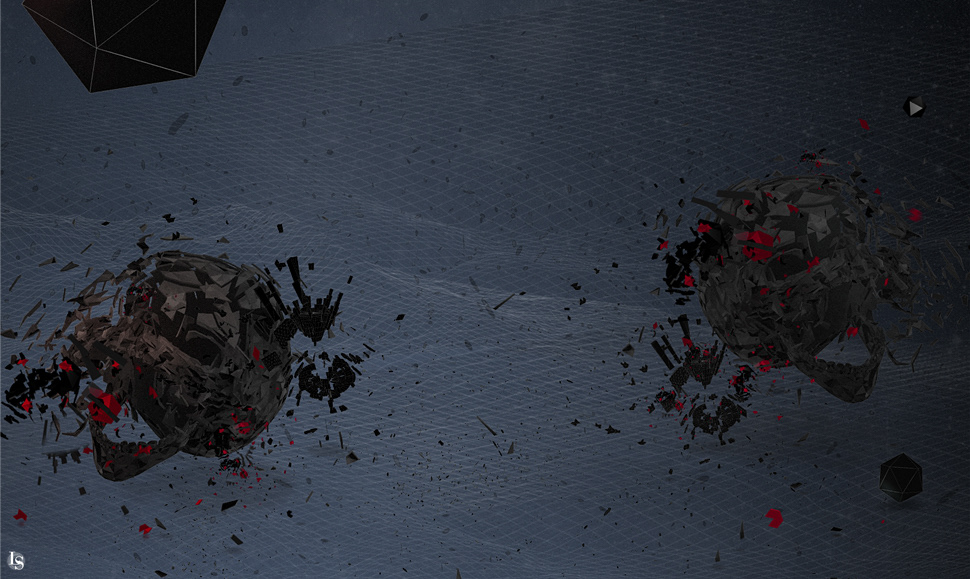
It was about time to work the background.
I decided to use blue shades in order to empower the reds of the composition.
Below are the 3 next steps (from left to right) :
1 - Adding some back elements, in the same mood (Simple shapes, and destructured poly skulls).
2 - Adding a skyline. In this case I rendered a 3D meshed horizon. Shadows of objects were added manually.
3 - Adding a simple form to enhance the contrasts on the main skull. In this case, a reversed triangle.

Some elements used in the background (without lightning and texture). These elements were rendered separately and lighted manually.

Cropped detail of the background, textured and lightened, including the shadows of the objects.
To enhance the composition, I decided to add a stylised 4, nourished by four little 3D hearts that are boosting the contrast of the whole illustration.

Last 3 steps (from left to right) :
1 - Putting together all the elements and adding some grain.
2 - Adding shadows and highlights manually.
3 - Making a first color correction to add some density.
1 - Putting together all the elements and adding some grain.
2 - Adding shadows and highlights manually.
3 - Making a first color correction to add some density.

Final corrections :
1 - Adding some last blur and sharpen to improve the perspective.
2 - Adding some hard light points.
3 - Color correction of the whole piece (in this case, Blue and Red shades have been pushed a little bit)
1 - Adding some last blur and sharpen to improve the perspective.
2 - Adding some hard light points.
3 - Color correction of the whole piece (in this case, Blue and Red shades have been pushed a little bit)
That's it!
Hope you enjoyed the process. Don't hesitate to make some comments / feedback.
Big thanks goes to Vlad and Andreas for the marvelous opportunity. Support the project : http://creativecards.cc
Direct link to the Creative Cards project on the Behance Network : http://www.behance.net/gallery/Creative-Cards-Project