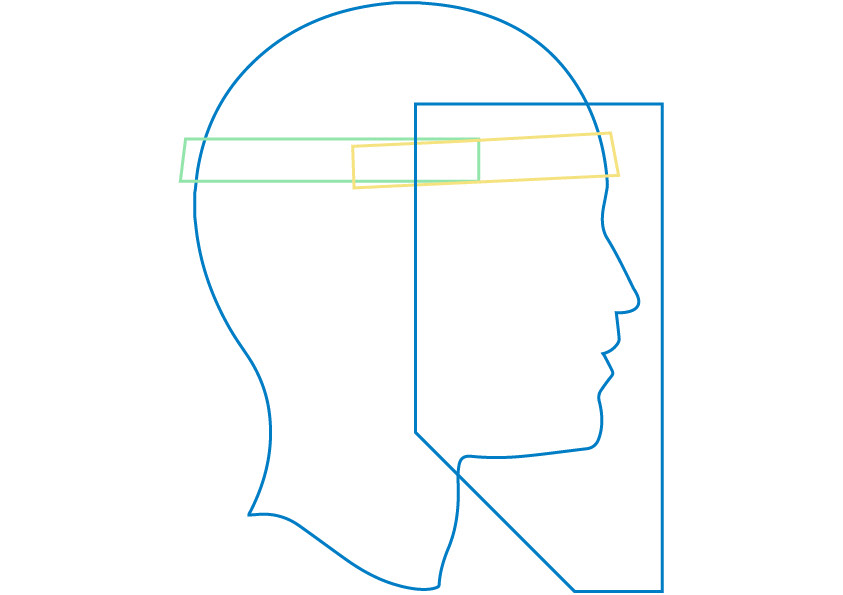
Face Shield
This face shield can be made without any specialised cutting equipment or tools, such as an A3 size printer, laser cutter, 3-D printer or additional special straps or materials. You require only one A3 sheet of acetate, a pen, ruler and scissors or cutting knife. No glue is needed.
The following 10 steps describe how to turn a single A3 sheet of acetate into a wearable face shield.
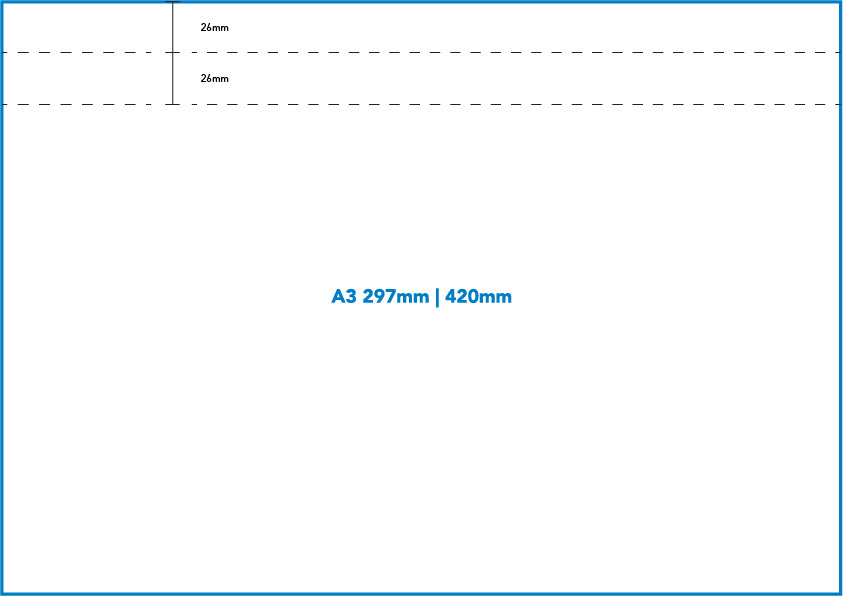
Step 1
Start in the top left corner of one A3 (297mm x 420mm) sheet of acetate. The sheet should be in the landscape position.
Cut two 26mm wide strips along the length of the sheet.
Place these strips aside for now.
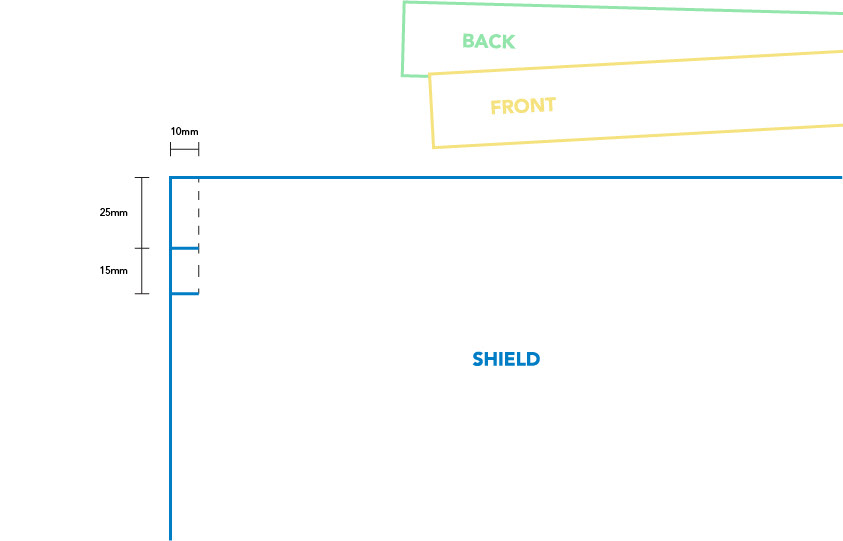
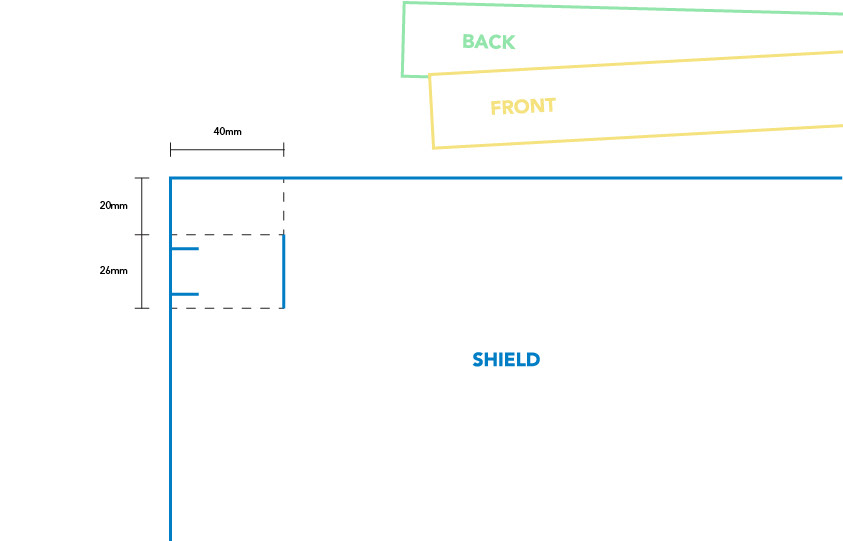
Step 2
The remaining piece of sheet will become the shield. Along the shield’s width, make a 25mm mark. Make another mark 15mm below this. Along the length of the shield, make a 10mm mark. Connect the marks, and cut two slots into the side.
Note: Depending on the thickness of the sheet, cut all the slots on the sheet wider to allow the connections to fit properly.
Step 3
In the same corner, make a 20mm mark along the width of the shield, and another 26mm mark below the first. Along the shield’s length, make a 40mm mark and connect the marks. Cut a slot along where the marks connect.
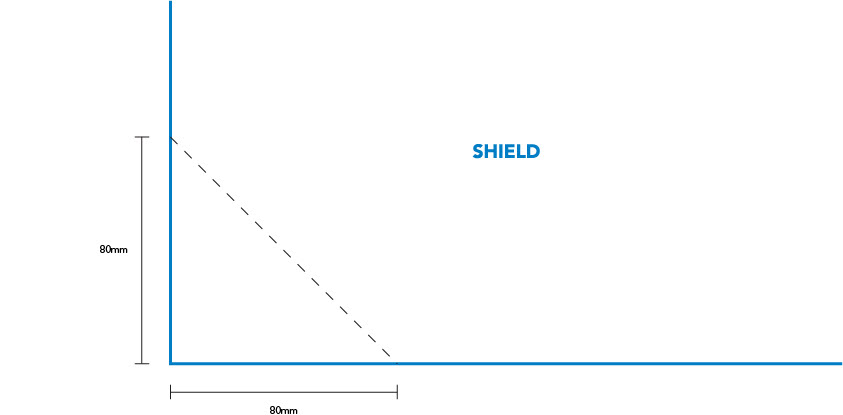
Step 4
On the bottom left corner of the shield, make two 80mm marks on both sides and connect. Cut out the corner.
Repeat
Repeat steps 2 to 4 on the right-hand side of the shield.
Put the shield aside, and turn your attention to the strips you cut out in Step 2.
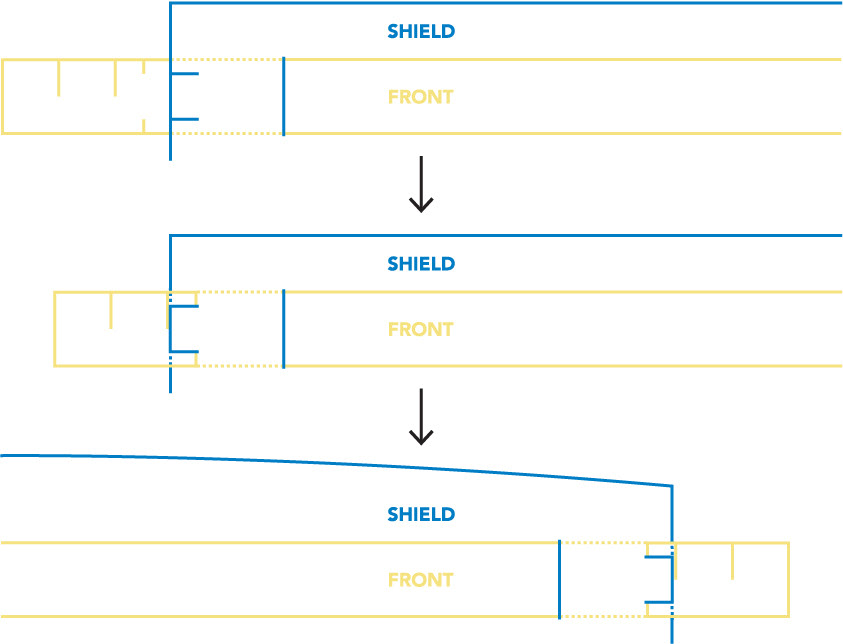
Step 5
On both sides of only the front strap make two 20mm marks next to one another on the length of the strip. Now, make two 13mm marks below this, and cut out two slots. Make another 10mm mark next to the second slot on the top and bottom of the strap, and cut two 5mm slots.
Only on one side of the bottom strap make two 20mm marks next to one another on the length of the strips. Now, make two 13mm marks below this, and cut out two slots.

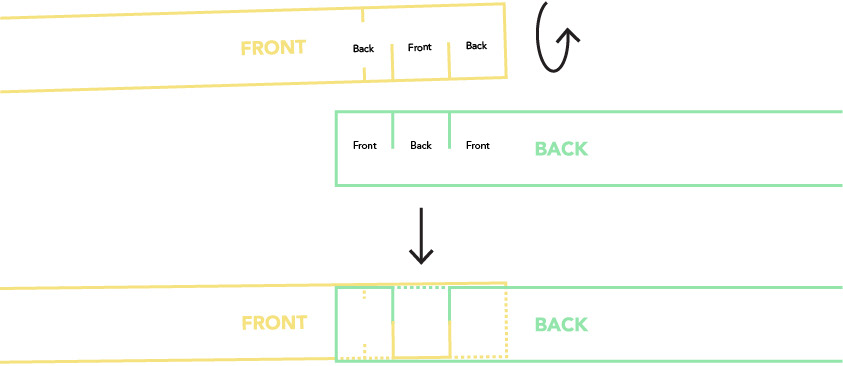
Step 6
Flip the front strip over. Slide and connect the two strips by aligning the slots.
Step 7
Place the connected strips around your head, with the back strap facing the inside, and pull until sitting comfortably. Where the two strips meet, make a mark on the back strip.
Disconnect the strips and set the front strip aside.

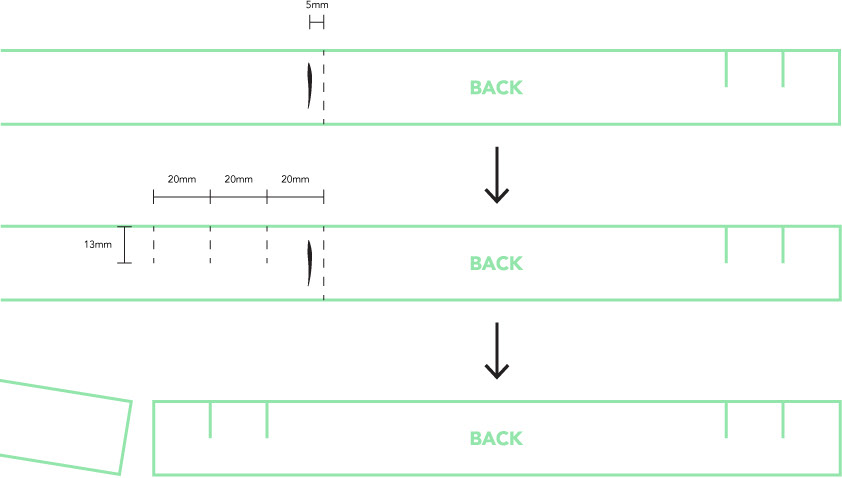
Step 8
From the measured mark, make a mark 5mm towards the already cut set of slots. Make three 20mm marks on the length of the strips away from the already cut slots, on the first two marks make 13mm below this, cut two slots. Cut off the excess on the third mark.
Connect the two strips on both sides, and place on your head to ensure the fit is correct.
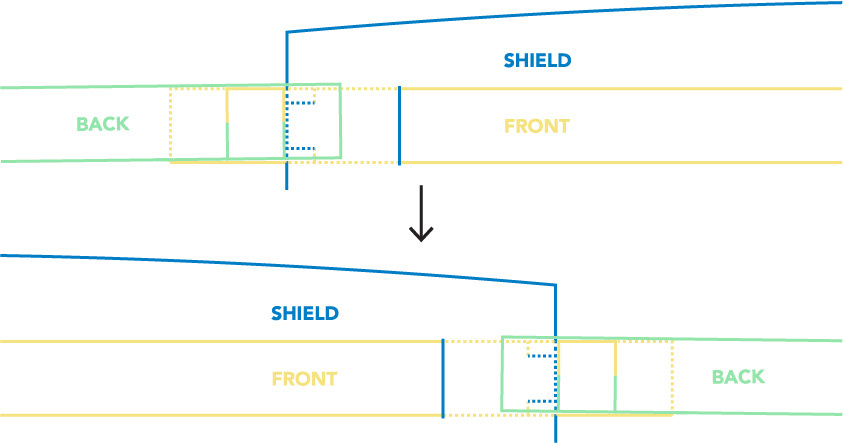
Step 9
Slide the front strip with the long slots facing up into the tall slot of the shield. Push the strip all the way through until all the slots have passed the shield. Push the strip back so that its two shorter slots meet up with the slots made on the shield, and connect. You might need to pop it into place.
Repeat this step on the right side. This will create a curve in the shield.
Step 10
With the back strip’s tab facing in, connect it to the front strip.
Repeat this step on the right side.
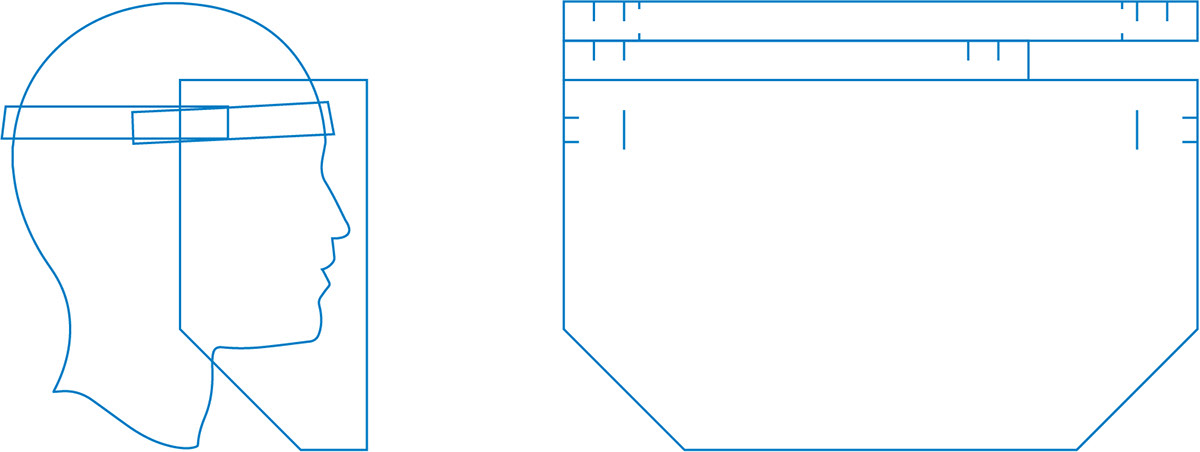
You now have a face shield!
Important: Please wear the shield along with other protective gear.