Task: Design a train ticket purchase experience.
Unlike other forms of public transportation, train tickets are purchased for specific routes, requiring passengers to specify their boarding and destination stations.
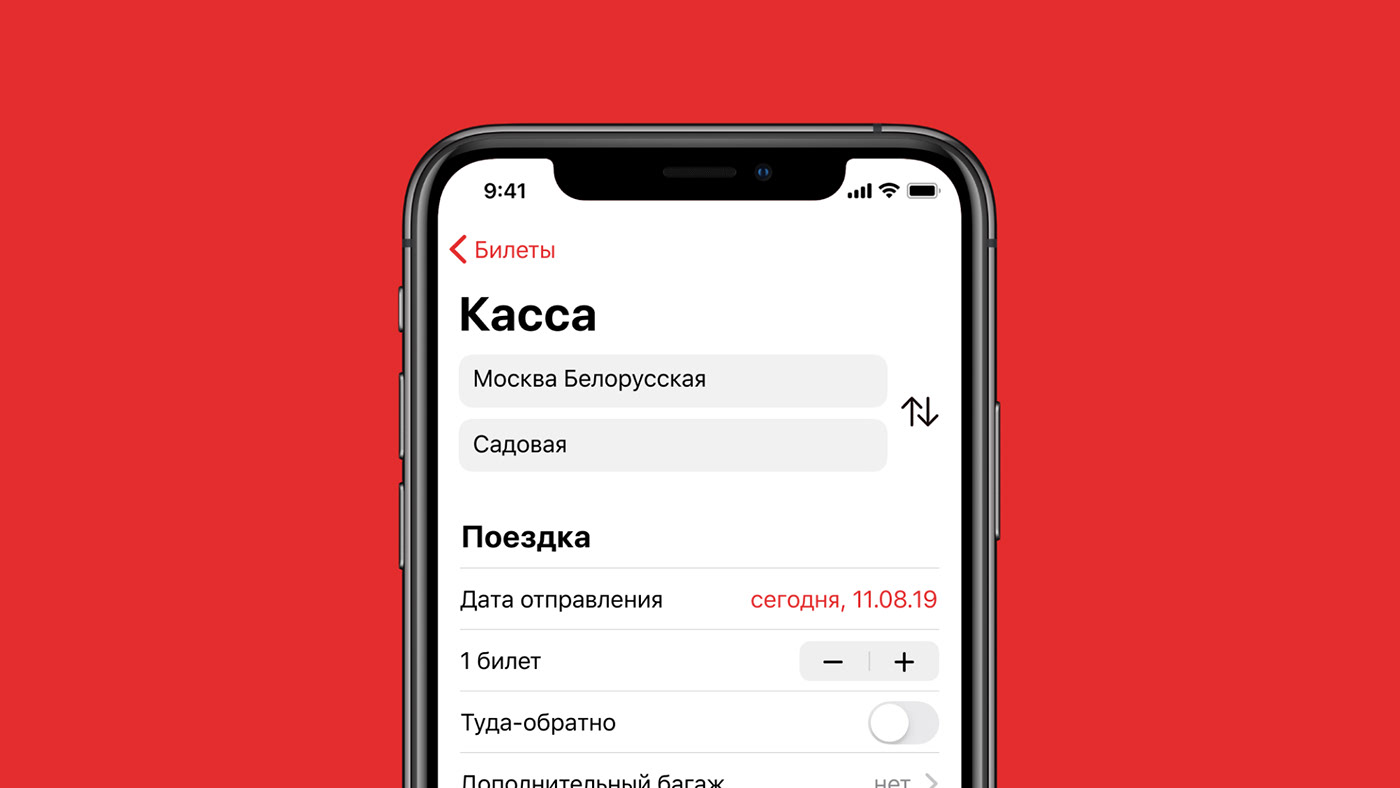
Ticket Purchase Process:
1. Select Boarding Station: Automatic station detection is not recommended as tickets are often purchased en route rather than at the station itself. The app displays both the nearest station and search history. The search history takes into account your location and time of day, prioritizing stations you are most likely to search for. For example, if you frequently travel from Grazhdanskaya in the evening, the app will suggest Grazhdanskaya as the first option.
2. Destination Station: The app considers the selected boarding station and offers options based on previous trips and searches. Since there are multiple stations with the same name, search results include the district name in the label. While a map could have been displayed, all surveyed respondents knew the name of their destination station, so there was no need for additional complexity.
3. Departure Date: Choose the date of departure. By default, today's date is selected as the most common scenario. The date selection is implemented using a date-picker wheel.
4. Number of Tickets: The most common quantity of tickets is 1, with a maximum limit of 4. The quantity selection can be done using a picker wheel. For example, selecting 2 tickets would require two taps (+/-) with the current button layout, making it more efficient than using a wheel according to the GOMS model.
Efficiency Comparison Table based on GOMS:
Number of Tickets Wheel (+/-) Buttons
1 - -
2 MKKK MK
3 MKKKK MKK
4 MKKKKK MKKK
1 - -
2 MKKK MK
3 MKKKK MKK
4 MKKKKK MKKK
Less is better. I'm sorry, it is really hard to explain whole GOMS concept here.
5. Round Trip Option: Interested in a return ticket? It's available!
6. Additional Baggage: This option requires entering additional parameters and selecting the number of baggage items. Since it is infrequently used, it is handled in a separate window.
7. Passengers: If there are no pre-defined passengers, they need to be added. A new window opens for entering passenger details, including an option for discounted fare. Once a passenger is created, they don't need to be entered again; simply check the box when purchasing a ticket. Passenger lists can be modified in the profile settings.
By the way, selecting 2 passengers will result in 2 tickets, and vice versa.
8. Complete Ticket Purchase: Apple Pay.
9. The ticket is now available on the main screen. It can be added to Apple Wallet or scanned directly within the app.
Fin.


