PROCESS
CREATING AN ILLUSTRATED POSTER
Here is a brief look at the process of creating one of my illustrated posters. This shows how loose thumbnail sketches evolve into a finished piece of key art for use in a global advertising campaign. For this case study I selected the season 2 poster I created for Stranger Things.
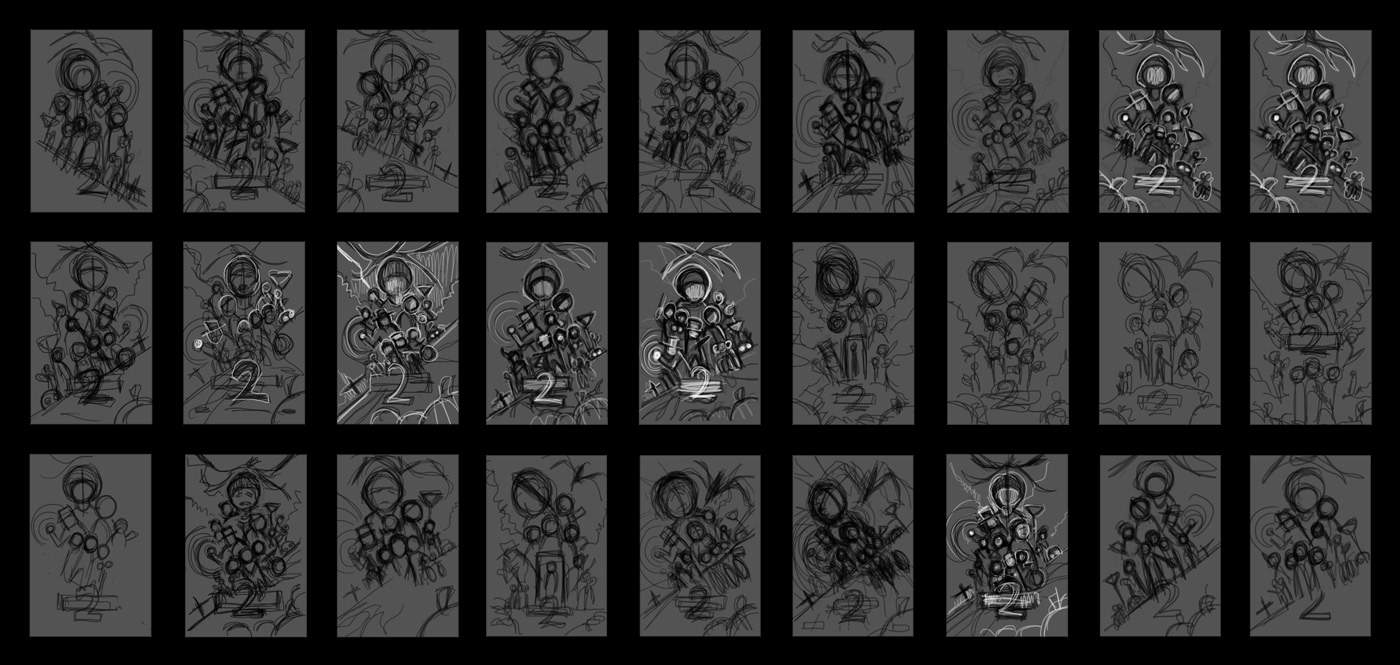
1. THUMBNAIL SKETCHES
The first stage of my process is to do as much research as possible for the subject I am working on. This involves watching the movie or TV show, and selecting key moments and images that might become useful. I also gather as much still photography as I can to assist with this process.
With all of the materials organized, I quickly sketch a series of small thumbnails to explore my initial ideas about the composition. Usually I begin by going in a number of different directions, and then start to develop the ideas that work best to improve them.
For this example, the big challenge was including a lot of characters and positioning them in a way that visually communicated their relationships and roles in the show. I did a number of sketches to try to solve these problems.
2. DEVELOPED IDEAS
Once I have settled on a design, I share a more complete drawing with the studio and discuss the direction I have taken. Often there are new ideas that come up at this stage and I go away and revise the design based on that feedback. This process usually continues until the studio are happy with the design.
In this example, we decided to feature the bikes more prominently at the bottom of the poster and adjusted the grouping and placements of some of the key characters.
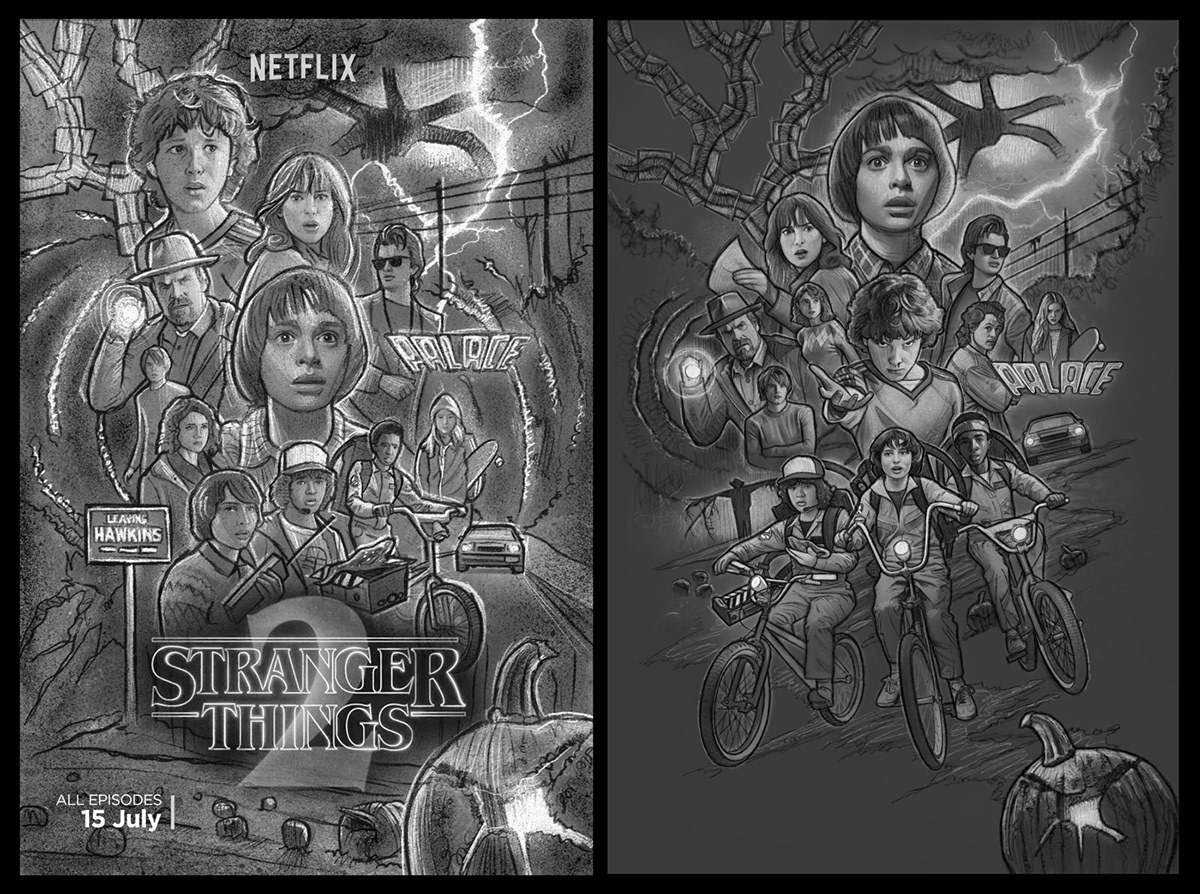
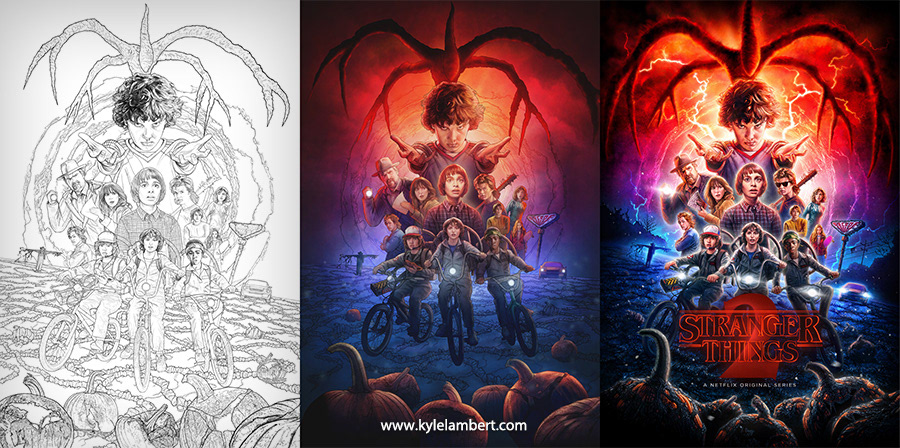
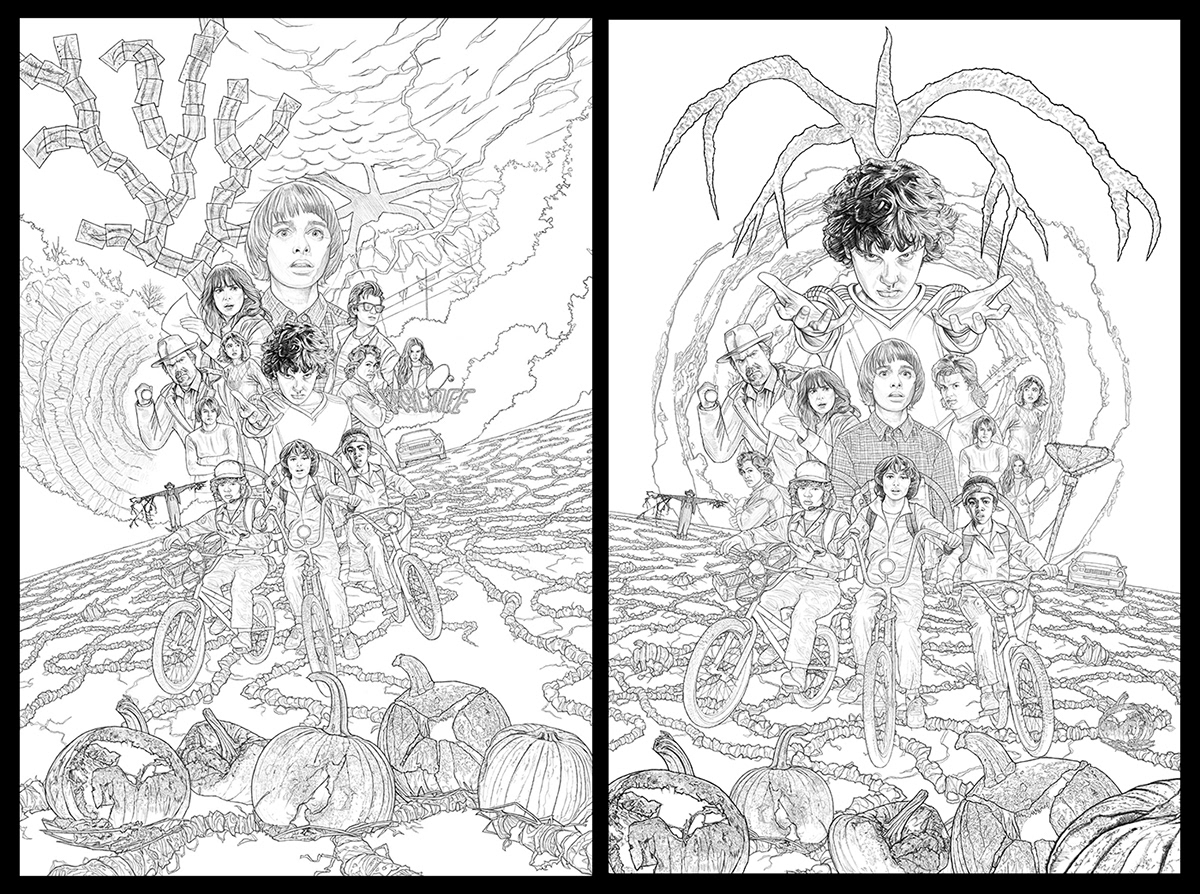
3. DETAILED DRAWING
Once approved I begin drawing a detailed version of the poster. I start with a very quick outline based on the approved design. Most of the time I don't have photography that matches the exact character poses I need, so I draw as much as I can free-hand and then draw over photography for the basic proportions of the faces wherever possible.
Once I have the basic layout sketched, I then spend several hours drawing over my outlines again, adding more detail and expression to the illustration. In some instances I will add shading at this stage to define key dark areas.
I draw everything on an iPad Pro and Apple pencil using the app Procreate. The app has amazing pencil brushes that I use for all of my outlines and detailing work.
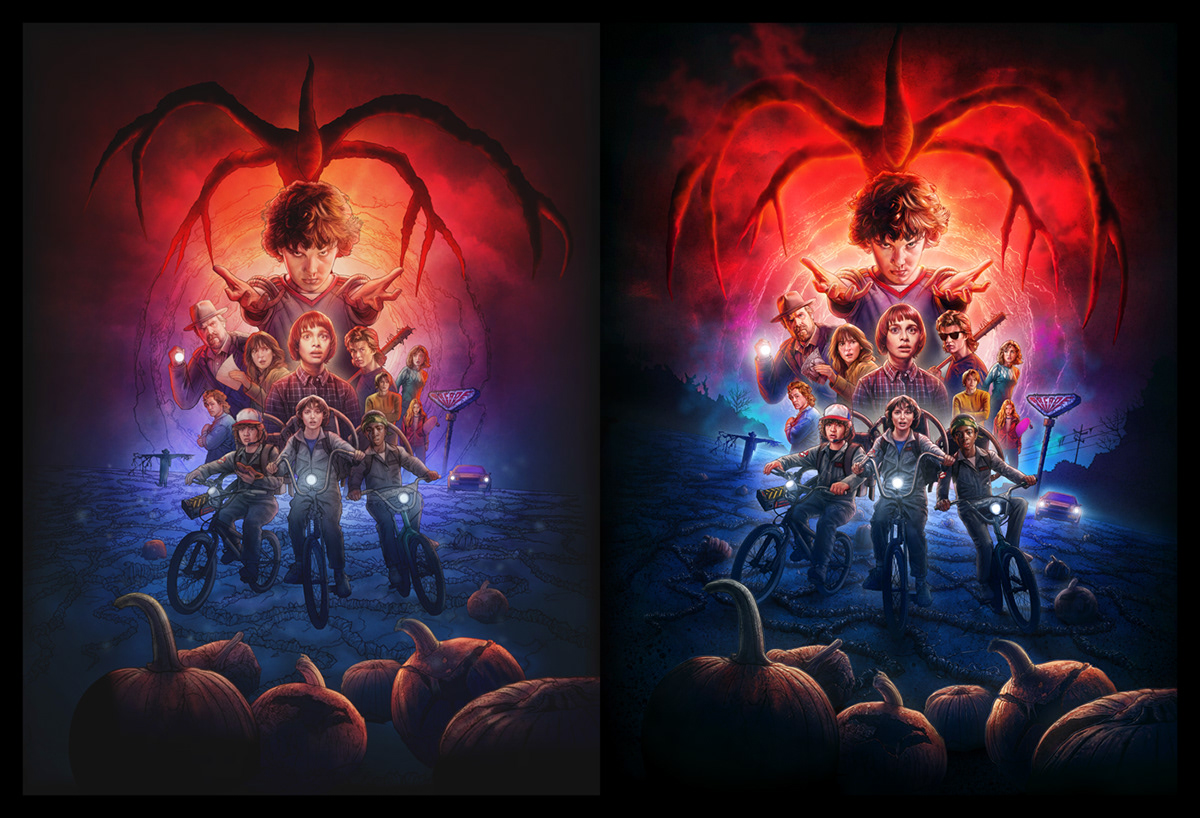
4. COLORING
With a finished drawing complete, I import the layers into Photoshop, where I begin exploring the basic color scheme for the poster. I use a large soft-edged brush to establish the broad strokes and then reduce the size of the brush to add smaller areas of color. The coloring is done on a layer underneath the drawing, with the drawing set to 75% opacity. This stage can be seen below on the left.
I then export the artwork back to Procreate to add final color details, again using the default pencil brushes. This stage can be seen below on the right.
I repeat this process a number of times until I am happy with the overall coloring of the art.

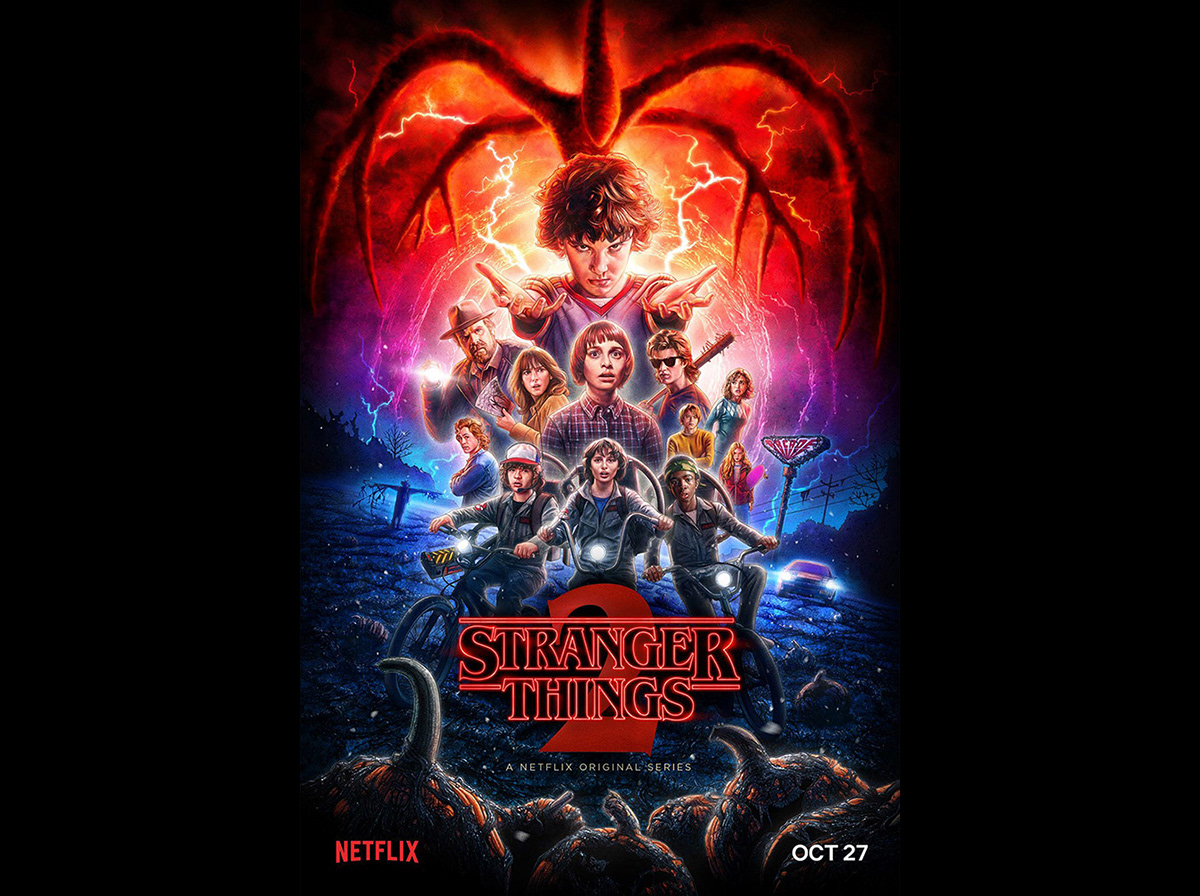
5. EFFECTS & TITLES
For the final stage, I add lighting effects using a 'Screen' blend mode layer. I also add any textures that are needed to give the art a traditional look. These are textures I have created by photographing and scanning old oil paintings I did in college.
I then place the titles and logos onto the poster and send a preview to the studio for any final notes. Often there are new ideas that come up at the very end or small adjustments to the color and lighting. Working in layers, these changes are usually quick to address.
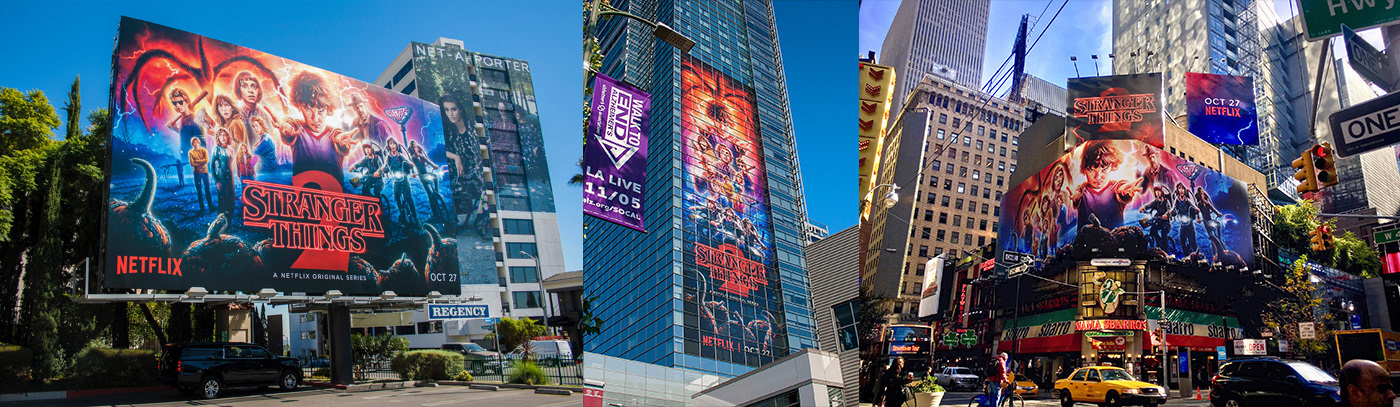
6. ADAPTATIONS
Once the poster is approved by the studio, I usually begin the process of adapting it into the various use cases for their advertising campaign. In this example I designed a series of horizontal layouts, which were used on over 30 billboards, a tall version, which was used on a 150 foot tall wall graphic, and a square design, which became the cover of the show's original soundtrack vinyl and CD release.

FAQ
What does Kyle Lambert use?
I work entirely digital. For drawing I use the Procreate app on an iPad Pro with an Apple Pencil. For coloring and building complex layered projects, I use Adobe Photoshop for Mac, which I use on a 27" iMac with a Wacom Intuos Medium sized tablet. I use both devices interchangeably throughout my process.
What brushes do you use?
In Procreate, I use the default sketching brushes that come in the app, mostly the HB brush. The only settings I change are the pressure sensitivity and size thresholds to accommodate how I hold and draw with my pencil.
In Photoshop, I use the soft-edged default brush with pressure sensitivity set to opacity for blend colors. The only other brushes I use are ones that I make specifically for each project, such as clouds, stars and smoke effects.
I do not sell brushes, but I highly recommend these packs available as part of the Adobe CC subscription - Brushes from Adobe
What size do you work at?
Currently the limitations of Procreate mean that I begin my drawing process at a maximum of 9500 x 7030 px. I then upscale as needed to the specifications given to me by the client.
How long does it take to complete a project?
The timing very much depends upon the complexity of the project and how many rounds of revisions I go through with the client. Some projects take a couple of days, others span several weeks.
Have you done any tutorials?
Outside of this page, I do not have any tutorials for poster illustration. There are a few videos on my YouTube page, but these are mostly speed paintings that show the various stages of my process. I also regularly post videos of my process on my Instagram account.
Below is a video showing my illustration process from a portrait I was commissioned to create for David Letterman.

FOLLOW ME ON INSTAGRAM


