Grade 10 Intro to Digital Film Warm Up Activity:Contrast and Affinity
This is a warm up activity for my Intro to Film course. For Contrast, my theme was colours. I chose blue and red. For Affinity, i chose to do horizontal lines
Contrast


Affinity


Shots and Composition
Part 1
1) The rule of thirds
2) Extreme Close Up (ECU)
3) Close Up (CU)
4) Medium Close Up (MCU)
5) Mid Shot (MS)
6) Full Shot (FS)
7) Wide Shot (WS)
8) Extreme Long Shot/ Establishing Shot (ES)
9) Two-Shot (TS)
10) Point of View (POV)
11) Over the Shoulder (OTS)
12) Eye Level
13) High Angle
14) Low Angle
15) Undershot
16) Overhead
17) Dutch tilt
1) Rule of Thirds
-A type of composition in which an image is divided evenly into a 3x3 grid.(Both horizontally and vertically) You can take a landscape shot showing the horizon, while someone is looking on the right or left side.
2) Extreme Close Up
-A shot that is so tight only a detail of a subject, such as eyes. It can be used when someone cries and it shows their tears. This is a good shot for human emotions.
3) Close Up
-A close up shot is a type of shot that tightly frames a person or object. When the subject is human, it will focus on their face. A good shot for this, is when they have an expression, such as surprised or scared.
4) Medium Close Up
-A medium shot is a shot that is chest and up. You might use this shot when someone is holding something or when they are talking directly to them.
5) Mid Shot
-A mid shot is a shot that is waist and up. The shot shows things in detail, while it still shows as if the audience was actually there. If the subject was human, it would be good if they were moving while talking.
6) Full Shot
-A full shot shows the entire person or object and is usually intended to place it in some relation to it's surrounding.
7) Wide Shot
-Wide shot is where the subject or person takes up the whole frame. If the subject is human, you can take a shot where he is going into a room.
8) Extreme Long Shot/Establishing Shot
-Extreme long shot is used to show the landscape of the place around the character. This shot can be used when you are establishing the setting where the character is walking/going to.
9) Two Shot
-A two shot is when the frame surround two people. The subjects don't have to be together just has to both be in the shot. This shot can be when two people show up together at a party or both be sitting down and talking.
10) Point of View
-A point of view shot is a shot that shows what the character is looking at. This shot is good for first person movies like Hardcore Henry.
11) Over the Shoulder
-This shot is over the shoulder of the subject. You would usually use this shot when the other person is having a conversation with the other person and it keeps switching.
12) Eye Level
-The angle is at the eye level, and makes you feel like they are actually there. This shot is good is if the subject is talking about something while they are moving.
13) High Angle
-A high angle shot is a low angle shot. This shot is good for if the subject is directly looking up at an object.
14) Low Angle
-A low angle shot is positioned on a low axis, making the subject looking bigger. This shot can be used when someone is trying to intimidate someone by making themselves look bigger.
15) Undershot
-The Undershot is a shot that is directly below the subject. This shot makes subject look bigger and more intimidating.
16) Overhead
-Overhead shot is directly above the subject. This shot is used when the subject is looking at the sky or an object above him.
17) Dutch Tilt
-This angle is on a roll axis.This shot is not parallel with it`s horizon line. This shot can be used if the subject has hangover and everything around him is spinning.
Camera Movements
Editing a Mood
Pitch - For this project, I'm going for a sad/calm mood. Since it's fall, I am going to take shots of the sky.
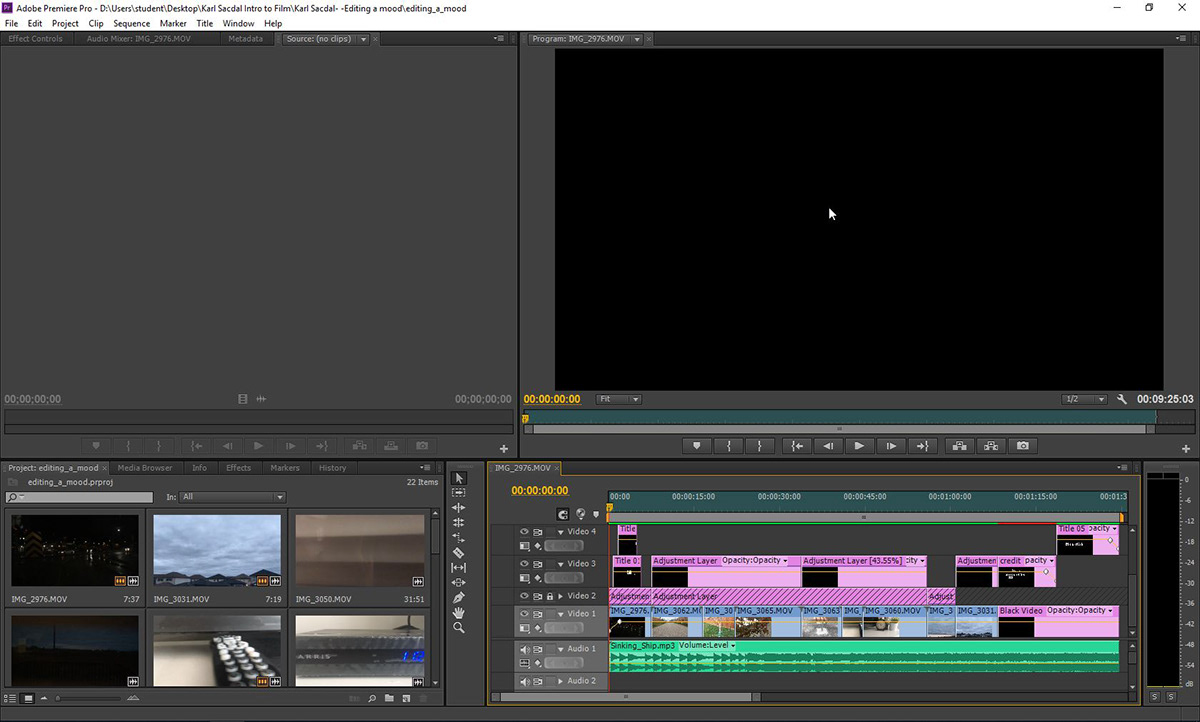
Relfection - This project was really fun. I loved playing around with the colors grading. The color really changed the mood. When i changed the color to blue, the clip felt pretty dark and sad. It was difficult to get some of my shots because of the weather. I really wanted to take a close up shot at the lake, but there was a lot of geese surrounding the lake. I did not have that much time over the weekend because we had to get ready for thanksgiving. I took shots of the sky because the clouds were really dark and grey. The clouds help give off a sad kind of mood. I also took a shot of a clock to help show time passing by, and switch to a sunset. The song gave it a pretty calming vibe, especially with the beat. Editing the clips was the most fun because you get to experiment with color grading. I tried lots of colors to see what mood it would reflect back. I used dark colors, since i was going for a sad/calm vibe. I tried the three way color corrector and the RGB curve. i found the three way color corrector more helpful since i was only going for a dark image and not that much of a difference. My least favorite part of this project was taking some of my shots over and over again. My favorite part was editing and experimenting with my clips. Overall, It was a very fun project and i liked it very much.
Walking And Arriving
My Pitch- A person walking to the cafeteria. they check their wallet and find no money. The subject going into class late.
Team Pitch- SOMEONE WALKING SOMEWHERE AND THEN TWO PEOPLE COME UP FROM BEHIND AND BLIND FOLD THE PERSON AND WALKING DRAGGING OR CARRYING THE PERSON MAKING IT LOOK LIKE A KIDNAP AND THEN THE PLOT IS THAT WHEN THEY REACH THE ROOM THEY SIT THE PERSON DOWN AND IT TURNS OUT TO BE A SURPRISE PARTY. MAKE IT FEEL SUSPENSEFUL BUT END UP HAPPY AS A TWIST.


