
Portfolio Project


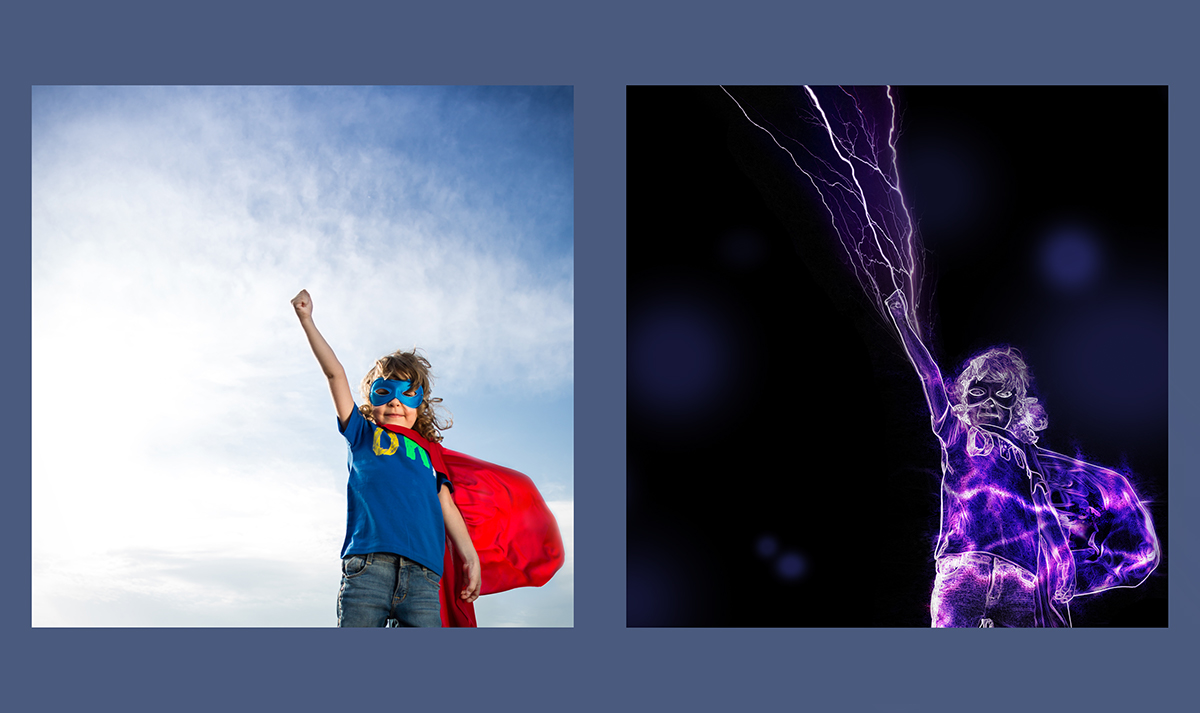
Thunder Kid
These pictures are the before (left) and after (right) of a human morph. The lightning effect went well with the child's pose and the lightning is meant to look like it is coursing through his body. The spots in the photo were added to add better balance to the final image.
Point Beach Sunrise
The before images (left column) were photos I took at three different exposure levels at sunrise. The final, composite image (right) was created using those three images, using masks to blend the three exposures into a final, evenly exposed image. The final image emphasizes the vivid colors at the horizon, while having a light enough beach area to balance the photo.

Sealraffe
For the Sealraffe, I combined photos that I had taken of a seal and a giraffe. The giraffe was selected out of its original background, placed as a layer on top of the seal, then a mask was applied to give a smooth transition from seal bottom to giraffe head. To create some unity in the final animal, I added some whiskers that were originally from the seal.

St. Louis Red Dawn
This image of St. Louis was for a selective color exercise. The sky from the original image (top) was selected and change to red for the final image (bottom). The surprising color actually brings a greater emphasis on the arch and rotunda because of the greater variety of color in the final image.

Smoky Hair
To produce the final image (bottom), the woman from the original image (top) was selected and duplicated. One of the copies was placed slightly to the left and morphed towards the top and bottom left corners and the left edge. Then, using a smoke-like brush, I masked and unmasked portions of both copies to achieve the final effect. The smoke adds even more movement to the image, as though she is being carried away like smoke in a breeze.

Nurse Peel
This image was created by first creating the outer sell that is being peeled away. The nurse image was selected, and one part of her head was selected. Then a puppet warp was used to take the two halves of the head toward either side. I blacked out the eyes, smoothed the skin a little, and added layer effects to the left peeled edge to make the nurse appear like something being peeled away. The other woman was placed below and I applied a shadow that appears like the peeled head is casting it. Then, I made the eyes red to bring the emphasis towards her stare, and the background was made a gradient of white to pink to bring unity to the final image.

American Rodent Story
The poster below was created for a fake TV show. Ten different images were used to create the final image. The prairie dog was placed on the lower third to emphasize it as the main character. The other elements of the show were put where they are to balance the image.

Goat Phone
This image of a goat eating grass from within the screen of a phone was created using a stock image of a phone and my own photo of a goat. The goat photo was placed as a layer on top of the phone layer, then excess parts of the goat image were masked so the dimensions fit properly. A blur was added to the grass to blend with the phone's depth of field. And, to unify the image more, the phone's screen was copied and used to create the subtle reflections that come through in the final image.


