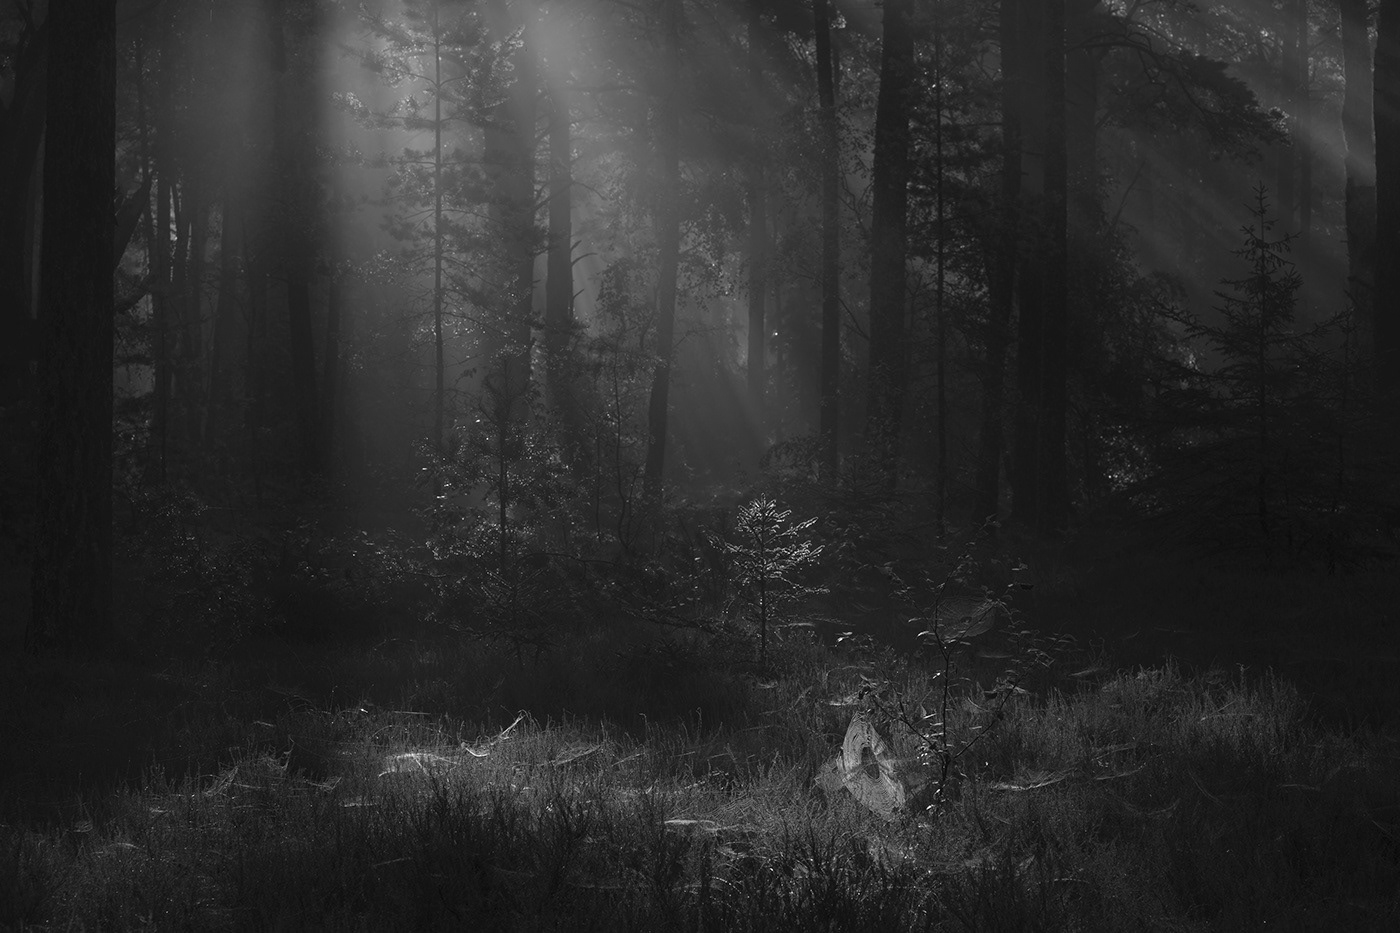
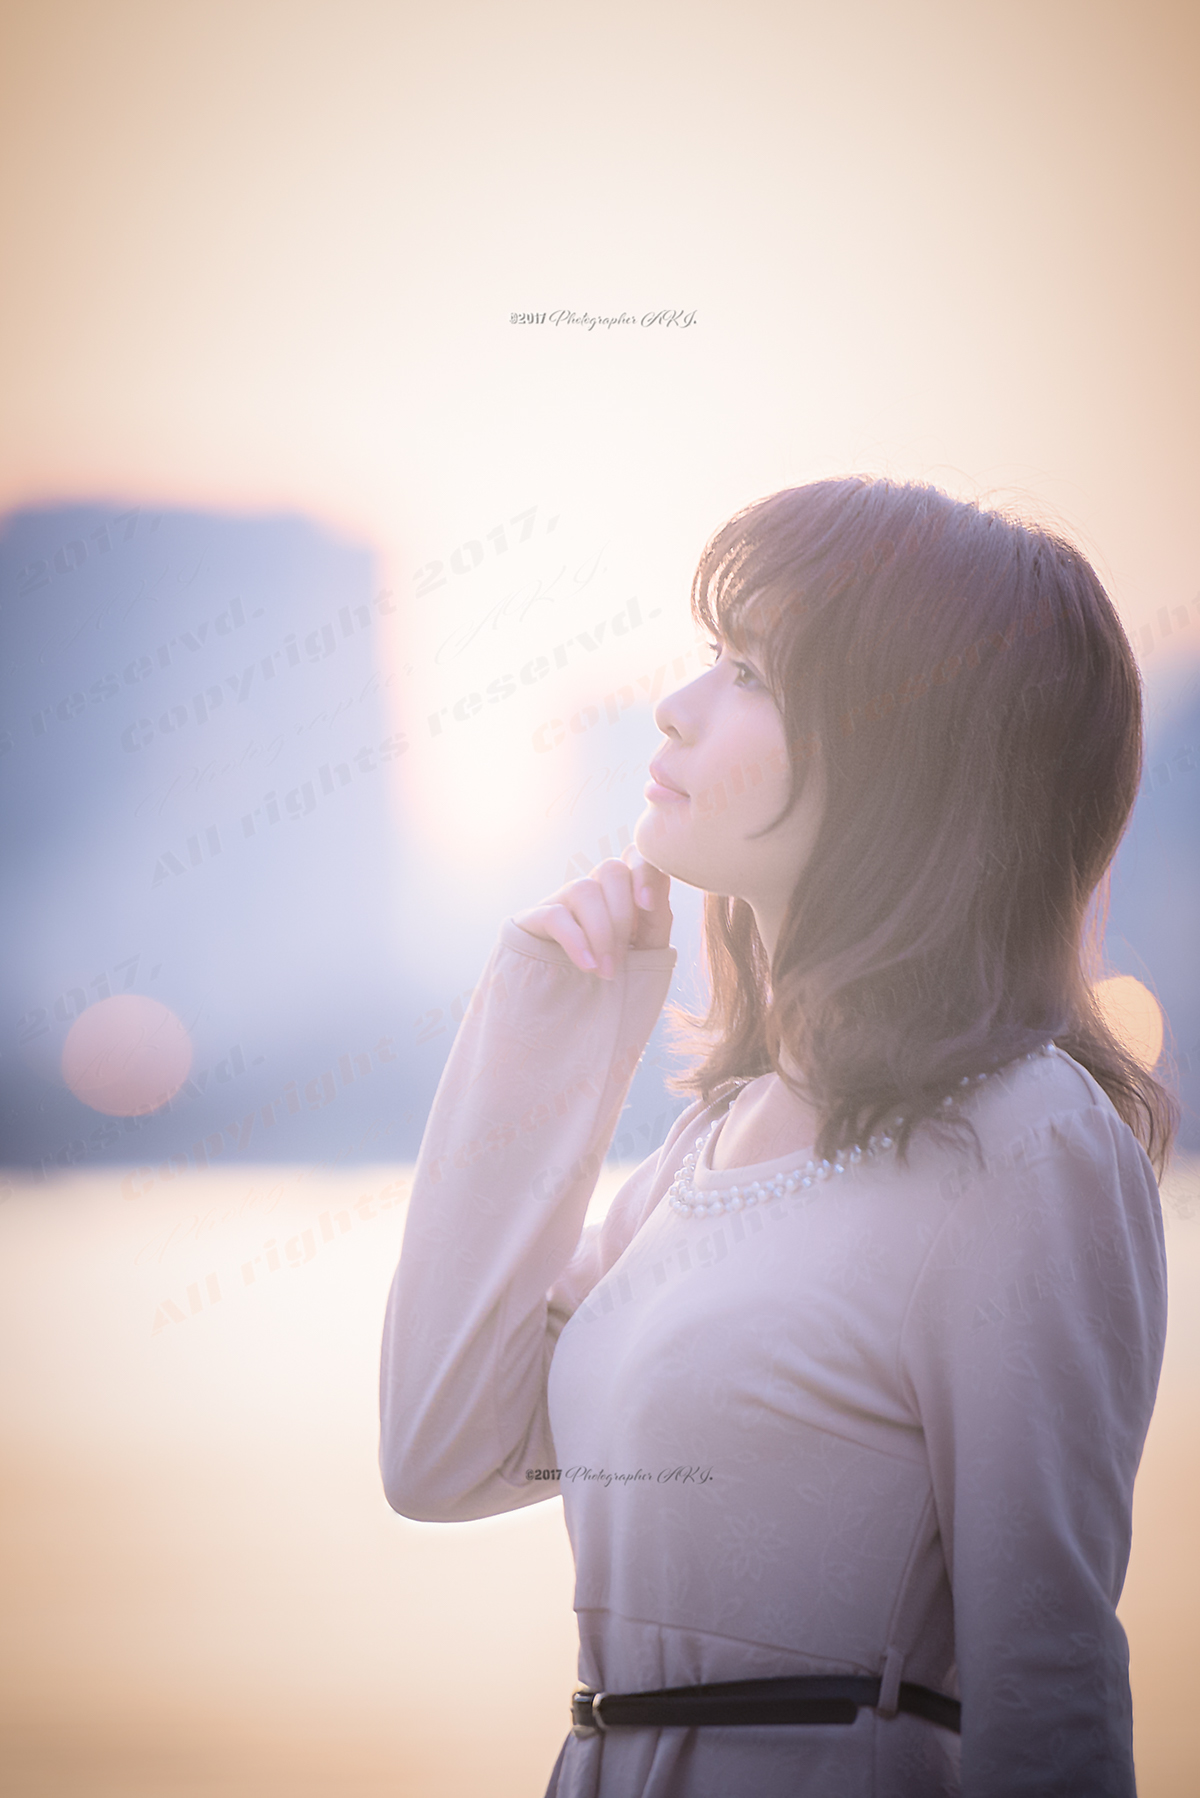
No.3-6の仕上げ版
Finished version No. 3-6
Finished version No. 3-6
眠らせていた、作品を
Lightroomから、再現像
(シャープを100%で適用)
Sleeping, works
From the light room, recursion
(Apply 100% sharp)
Lightroomから、再現像
(シャープを100%で適用)
Sleeping, works
From the light room, recursion
(Apply 100% sharp)
レタッチ前のデータはこちら
このままでも良いのだけどもう一工夫
Here is the data before retouching
Even though it can be as it is, another idea
このままでも良いのだけどもう一工夫
Here is the data before retouching
Even though it can be as it is, another idea
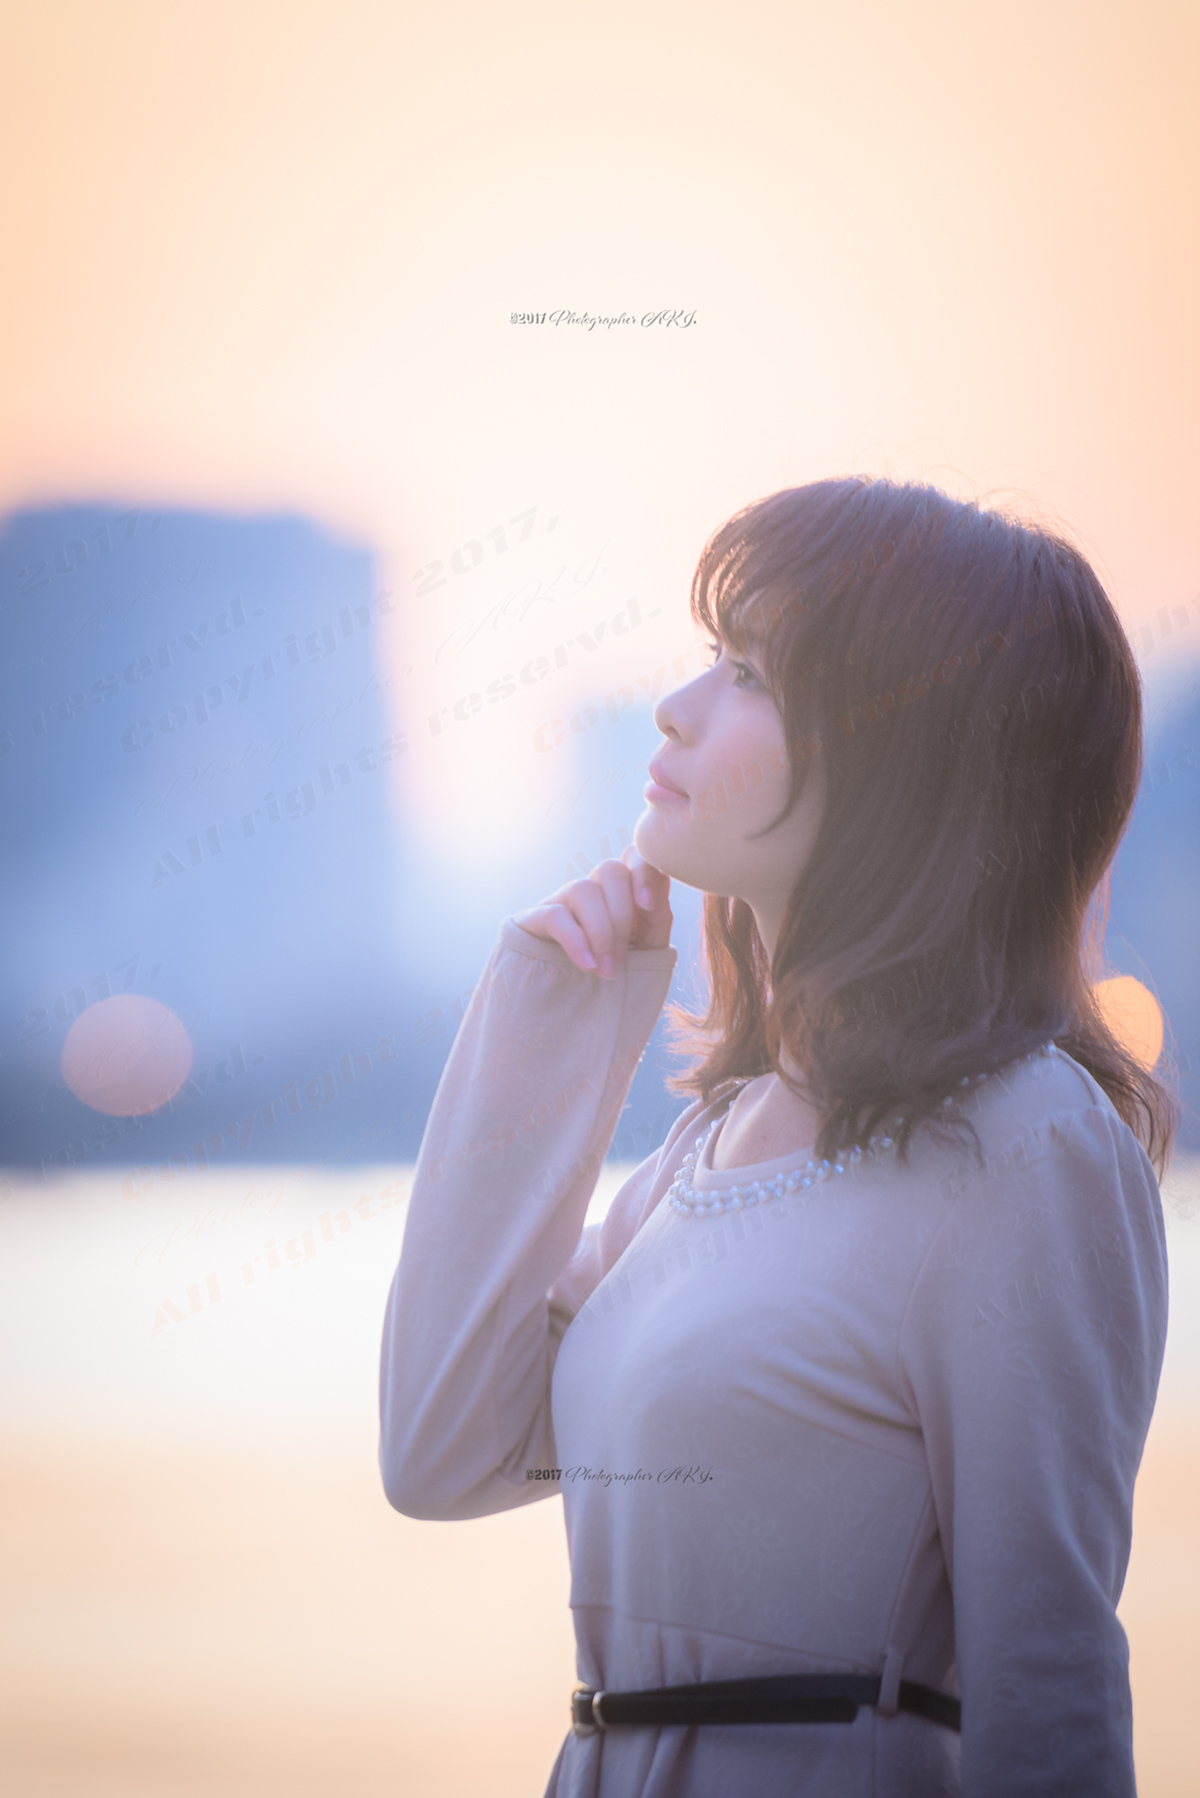
Model : K.Nagayama
Camera : Nikon D810
Tool : 1.Adobe Lightroom Classic CC 2018
Camera : Nikon D810
Tool : 1.Adobe Lightroom Classic CC 2018
Photoshopへ転送し、
先ずは、編集用のアクションを適用
その後、背景レイヤーへシャープ→ブレ軽減を適用
(自動で選択されるものに合わせ4つを自動領域で追加)
Transfer to Photoshop,
First, apply the action for editing
After that, apply Sharp → Blur reduction to the background layer
(Add 4 in automatic area according to what is automatically selected)
先ずは、編集用のアクションを適用
その後、背景レイヤーへシャープ→ブレ軽減を適用
(自動で選択されるものに合わせ4つを自動領域で追加)
Transfer to Photoshop,
First, apply the action for editing
After that, apply Sharp → Blur reduction to the background layer
(Add 4 in automatic area according to what is automatically selected)
次に、背景レイヤーを複製し、フィルターでモノクロ化
Next, duplicate the background layer and monochromate it with a filter
Next, duplicate the background layer and monochromate it with a filter
続いて、下の背景レイヤーへ50%のスクリーンで適用
Then apply to the lower background layer with 50% screen
Then apply to the lower background layer with 50% screen
最後の仕上げに、CC道場テクニックと畠山さんとKaz Omoriさんの
作画テクニックをWacom tabletを使い、ブレ軽減で歪んだ部分を補修
作画テクニックをWacom tabletを使い、ブレ軽減で歪んだ部分を補修
On the final finish, CC Dojo technique and Hatakeyama and Kaz Omori's
Using Wacom tablet for painting techniques, repair distorted parts with shake reduction
Using Wacom tablet for painting techniques, repair distorted parts with shake reduction
Model : K.Nagayama
Camera : Nikon D810
Tool : 2.Adobe Photoshop CC 2018
Camera : Nikon D810
Tool : 2.Adobe Photoshop CC 2018
そして完成
最終工程の、手書き部分以外はアクション化出来たので
次回撮影出来る機会まで、この方法はこれで封印
And finished
Since it was able to become an action except the handwritten part of the final process
Until the opportunity to shoot next time, this method is now sealed
最終工程の、手書き部分以外はアクション化出来たので
次回撮影出来る機会まで、この方法はこれで封印
And finished
Since it was able to become an action except the handwritten part of the final process
Until the opportunity to shoot next time, this method is now sealed