Earlier this year I worked on an art exhibit organized by environmentalist Holly Hawk. The exhibit opened on Earth Day at the Art Institute of Hollywood and it's theme was the rapid decline in honey bee populations due to Colony Collapse Disorder.
I began brainstorming ideas for paintings or sculptures I could create but nothing seemed to really convey the severity of this issue. Billions of bees are mysteriously dying each year and I wanted to show how immediate and present this problem is. I often notice dead bees scattered around the sidewalks around Los Angeles, there is usually at least one or two every ten or fifteen feet I walk. One day while walking by one of these mysterious dead bees I realized this was what I wanted to show. I am always amazed at the number of dead bees I walk by, this makes it obvious to me how real this issue is. I wanted to share that confrontation, so I began collecting dead bees I found on the sidewalks near my house. I quickly accumulated over 300 dead bees without much effort, i'm telling you they are everywhere if you look. I came up with the idea to make three pieces that would tie together. All three would be a scene suspended within a thick layer of resin and all three would use the dead bees I found.
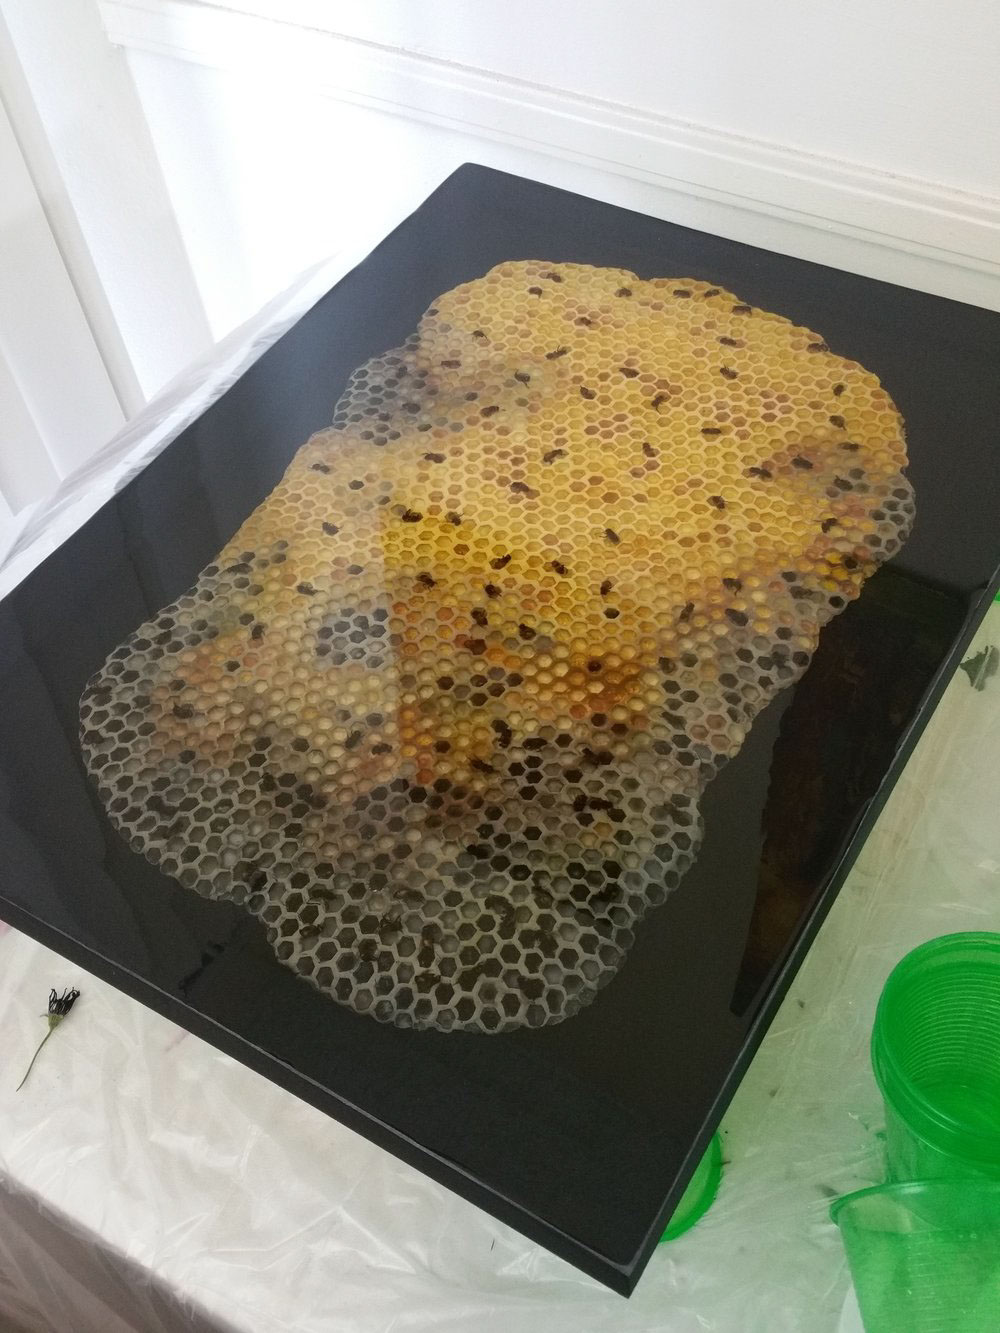
Since each of the three pieces have very different creative processes I will write a separate post for each one. This is the first piece in this set, it is 18 x 24 inches and weighs about 20 pounds. I wanted to show a deep and intimate view into the bee's world, I wanted to show the destruction within their homes. I decided to create a hand-sculpted honeycomb that is dying and rotting away as the bees struggle to keep it alive.
The Process
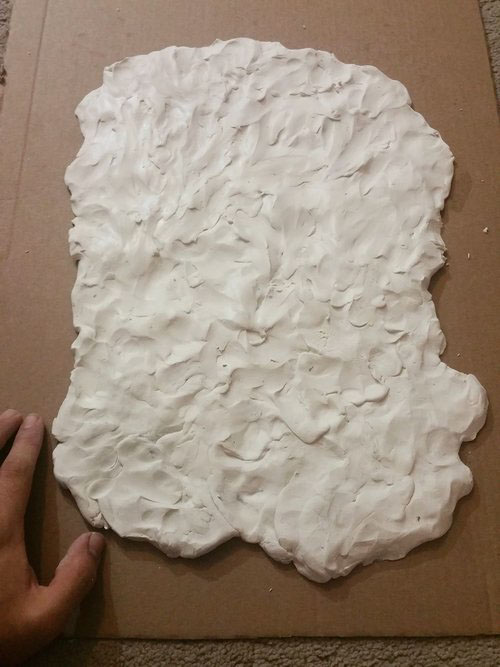
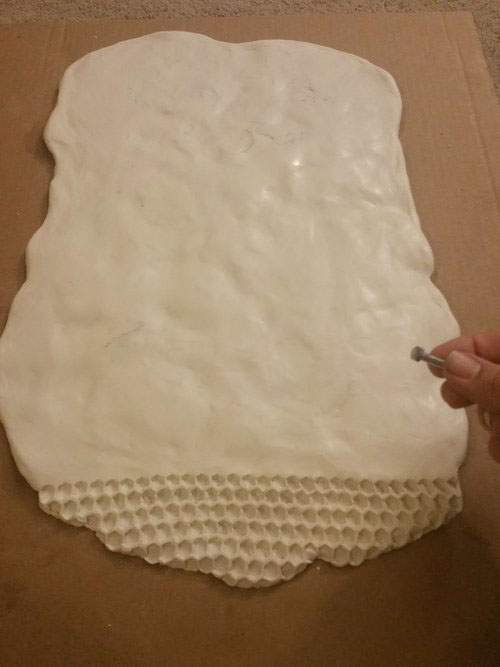
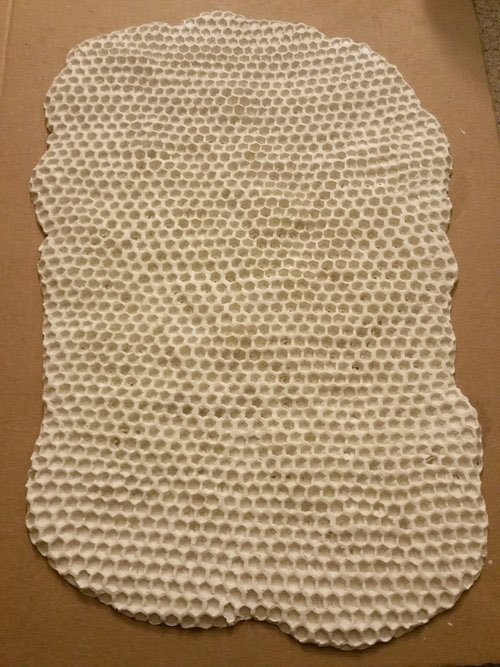
STEP 1: I sculpted the honeycomb out of polymer clay. I roughed out the shape, smoothed the surface, and then using the head of a bolt I tediously stamped in row after row of honeycomb cells.
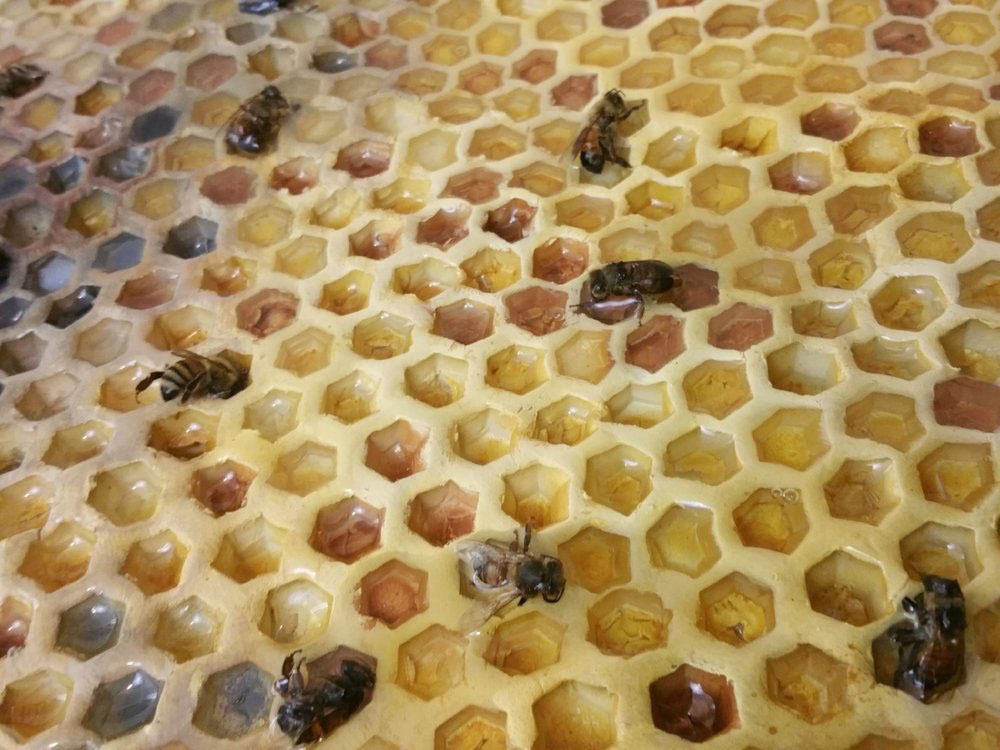
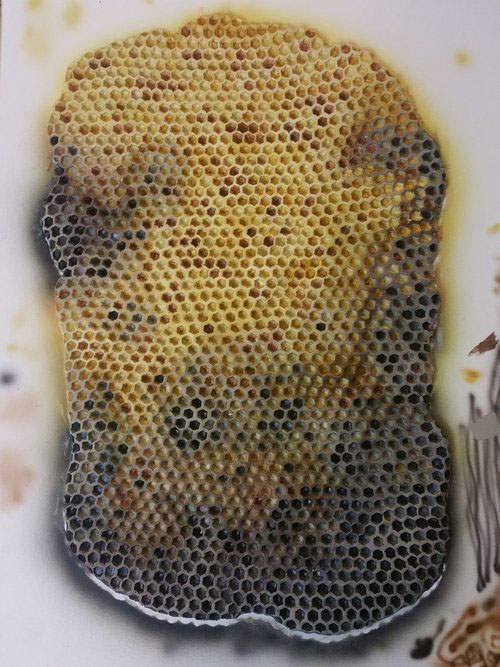
STEP 2: After the entire honeycomb was sculpted I baked it in the oven until it hardened. The first layers of color I applied with an airbrush. I wanted to make the honeycomb look as if it were dying and partially rotting away so I made parts of it gray to look decayed and dried out. After airbrushing in colors to each individual cell I switched to acrylic paints and dry brushed in further texture over the decaying sections.
STEP 3: I took a cradled birch wood panel, painted it black, and poured a thin layer of resin into the bottom. Next I took the painted honeycomb and set it into the resin and let it cure overnight. Once the resin was hardened and the honeycomb was locked in place I began adding in the dead bees. I staged them to look as if they were alive and struggling to keep the honeycomb vital. I added several thin layers of resin over the bees and honeycomb and let each layer cure overnight securing the entire scene in place.
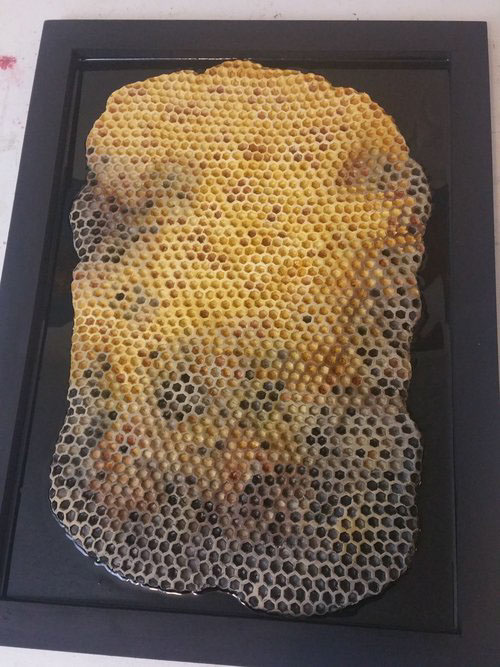

STEP 3: To bring this piece to a finish I poured a final layer of resin that encased the entire frame. In the end the resin ended up being about an inch deep and the final piece weighs close to 20 pounds.
Here is a photograph taken of the final piece. Photographing through an inch of clear resin is very difficult for lighting and focus, the colors of the bees show up much better in person.

Thank you for viewing! Below are a couple more snapshots from various stages of the process.