In this lesson, we learnt three ways of transferring a print to any surface (wood, glass, cloth, etc.) via three methods - ironing, solvent or adhesive. Upon hearing in class that it was possible to transfer an image to a surface via ironing using normal paper, I was surprised. All along, I had thought that that was only possible by using iron-on transfer paper. I learnt that although it was possible to transfer prints onto another surface using normal paper, it is impossible to get all of the ink transferred over, a feat that only iron-on transfer paper is capable of achieving.
During our hands-on time, the first method I tried was to use the ironing method to transfer a photograph of a cat to a piece of cloth. Unfortunately, no matter how much I ironed it, not a single bit of ink came out. (Sorry, I didn't take a picture, because at that time I didn't think it was necessary to take a picture of nothing on a piece of cloth)
Thus, I decided to use the solvent method to attempt to transfer the image of the cat to the piece of cloth. I sprayed thinner on the paper and rubbed it, and repeated this several times, but was unable to get much of the ink to transfer over. I even ended up pouring the thinner onto my paper and scrubbing at it as much as I could, but it did not help at all. This was how the final result looked like:

Finally, it was time for me to try out the adhesive method. I applied white glue on one of my prints and pasted it on a piece of wood. I left it in the studio overnight, and returned the next day to wet and peel off the paper. I was surprised and pleased with the results. This was so far the only method of transfer that worked for me!

I decided to try out the adhesive method using packing tape next.


After water has been added and paper scrubbed away. Woah! It looks amazing! So much of the colour was transferred over!

Pasting it on a piece of wood. It looks great and clear! Of all the methods I've tried, using packing tape gave me the best results!

There, doesn't it look so much clearer compared to the one where I applied the white glue method?
Working on the Sign
I decided to create a sign for a cat cafe. I looked up references online to gain inspiration for the design of the sign and the typography I should use. Here were the pictures I saved:


I still have an image of Orange, my favourite stray cat, remaining, so I decided to use her picture for the sign. I chose to use the adhesive transfer method via packing tape, of course, as my experimentations have revealed that using packaging tape produces the clearest and best results.

I cut her out from her background and placed tape on her picture.

After putting her in water and scraping off all the paper. Guess I accidentally scratched off some of the ink while removing the paper. (To be honest, after doing this, I asked myself, "Wait, why do I even need to wet the picture and scrape off the paper since I already cut out her background?" And Orange lost the white colour on her paws and tail. I guess I've got to do that for the sake of this assignment!)

The other side of the wood was too dark for Orange to show up clearly, so I decided to use the lighter side of the piece of wood. Next up, it's time to add the words!

I don't know whether or not markers work with the adhesive transfer method, but I decided to give it a go.

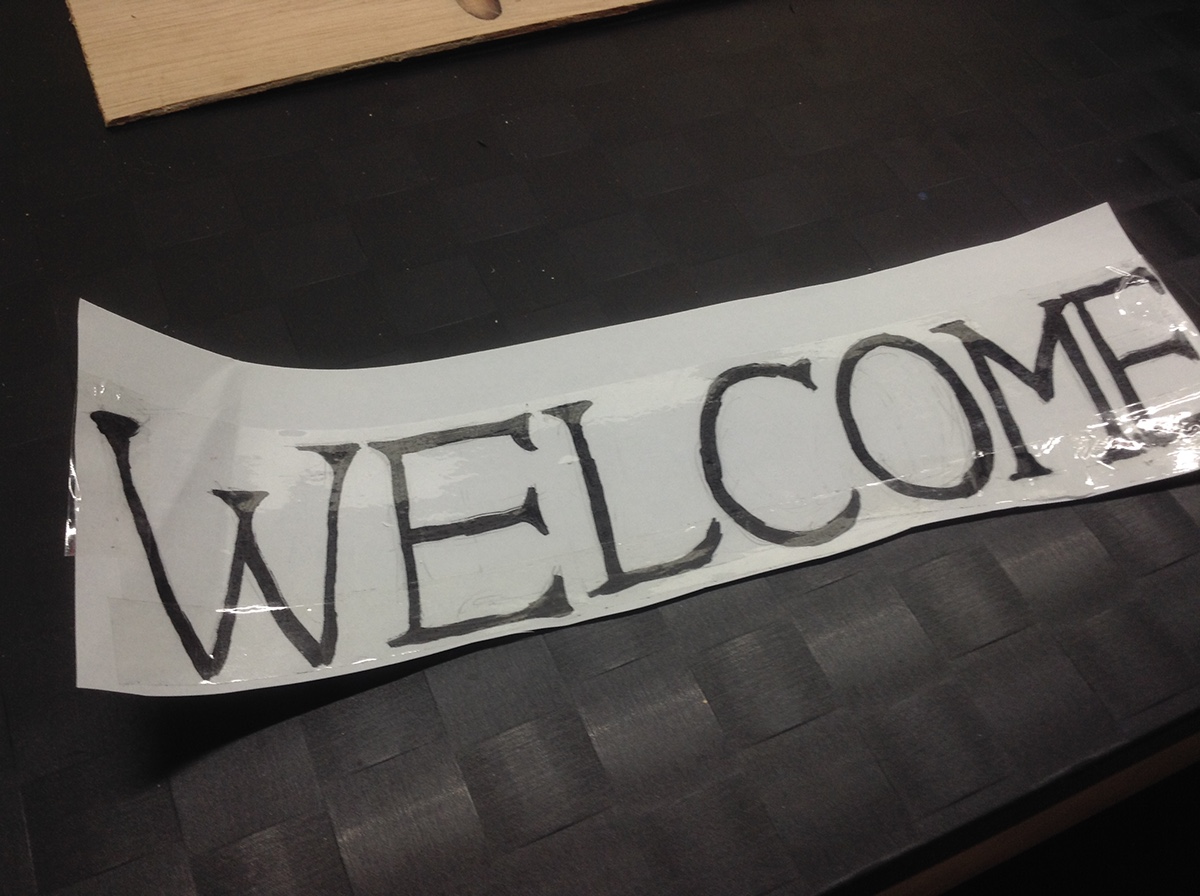

Turns out that they don't... :(

I considered 'cheating' by simply removing all the white parts and pretending that the transfer worked successfully, but I gave up after this point and decided to just use a printer.

Designing my sign in Illustrator.


I expected it to work this time, but alas, it did not work. I was pretty confused - I had thought that my printer was an inkjet printer. I wonder if I was supposed to wait for it to dry before doing the transfer?

Either way, I didn't have any more time to waste, so I decided to 'cheat' and carefully scrape off all the background paper.

Well... it's not perfect, but it's better than nothing. At least the bits of paper aren't as visible when viewed from a distance.

Next thing to do was to do the same to the remaining text. I'm so glad that I decided to put the words 'Cat Cafe' in an oval.

And this is the final product! I'm pretty proud of what I've done, though I know I could certainly have tried transferring the type properly... if I had the time to.
Reflection
This lesson was very useful to me, as I got to learn three (or maybe two) different methods of transferring images to any surface. The only methods familiar to me prior to this class were the ironing method and the solvent method - the latter due to the fact that we had used thinner to do print transfer in Year 1 before. It is really great that the newest method I learnt would end up becoming my favourite means of image transfer. I do foresee myself using print transfer via adhesives in the immediate future!
