

Reflections
This week we learnt about image transfer. I have always heard the term image transfer, but never really knew what it meant, or the process involved in transfering the image. I'm really glad I got to learn about this because what I imagined was completely different. Anyway we learnt 3 methods of image transfer, which were solvent, heat and adhesive based. I was so surprised that we could actually use glue, tape and water for the adhesive method. Who knew that image transfers is actually at the tip of our fingers? Its as simple as that. This lesson is very useful especially when we want to transfer images or illustrations onto somewhere that the printer is incapable to print on. For example, we can use the methods learnt to print onto our notebooks, bags or even the wall (I think haha). Transfering images traditionally is very helpful especially for us designers, if we want to document things or even as a daily inspiration in our notebooks. As we were trying out these three methods, I realised that the surface that we will be transferring on plays a major role in determining whether the image will be transfered to the surface. The amount of pressure used and stability of holding the drawing down will also affect the quality and sharpness of the image transfer.
Experimental Process

The first method I tried on was solvent based. Huei Hoon brought for us thinner based solvent markers for us to try out. The markers act as a substitute for thinner.

Remember to secure the paper and wood with tape
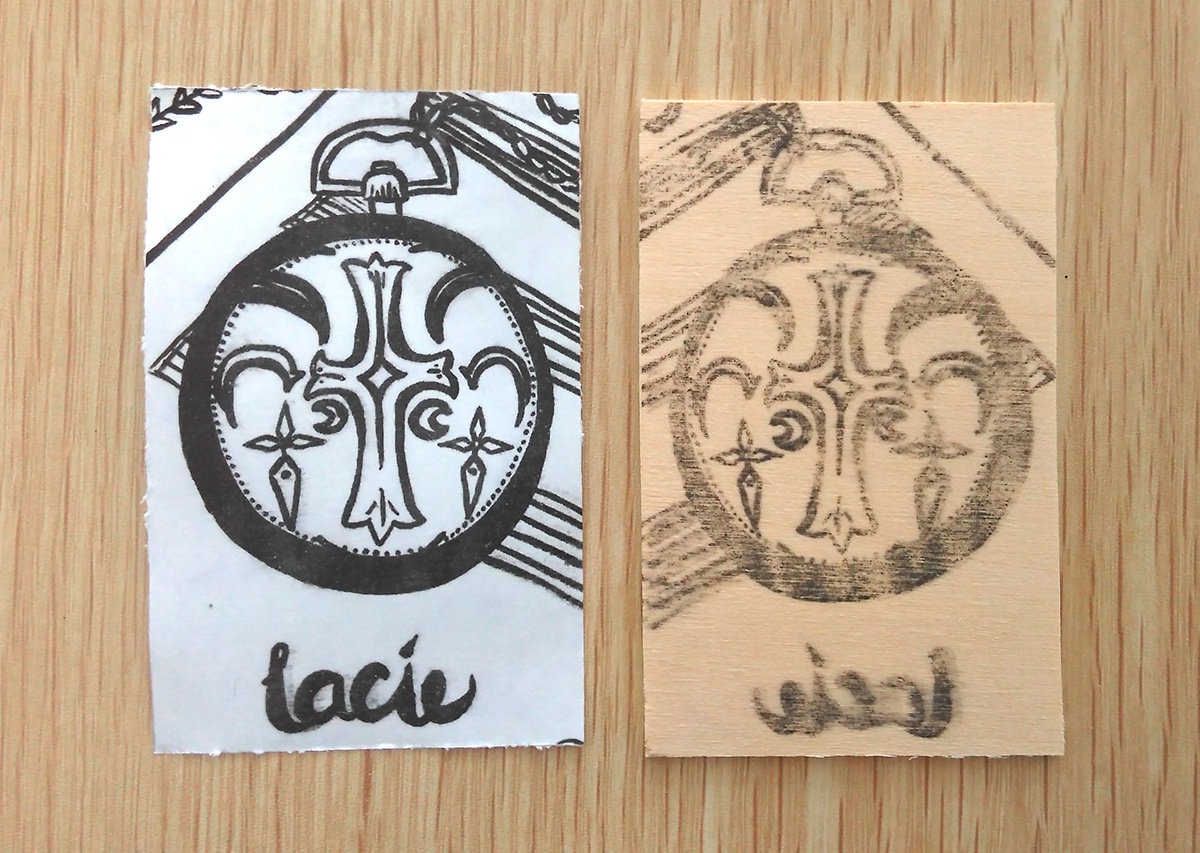
In order for the transfer to work, the printed image must be printed from a laser printer

The next method I tried on was heat based, which means that I have to use an iron to transfer the image


The transfer to the cloth was very faint probably because of the material. The cloth might have been too thick to transfer on. The heat also plays a major role. If the iron is not hot, it won't transfer as well. I think I should have ironed longer, then maybe the transfer could have been more apparent.

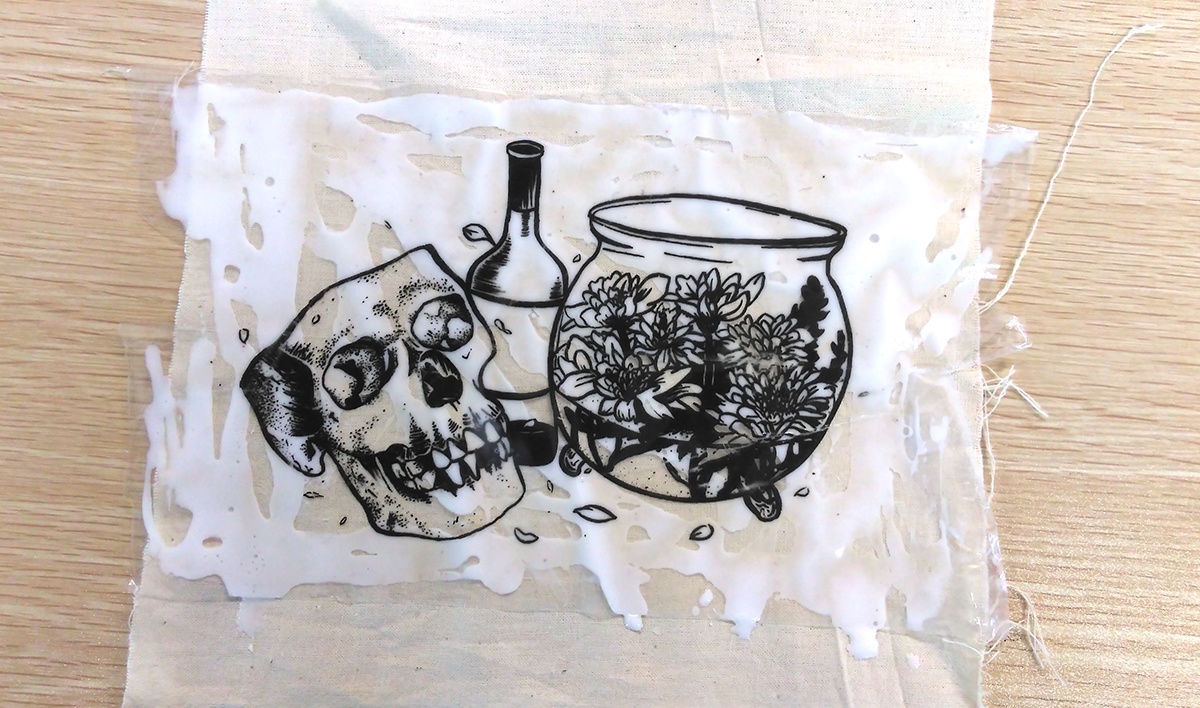
The last method I tried on was the adhesive method. First and foremost, I used normal tape to tape the top of my illustration. Afterwards I used a hard plastic surface to remove the air bubbles.

After which, I sprayed water onto the back of the drawing and started rubbing off the paper from the tape

And so this is the final outcome. So far this method looks the most promising to me.
Next, I spread mod-podge, a substance similar to white glue, on the cloth and pasted the image transfer on top of it. Now all I have to do is to wait for it to dry. Since I put too much, it took quite a while to dry up.

So this is the final outcome for the adhesive method. It looks pretty clean. The only thing that I don't like about this method is that if I transfered to a matte surface like the cloth I used, there will be a strip of shiny surface surrounding the image because of the tape used. Hence, it will make the whole outcome look a little weird. I think it will be okay if the surface I transfered on is shiny, because visually it won't make much of a difference.
Brief
Design a wooden signage using image transfer method. Select one of the businesses below and do a small scale mockup with wood. You can either use an existing brand name or come up with one yourself. You are free to propose any style or art direction for the design. The client is also open to an illustrative signage.
Choices:
• Florist
• Organic Food Grocer
• Café / Pub (including cat café /other novelty cafes)
• Restaurant / Eatery
• Café / Pub (including cat café /other novelty cafes)
• Restaurant / Eatery
Research
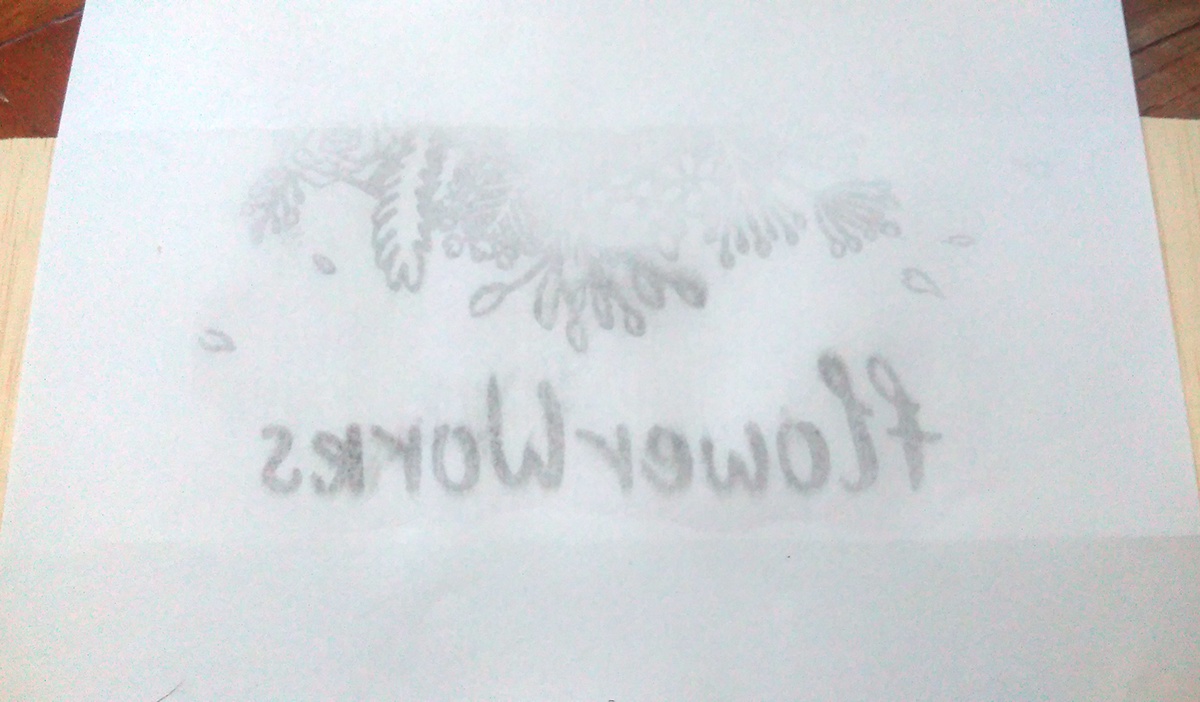
I decided to work on florist signages because I am an avid nature lover, though I am not necessarily a flower person. I came up with a fake shop name, FlowerWorks.

Reference: http://highresolutions.com/blog/wp-content/uploads/2014/02/IMG_4183.jpg

Reference: http://www.johnslaterphotography.com/v/tp/116/225/4653900250_4_sign-traditional-french-florist.jpg

Reference: https://d13yacurqjgara.cloudfront.net/users/850679/screenshots/2620323/romantic_d_5_1x.png

Reference: http://www.senseadvertising.com.au/wp-content/uploads/glasshaus4.jpg

Tested on the name of the signages with pencil beforehand, and then brush pen

I drew this illustration with pencil and then traced it with a brush pen. Since the name I chose for the signage is FlowerWorks, I drew a gear in the centre with flowers and herbs surrounding it. Later on, I addded petals from my other illustrations to add an effect showing how FlowerWorks, is constantly growing new species to provide customers a variety of flowers and herbs to choose from.

This is how the final signage looks like. I scanned in the drawing, and edited it on photoshop and illustrator. Now to transfer it to the wooden block.

Materials needed to start the transfer. I tried transfering onto the leftover wood to test which method was the best to transfer with.

The first method I tried on was the solvent based, thinner

The transfer was decent, but there were smudges at some parts because too much thinner was appplied to that area. I also realised that I didn't flip my image when I printed, so I have to remember to flip it for the final transfer.
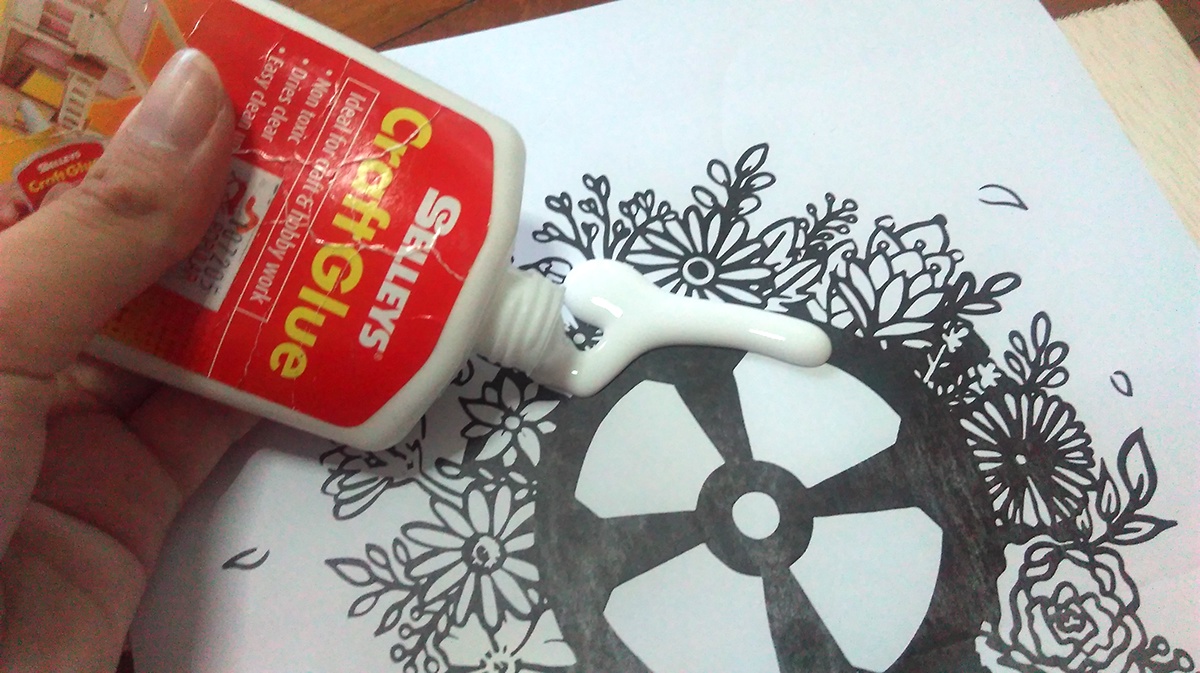
The second method I tried was the adhesive method, which I used glue solely instead of tape, because I didn't like the shiny texture on the wooden board.


Then I pasted the image on the wooden board and waited for it to dry before peeling it out

After waiting for a day, I sprinkled water and started rubbing off the paper

This technique didn't work because during the process, the illustration is being rubbed off as well, so this isn't the most practical method of transfer

Time to start on the real thing!

After trying the various methods, I decided to carry on with using the solvent based method. Honestly it took me around 3-4 hours for me to print the image, because I had to layer it slowly to get most of it to the wooden board. Even after all that time spent, the clarity and sharpness wasn't that great, probably because of the material that it is transferred on.
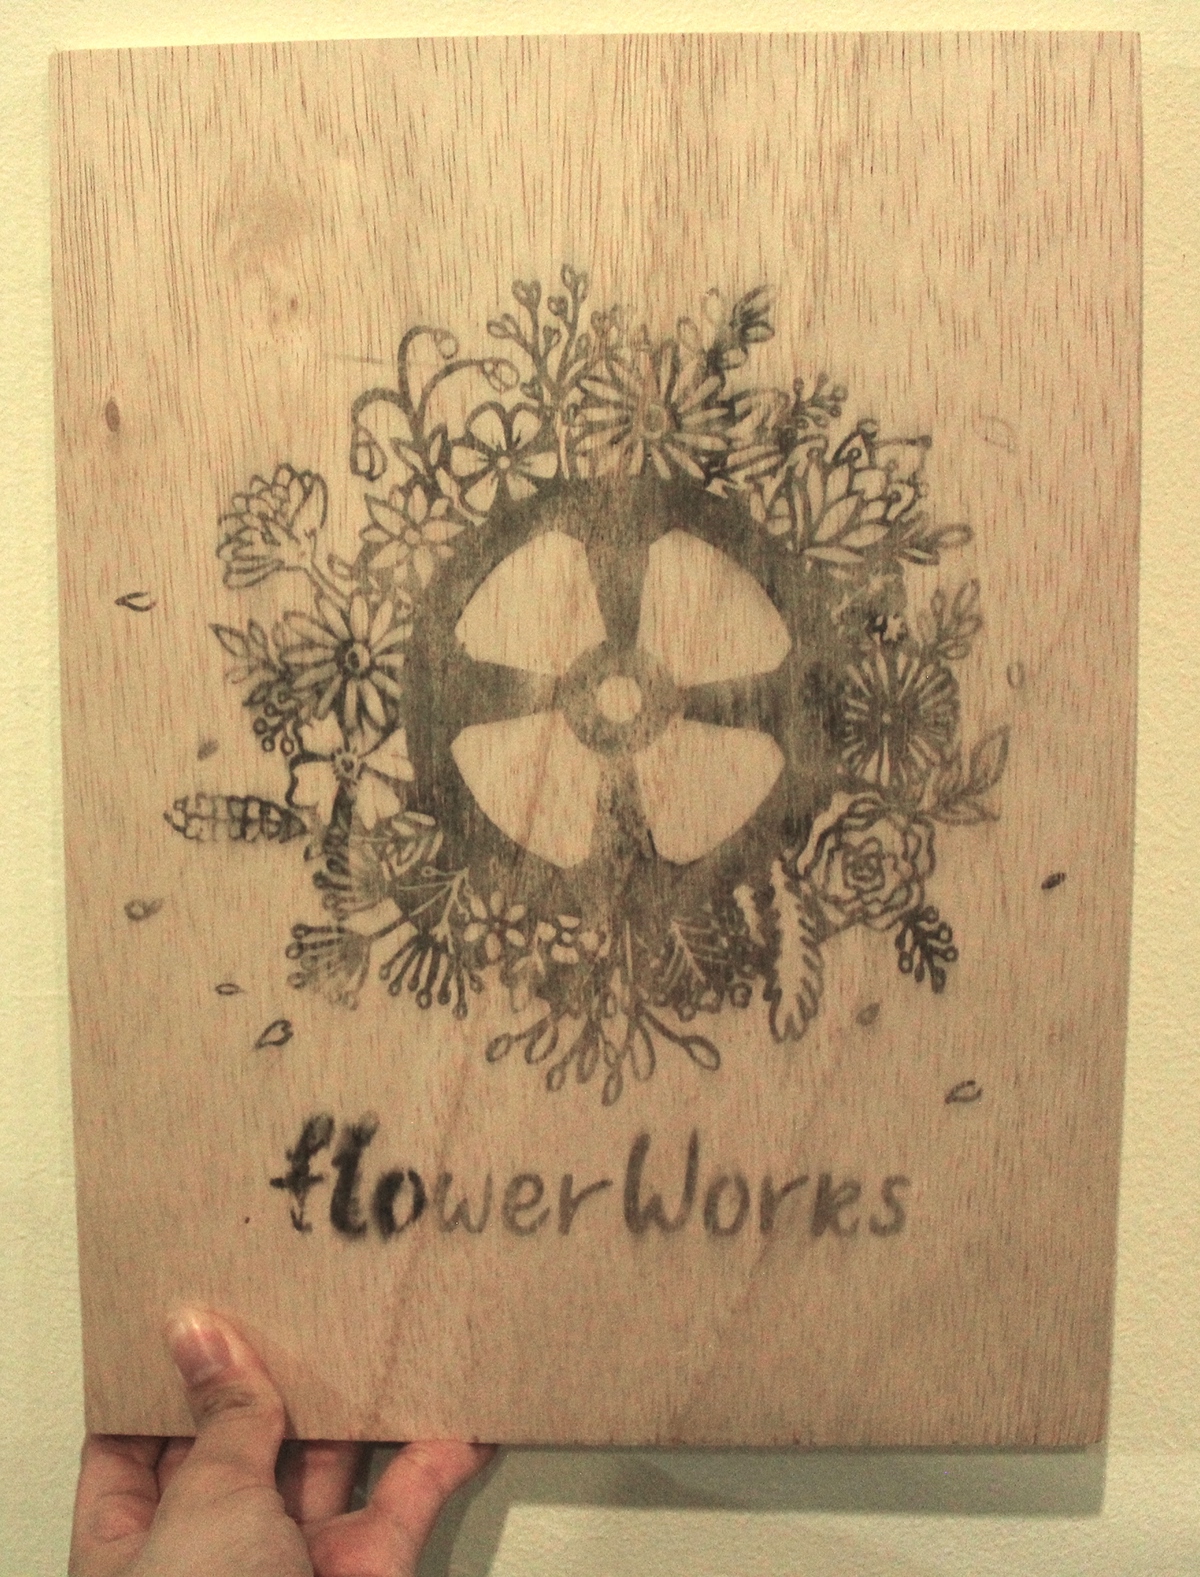
The final outcome of the signage, "FlowerWorks"


