
REFLECTIONS
We’ve all used a printer countless of times and scanned countless of documents or works using the scanner but never have I ever tried using the scanner as a device to capture images. When I was younger, I’ve watched comedic shows printing out funny faces using the photocopy machine. If I wasn’t being introduced to this digital capture technique, also known as Scanography, perhaps I will forever assume that that’s the limit of what the scanner can do, scanning funny faces of people. It was definitely an eye-opener because there are actually a handful of effects the scanner can do easily that the camera cannot do. Being someone who is obsessed with editing her pictures on Photoshop, of course, Scanography would appeal a lot to me. Just think about it, we can easily do crazy effects like distortion and blending two items together and even morphing of objects without even having to touch Photoshop or our DSLR. Isn’t that just awesome?
Experimenting with Scanography sure was a big mess. You’ll understand why when you see the experimental processes I’ve done together with Francesca below. Nonetheless, it was actually a fun experience and the excitement builds up every time the scanner surprises me with something I never expected I would create by doing some certain actions or movements on the scanner. However, not expecting what is the final result turned out to be a challenge because whenever we thought of how we should create a certain image, it won’t really turn out the way we want it to. We decided it was best to keep on scanning different objects and materials until we found the style we could actually work on in our brief. Well overall, I have to say, we did quite a bunch of crazy things with the scanner and had fun to top it off, so it was definitely a great way to start the school term in my opinion.
ASIGNMENT 1: SCANOGRAPHY
Scanography is the process of capturing digitised images of objects for the purpose of creating printable art using a flatbed “photo” scanner with a CCD. The higher you set the resolution for the scanner to scan, the slower the speed of scanning will be. Below are the experimental processes I did together with Francesca.

Behind the scenes.
"Let's get high"
EXPERIMENTAL PROCESSES

Experimental Series 1:
1. For the first scanned image, we took a petri dish, placed many different colourful pills in it and moved the dish left to right, following the scanner’s light.
2. Using the same petri dish and technique, we placed a piece of blue transparency below it.
3. We rolled a pen across the screen and picked it up and placed it down repetitively to make duplicates of the pen and this was the result.
4. Again we used the same petri dish, but this time we decided to shake it along the light and follow it in a ’S’ direction.

Experimental Series 2:
For this series of scanned images, we placed coloured pills all over the scanner and experimented with the way we can scan a hand.
1. Hand pulled along with the scanner light.
2. Hand wiggled left to right as it moves along the scanner light.
3. Hand pulled and wiggled left to right as it moves along the scanner light.
2. Hand wiggled left to right as it moves along the scanner light.
3. Hand pulled and wiggled left to right as it moves along the scanner light.

Experimental Series 3:
In this series, we scattered a few more pills on the scanner and placed a piece of coloured transparency above it. We pressed our hands above it and the outcome seemed like an anti-drug poster. I really like how the transparency sheet folds and scans out reflective surfaces. We even tried shifting the whole set side to side to get the distorted effect. Francesca elso tried to duplicate her finger by lifting and placing her finger back to the scanner after it scanned for the first time.

Experimental Series 4:
In this series, I assisted Francesca in her final brief. She wanted a galaxy themed series so we decided to crush the pills to create the milky way effect. By shifting the pills slightly away from the position and back to its original position, we were able to create a small planet with a ring on it. We also tried moving one pill along the scanner light in an S formation and it turned out to look like a coloured today wave. We found that the background might be a little too plain so we first decided to lay a blue transparency sheet over the pills and removed them and placed them back continuously and we got the effect where there are blue lines across the background. We also tried to lay blue transparency for the first half and shaped to the red transparency for the second half of the scan to get a pretty cool transition of blue to red. Last but not least, we tried to use our phone’s flashlight to attempt to create a light painting and moved the light up and down along the scanner light.

Experimental Series 5:
From the previous experimental series, we decided to experiment with more light painting and transition of the transparency paper. We even thought that since the scanner could capture light, perhaps an external light source could also brighten up a dark object. We scanned a camera lens only to get a dark image so we decided to brighten it up by pointing our phone's flashlight to the camera lens. We didn't get the results we wanted but nonetheless, you can actually see the light going through the camera lens in the third picture.
We then decided to just continue experimenting with using the phone's flashlight and transparency paper. We made the light do various things like, moving it up and down along the scanner light, making swirls with the phone over the scanner's light, going zigzag and going in an S-formation.

Experimental Series 6:
After we had our fair share of experimenting with using an external light source, we decided to leave the coloured transparency sheets on the scanner and decided to scan our fingerprints.
1. Repetitively lifting and placing our finger back onto the scanner light.
2. This time we did a peace sign with our hands and did the same technique as seen in the previous scan. This time round we shifted our fingers in a faster pace, therefore resulting in more fingerprint repetition.
3. We felt that the second scan looked a lot like an x-ray scan. So initially we planned to line up objects to take the shape of a hand but then we realised we didn’t have the materials we needed. Nonetheless, this x-ray technique is surely one that we can experiment with in the future.

Experimental Series 7:
This is probably the only series where we thought about the brief before we actually execute the work itself. It is actually and interesting brief since it addresses the amount of time we spend on our electronic devices nowadays. Thanks to these electronic devices, we are living very fast-paced lives, hopping from one conversation to another continuously. To make this series possible, we actually needed three phones and three people joining a WhatsApp conversation. You can actually notice the number of failures we had because the phones decided to dim down or totally switch off its screen. In the end we finally achieved our finalised scan where we have 3 phones laid out side-by-side. As the scanner is scanning, we quickly typed messaged into the WhatsApp group chat so the messages are actually moving up the screen. This then creates a distorted effect on the screen which is pretty cool in my opinion.

Experimental Series 8:
I packed a bunch of coloured pills into a transparent plastic bag and decided to scan decided to shift it in random motions along the scanner light only to achieve some kind of space junk or flying vomit effect. Well you can’t expect rainbows all the time. So I thought maybe I could use the bag of pills to look like a space rock instead. So here comes the milky way set up we had before as well as coloured transparency. At first I thought the bag of pills wasn’t bright enough so I decided to flash my phone’s flashlight above it. I didn’t get the results I expected but it still gave me the inspiration to create a meteorite instead. I placed my hands into the transparent bag and ball it up into a fist. It did resemble a meteorite a little but I wasn’t really satisfied with the results.

Experimental Series 9:
Just when we were about to clear up, we thought we should use this chance to scan a crumpled transparent sheet to see what results we would get. It turned out really cool so we decided to do one last scan by placing a red transparency over and my hand on top. We ended up with a horror themed scan.
PROJECT BRIEF: Infectious
Like a disease that can spread to those who are close to you, I introduce you to Infectious. It is a series of Scanographs where you’ll see distorted scans of worn out shoes. In this series, the wear and tear represents being infected. And exactly who infected them? Well, it is none other than the owner of the shoes.
Since young I’ve felt really insecure of my feet because I find them really ugly, especially my toenails. Being born with bunions, wearing the wrong shoes would be awfully painful since there is a huge lump at the side of my feet. Because of this heredity, the sides of my feet will always be bruised or sore. To solve this problem, I buy bigger shoes or simply wear slippers but I tend to curl up my toes every time someone glances down or when I feel like my feet are being stared at.
Stories aside, what I’m trying to portray in this series is that if you keep your painful secrets to yourself, you might actually hurt those who are closest to you. Just like how I try to conceal my feet with shoes, only to end up destroying them as time passes by.

Experimental Processes:
The techniques I mainly use to create the distortion effect are shifting the shoe side to side in a repetitive motion, twirling the shoe as well as dragging the shoe. I also decided to create a morphing effect where the shoes will transition to distorted skin and back to the shoe to portray what concealing yourself will feel like.
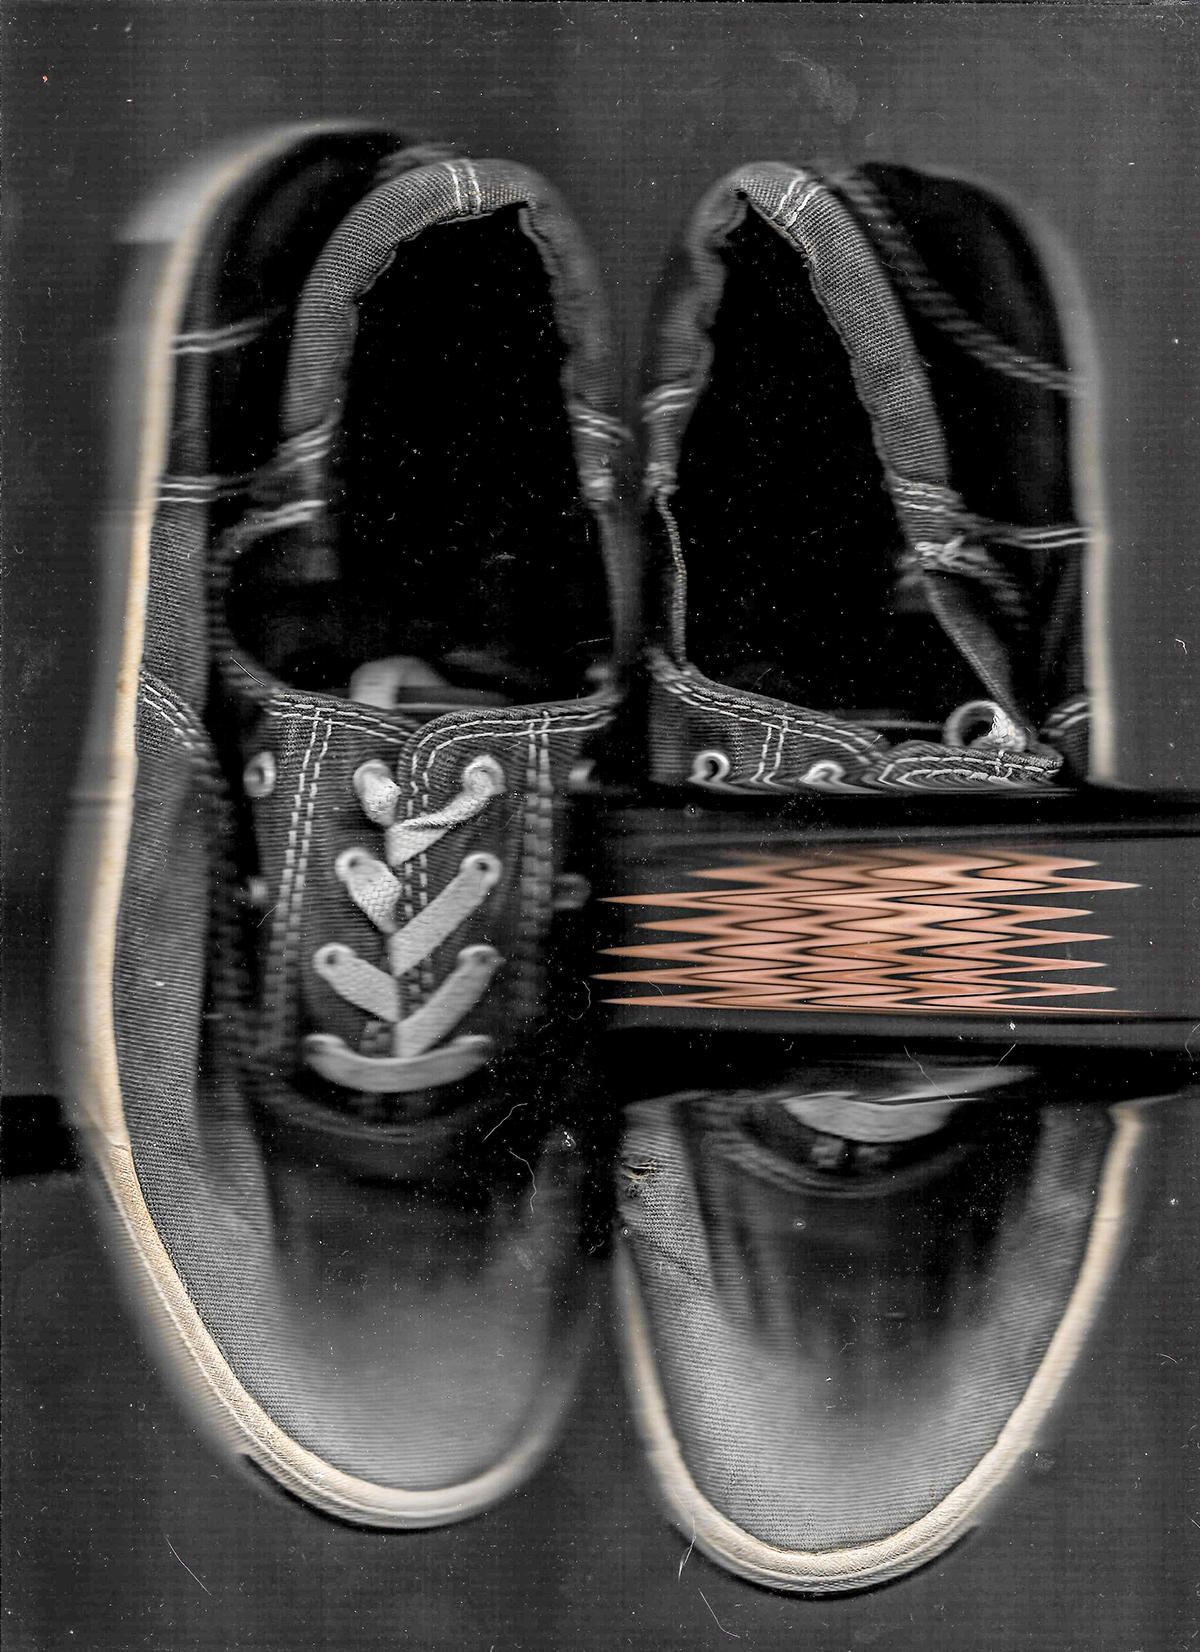
1. Jack Purcell
From the Converse series, we have one of the best shoes I ever had, the once black Jack Purcell. It is the shoe that has followed me the most in my first year of poly and lasted a good whole year before a tear started to form at the bunion area. Here I applied the morphing effect in order to portray a distorted feet hiding in the shoes.

2. Converse
These are shoes from secondary school which I don’t wear anymore but still keep in hopes that one day I will wash it and whiten it. I love Converse shoes because of their design and they are actually really comfortable to wear. The only downside is the durability and they tend to tear at the places where my bunions are, sadly. I wanted to create emphasis on the hole at the bunion area so I dragged the hole down, following the scanner light. I felt that this pair of shoes suffered a lot in such a short period of time so I decided to add the distortion effect.

3. Brand X
These are shoes I don’t even know why I bought them. The only times I put them on is when I think it will match my outfit for the day. They look like a Converse but they absolutely feel nothing like a Converse. These shoes literally crushes the front of my feet. The fabric is so solid which is probably why my bunions hasn’t penetrated through the fabric yet. I decided to apply the morphing technique as well as the distortion and twirling one side of the shoe.

4. Superga
First things first, I’d like to say that I might actually be the trendsetter for the Superga trend. Which is why I treasure these pair of shoes. Actually they’re my mom’s. Superga is the only shoe brand I find comfortable to wear, has a nice design and has the durability that I’m looking for. It lasted for 3 good years before I saw the first tear forming. It's the only shoe that endured the most which was why I decided to apply a pretty vigorous distorting effect on the shoes. When I scanned these shoes, they totally lost their colour which was why I decided to pump up the blues on Lightroom. In addition to that, I also increased the detail and contrast in all the shoes to create more emphasis on the worn out shoes.

Infectious
Series of scanography images

