Design Principles II, Spring 2016, Instructor: Liz Knight, Partner: David Kessler
Multi-Functional Wallet
A minimal wallet design exploring quick accessibility and utility.

Prompt | Timeline: 2 Weeks
In your assigned groups, create a family of three products for a specific consumer stemming from a classmate's sketch. For one of the objects, create a physical prototype. All products must use the laser cutter in their manufacturing process.
Process
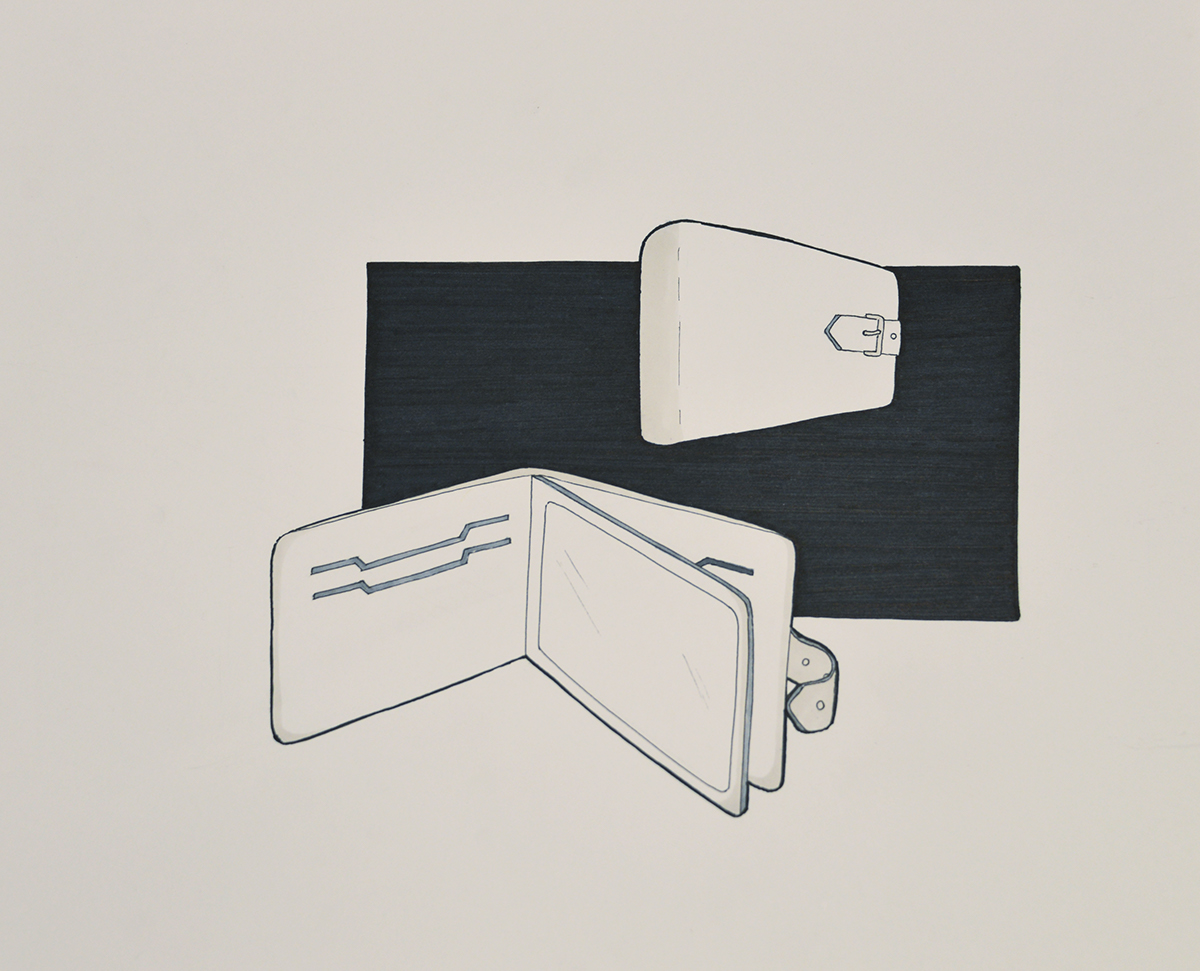
My partner and I selected a sketch supplied by Daniel Woolhiser to expand upon and build a family of products around. The sketch illustrated a laser-cut wallet that would be more space-efficient.

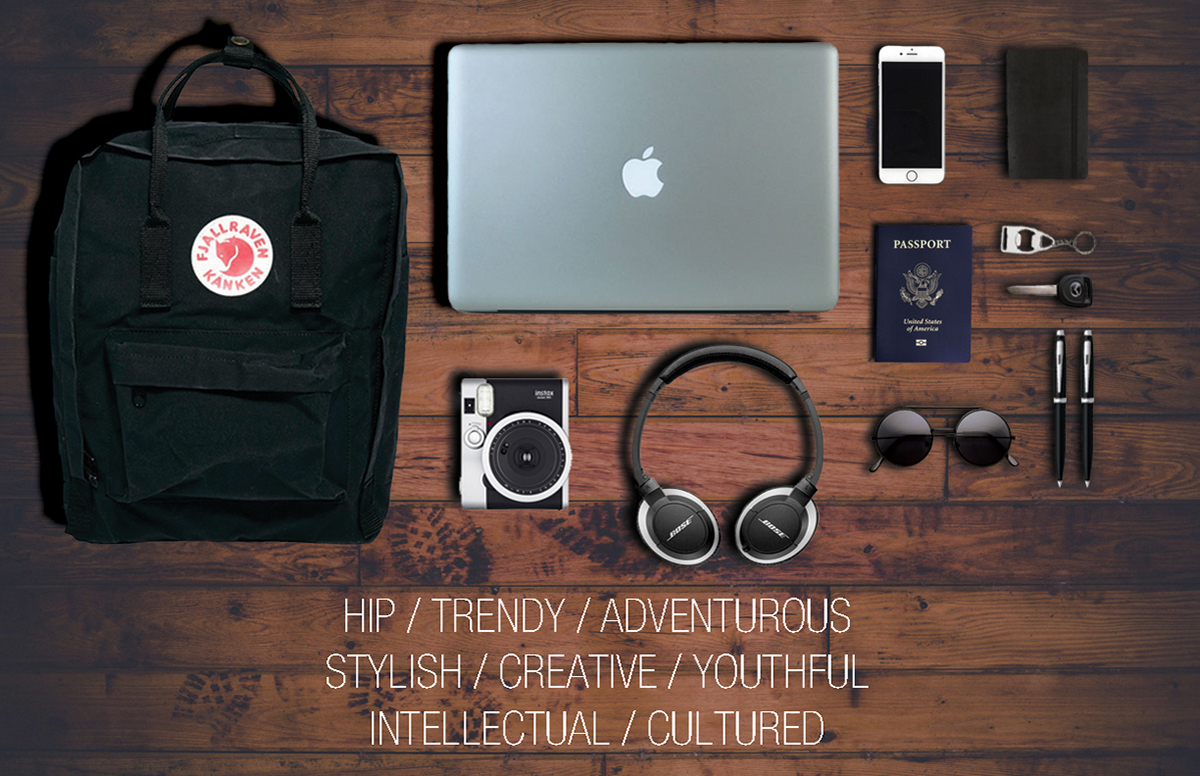
We decided that our consumer was going to be a young intellectual, and created this user board around this idea. I created the user board while David generated the text.
To start off with, I began sketching quick wallet designs. These wallets seemed more like the typical wallet one would find.

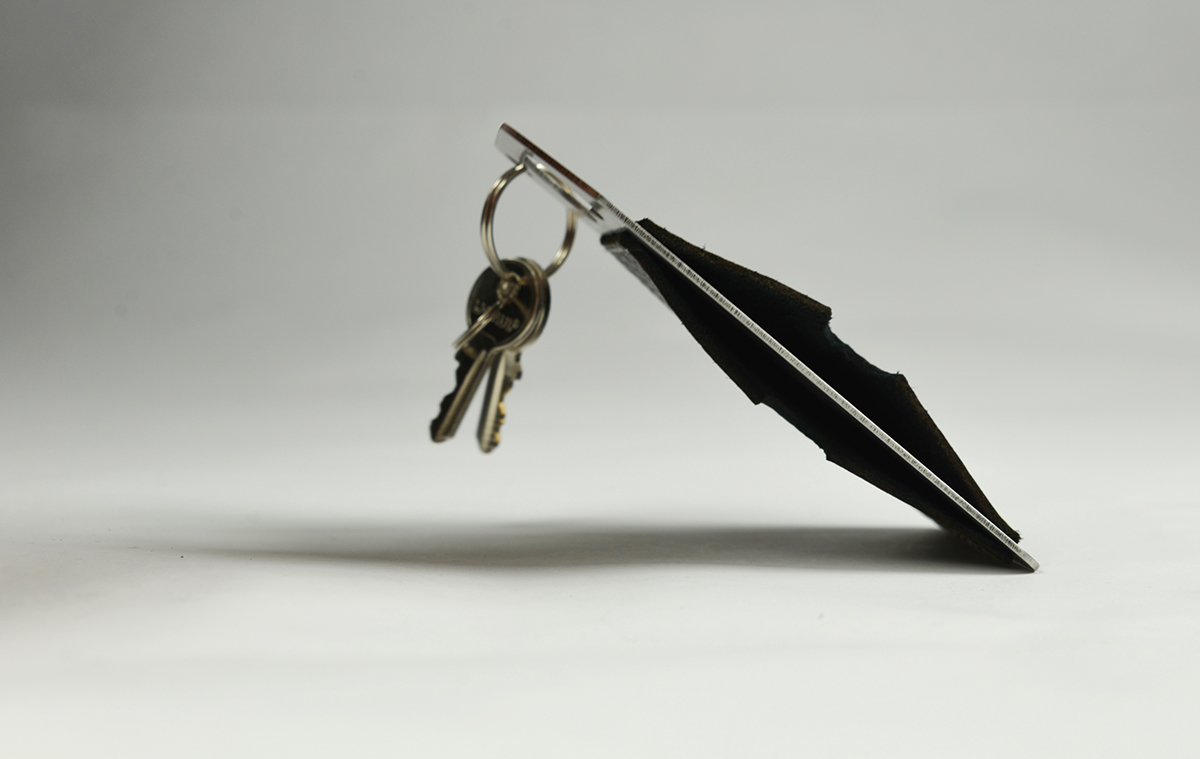
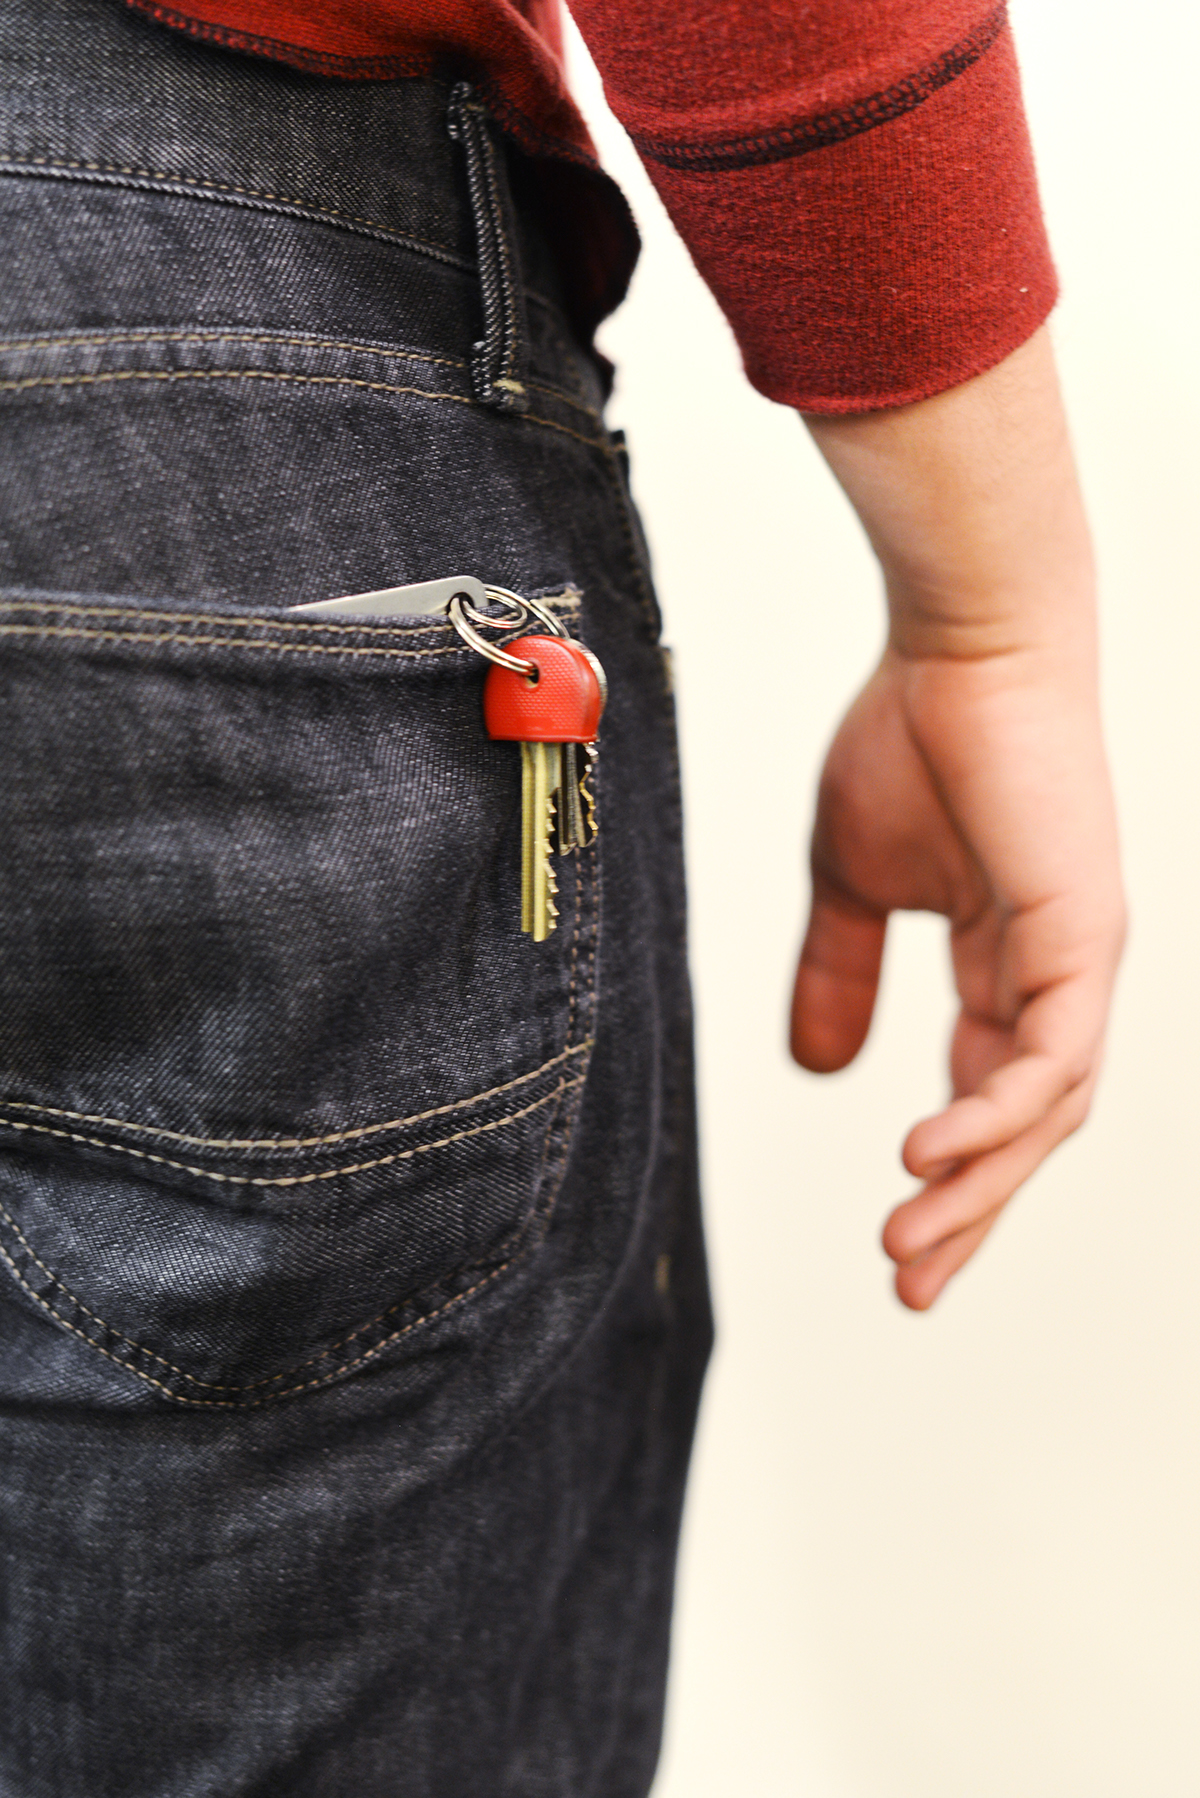
One other idea that I had for a product in our family was a keychain/keyring. I wanted to incorporate this idea into the wallet design.

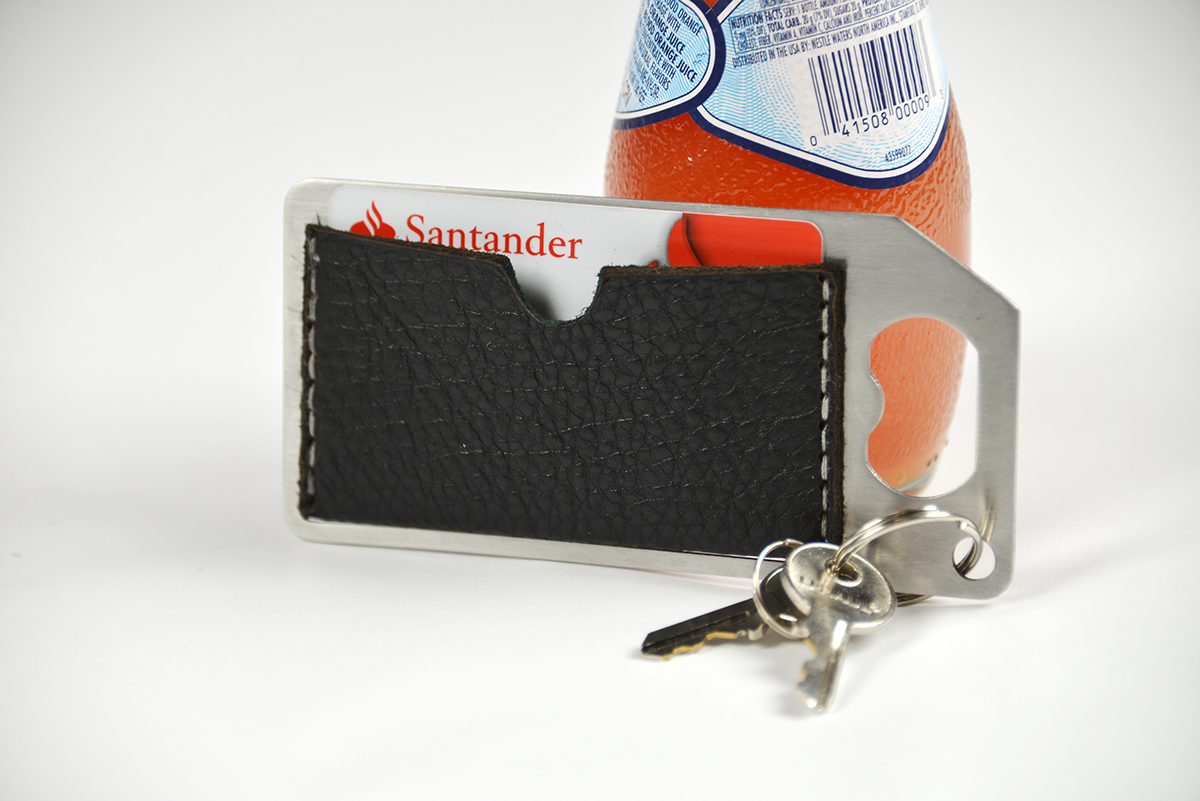
We decided that we wanted to have a wallet that could be multi-functional, but at the same time, have a design without excess features. We decided to add a bottle-opener feature to the wallet as well.
To enhance the form, I added an angled cut to one of the corners. In order to maintain visual balance within the piece, we positioned the bottle opener in the left center of the stainless steel plate. We initially created two circular keyring holes, but later revised our design to have just one, as the placement of the holes was crucial from a functional standpoint, and we wanted to maintain a simple design.

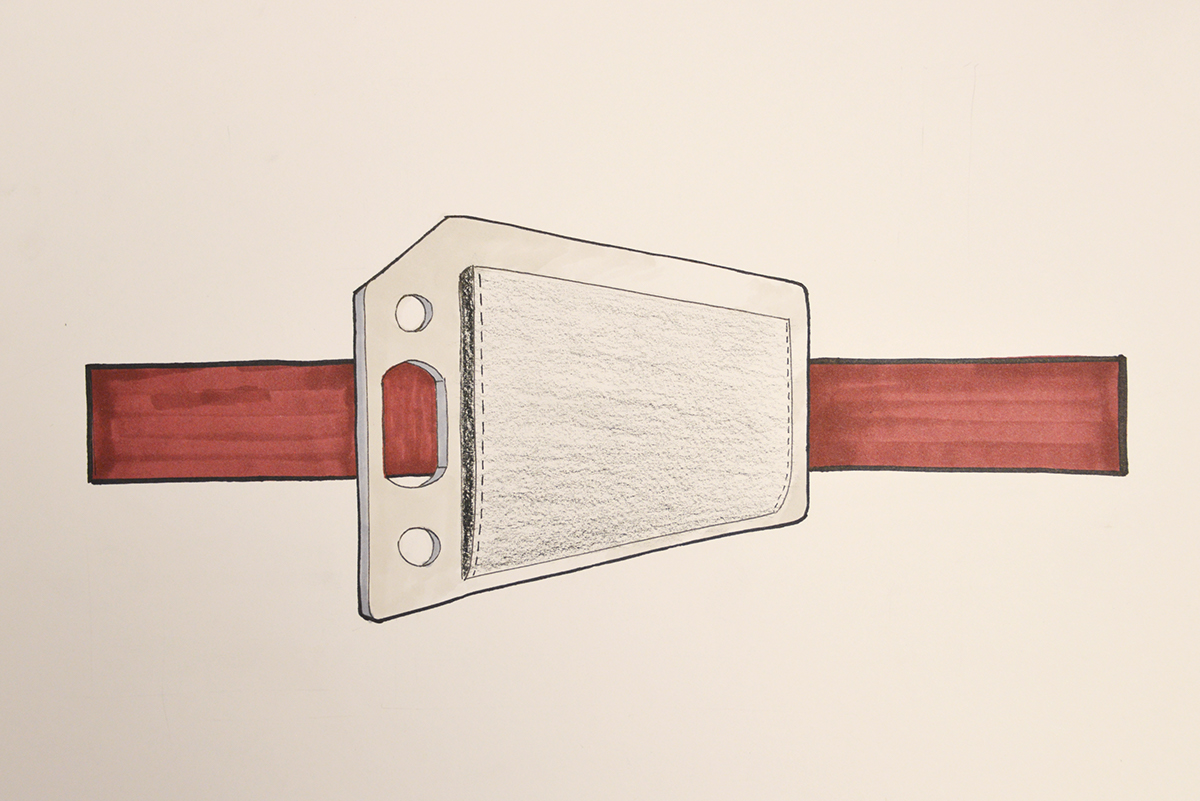
We came up with the design of the wallet as being a flat sheet of laser cut metal that leather could be attached onto. We added laser-cut holes in the metal sheet that would act as standards for when leather was added. However, to avoid the stitching in different directions, I came up with the idea to loop the leather around the metal through a slot in the base of the stainless steel plate. This allowed the wallet to be functional on more than one face.

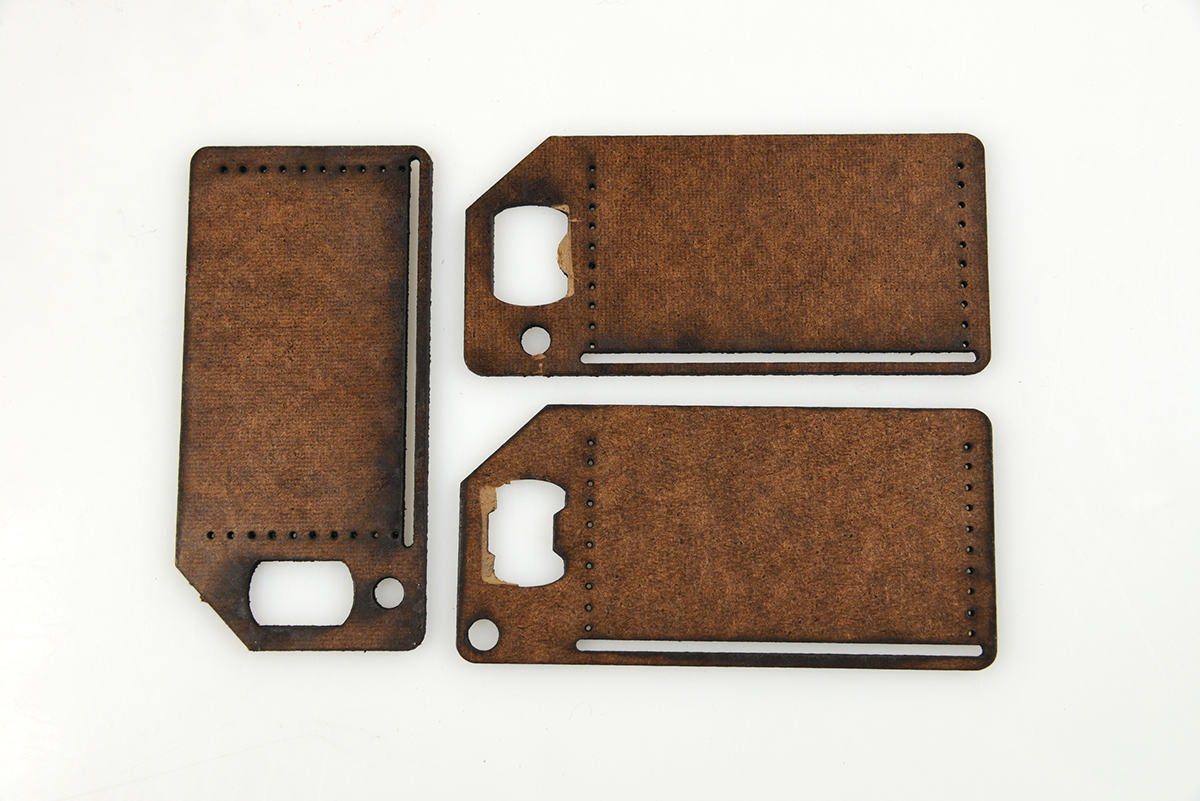
We moved to generating physical models to decide what would be the best bottle opener slot not only functionally, but aesthetically. Below are a few masonite tests created from a laser-cutting document I created on Illustrator.
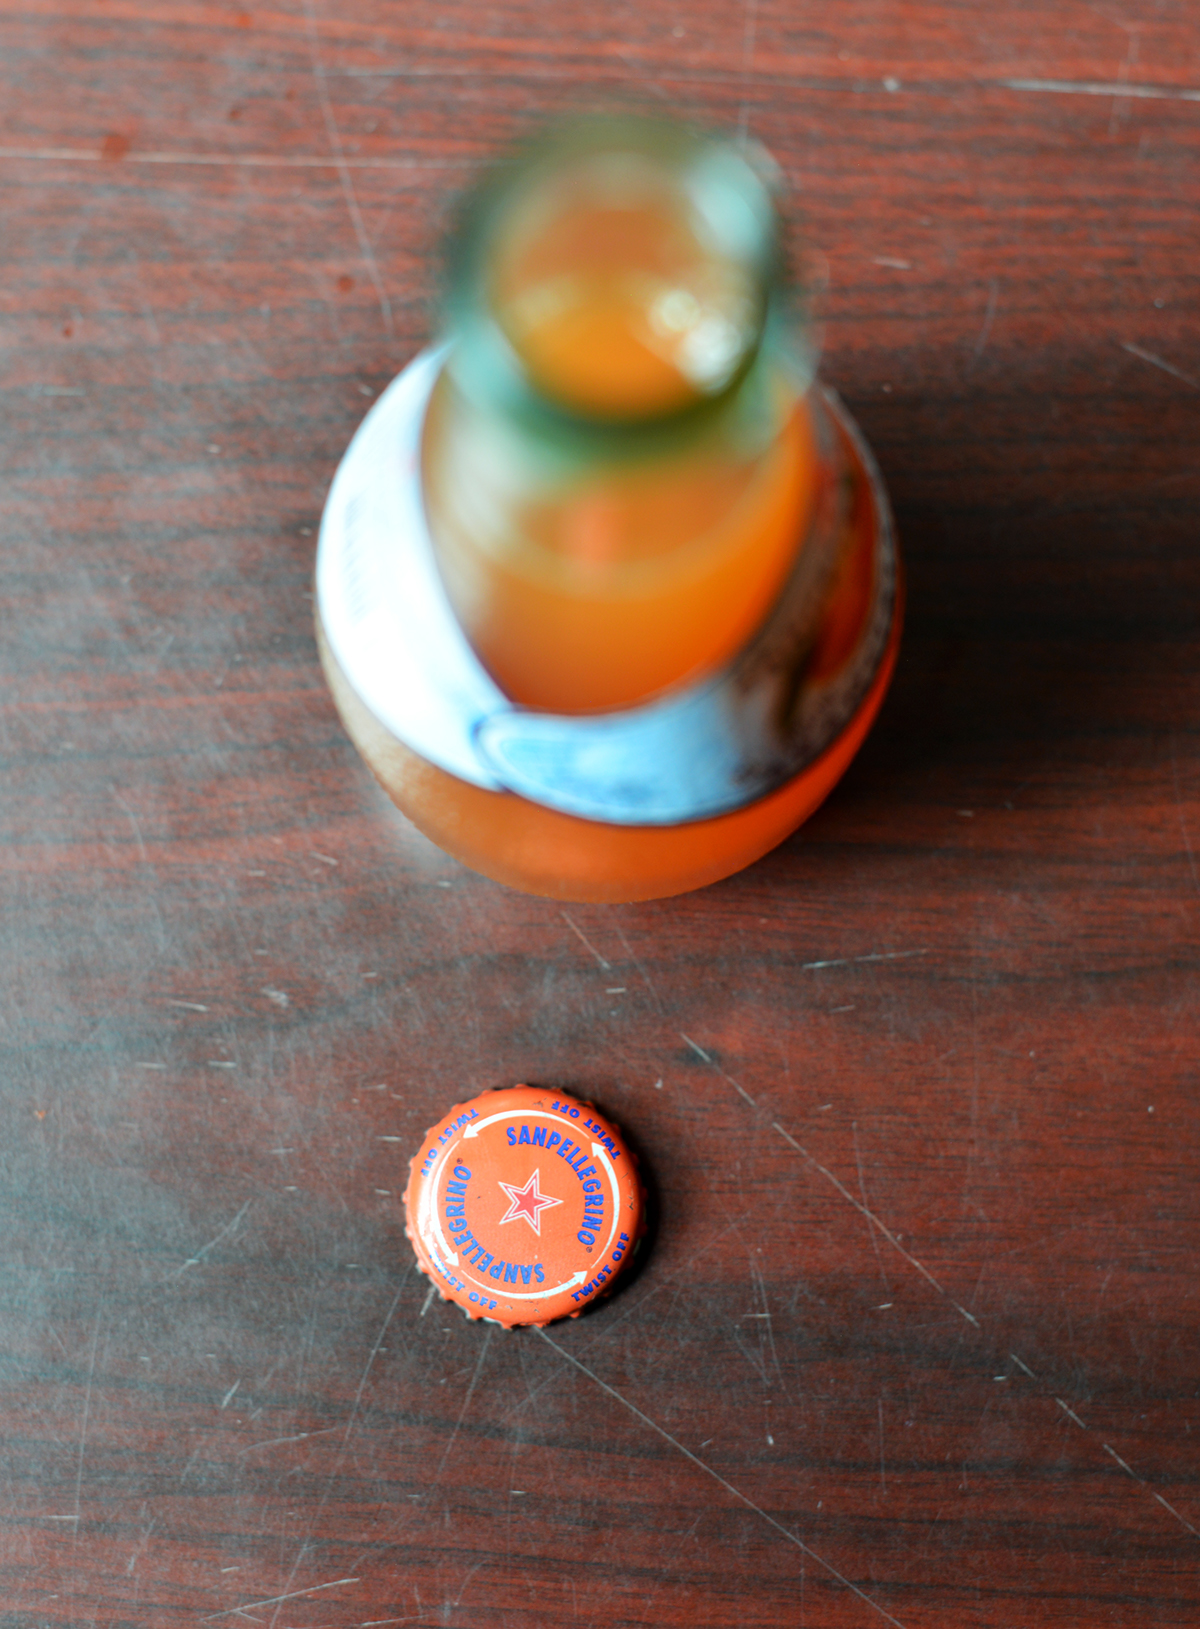
From researching various types of bottle openers and measuring the dimensions of bottlecaps, I discovered that the most crucial dimension of the bottle opener is where it contacts with the cap. Ideally, the bottle opener should contact at the base of the cap and at least halfway past the top of the cap, which is a minimum of 15mm. Using this method, the bottlecap would cleanly come off the bottle in one try. The typical diameters of bottlecaps tended to be around 20mm, so the width of our bottle opener had to measure at least that.

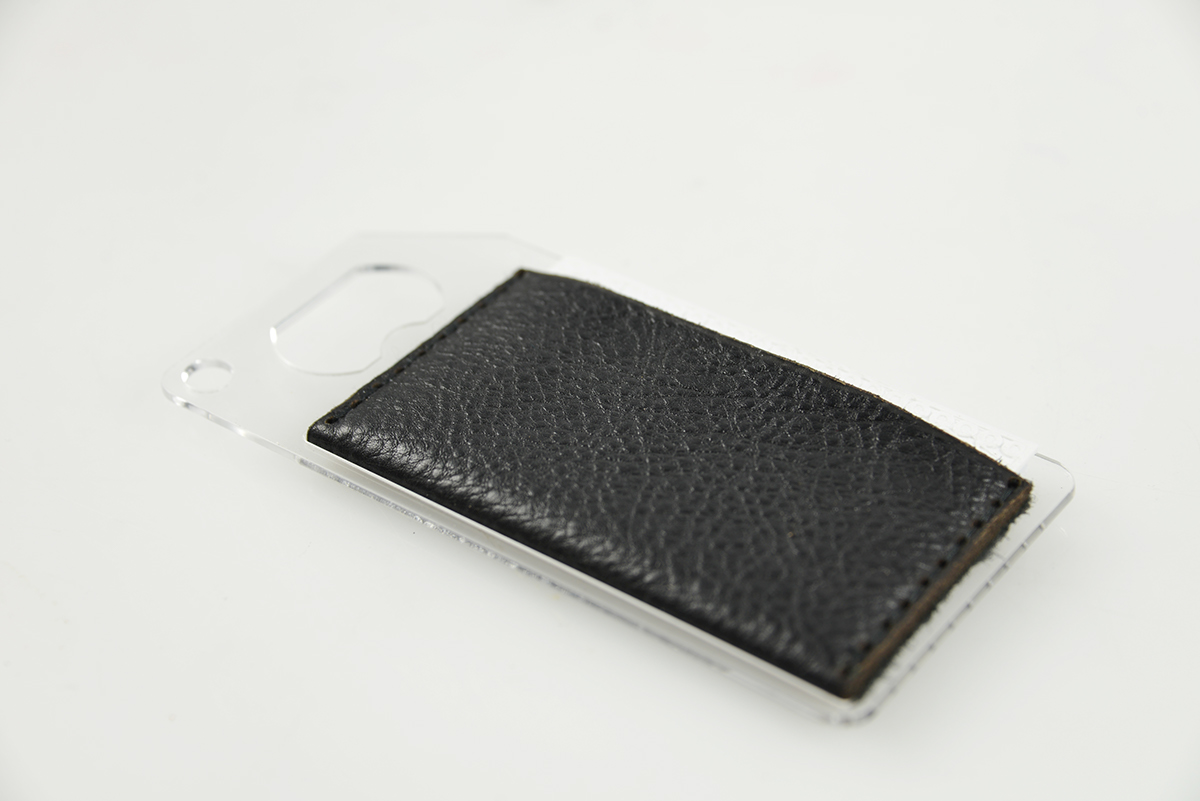
I created a mock-up model made out of acrylic to check that the measurements were correct and that all the features were in their ideal locations.
Before creating the final model, we had to take into consideration that the thickness of the sheet metal had to be a certain dimension in order to prevent it from bending after use. We found that 14g stainless steel to be the best option.
Below are all the parts prior to assembly.

The final product I made, finished with white hand-stitching.
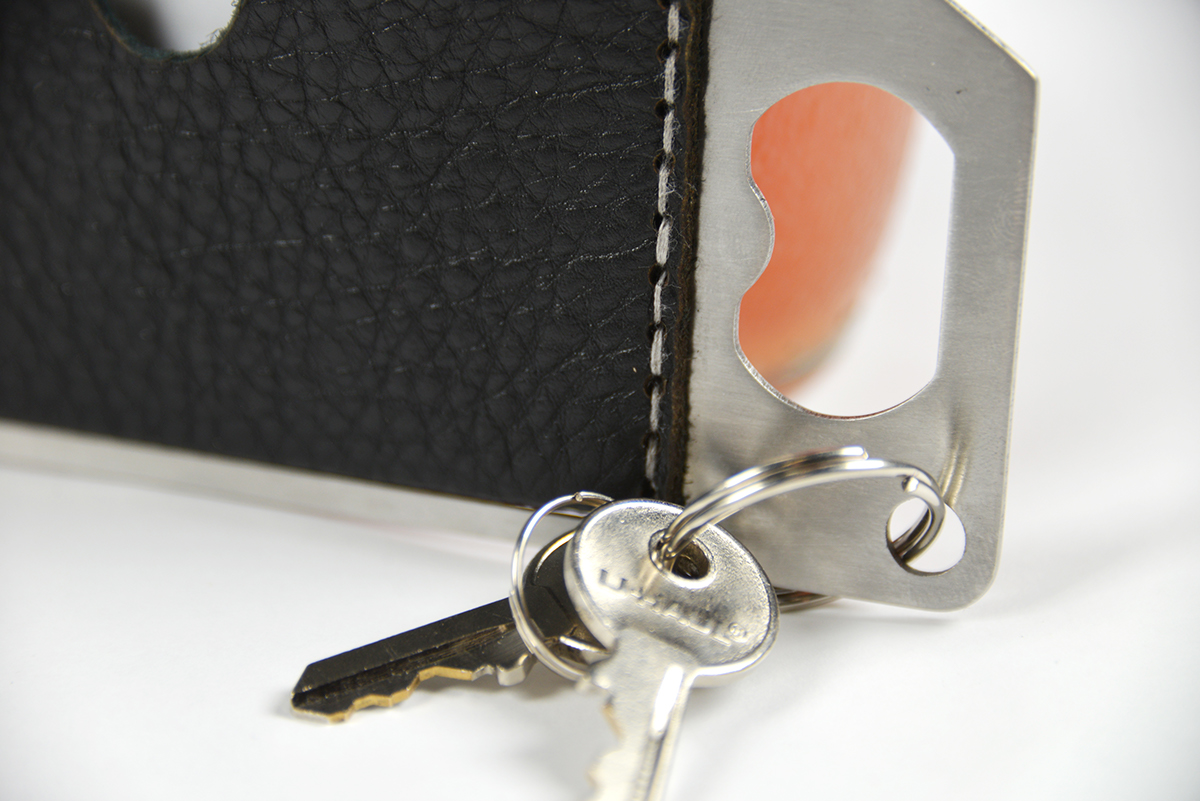
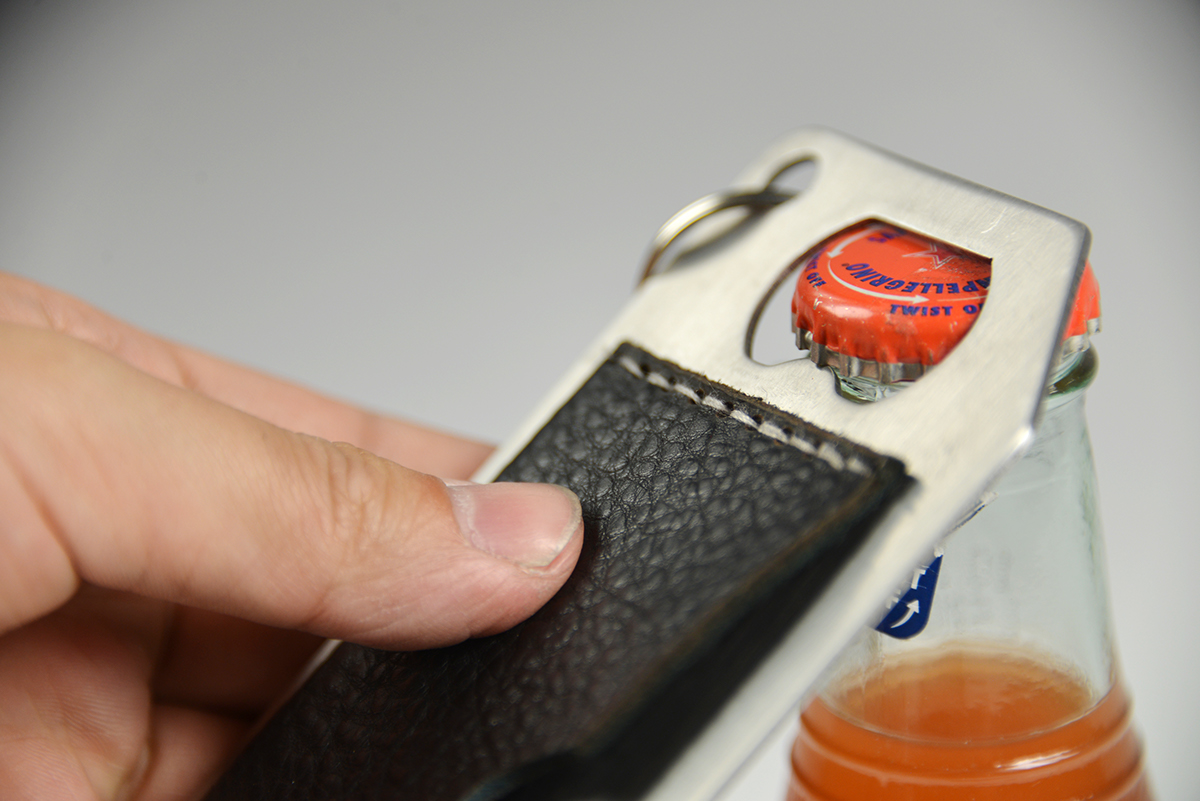
A demonstration of the bottle opener feature. Due to the correct measurements, the cap remains undamaged.
The wallet has pockets that can be used from both sides.


Model: Clayton Wiggers
Model: Christian Palacios