The following is a breakdown of the modelling and texturing workflow used in the creation of my Saleen S7 model. Big thanks to the Pluralsight tutorial "Maya Modelling Techniques: Automotive" by Justin Marshall for the training and required assets.

The EP curve tool was used to create NURBS curves to create half of the body shape.

The loft and birail tools were used to create NURBS surfaces using the previously created curves.

Further NURBS surfaces were created using the same techniques as above. Following this, the main body was converted to Polygons to allow for editing.

The scoops on the side were created using extrudes and re-drawing lines to remove triangular faces. The door was extracted form the side of the car to create a seperate piece of geometry. The headlight well again was extracted and extruded to model the desired shape. Thickness was also added to the mian body.
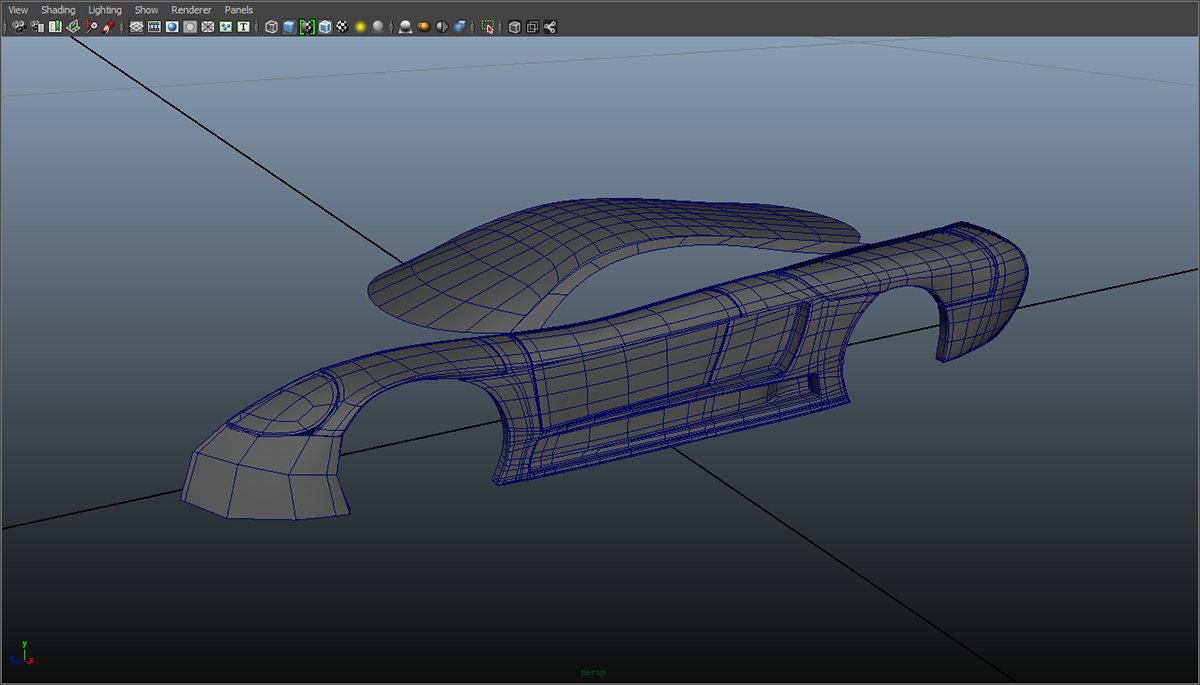
The main body was seperated into different panels. Thickness was added to these panels and the door using the extrude tool.
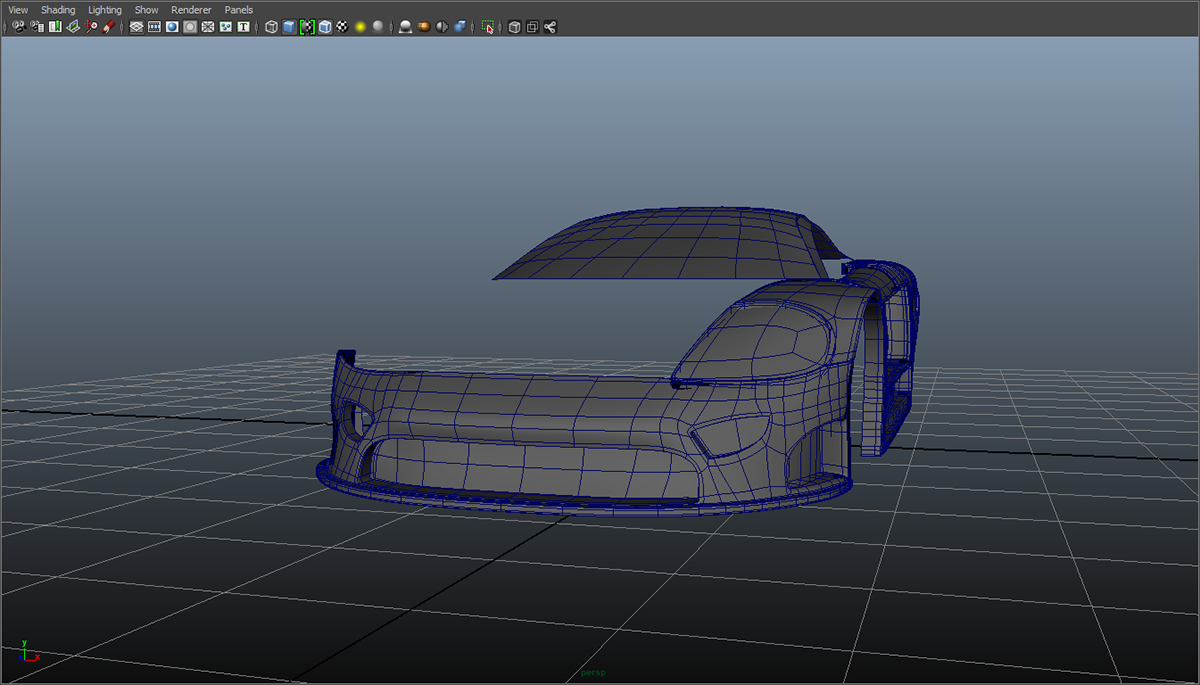
Half of the front bumper was created by extruding out from the front of the car. The geometry was re-drawn to allow for the vents and grills to be extruded. The back faces of the grill and vents were seperated as they did not need to be attached. The bumper was mirrored accros the X axis to complete the full shape.

The same process for the front bumper was applied to the back piece. This time, the geometry was modified to allow for the lights and the top and bottom details. The bottom fins were extruded out from the main bumper. The trunk was also modelled here.

The addition of the hood was created using the birail tool and converting the NURBS surface to polygons. The hood was split to give the side pieces and the geometry re-drawn to allow for the creation of the scoop. The roof and top of the door were started here.

The roof was mirrored over and the b-pillar created by simply using the extrude tool. The detail was added by creating the circle shape with the geometry that was already there and adding new lines. The lights were modelled in 3 parts; the cover, the body and the lens. These were grouped and dupicated and scales to get the 3 different lights. A plane was created for the side windows and manipulated using a lattice deformer.

The rear lights were duplicated from the front and scaled to the correct size. The exhautes were modelled from a polygonal pipe, the number plate from a polygonal cube and the detail between the lights, again modelled from a cube. The rear diffuser needed more more manipulation, but still originated form a cube.

The venting panels for the front and side vents were modelled from a polygon cube and manipulated accordingly. They were then duplicated and modifed to suit.

The wheels consist of the tyre, rim, brake disc, brake caliper, spokes, spoke centre and cap. They were all modelled from a cylinder and were modifed using extrudes and deleting, duplicating and extracting faces.

To create the undercarriage, a half sphere was used to create a wheel well. This was extruded out and mirrored to complete the front, then duplicated for the back. The two pieces were combined and were joined by extruding out the edges and merging the vertices. Finally the rest was modelled by using extrudes to follow the shape of the car and fill all gaps.

The venting on the backlight was created by extracting faces off of the backlight and adding some depth. Using duplicate special on a small manipulated cube the vents were created, which were then positoned using a lattice deformer.
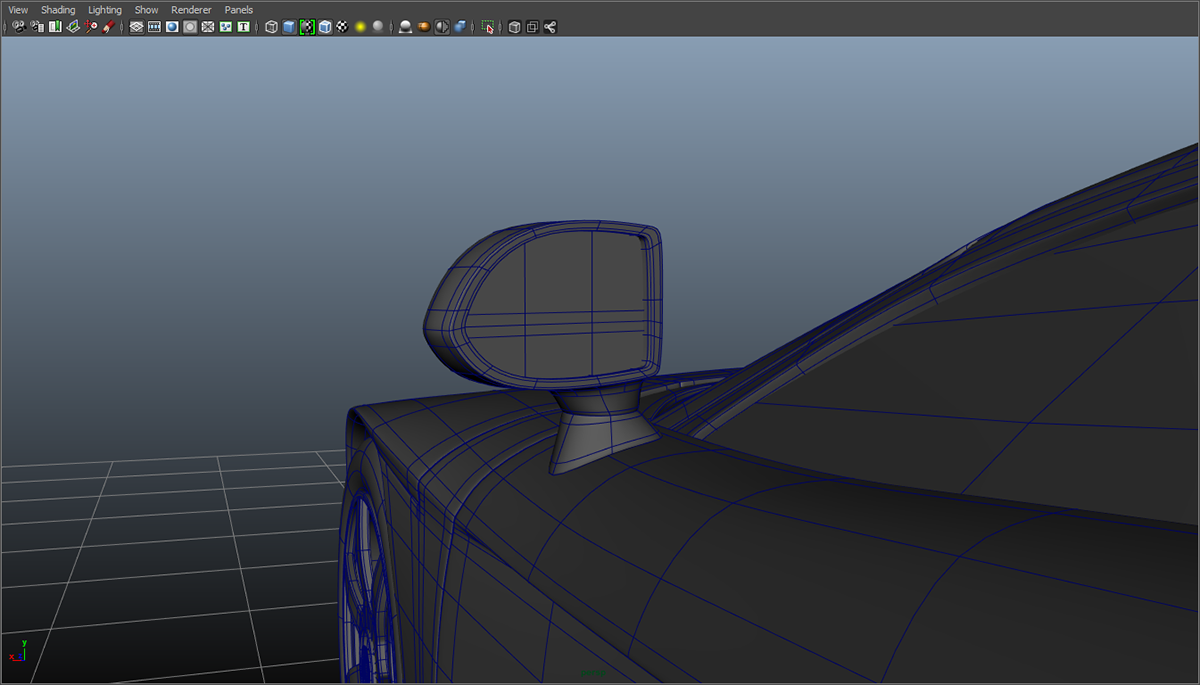
The wing mirror was made using a single cube and manipulated. It was then seperated into 3 pieces; the glass, the casing and the base.

The final piece of geometry modelled were the windshield wipers and reflectors (on the side of the car). The windshield wipers were modelled with 3 seperate manipulated cubes. The reflectors (see two images below) were simply made by flattened cylinders.

The finished windsheild wipers positioned on the windshield.

The final modelled car, front and back perspective views, showing the complexity of the geometry. Most of the geometry was converted to sub-d surfaces and smoothed out if not already done so.

Different materials were used to seperate out the pieces of the car into the correct groups and to help visualise the final look. The black was created with a phong mat and the bodywork used a blinn.

A half sphere was used to create the HDR light setup, and was textured with a provided HDR image. The car was placed ontop of a NURBS object.

The bodywork material was replaced with the Mental Ray car paint texture. A further car paint texture was used on the brake calipers. The Mental Ray dgs material was used for the chrome effect on the alloys and semi transparent blinns were used on the lights.

Final render of the rear of the car.

Final render of the front of the car.


