
For a robot-themed party, I made a model of my face out of paper with added neon. This is how I made it.

I started with reference images from various angles taken of myself.

Using Autodesk 3ds Max, I made a 3D model using the reference images as a guide, mapped with a simple front projected texture. It has 464 triangles, which is a lot for this kind of thing, as I found out.

Using Pepakura Designer 3, I was able to flatten and separate the virtual model into parts ready for printing onto card.

The images, complete with tabs for glueing together, were printed onto 4 sheets of A4 craft card.

After cutting the pieces out, I began the painstaking process of glueing the pieces together. This took about 15 hours in total over a few evenings and late nights.

You can see how the pieces were attached from the inside of the face.

This is my first try of the incomplete mask, worn as it was intended to be under a hood.

When the glueing was complete, I sprayed it with several coats of a clear varnish on both sides to strengthen it. I also painted the inside black to stop it from allowing light to show through.

I cut the entire iris out so that I could see when I was wearing it.

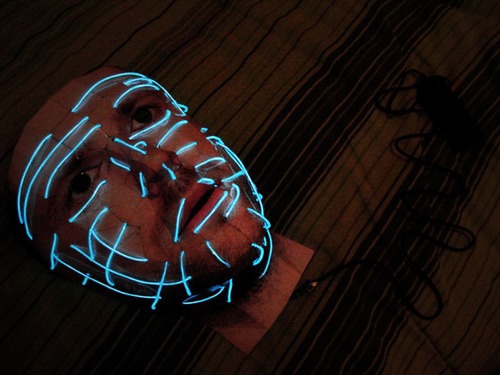
This is Electro Luminescent wire. I wasn’t sure quite what I had in mind with this

I ended up threading the EL wire through the face, following the lines of the folds to give it a broken wire-frame look.

This is it with the wire lit up. It is powered by 2 AA batteries, and stays cold.
Here you can see the switch and battery holder. It has three modes - on, off, and flashing (not pictured).

This is me wearing the mask at the party, lit and unlit. I added a pair of Ray-Bans also made of card.

It wasn’t very comfortable to wear, and I had to drink through a straw. I spent a lot of the party carrying it.


