Goal:
This project will give you an introduction matching CG to Live Action. Skills that you will learn include setting up a camera, light rig, shadows and reflection of the environment on a simple object to "match" it to that in a photo. In seeing the complexity of matching lighting of a CG object to the real world, you will develop a finer grasp of the lighting tools and the need for attention to detail.
1. Photography
At this step, I took a few sets of photos. The first two are under the strong sunlight. The last two are under soft sunlight indoor. That makes the contrast, shadow ad the change of color softer. So I choos the last one to do this project.


The photos below are the rest photos of this set. The photos with chrome ball, gray ball, gray cube to help me do this project.


2. Camera Setting
At this step, I need to set a camera in maya, and match the camera setting to the photo I took.


First of all, I need to find out the camera information of my photo. Open the photo in Photoshop, and go file->file info->camera data to get the focal length and camera model. Then go to the website http://digified.net/focallength/ to calculate the real focal length.
Next, we can go to the MAYA software to set a camera.

First, creat a camera and set focal length 158, and name it rendercamera.

Then, create an image plane and add the photos which include the cube and the gray ball.
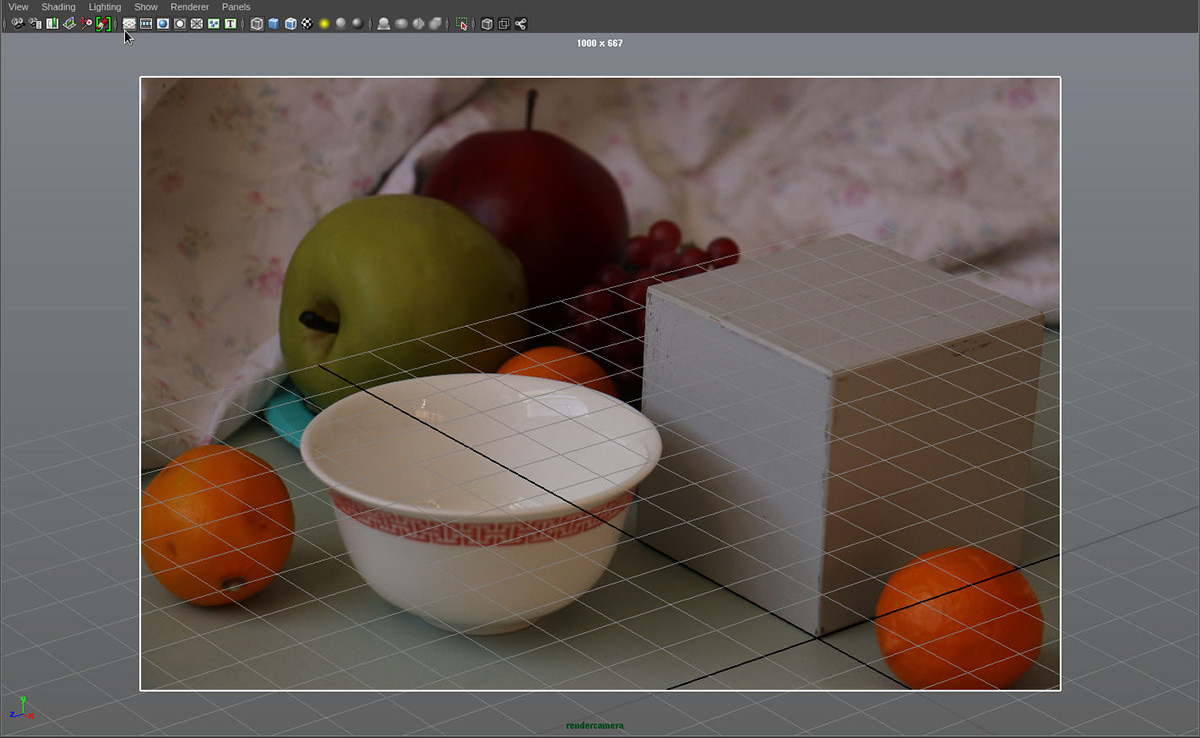
Match the grid to the edges of the cube in the rendercamera panel to make sure the angle of the camera


Creat a cube(4*4*4) and a sphere(radius:2), and adjust the angle of the camera to match the objects to the photo.

Create a model of the bow, and adjust the position to match the photo. And all so create a plane as the table.
3. Set the Key light.
At this step I set two area lights as my keylight. I make this choise because the light come through a window and the shadow seems not a single shadow.


Use raytrace shadow attributes to make the shadow soft. Adjust the position and the angle of the keylights to match the shadow. And also create some point lights as the fill lights to make the shadow brighter, and turn of the shadow of the point lights.
Render in rendercamera panel and import a photo in render window to help you compare and match.
4. Render Layers
Create new render layers and name them: Diffuse, Fill, Specular, Shadow, Relection, Ambient, Occlusion.

Give the bowl a blinn shader. Change the attributes of the shader to be same as the real bowl.

Create a Dome

First of all, cut the photo with the chrome ball.

Create a sphere, Scale it up to cover all the objects inside. Give it a suface shader. click the button of the out color channel. In the new window Create Render Node, right click the file button and choose create as projection and change the Proj Type into Ball. Put the image of the chrome ball into the image channel. Change the Textured Channel into out color to see the texture clear.

Then you can see there is a projection created. Rotate it to make the center of the image on the dome match the 0 point of the field chart. Render the view in rendercamera panel to see if the high light at the right position.
Diffuse Layer

Add the bowl and all lights into this layer.

Right click the sepcular color and choose create layer override. Whenthe name turns orange, turn off the specular color.

Render Result
Fill Layer
Add the bowl and the dome into this layer.

Open the render setting. Override the render using and change it to mental ray. Turn on the final gathering.

Select the dome, open its attribute editor, override and turn off the Primary Visibility under the Render Stats, so that the dome won't be rendered.

Give the table a suface shader, put the clear backgroung photo into the image channel. Change the Proj Type into Perspective. And also turn off and overrive the Primary Visibility of the table.

Render Result
Reflection Layer
Add the bowl and the dome into this layer.

Give the bowl a new blinn shader named Mirror. Change the attributes as the picture shows above.

Render Result
Ambient Layer
Add the bowl to this layer.


Give the bowl a new blinn shader and put the texture image into the color channel. Change the attirbutes of the shader as the picture shows above.

Render Result
Specular Layer
Add the bowl and the key lights into this layer.

Change the attributes of the shader as the picture shows above.

Render Result
Shadow Layer
Add the bowl and the table into this layer.

Duplicate a bowl and adjust the position to match the original one in the photo.

Override and turn off the Primary Visibility of the left bowl. Give the right bowl and table the shader Lambert1.

Open the Attribute Editor of the Shadow Layer. Right click the Presets button and choose Shadow.

Render Result (Display alpha channel to see the result)
Occlusion Layer
Add the bowl and the table into this layer. Override the Render Using and change it into Mental Ray.
I create two occlusion layers with two different size.


Opent the Attribute Editor of this layer and change the preset into Occlusion. Then, there will be a new Surface Shader given to the objects in this layer, and also a mia_amb_occlusion node was added into the out color channel. Change the attributes as the picture shows above.

Select the rendercamera, open the Attribute Editor. Override the Background Color and turn it white.

Render Result

Render Result
5. Composition

Open the Render Setting,type "%s/%l" into File name prefix.Change the Image Format into maya IFF. Change Renderable Camera into rendercamera. Change the Image Size.


Click Batch Render under the render menu.

Read all image in the software NUKE and organize them as the picture shows above.


Change the color correct node to adjust the color of each layer to match the real bowl. During this process, I also go back in maya to change the color of fill lights, light position, and some other attributes to make the shadow, contrast and the color of the bowl match the original one better. And I change the type of the keylights into spot light.

Use wipe tool to compare the cg bowl and the original bowl.

Use Dilate note to fix the black edge.

Use Write node to render the final results.
6. Render Stills


7. Issues
There are still some issues need to be fix in this project. I will figure them out and finish this analysis.
Depth of field.
Specular.
Contact shadow.
