


linking 2 tents together using magnets in the middle, it creates a new fully enclosed form.


the pattern on the floor created from the light shining through the fabric

detail image of the lace fabric with the light shining behind it.

product contract
Process Work:

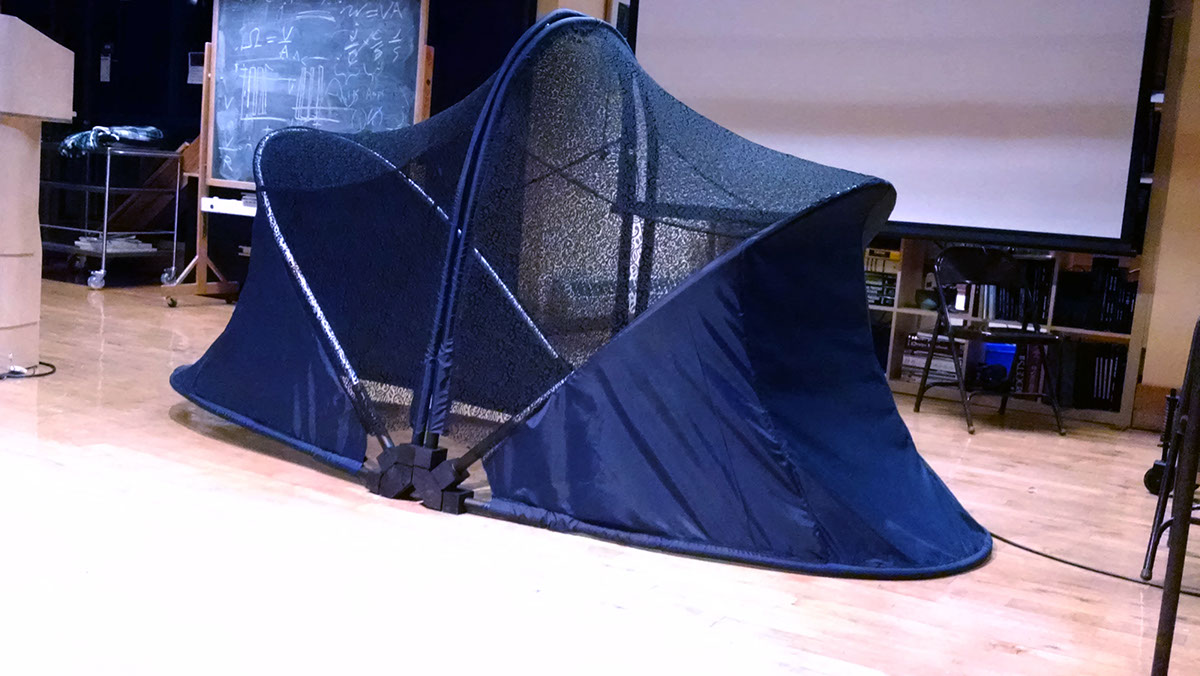
I began my design process with looking up inspiration. I was drawn to tents that had organic forms that resembles forms and curves in nature. I was also very much drawn to the illumination of tents at dusk or nighttime. I love how the light glows through the fabric and reveals silhouettes within the tent.

After looking at my inspiration, I began sketching. Taking pieces of my inspiration and altering parts to make something new.

further form sketches and material research

After creating several designs that I liked on paper, I created small 3D models using wire and fabric. I experimented with material as well, trying to incorporate the idea of stars that you see while camping and re-iterating that pattern within the tent design.

After seeing the how the light played with my model, I wanted to do a further material investigation. Rather than using tent material and altering it, what would a tent look like if the material was patterned to create beautiful shadows? I found several pieces of lace and investigated how light played with the material and how the shadows would look.

light and pattern exploration

The first step to creating my tent was to create a jig in order for the clamshell tent to stand and adjust. This jig has hinges that allow for it to open and close for easy access. It is made out of PVC pipes, wood blocks and hinges.

After creating a jig I then formed the skeleton. The skeleton is made out of electrical conduit that was hand bent.
After the skeleton was finished, I began my patterning process. I initially laid fabric over 1/4 of my tent, pinned it to tension and then copied that same pattern peice to all 4 faces (ideally it would be completely symmetrical).
After the skeleton was finished, I began my patterning process. I initially laid fabric over 1/4 of my tent, pinned it to tension and then copied that same pattern peice to all 4 faces (ideally it would be completely symmetrical).

This is my first mockup, which had a significant amount of tension issues. Since the conduit was bent by hand, they were not all completely identical curves, thus the same pattern piece did not work. Many places the tension was way too tight, and many where it was too loose. When trying to make alterations, by pulling the fabric and pinning it, the tension did not get better.
Thus, I bagan a second mock up tent.
Thus, I bagan a second mock up tent.
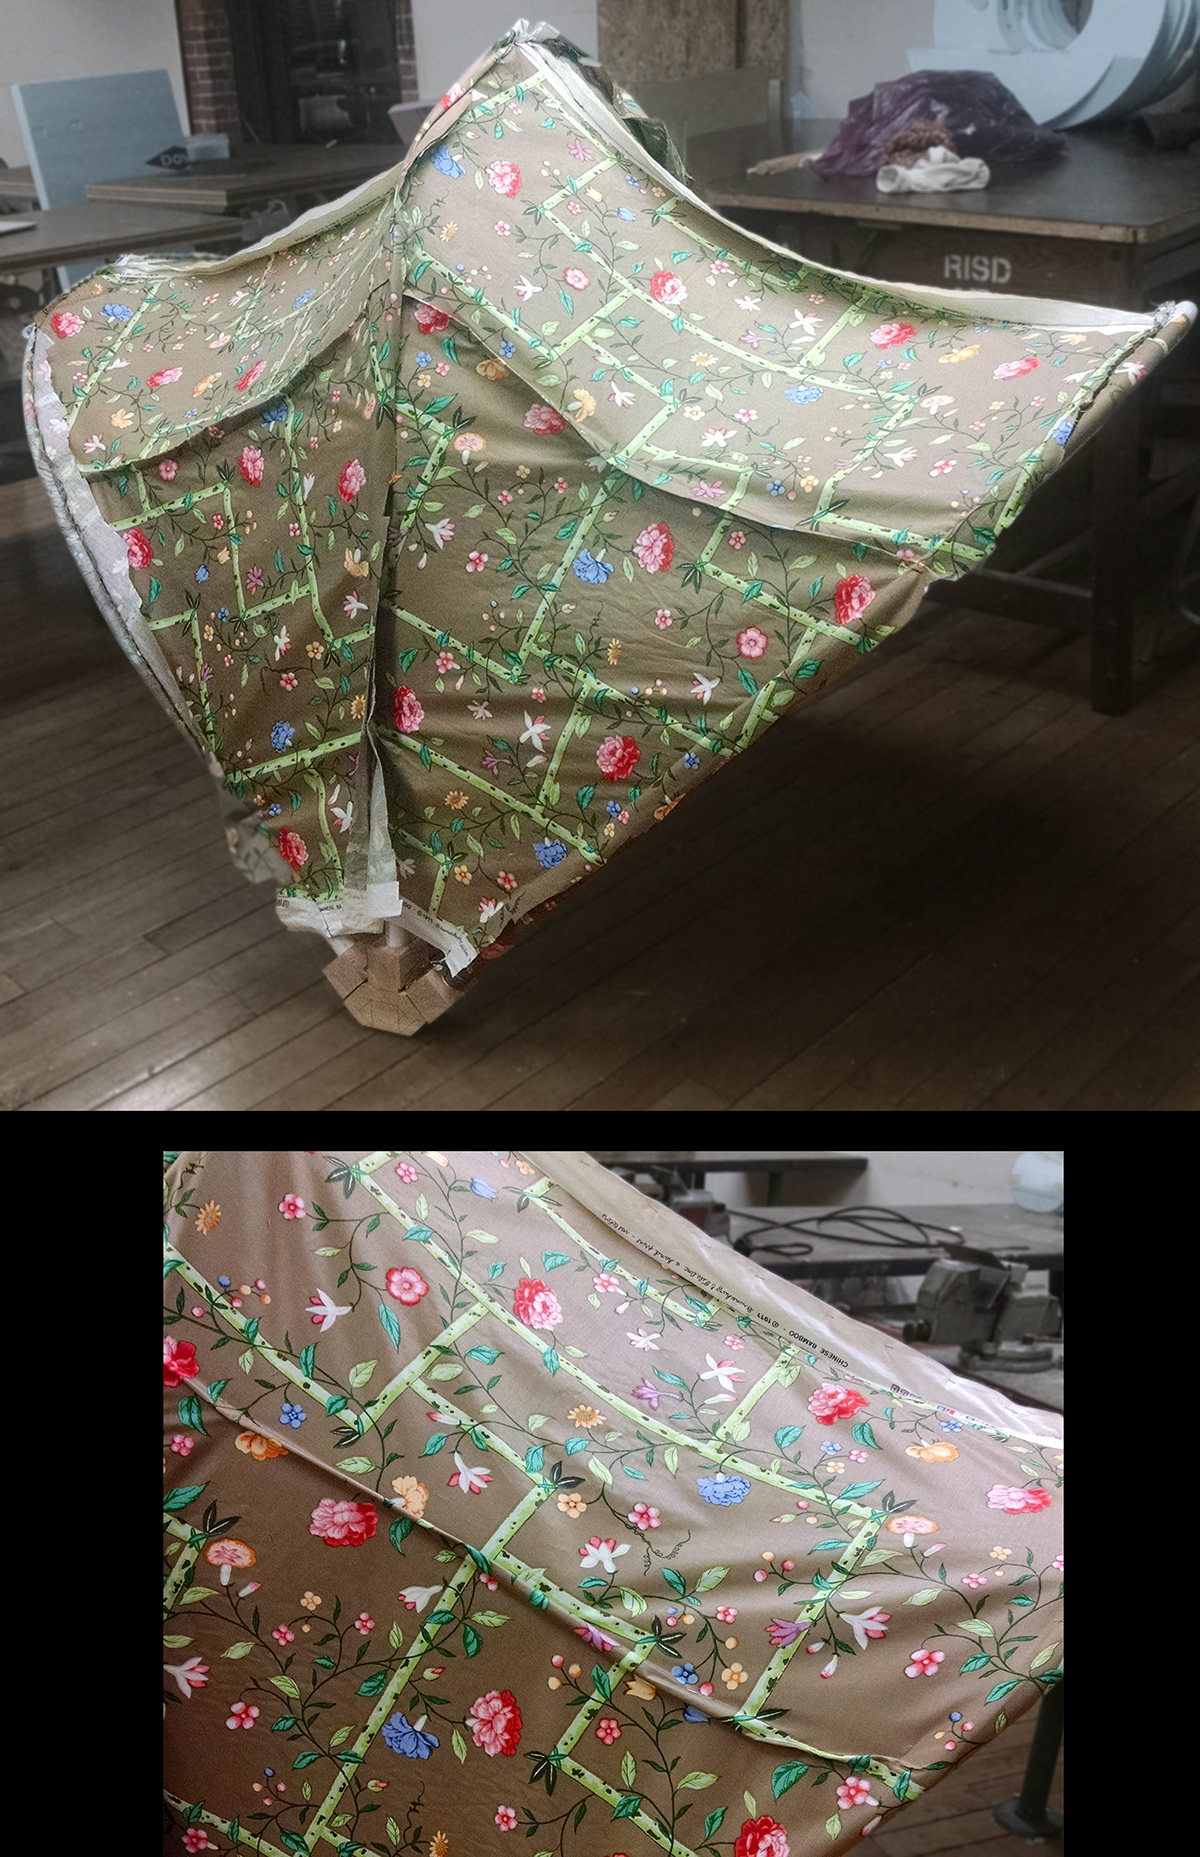
This is my second iteration. Instead of pinning only one side of the tent and copying it, I patterned the entire tent, labeling each side. In order to create good tension, I realized I had to create a new seam in the middle to take away some fabric to create a curve.

I then trimmed off the excess, drew lines at where it was pinned to tension, and then added seam allowance and cut my pattern. The top image shows the fabric that was taken off the tent (2/4 pieces) the bottom images show the final patterning pieces. 4 pieces of each pattern were required for my tent and each one varied a small amount due to the conduit bends.
I sewed my final patterned pieces together as the last mock-up, made several alteration, then ripped out the seams. I then used the final patterned pieces to lay over my final fabric to cut.
I sewed my final patterned pieces together as the last mock-up, made several alteration, then ripped out the seams. I then used the final patterned pieces to lay over my final fabric to cut.

The last step in creating my tent were making the pole wraps, I began by tracing the curve of my skeleton, then mesuring in half the circumference of the pole and adding seam allowance. I would create 2 identical pieces and sew them together to create a curve.
Thank you!
Don't forget to hit appreciate if you enjoyed my work
Don't forget to hit appreciate if you enjoyed my work

