During my final year at Kingston University, I made this short tutorial on 3D in Photoshop.
In this tutorial I will try to give you a glance of what Photoshop CS6 is capable of in terms of generating 3D text and composing it in a real-life photo, disguised as text shaped buildings.
First, download the source images below.

City_scape.jpg (Orignial source: http://spontaneous-at-times.deviantart.com/art/Fall-284925797)
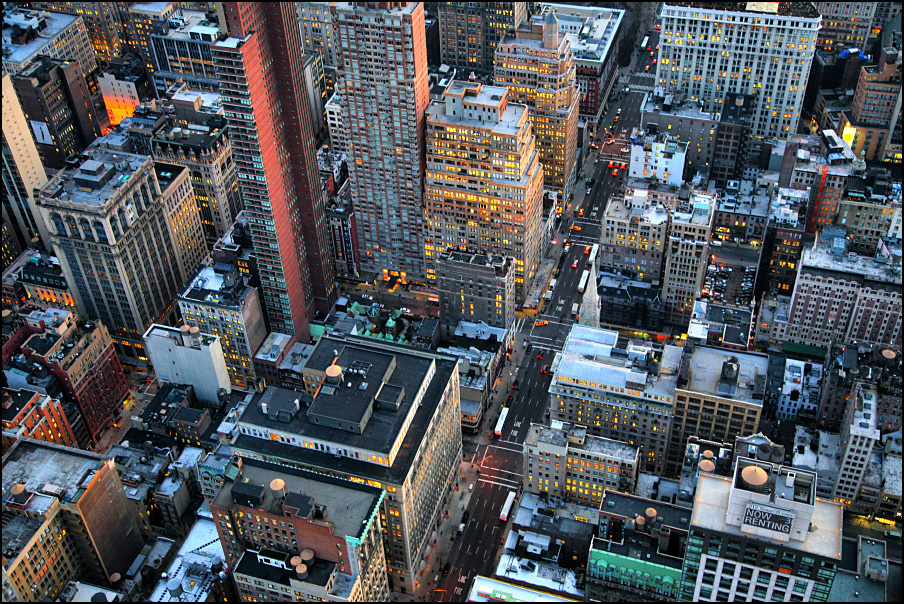
NYC_from_above.jpg (Original source: http://toko.deviantart.com/art/NYC-from-above-I-123587353)
roof01.jpg - (Original made by me)
roof02.jpg - (Original made by me)
1. Open "NYC_from_above.jpg"
2. Set Workspace to 3D - see below

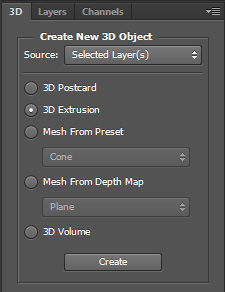
Click on the text-tool (T) and create a new text layer saying: KU (or whatever you want). This will be the basic 3D shape.
For the text I use Arial in black (not bold), 36 pt and colour it in #7E7566.
With your new text layer selected in the layers tab, click on the 3D tab. This should be visible when using the 3D workspace, if not, you’ll find it under Window>3D.
When inside the 3D tab, make sure 3D Extrusion is ticked and hit create.
Photoshop have now converted your text layer into a 3D layer, that now contains the text as a 3D object. The next step is to make our 3D object align with the citys ground plane, to do this; we need to make a few changes.
Make sure Current View is selected in the 3D tab. Change the FOV to 50mm.
This value is the size of the lens when the photo was taken, it is very important that these values are the same as it determines the perspective of the 3D grid.
Note: If the values don't match, your 3D object won't fit properly and look odd.
Click next to the camera settings, on the icon for the coordinates tab:
Select the move tool (M) to rotate and pan the camera. Make sure not to change the Field of View (FOV).
Try your best to align the blue and red grid lines with the surface of the ground. Also, it is easier to align the grid by temporarily hiding the 3D object. To hide a layer, click the eye-icon located to the left in your properties tab.
After placing the grid, un-hide your 3D object and rotate it 90 degrees on the X-axis. The easiest way to do this is to print in the value and press Enter.
Also, you may want to change the size of the 3D object to fit the surrounding buildings a bit more nicely.
The next step is to give the 3D object a nice bevelled edge as seen on the surrounding rooftops. Click on the Mesh tab-icon (T-shape) to change property tab again.
Click on Shape Presets and select the one to the far right, as seen in this image:
Notice that your 3D object change in size as the extrusion depth decreases to 68, change the value to about 168, the buildings shouldn't be floating in mid-air.
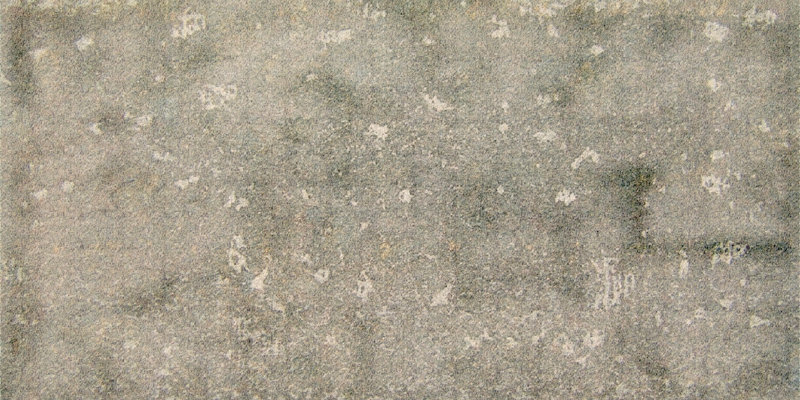
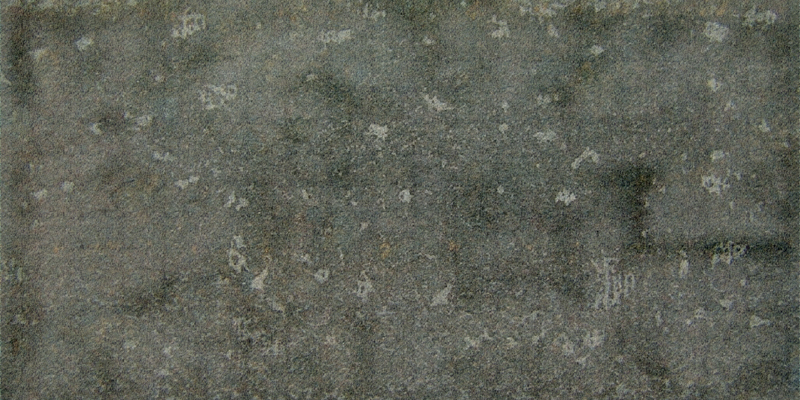
To make the 3D blend in with the surrounding environment we need to change its materials. Below are three examples of textures, feel free to use them!
To make the 3D blend in with the surrounding environment we need to change its materials. Below are three examples of textures, feel free to use them!


If you rather want to create your own, here is how! Photoshop CS6 comes with a fantastic new feature called Perspective Crop, located under the good old Crop tool.

With this tool we can make surfaces in perspective become flat with just a few clicks!
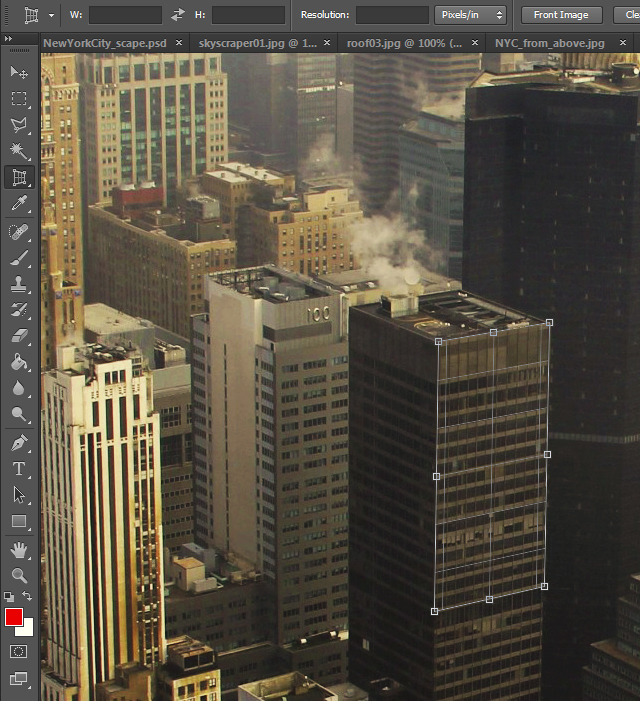
Open up the file “city_scape.jpg” inside Photoshop. This image has greater resolution and will therefore make the textures crisper.
Select the Perspective Crop Tool and choose a flat surface of a building and try to create a rectangular shape as straight as possible, following the lines of the surface perspective. Press enter to crop and flatten the surface.
Now you should have something like this:

Change colour, brightness/contrast etc. after your liking. Repeat the same steps for as many textures you think you will need. When you have a texture ready, save it to your project folder, as we will load it later.
In it's current state, the 3D object is in one file, to be able to attach different textures to the objects we need to separate them; go to 3D>Split Extrusion (make sure that we have our 3D object layer selected).

A prompt message will show up saying that we will lose any animations, hit OK (we don’t have any animations).
Our objects are now separated, though still under the same group. To add a material to the outer walls, start by selecting the K Extrusion Material-layer, located in the 3D tab.
Up in the properties panel you have a few different options, if you are familiar with 3D since before will recognize these attributes.
* Diffuse – Changes the colour of our object
* Specular – Changes how reflective / shiny our object should be, black is matte and white is full specularity.
* Illumination – Creates the effect that the 3D object is lit from within.
* Ambient – Sets the colour for ambient light visible on reflective surfaces.
For now, modifying the diffuse property will do.
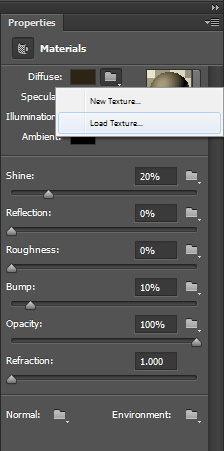
To apply our texture map to K Extrusion Material, click on the folder icon next to the diffuse tab and hit
To apply our texture map to K Extrusion Material, click on the folder icon next to the diffuse tab and hit
Load Texture.
Go to the directory where you saved your texture map and open it. K Extrusion Material should now have the texture map applied to it.
Note that the material is stretched across the surface of the 3D object, to fix this; we need to edit the UV values.
To open the Texture Properties, click on the same place as when loading the texture, though the folder icon has now been replaced by a floppy disk icon.
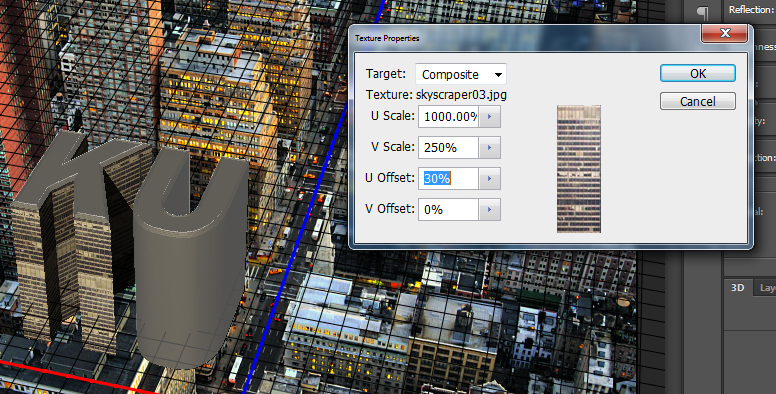
Change the Texture Properties after your liking, click OK when you are happy with scale and offset.
Repeat the same steps as above for the roof, in this instance called K Front Inflation Material.
For the bevel, K Front Bevel Material, click on the Colour Option box next to “Diffuse” and pick a colour from your wall texture.
The other parts; K Back Bevel Material and K Back Inflation Material will not be visible so don’t worry about them.
Repeat the same steps above for any other objects you may have. I did the letter U in the same style as the K, though additional textures could make your picture more dynamic.
The last step before rendering out the final image is lighting. I used two lights, both Infinite lights.
One light is created by default, to add a light, click the icon


Select New Infinite light
I have one light pointing from the top right corner and one pointing down from the “outside” the screen. Play around with the intensity and direction until you’re satisfied with the result.
Only one of my lights, the one pointing from the top right, have shadows, while the second light is used to soften the shadows from the other light.
When satisfied with all your lighting, colouring and texturing it is time to render.
First select your 3D layer in the layers tab and then use the Rectangular Marquee Tool (M) to select an area around your 3D object. By doing this, we limit what Photoshop will render, thus saving time; rendering an area as large as the whole image would take longer.
After rendering our 3D object, it becomes a merged layer placed above the other parts of the image. In order to make our new buildings blend in and reveal buildings underneath it, we need to do some editing.
Duplicate and hide the newly rendered layer, then use the Polygon Lasso and the Eraser Tool to select and remove the parts you don't want to show.
Tip: By lowering the opacity of the layer, you can much easier see where the lines of the other buildings are.
Extra tip: If you want your buildings to blend in even better, consider adding AC-system, water towers etc similar to the other surrounding buildings.
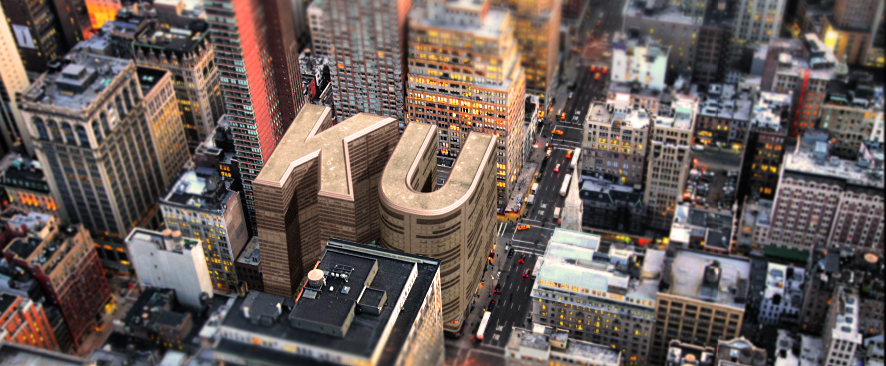
My final result.
Thank you for checking out this tutorial, I hope you enjoyed it! :)
Regards
Mikael


