Stark Contrast

Having a deep passion for the Marvel superhero Iron Man, Joey Kowalczewski chose to design and develop a Tony Stark-inspired night light dedicated in memoriam to the hero.
To begin, Joey needed to collect an image from online to use toward his project. Having a deep passion for Iron Man, as previously expressed, he chose a logo of the comic book character. After this, he inserted it into a design platform named InkScape, so he could make any size and document type adjustments he needed to (size: 6.018x1.847, doc type: converted to svg from png).
After InkScaping, he imported the svg file of Iron Man into EasyEDA, a PCB designing software, and designed a layout that would work best for his Stark Contrast project. He worked with the Copper Area tool, which he hadn't done before, but it helped to create a designated clearance area for the ground wires.

(Above): An EasyEDA power circuit board (PCB) of the expected Iron Man base plate for the project.
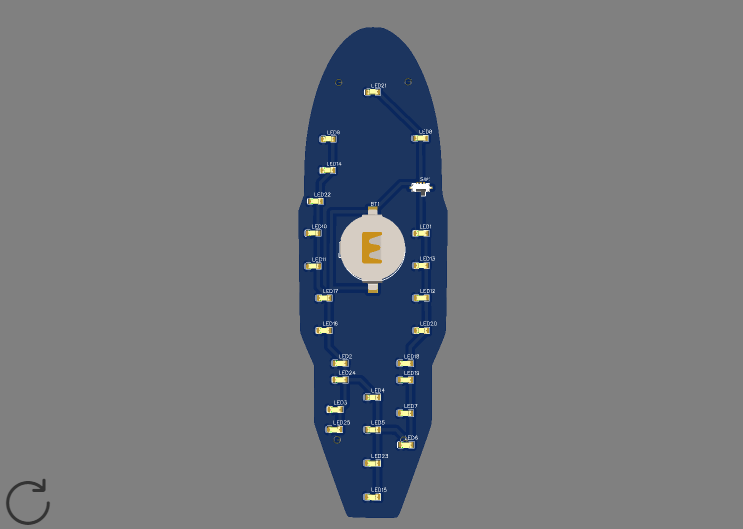
(Above): Another view of the PCB, but in 3D form with a more realistic view of the outcome.
Joey also used a water jet cutter, which he also hadn't done before, but learned how to adjust the height of the jet nozzle with the attached height guard and the proper steps to activate the machine.

(Above): Joey cuts an outline of his Iron Man logo on a copper plate for the base of his project.

(Above): The aftermath of the WazerCam water jet cutter on the copper plate, having cut out the Iron Man from an uploaded outline gcode file.

(Above): Iron Man copper base plate
Many people might think it's difficult to tone the copper plate for the circuit design, but it's actually not too sophisticated. One must have a heat press and circuit toner transfer paper that can print out their designed EasyEDA transfer file. After this, you must tape the copper plate copper side-up to the transfer paper design facing down on it. Following this comes the heat press where the circuit design is transfer toned onto the plate.

(Above): Getting prepared to circuit tone transfer the Iron Man base in a heat press. Doing this allows for designated areas to provide internal current flow and be separate from other areas of the PCB. Also, spots for the LEDs, battery holder, and battery itself.
(Above): The completed circuit tone transfer after the toner transfer paper was heat pressed onto the copper plate.
One must proceed with caution on this step, where the black toner residue is removed so exposed copper can directly reach the attached components on the board and function properly. Hazardous chemicals such as citric acid and gasoline are used to remove the toner residue from the plate and submerged in water as well after each use of chemicals. After the gasoline covers the Iron Man plate, it is submerged in water for the last time, then has isopropyl alcohol applied to clean the chemical remnants.

(Above): The Iron Man plate after undergoing significant toner removal.
SMD hand soldering is used to attach all components to the Iron Man plate, from the switch to the LEDs. A microscope is highly recommended with this soldering process, as the components are pretty miniscule, but important to be soldered efficiently.

(Above): The Iron Man plate after having all LEDs, switch, a battery holder, and the battery soldered on. Also, beside it is the acrylic overlay with a forefront sticker.
3mm screws are used to enter in through the back of the copper plate and attach to the acrylic overlay on front by using standoffs on the front of the copper plate. The 4 standoffs are connected to the acrylic by inserting 3mm screws through the front of the acrylic.

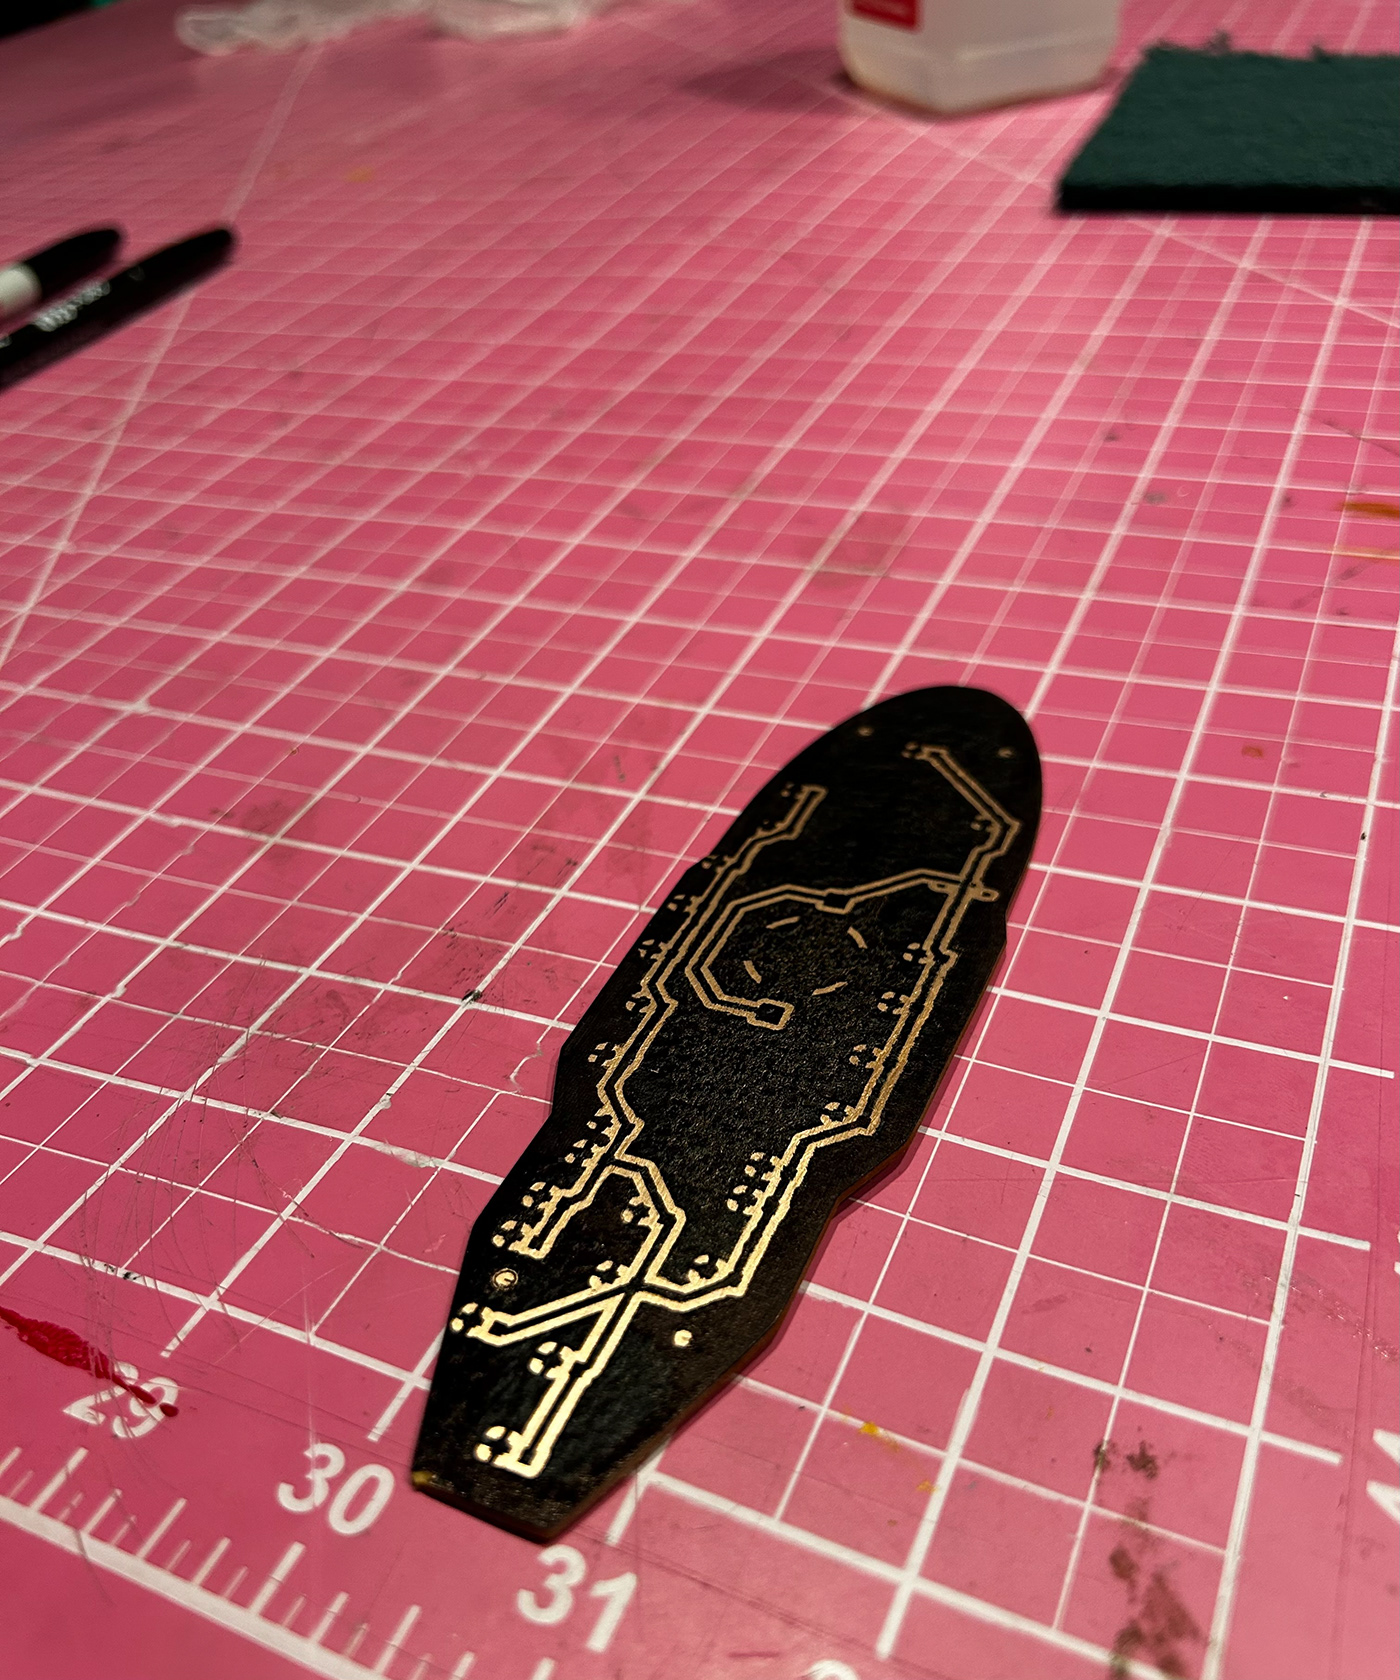
(Above): A posterior view of the Iron Man plate, showing the circuit paths.

(Above): An anterior view of the Iron Man plate, showing the forefront sticker illuminated from beyond the acrylic layer.

(Above): An almost lateral view of Iron Man plate, showing the LEDs illuminating the project.

(Above): Stark Contrast in a natural environment

