- RoboQuilts -
In November, York College was visited by the York Quilters Guild. There was a table filled with quilts of different materials, techniques and colors for us to learn about.
I took photos of 2 quilts which were particularly interesting to me:


I found the first quilt extremely appealing because of the interesting dye pattern and the technically impressive stitching. These elements combined created a strong quilt which looked modern and beautiful.
The quilt on the right was in complete contrast to the first quilt and interesting for other reasons. The second quilt was a Victorian patchwork quilt which was comprised of a huge variety of scrap materials, joined together with intricate hand stitching.
For our quilt reaction project, we were each asked to create 30cm x 30cm artwork, inspired by the quilts and including a stitched element. I decided I wanted to do a robot illustration, inspired by my robot, which would be made of 3d materials with interesting texture.

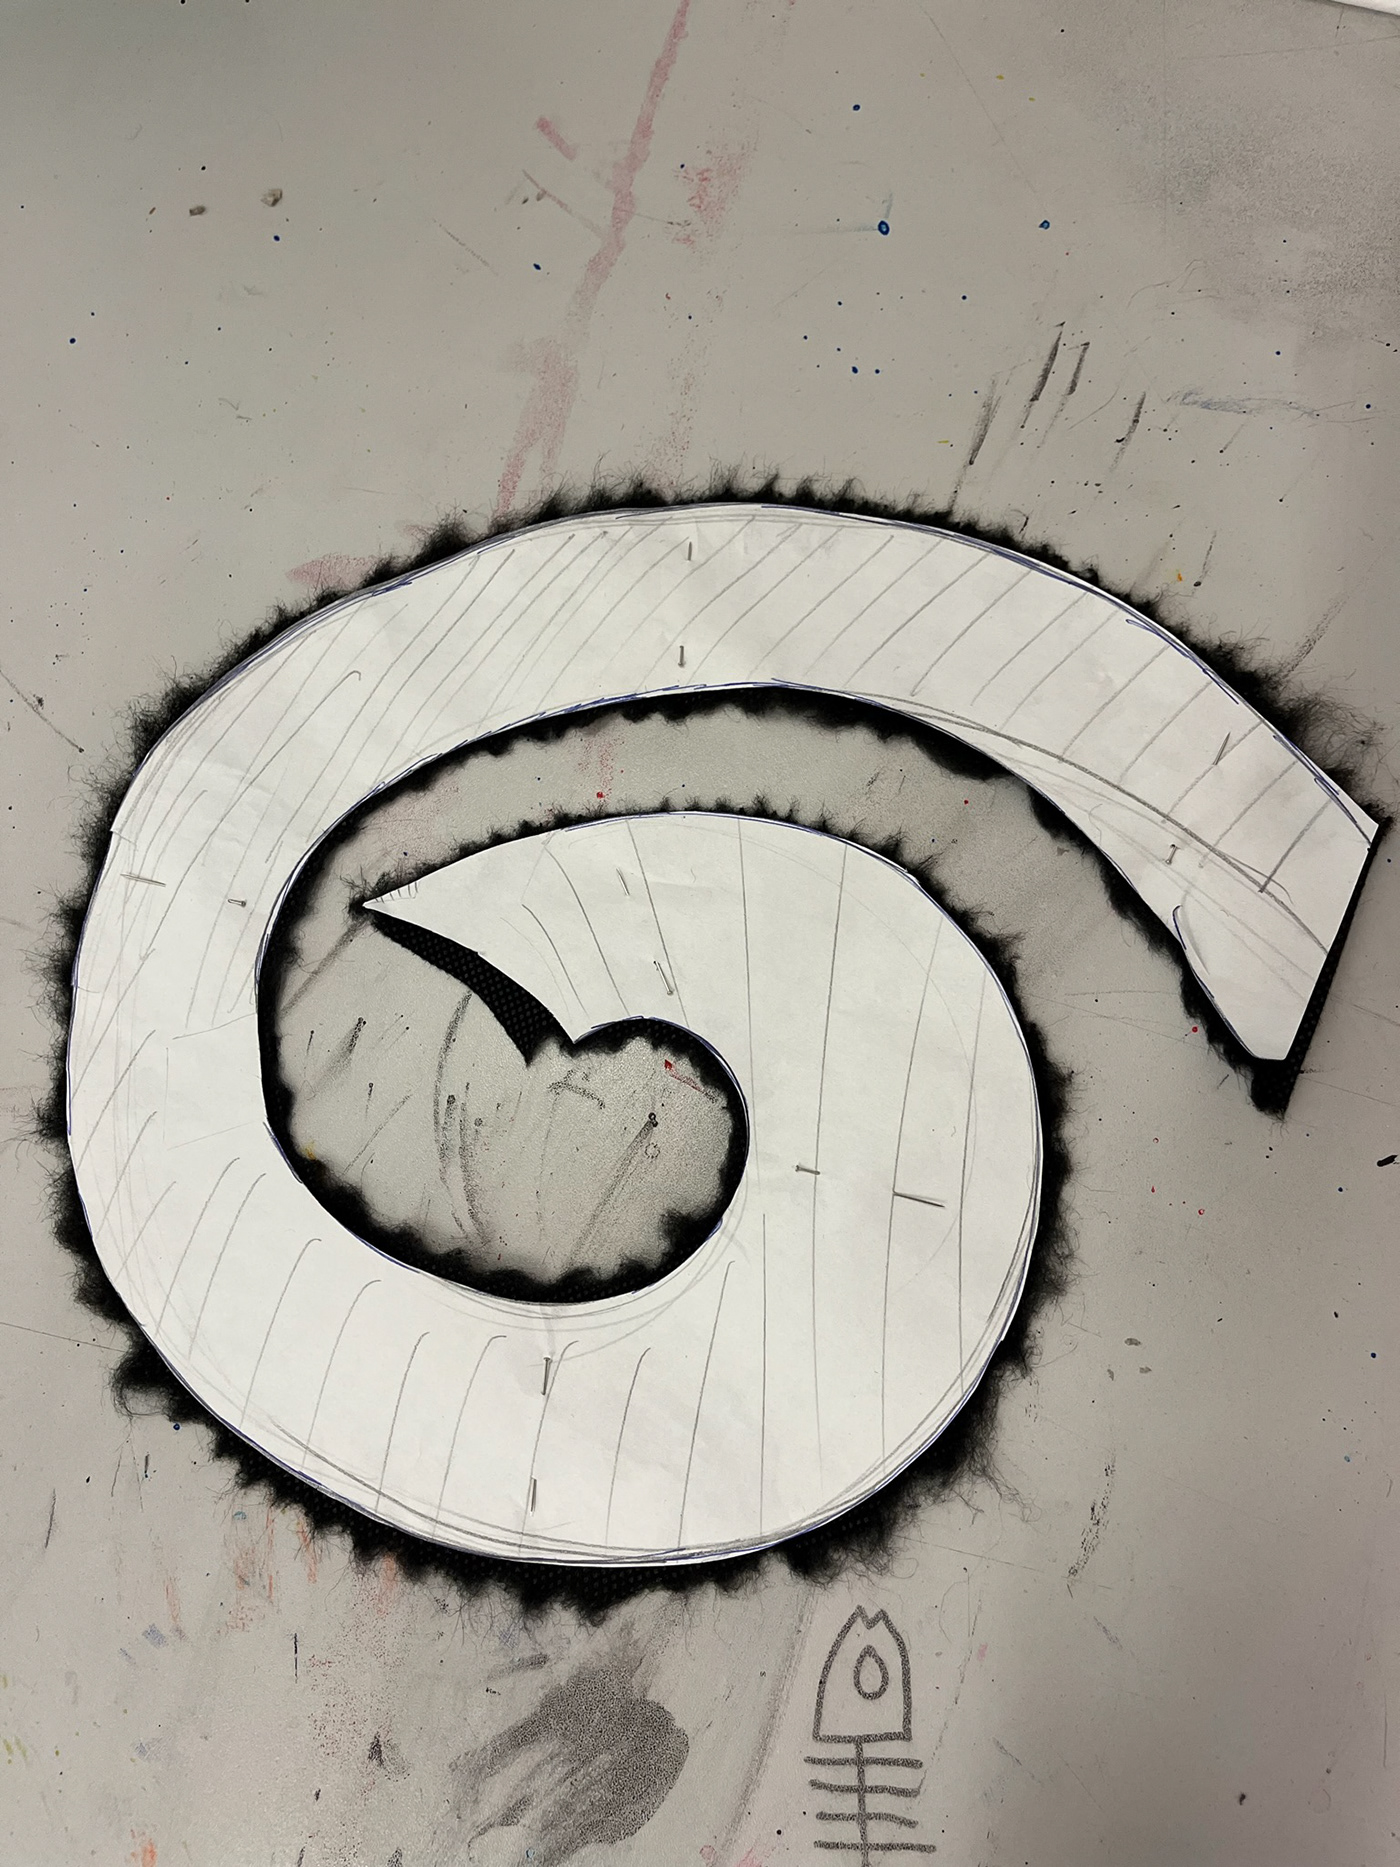
The drawing on the right was my initial idea for the robot arm design. The designs was inspired by the arms of my robot in my 'robot improvements' project. I really liked the idea of creating a long, twisting arm with a grabber on the end.
The design on the left is more interesting compositionally and would allow me to utilise more texture and varied materials in my design.


To begin the design process I created some test patches of different materials and ink.
I initially wanted to create a back ground with a different texture underneath which would be revealed through tears (as seen on the left hand page). The most successful version of this technique was the brown paper with black mesh then grey paper.
I liked this technique but I felt it would be inappropriate for this project as it would muddy the composition of the design. Instead I decided to test simple ink splatters as this would make a plain background more interesting but wouldn't be too texturally or compositionally complex so that it would take away from the subject.
The ink splatters looked great on the the grey and brown paper but indistinguishable on the blue paper. I also felt the ink on the blue looked a bit muted so would be better suited to a different design.

I decided to create my background using a straw to apply blue ink to grey paper. I'm extremely happy with how this background looked and I feel it best suited the design as it looks interesting but doesn't challenge the subject.


My next challenge was to create the claw for the robot arm.
I wanted the robot claw to be raised from the rest of the design so I decided to create it using 3 layers of cardboard.
After creating the claw I used metallic copper color paint which was consistent with my robot design.

I then drew a template for creating the robot arm out of black gardening membrane.

After placing the template and the claw on the background, it was immediately apparent that the claw hand was too small and needed to be scaled up.

I created the claw again using the same method and materials only scaled up. This larger scale claw made it much imposing and the central subject of the design.

To create a damaged and torn look for my robot arm, I cut my material around 5mm bigger than my paper template. I then used a pair of plyers to tear at the edge and create a ragged finish

To attach my membrane to my background I hand sewed grey thread to create the fold lines into the robot arm.
To finish the piece, I used hot glue to add stripped cables. These cables were taken from an old extension lead which I then used a Stanley knife and snips to strip down and expose the wire.

