The project will create a 3D visualization of the Lahore Fort. The scene will be set in a post-war environment, with the fort showing the resilience of the huge statue. However, new trees have grown around the fort, symbolizing new life.
Final Look and work flow
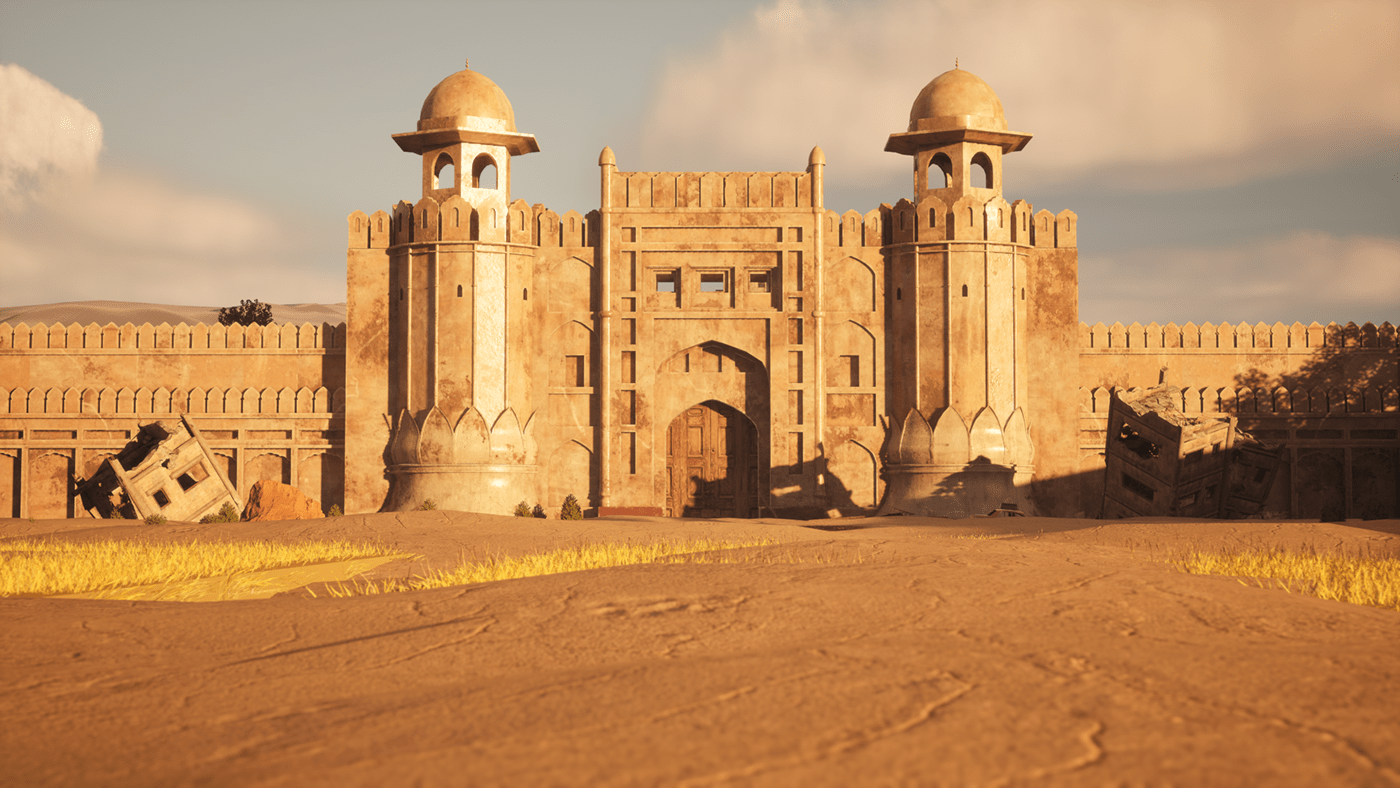
Reference Image

Modelling Approach
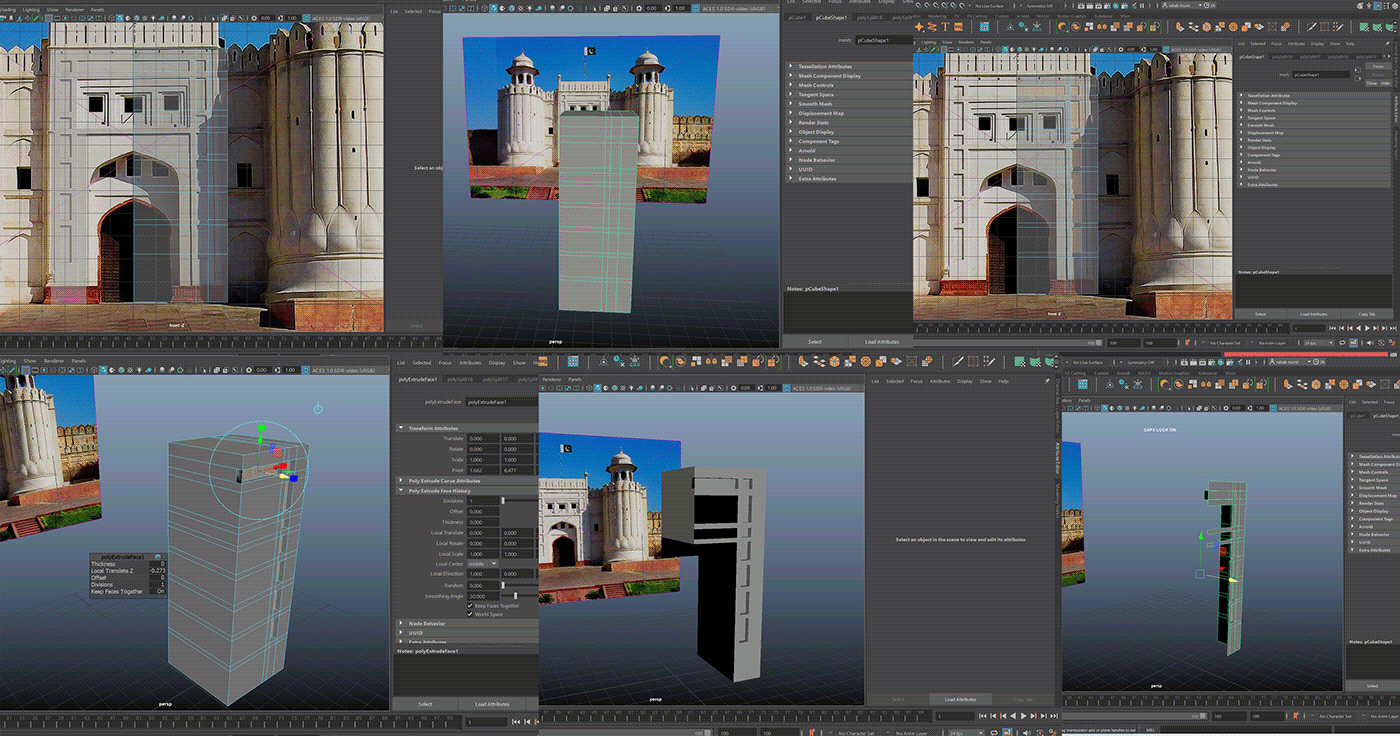
During the creation of my 3D model, I decided to use Polygonal Modelling technique to ensure optimal geometry flow, ease of editing, and compatibility with other software packages that I will be using other than ‘Autodesk Maya’
In the initial phases of shaping the Lahore Fort Gate model in Maya, I began by forming a basic cube shape. To match the size and proportions shown in the reference Image plane, I adjusted the cube's dimensions using the image as a guide in the front view. Stretching was applied to the cube to align it more closely with the reference image.
To refine the cube's structure, by using multi-cut tool, I subdivide it for making the windows and important shapes. After that I excluded the windows outwards, I deleted the parts of the cube that were not needed. Figure 1 is the showcase of how it has been done.
Platform udder the doom:
I focused on creating the platform after completing the dome. To begin, I used a basic cylinder shape and divided it into six subdivisions. Next, I used the 'Multi Cut' tool to add a subdivision to the cylinder's upper side to further shape it. I then selected the new subdivision and extruded it outwards to create the platform's initial form. I used the 'Bevel' tool. I selected the platform's edges one by one applied a bevel effect while adjusting parameters such as fraction and segments to achieve the desired rounded look.

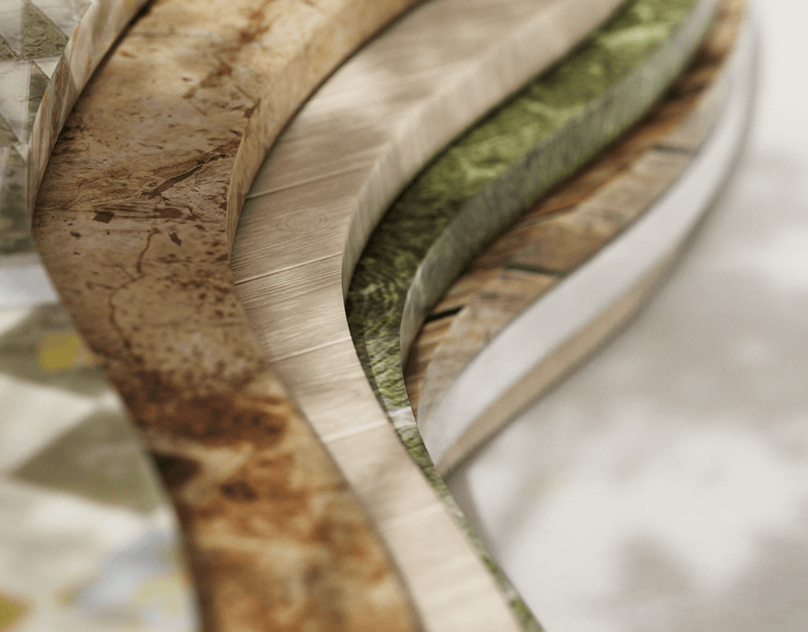
Colour ID’s and Baking
When working in Maya, I assign specific Colour IDs to different parts of the model where I needed, to guide the texturing process. I saw many tutorials on YouTube (Lloyd, n.d.) After that, I move on to Substance Painter, where I begin by baking the model to capture essential details that will enhance the realism of the texture.
For the 'Clean White Coating, I used a 'Filled' layer in Substance Painter. I picked the colour from the colour picker. Then, I added ‘Generator' and changed the 'Height' parameters, making precise adjustments to achieve the desired effect. After that I moved on to creating another 'Filled' layer and focused on 'Roughness.' I fine-tuned the roughness parameter and changed the scale of the roughness grans as well.
In the sending colour coating which is the Peeling Paint, I selected the colour from the colour picker closer to the reference, added a mask for the Peeling Paint colour, added a filled layer and then on top of it I added ‘colour selection’ option, then by going to its properties I inverted this by picking the colour picker and chose the aria where I did want this colour.
I enriched the upper part of the second filled layer. I added a ‘generator’. Here, I applied a noise effect to introduce subtle variations to mimic the look of peeling effect then I use the 'Multiply' blend mode, and I decrease this noise texture. This was a good starting point be I can see the results now that it's getting a good realistic look.
After ‘Peeling Paint colour’ I incorporated a third filled layer and applied ‘generator’ on it as well, this time I added the grunge effect within the layer's settings.

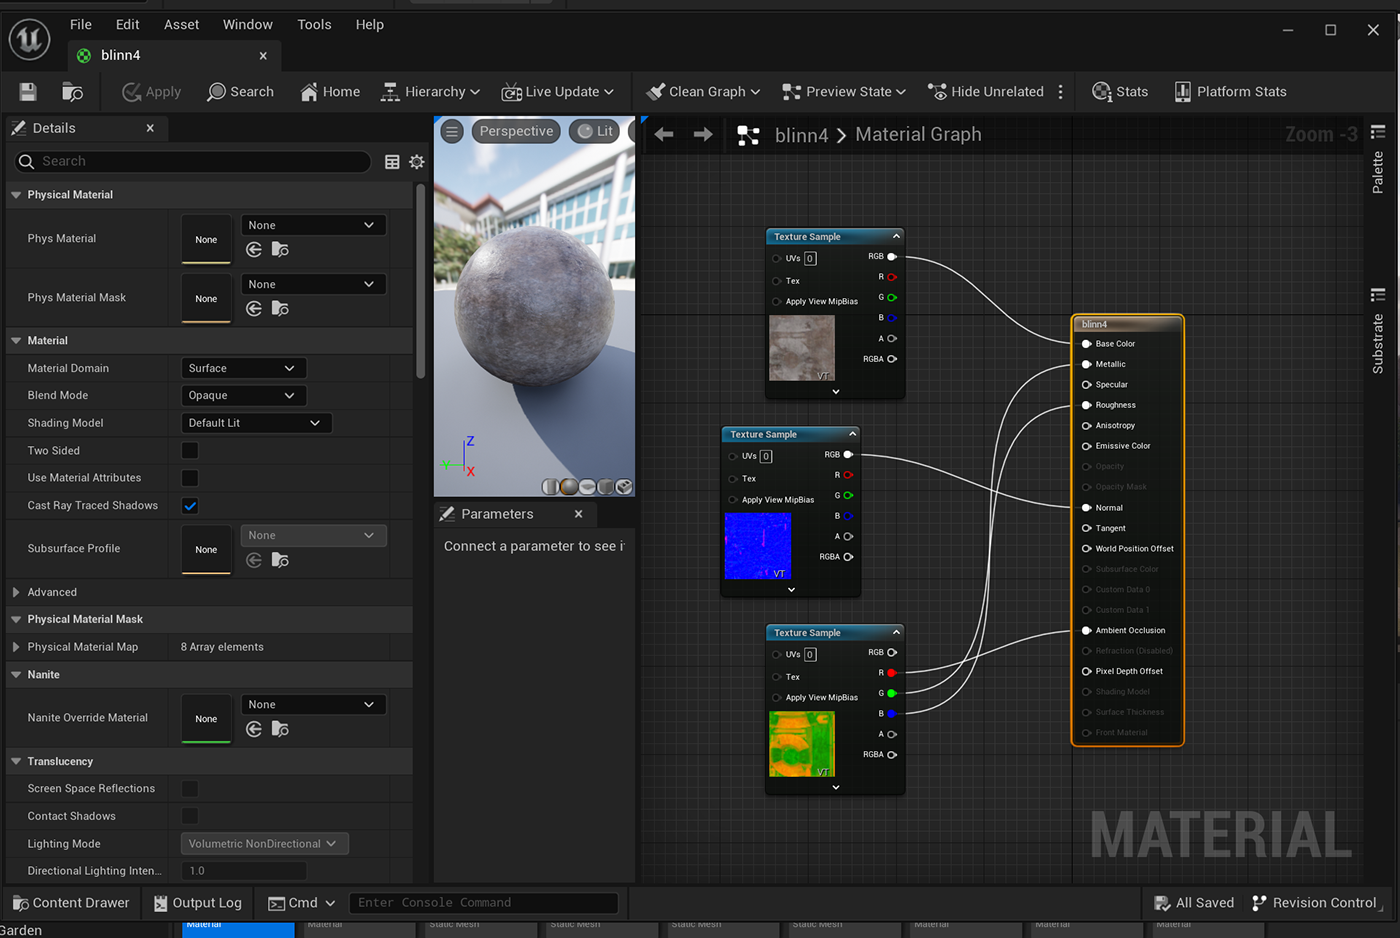
Before bringing the materials into Unreal Engine, I organized them into two folders: one for the gate and another for the walls. Unreal Engine automatically divided these files into three main materials: Normal, Base, and (Occlusion Roughness Metallic). Placing the materials in Unreal was straightforward. I ensured that virtual textures were enabled in the settings under the sample type tab. Then, I began assigning the materials to the Material Output tab. According to (Studio, 2023) Base RGB went into the Base Material Output, Normal RGB was directed to the Normal channel, and for the Roughness channel, it had three nodes: R for Ambient Occlusion, G for Roughness, and B for Metallic. I saved the settings and checked the results, ensuring that the materials were correctly assigned and appeared as intended in Unreal Engine.


The song "Challa" that I've chosen to play as part of my aftermath artifacts is a traditional Punjabi folk song. It represents the cultural heritage of the Punjab region, which includes Lahore and the Lahore Fort. "Challa" (Ali Khan, 1988) has a long history and has been sung by various artists over the years. It's part of the Supreme Collection album by Shaukat Ali Khan, released in 1988.