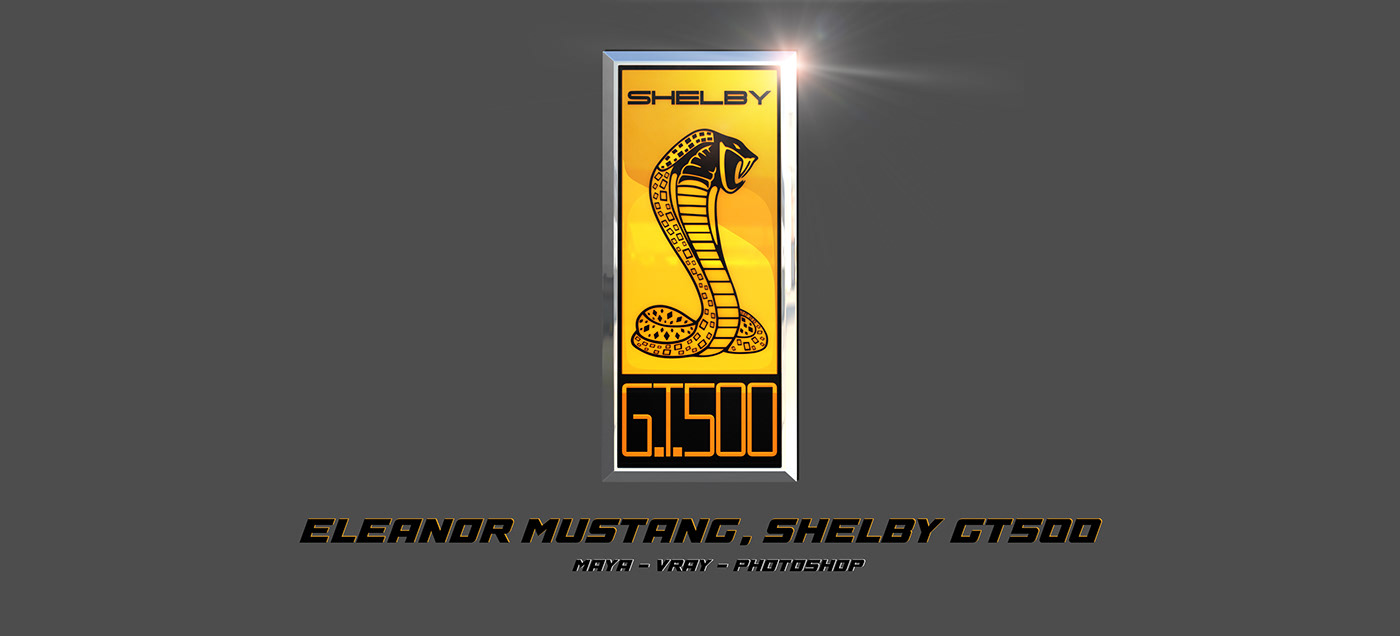


Hello, thank you for checking out my Eleanor Mustang Project.
This is something that I have been working on, since as far back as 2015; which is why I have placed a timeline at various stages throughout the project.
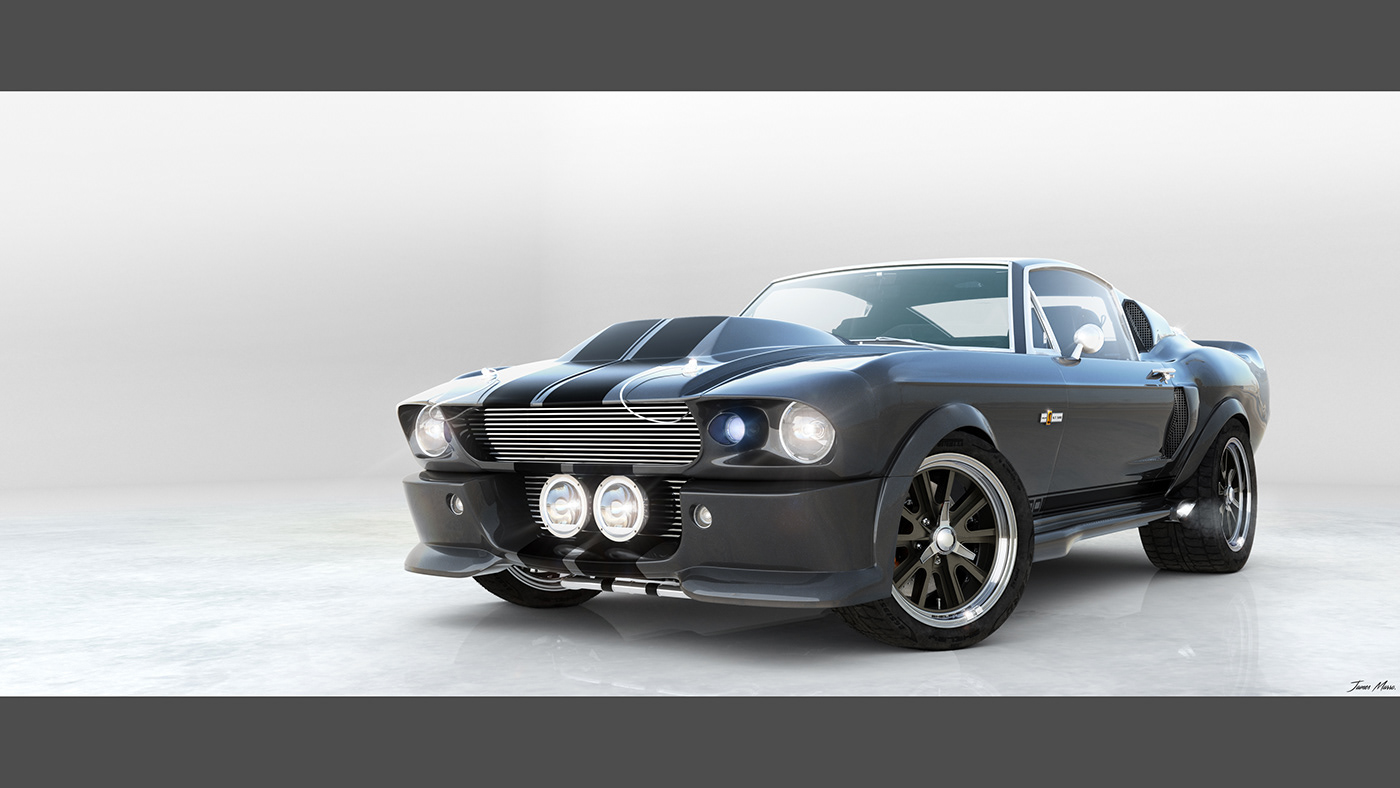
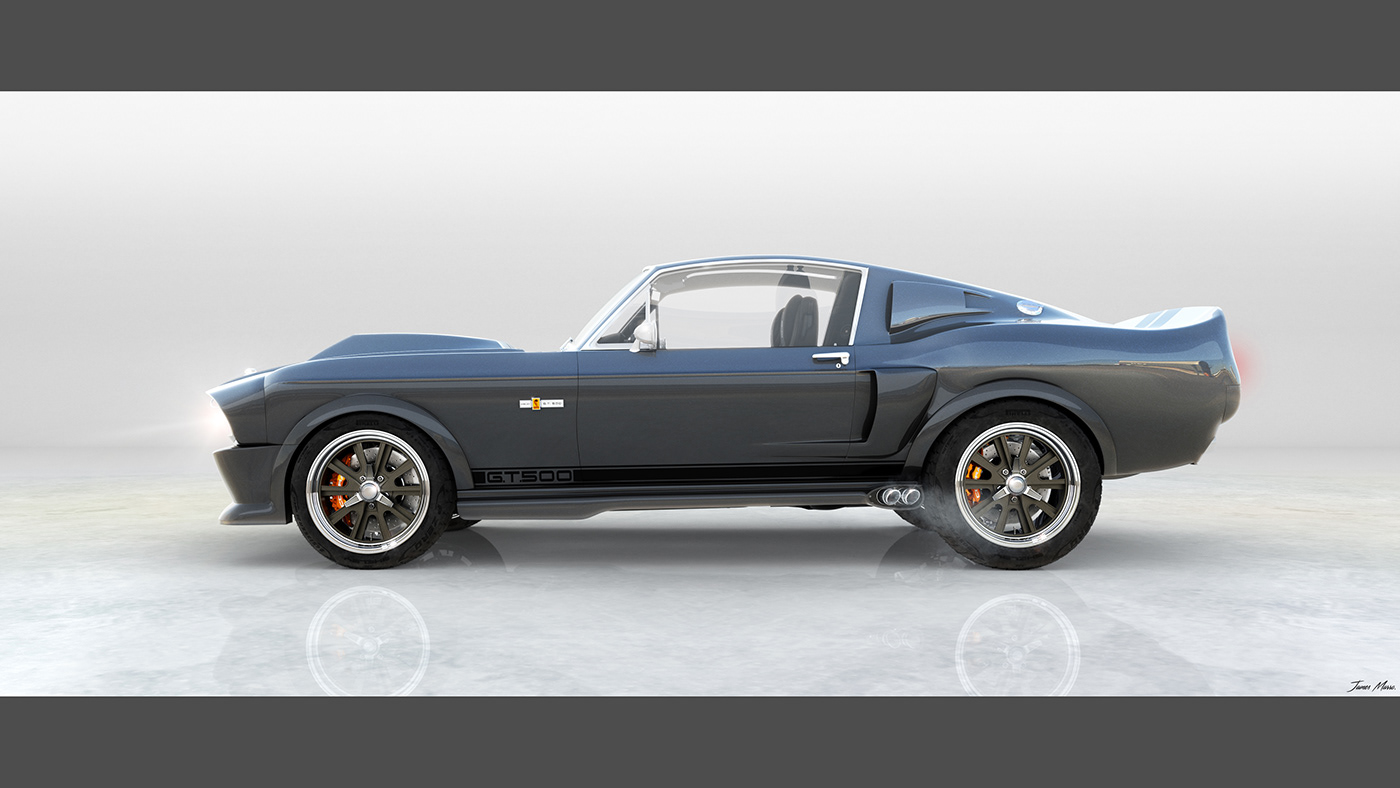
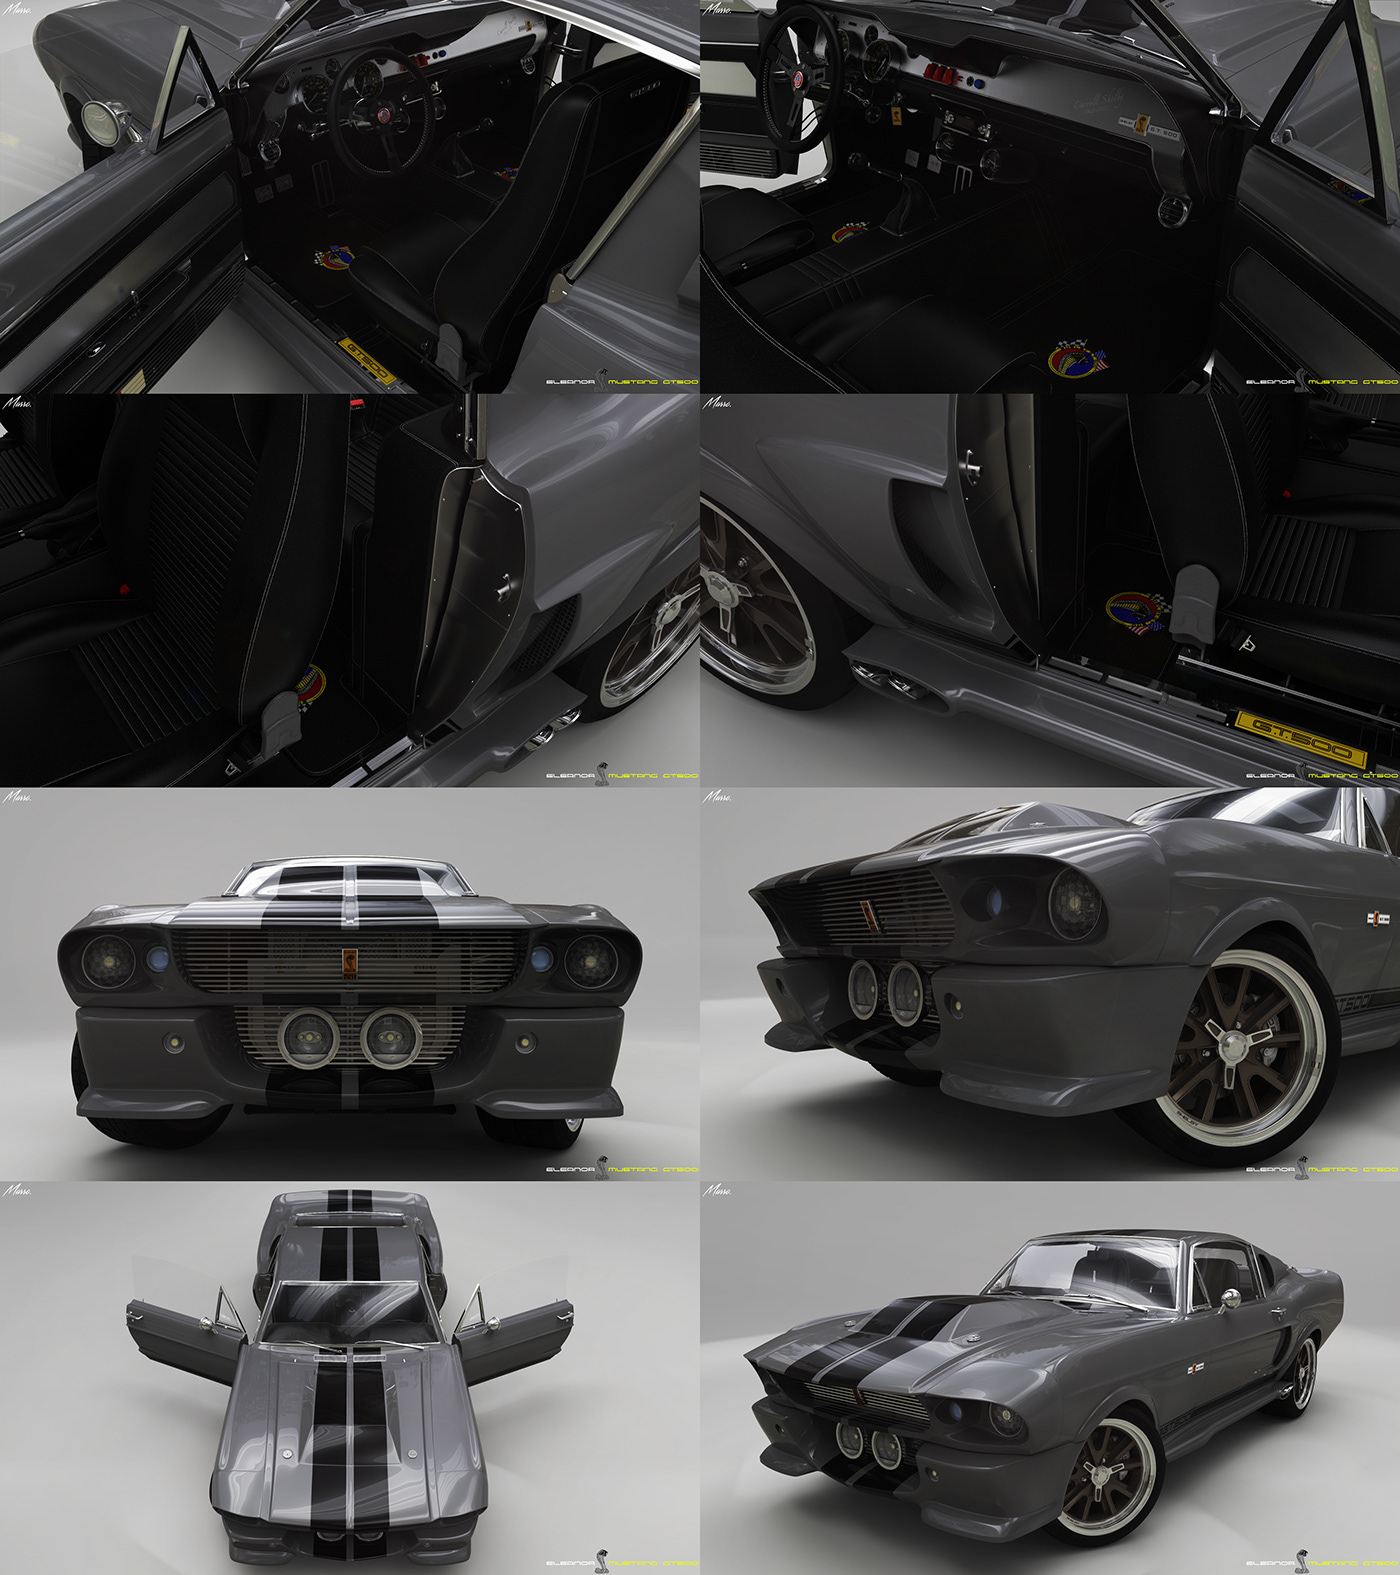
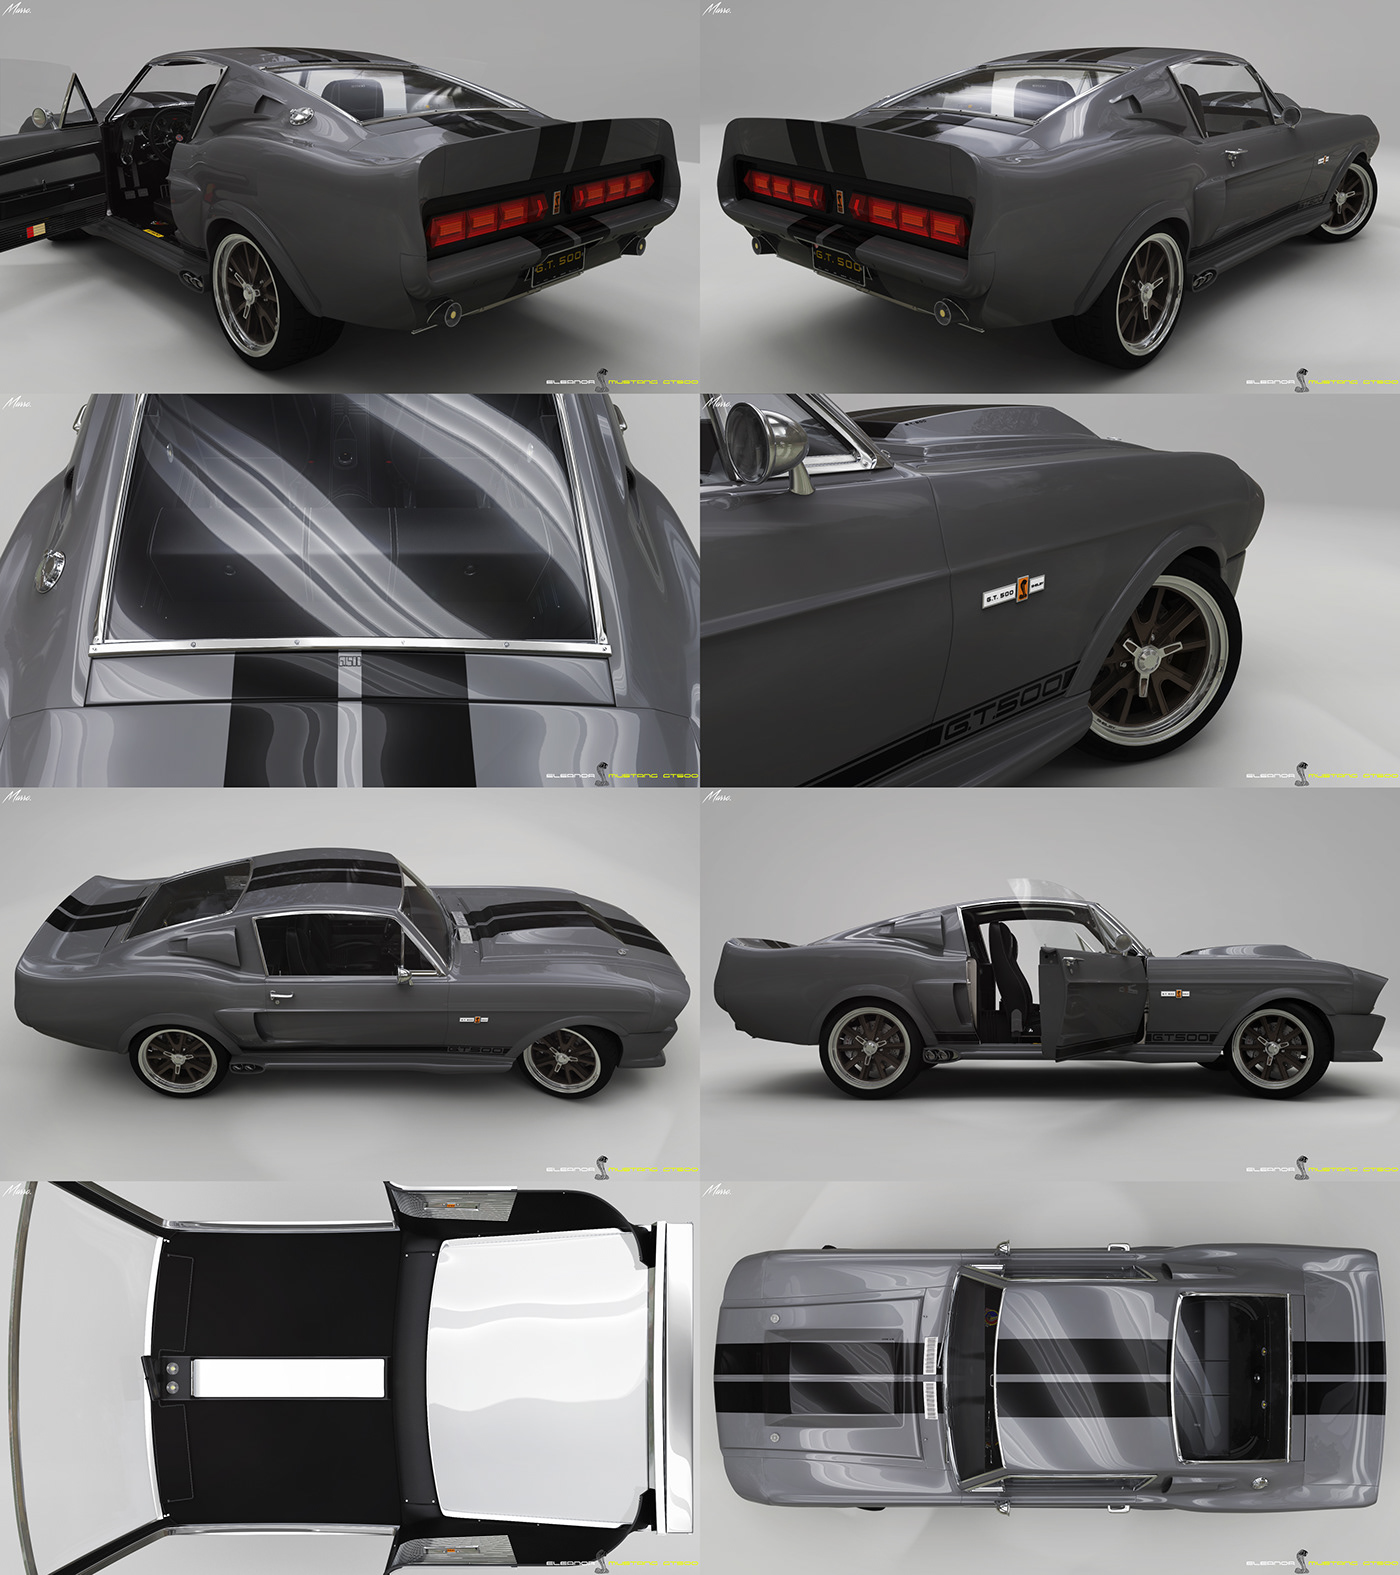
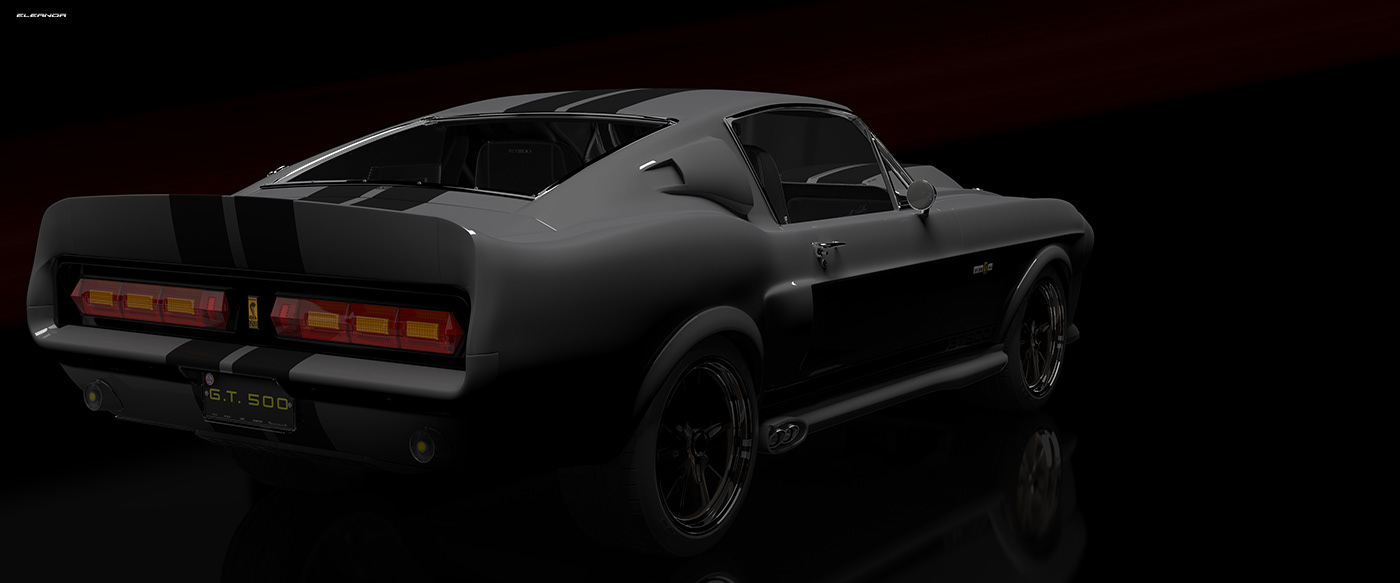
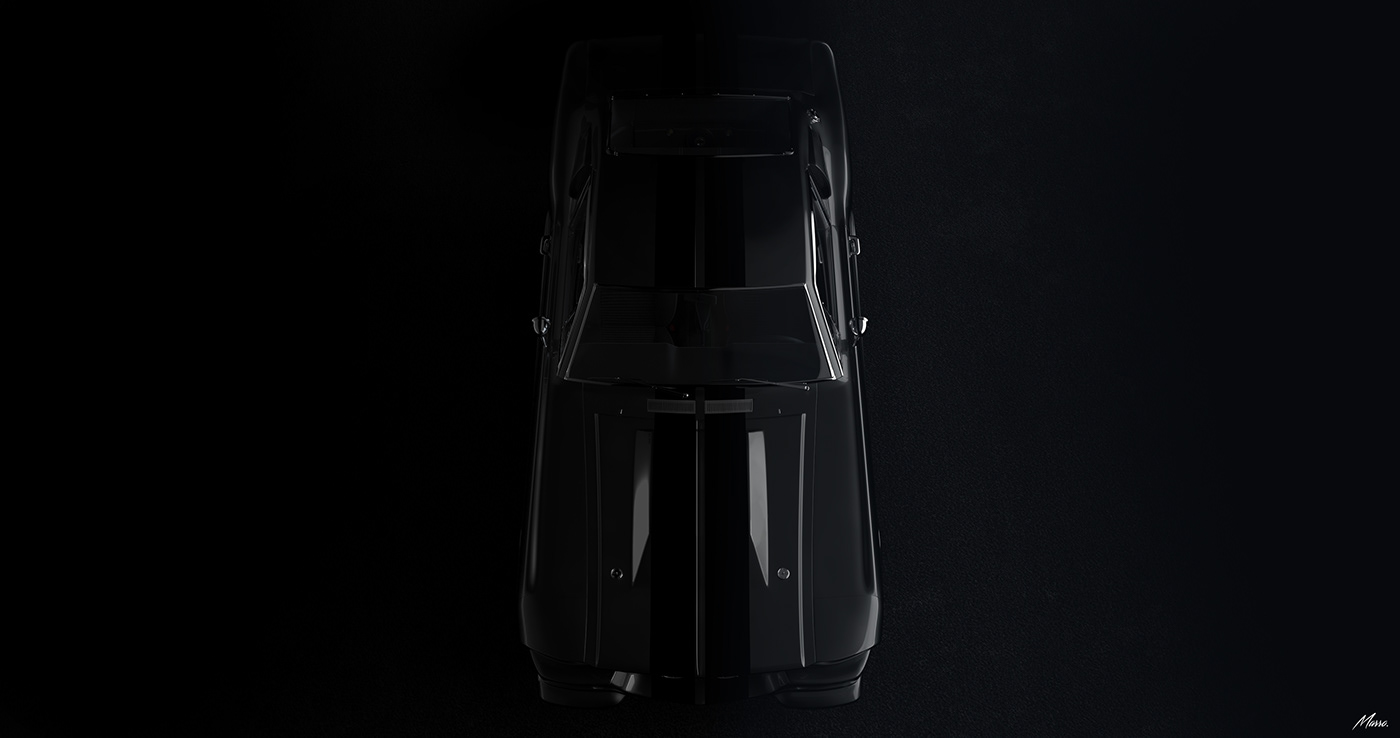
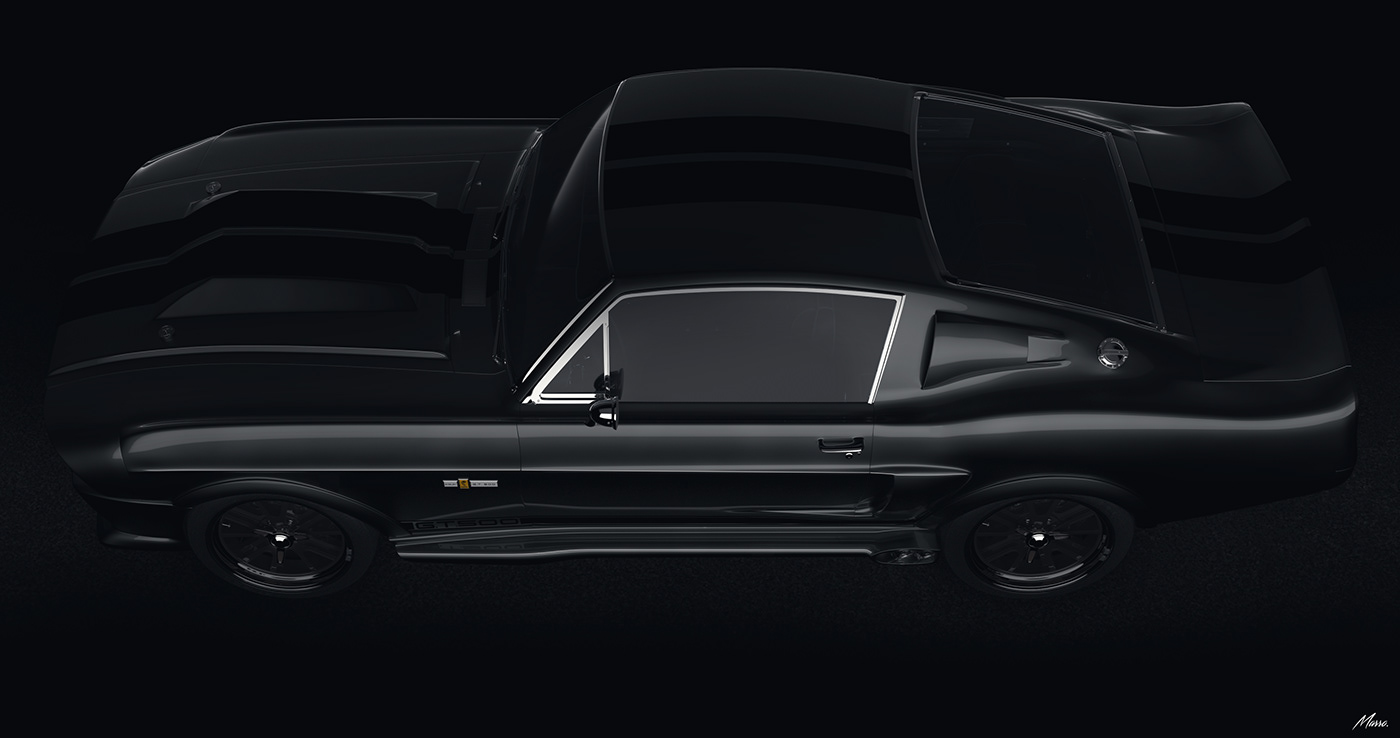
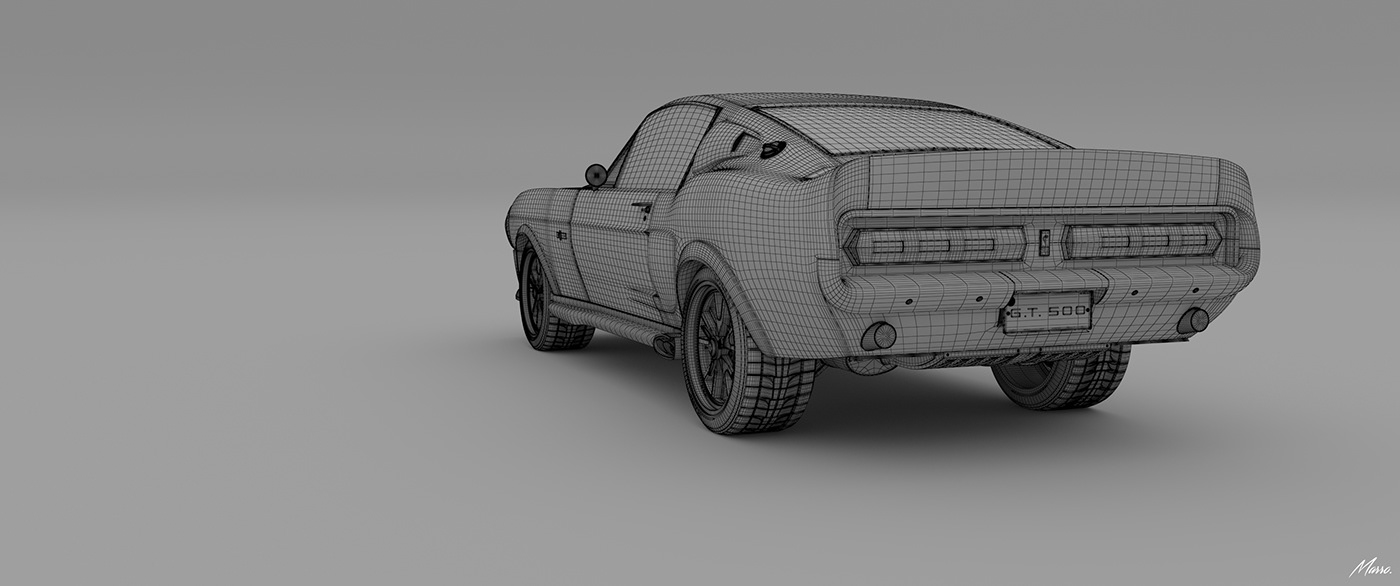
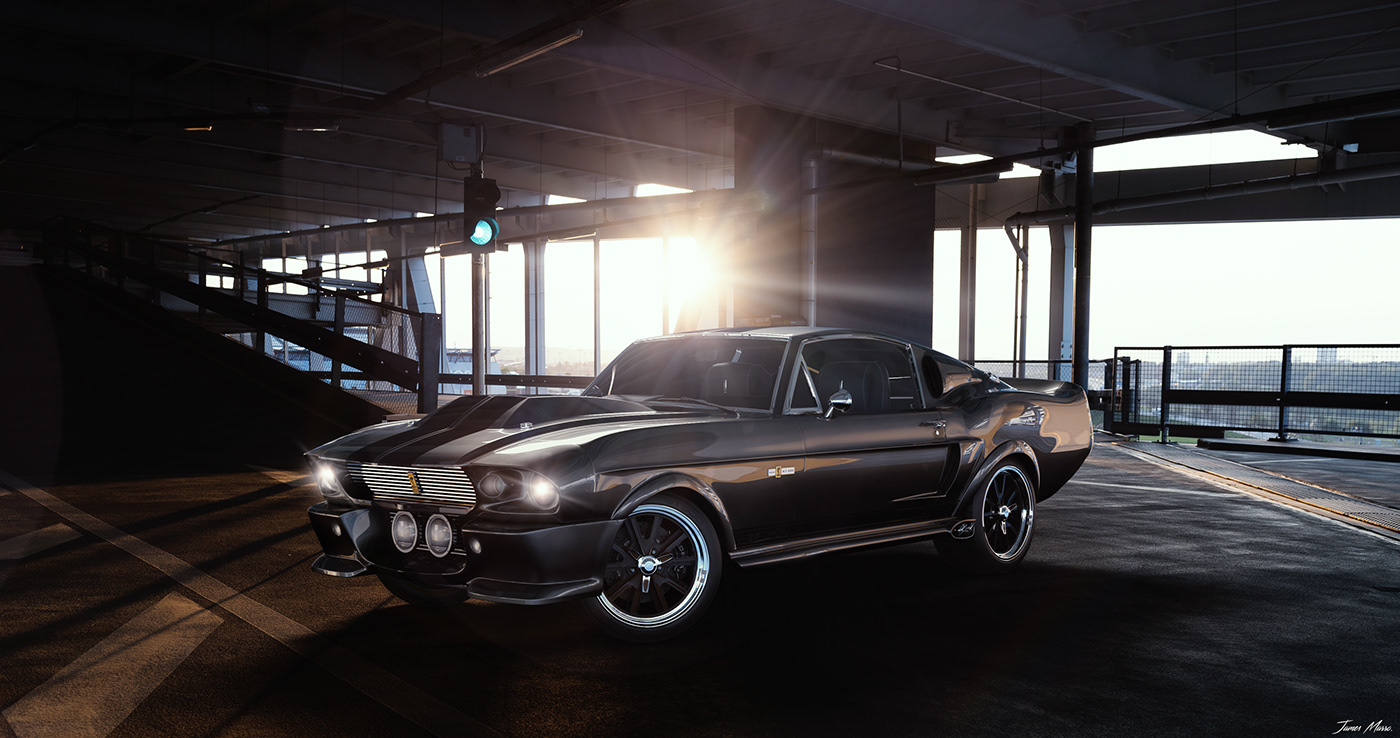
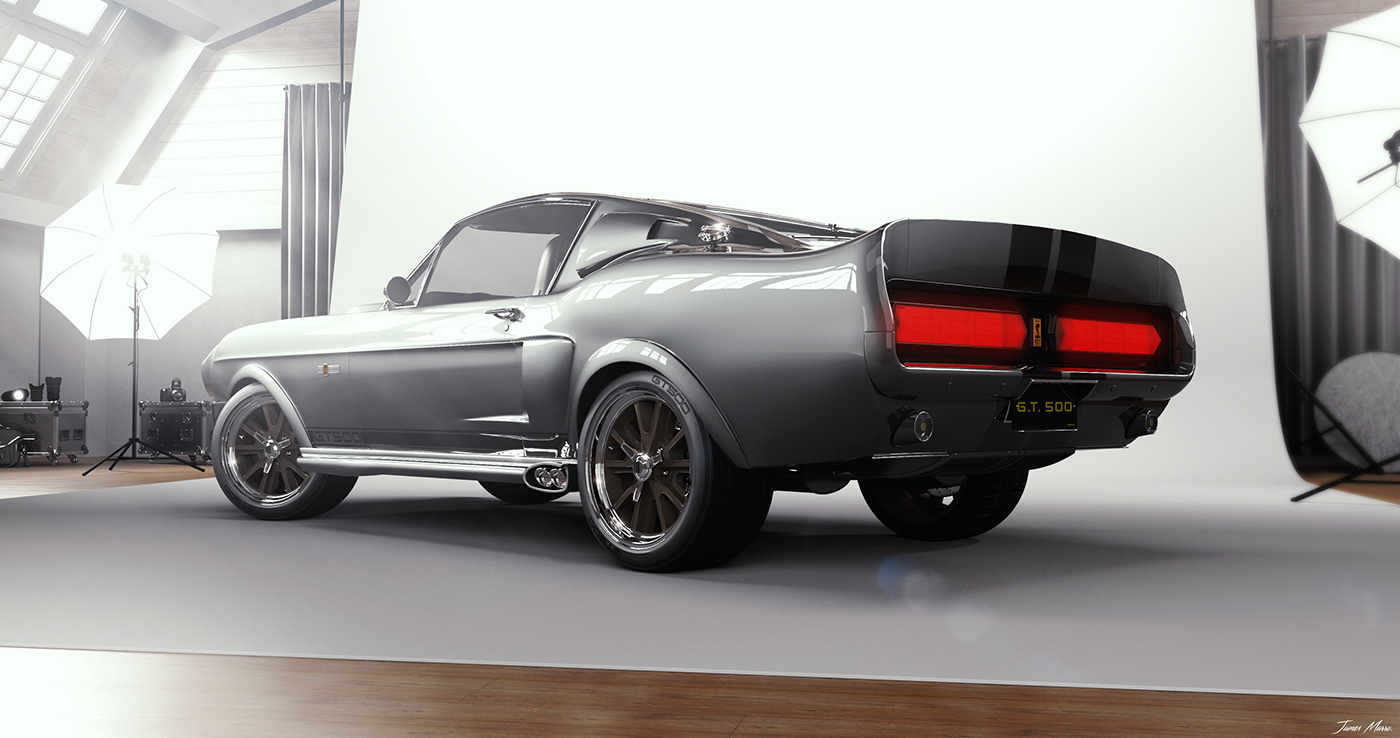
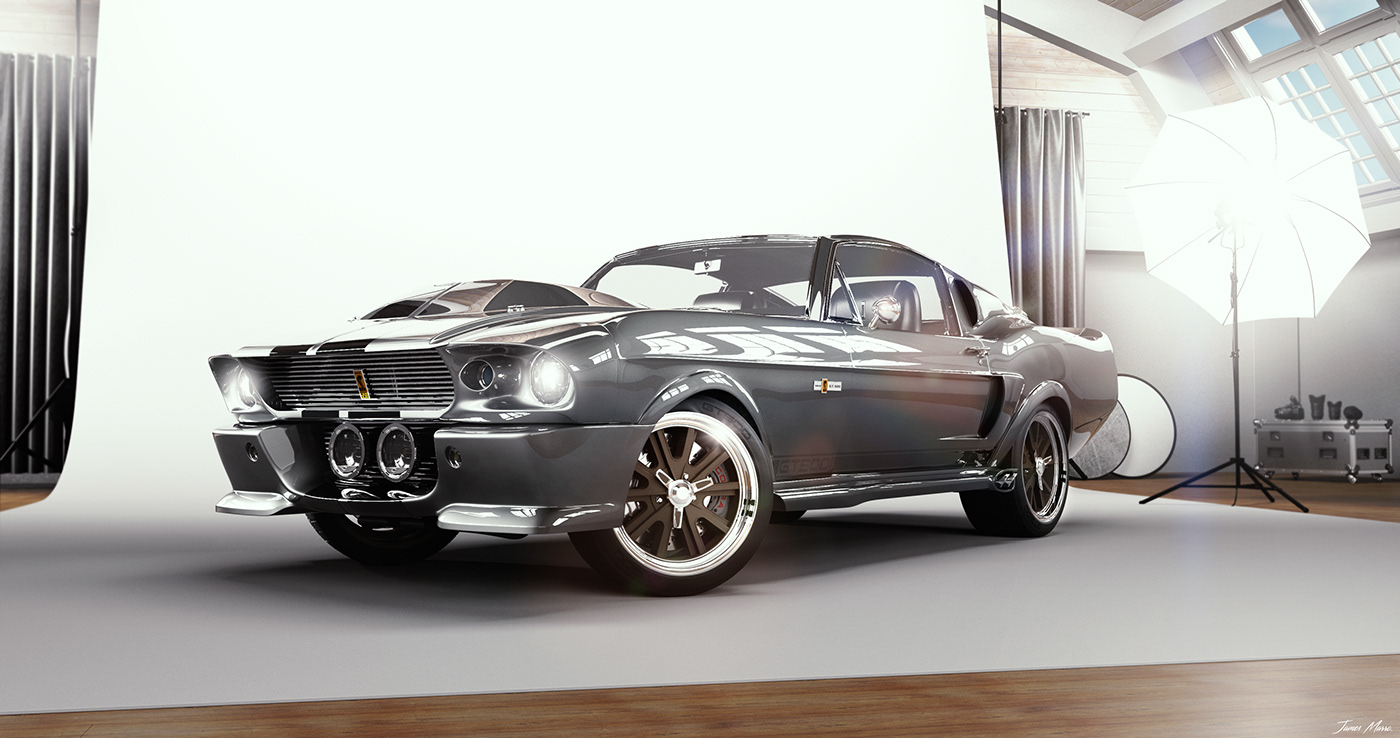
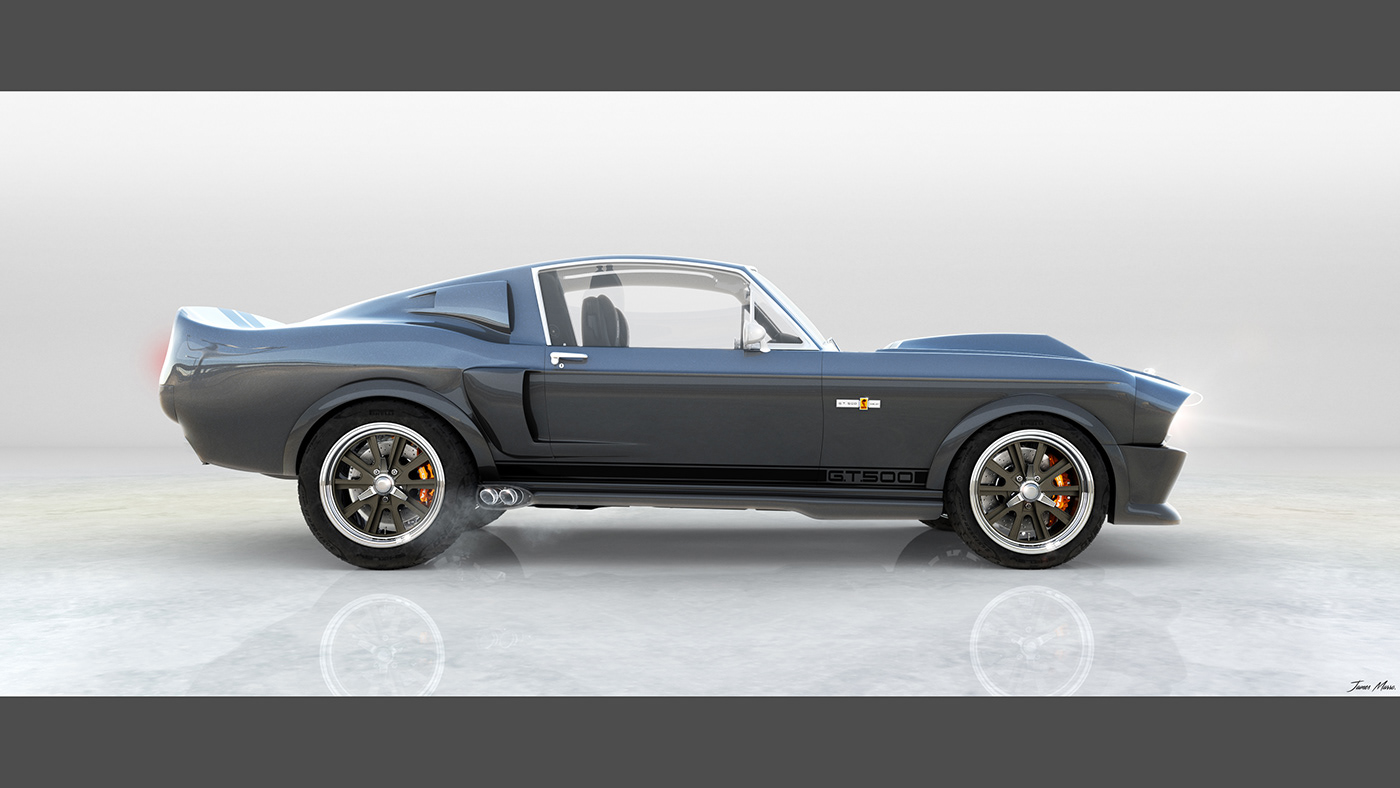
Here is part one of the project in a white studio environment. Part two in a black studio environment can be found in the link below:
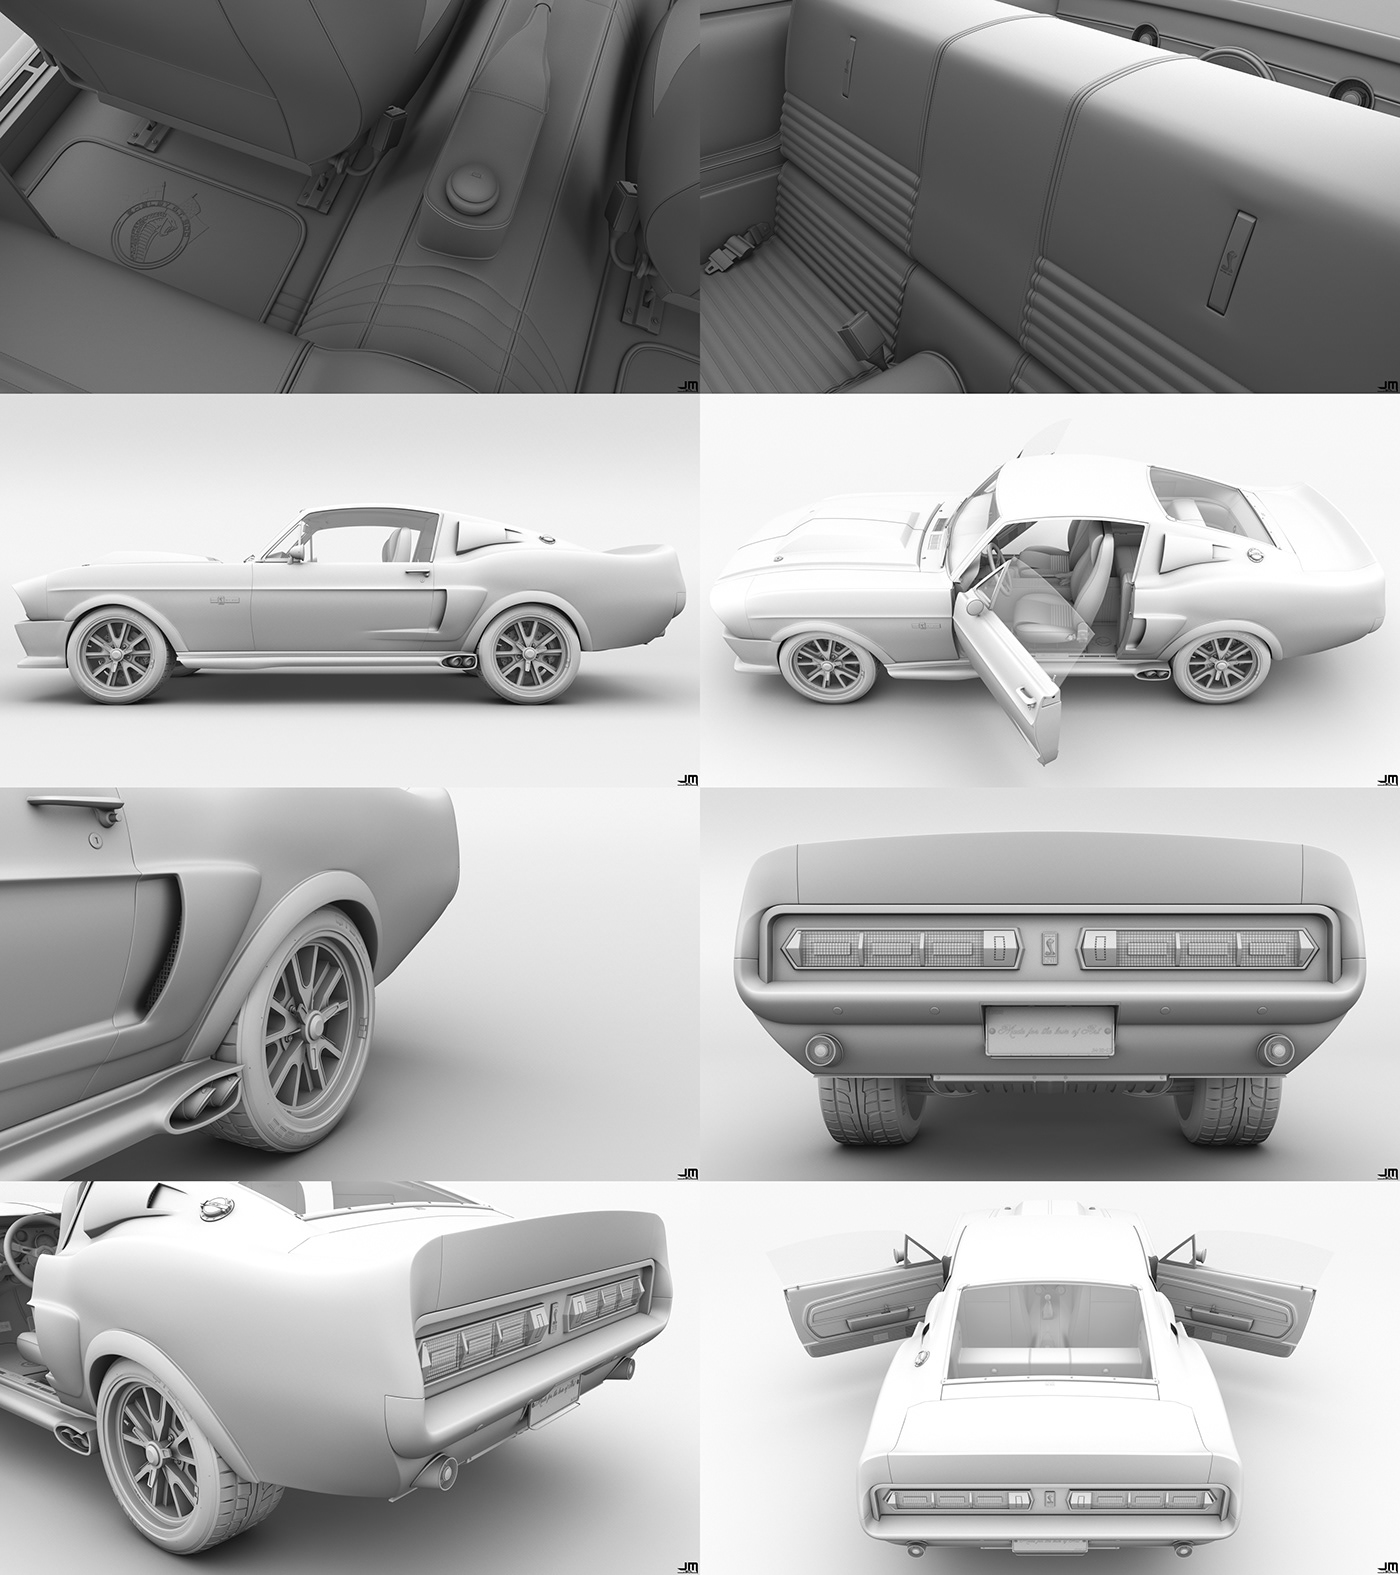
In short, this is a 95% remodel of the car that I made back in 2015 (Exterior) / 2016 (Interior). A Lot smaller details were added to this revision of the car, as well as a more dedicated chassis.
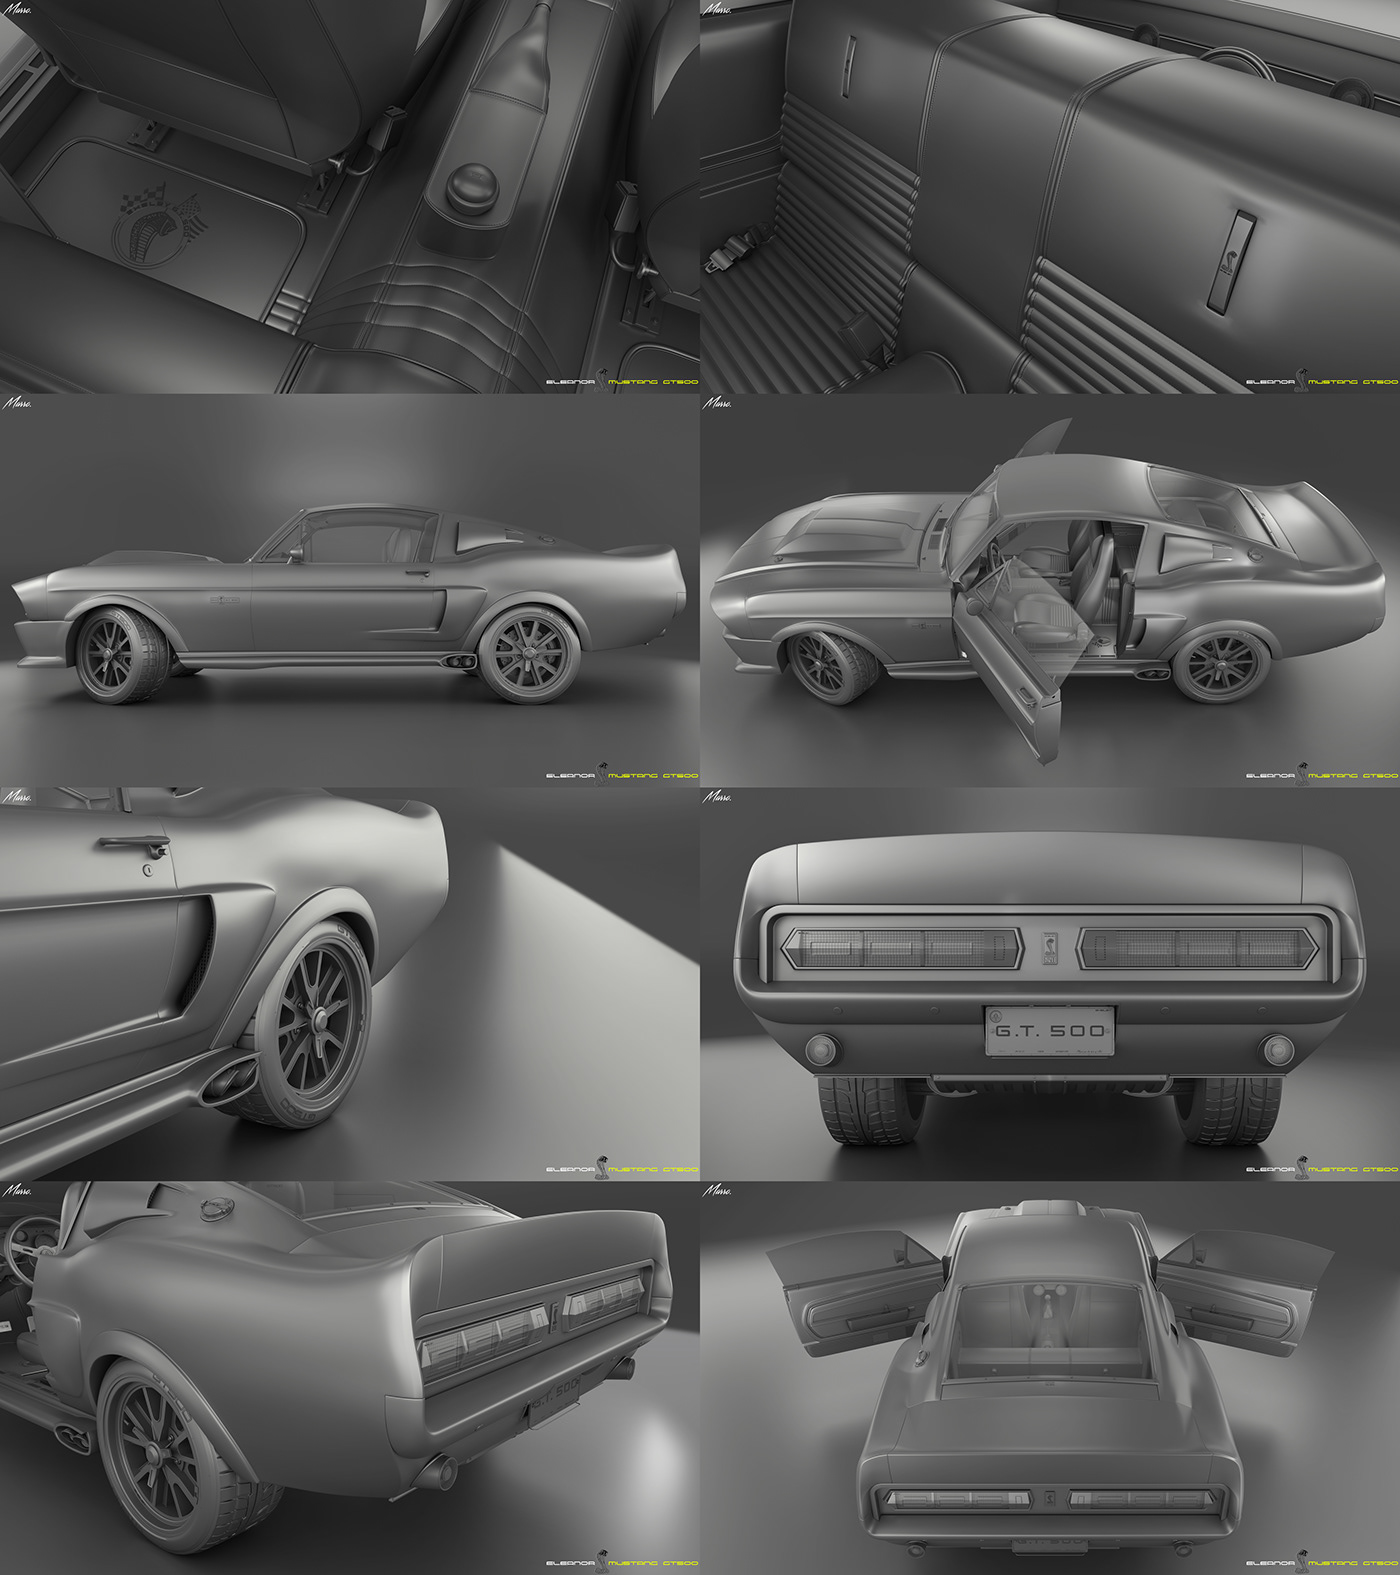
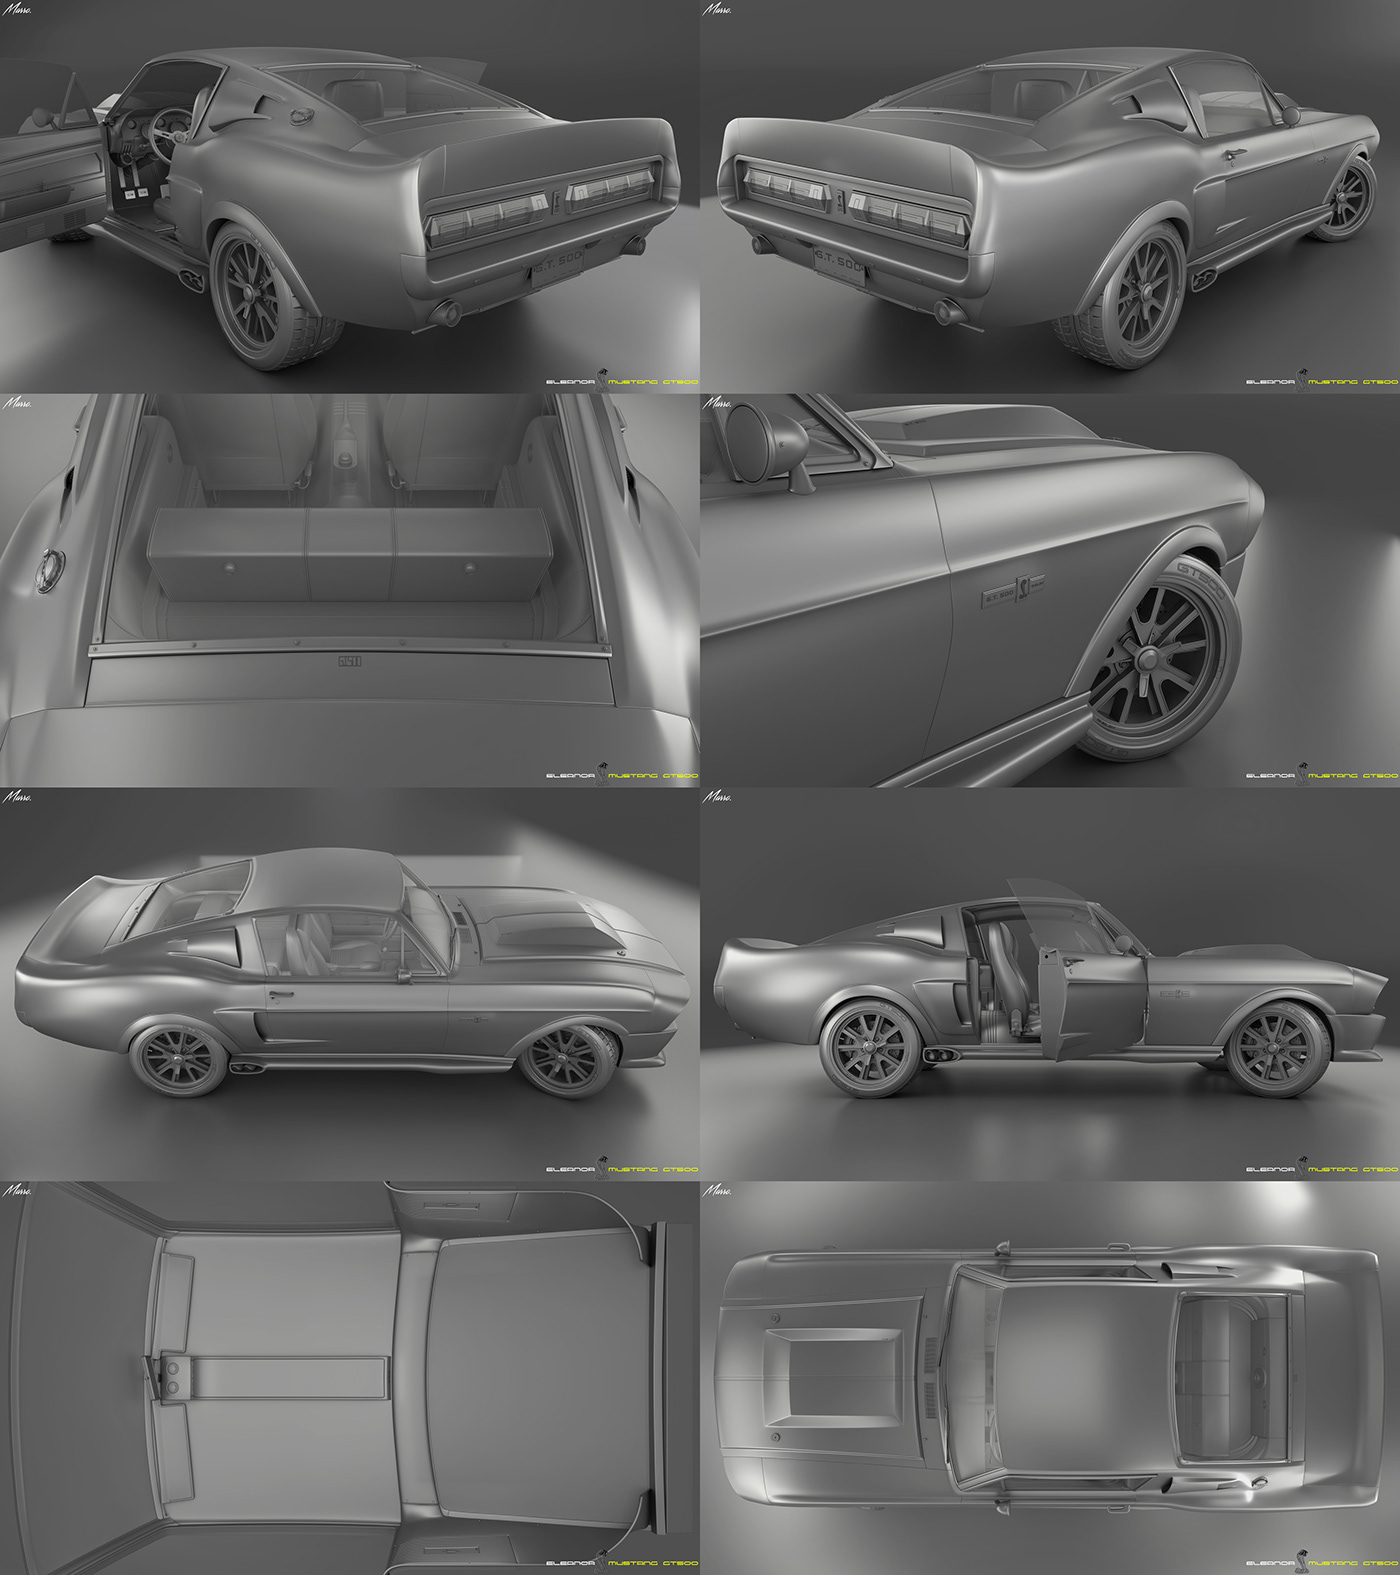
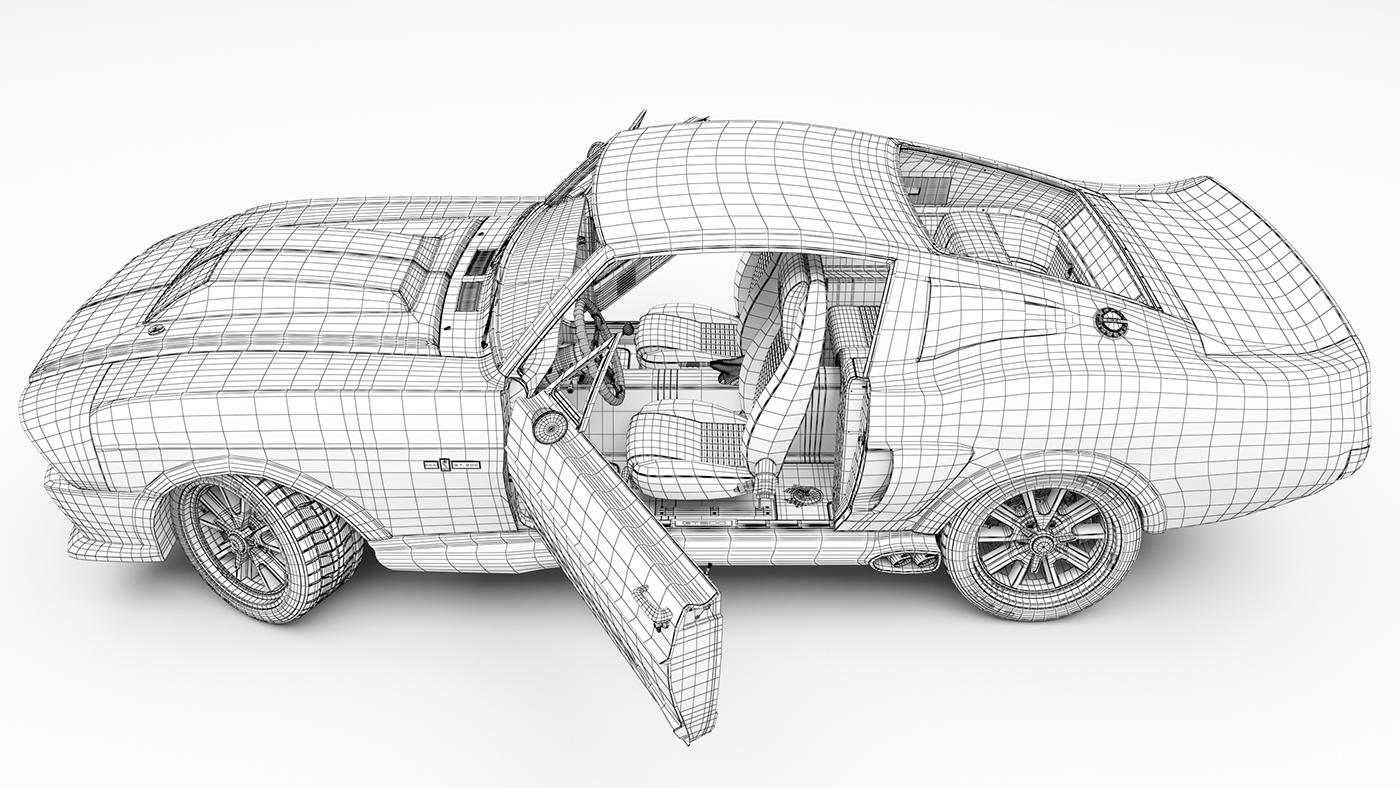
For that, I took a CAD car and began to split it up into sections. After, I began to move parts about and add in my own details in order to not only cover the entire floor; but also to then not intersect with any of the interior of the model. As you can imagine, this was a challenge to get right for both fitment and scale.
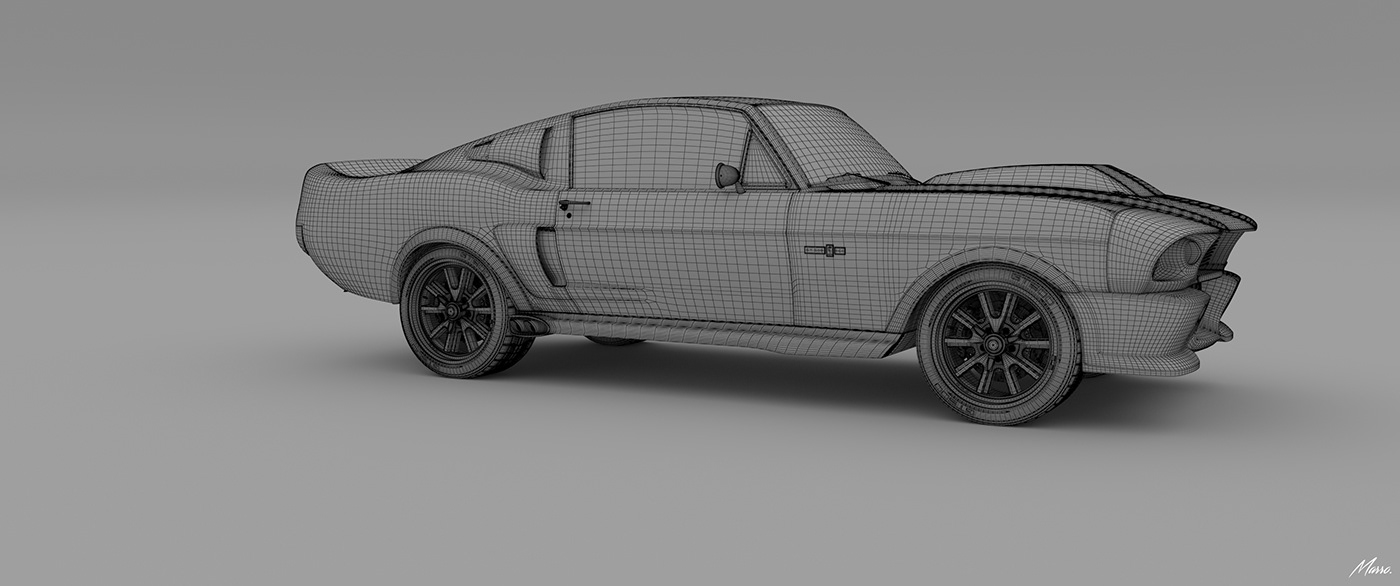
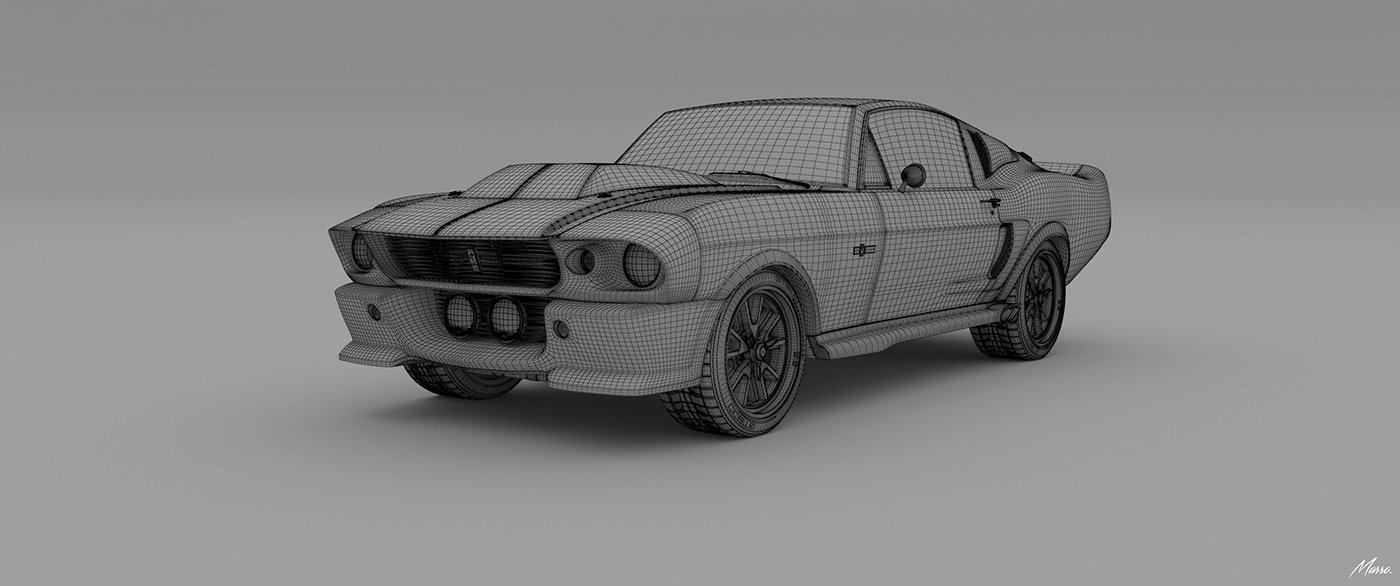
You can play 'spot the difference' when looking at the older car, halfway down the project. But beyond the added details and addition of a chassis; the biggest improvements needed, were the body panel shapes, as well as my wider track of the alloys.
I wanted this version of the car to have a bigger set of rear tyres; and much wider track than the movie car. That way I can really achieve that squatted muscle car look. So in order to make that work, I really had to look into the wheel arch shapes and placement of them for it to look natural.
All of this was created in Maya, rendered in V-Ray and retouched in Photoshop. I used Seams Easy to create my stitching, which is a free plugin that can be found here:
Or you can purchase what I originally used back in the day, which was called Stitch:
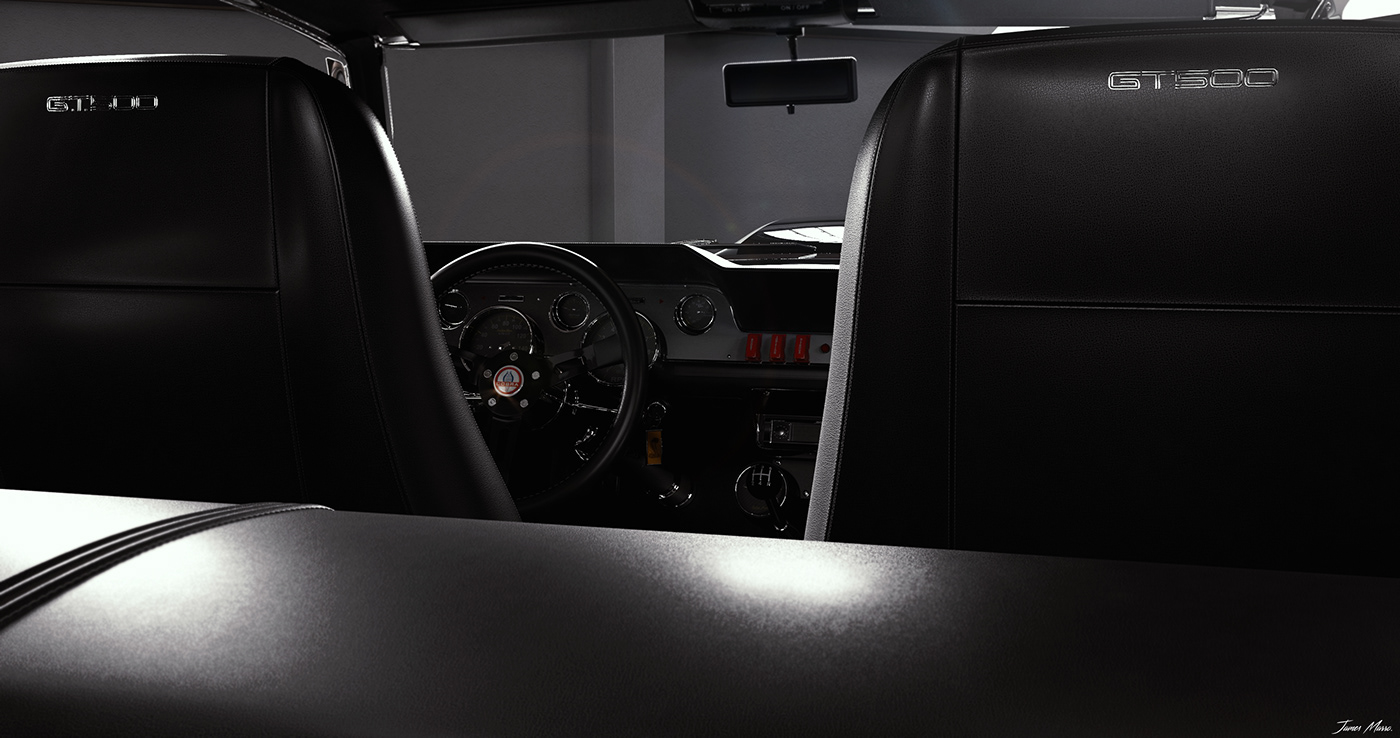
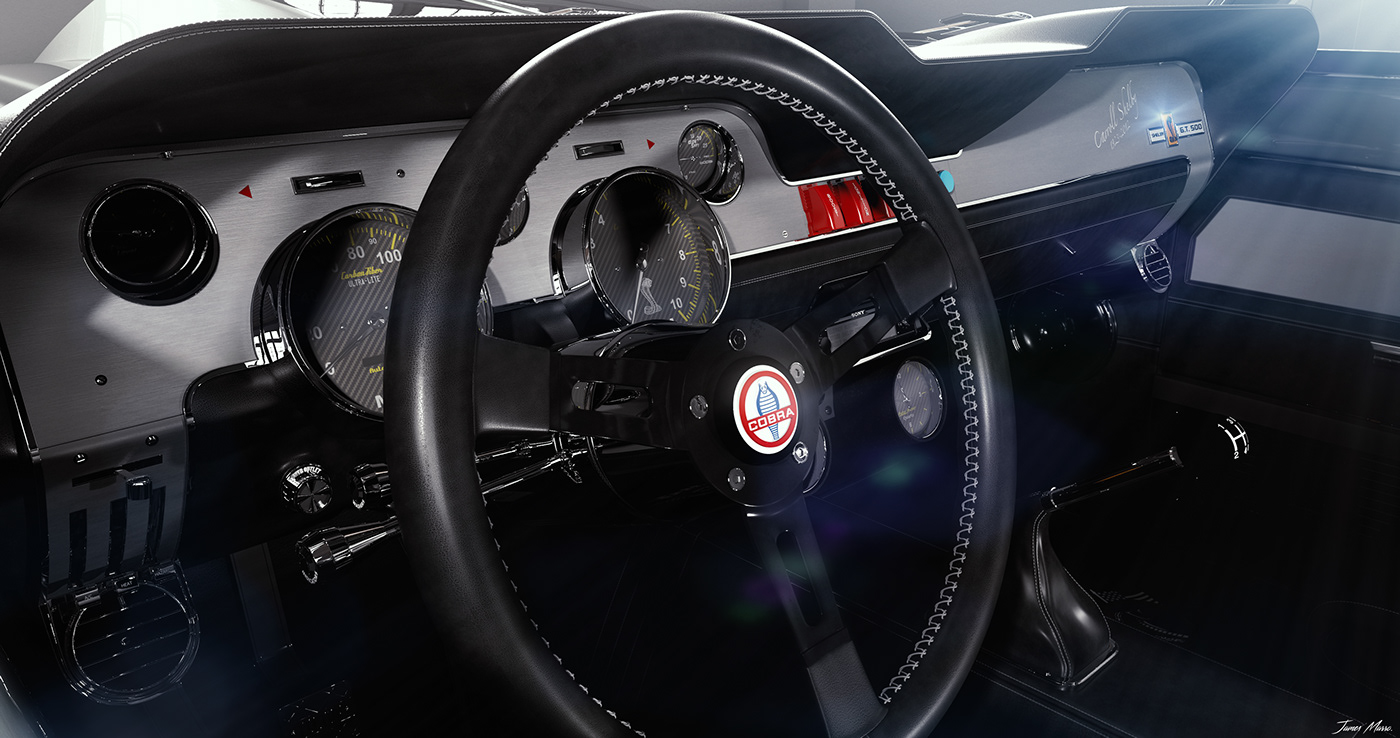
Now if you did not know, the Eleanor Mustang is a movie car, from the film 'Gone In 60 Seconds'. A car that was never manufactured by Ford themselves. Therefore the design of this car is a mix of many cars that you will see online, as they're all essentially a replica of a movie car. So I took design ques from many places, mostly from the car made by a company called Wheels & More, certainly for the interior modelling.
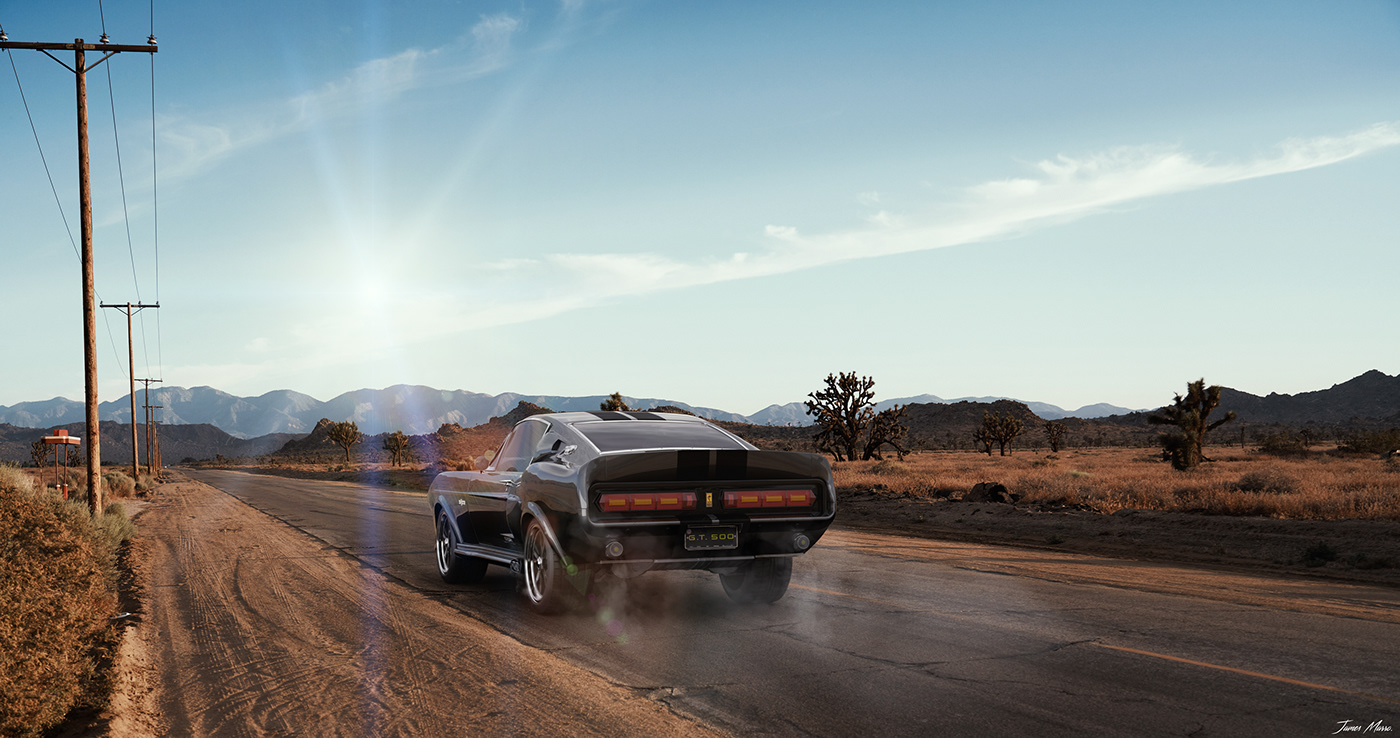
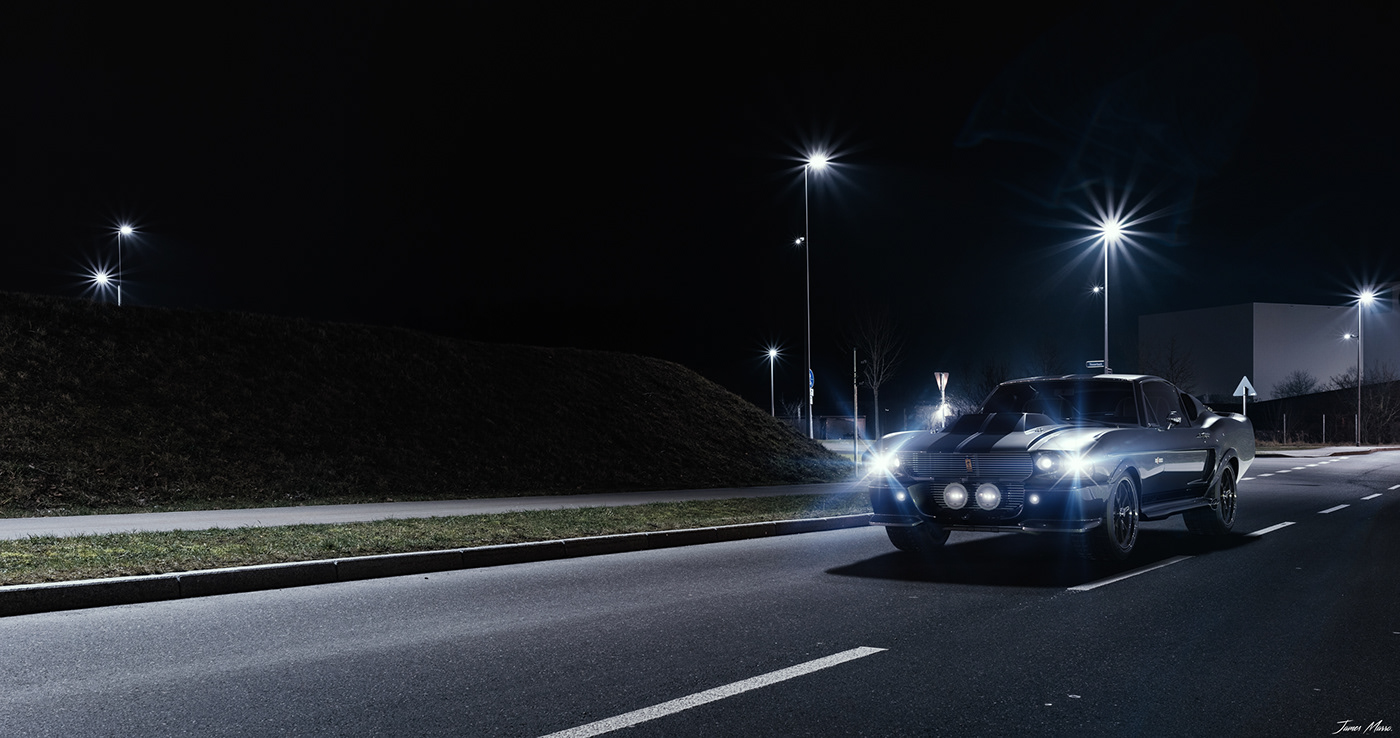
You will see below that I have kept angles and post work fairly simple. I did this because I mostly want to show off my modelling ability within this project, as I plan to use this for other work, later to come.


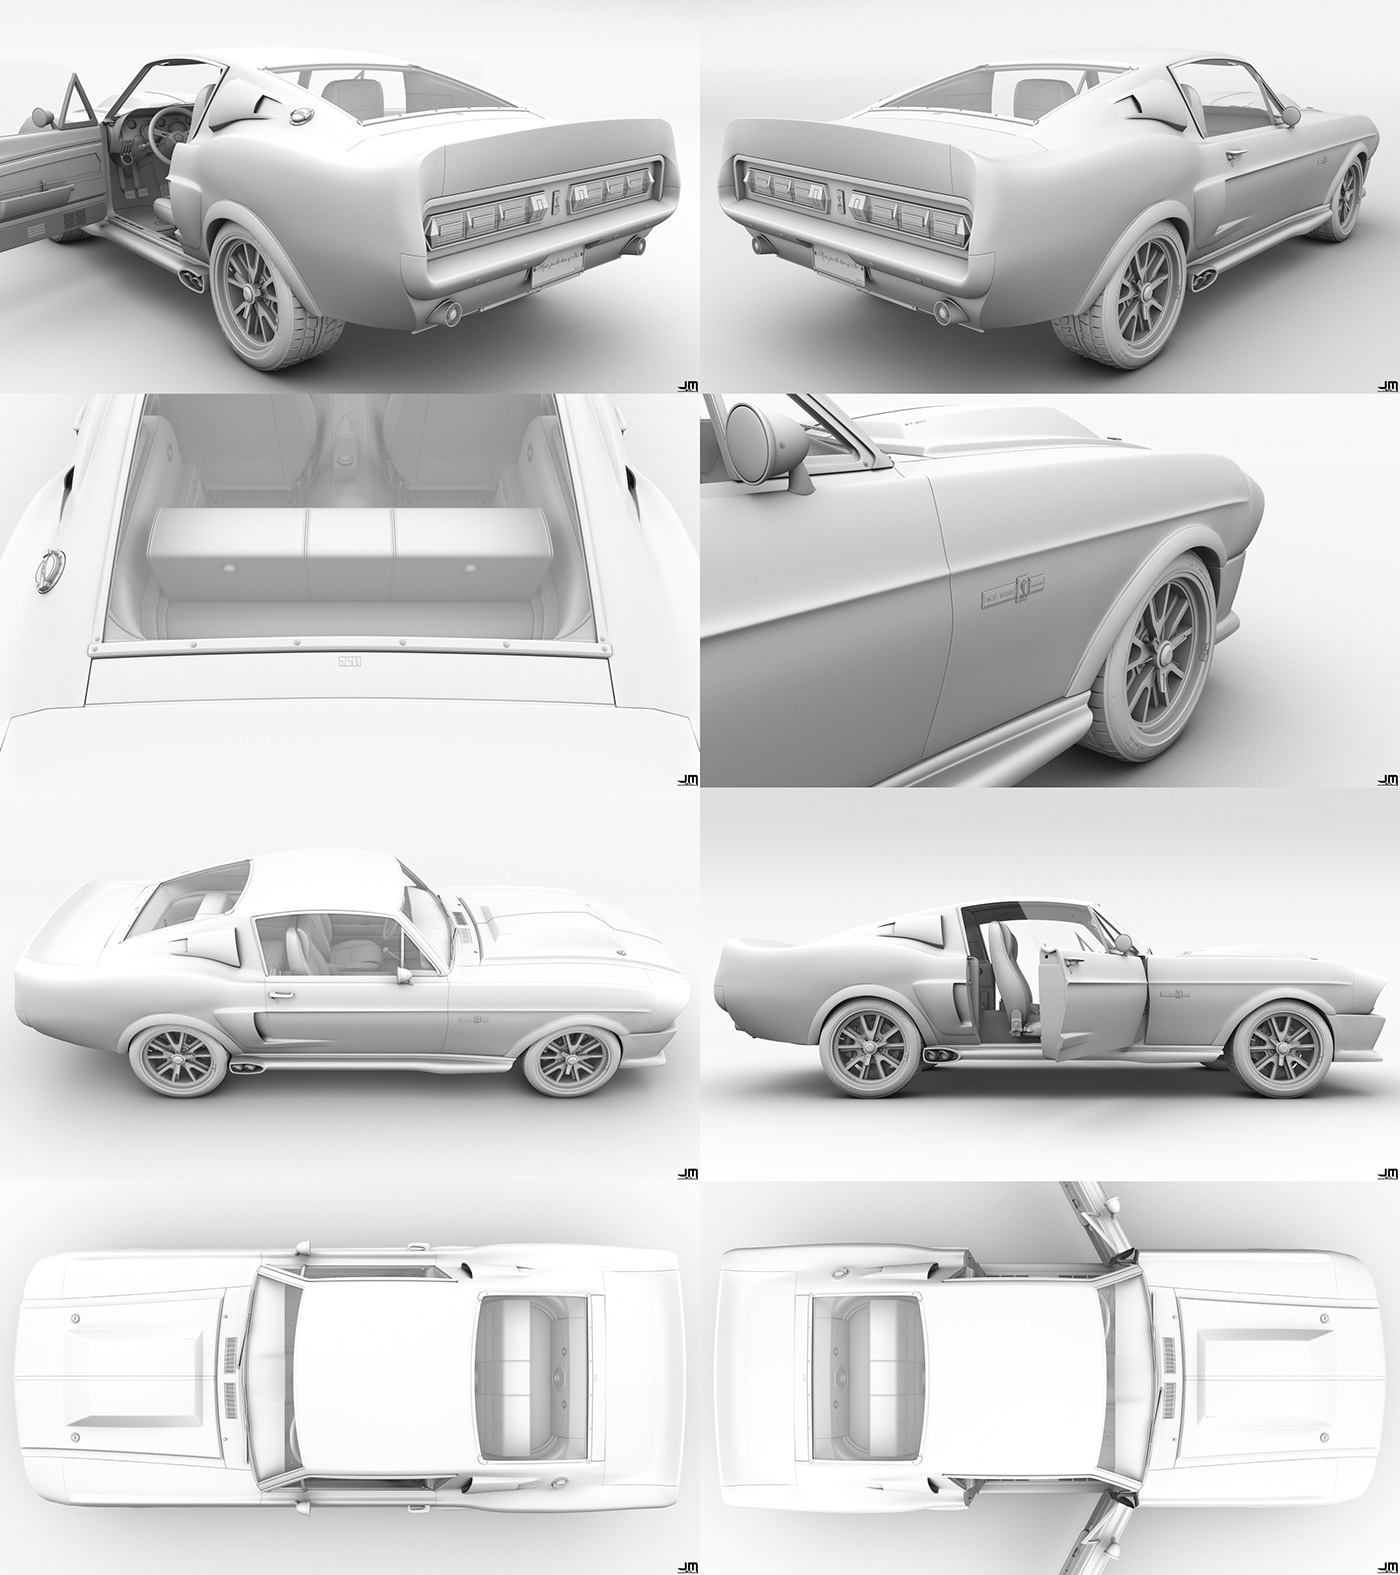
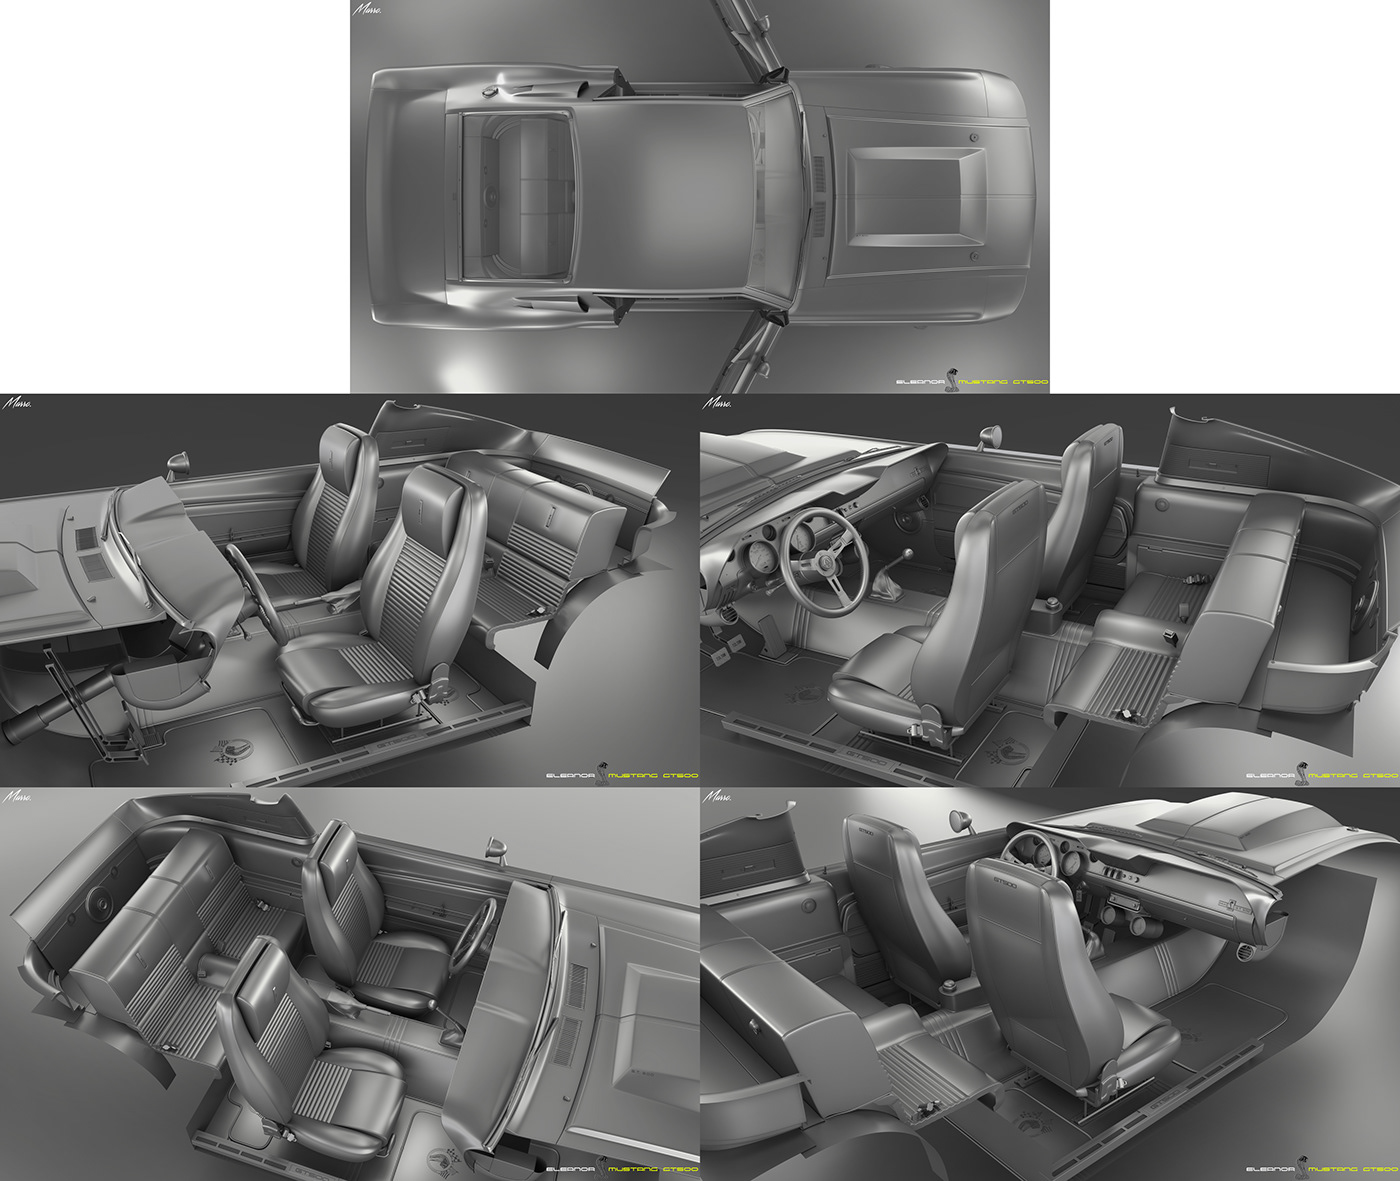
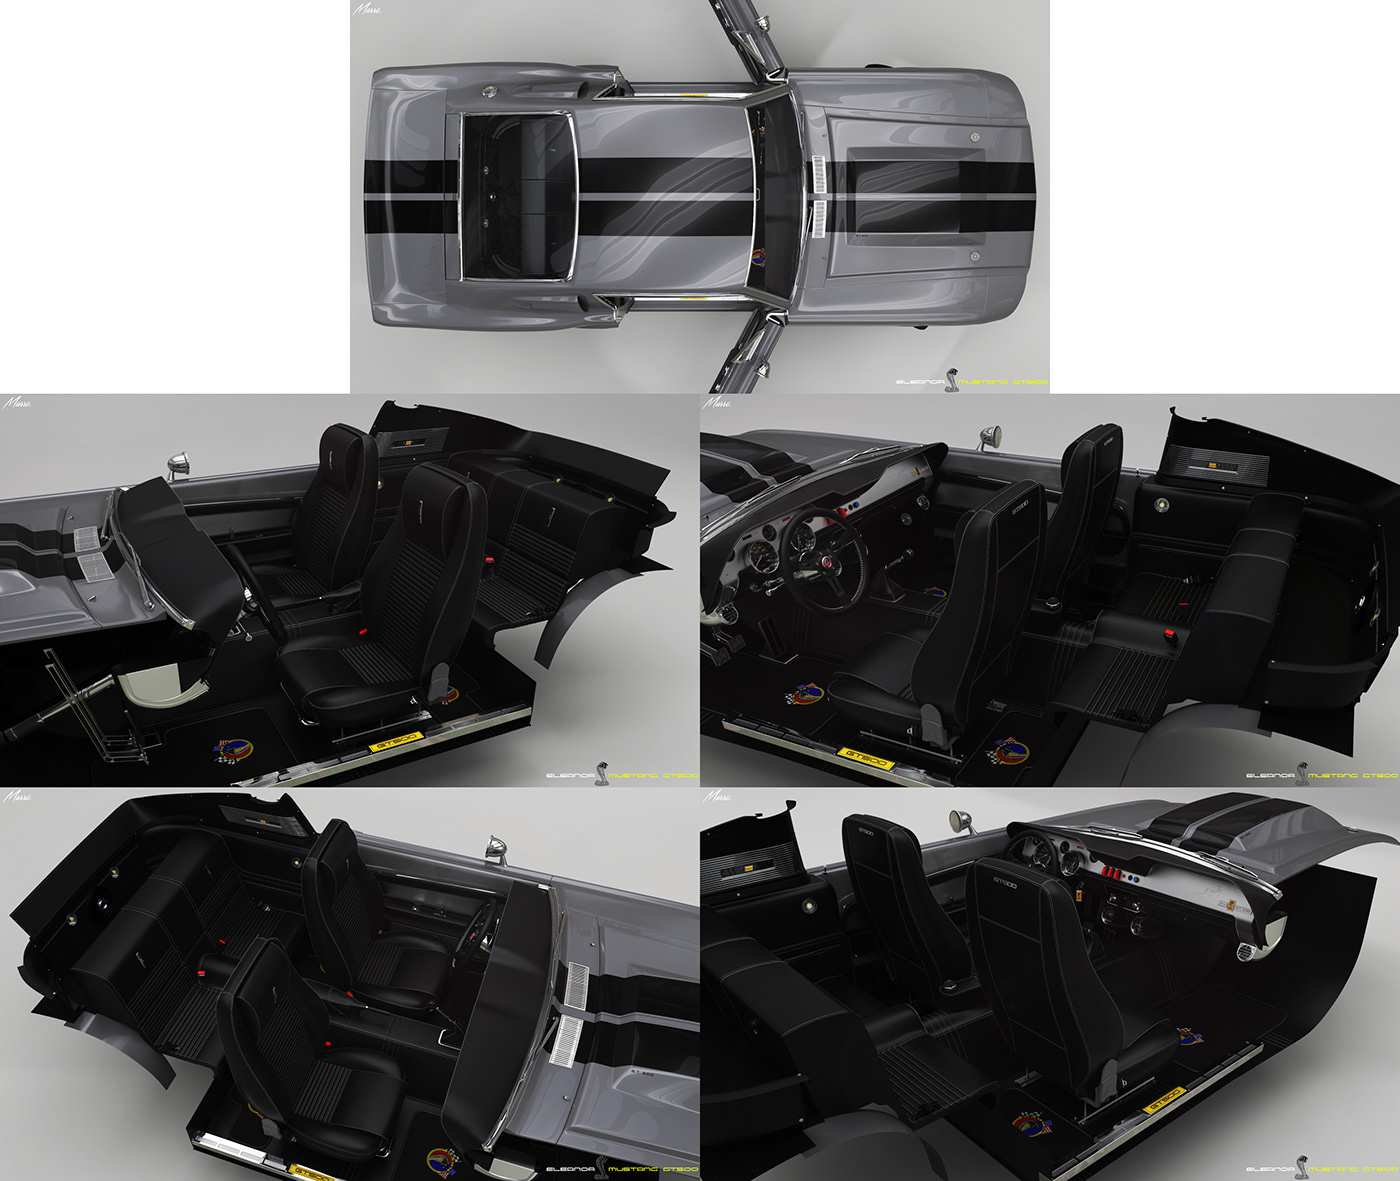
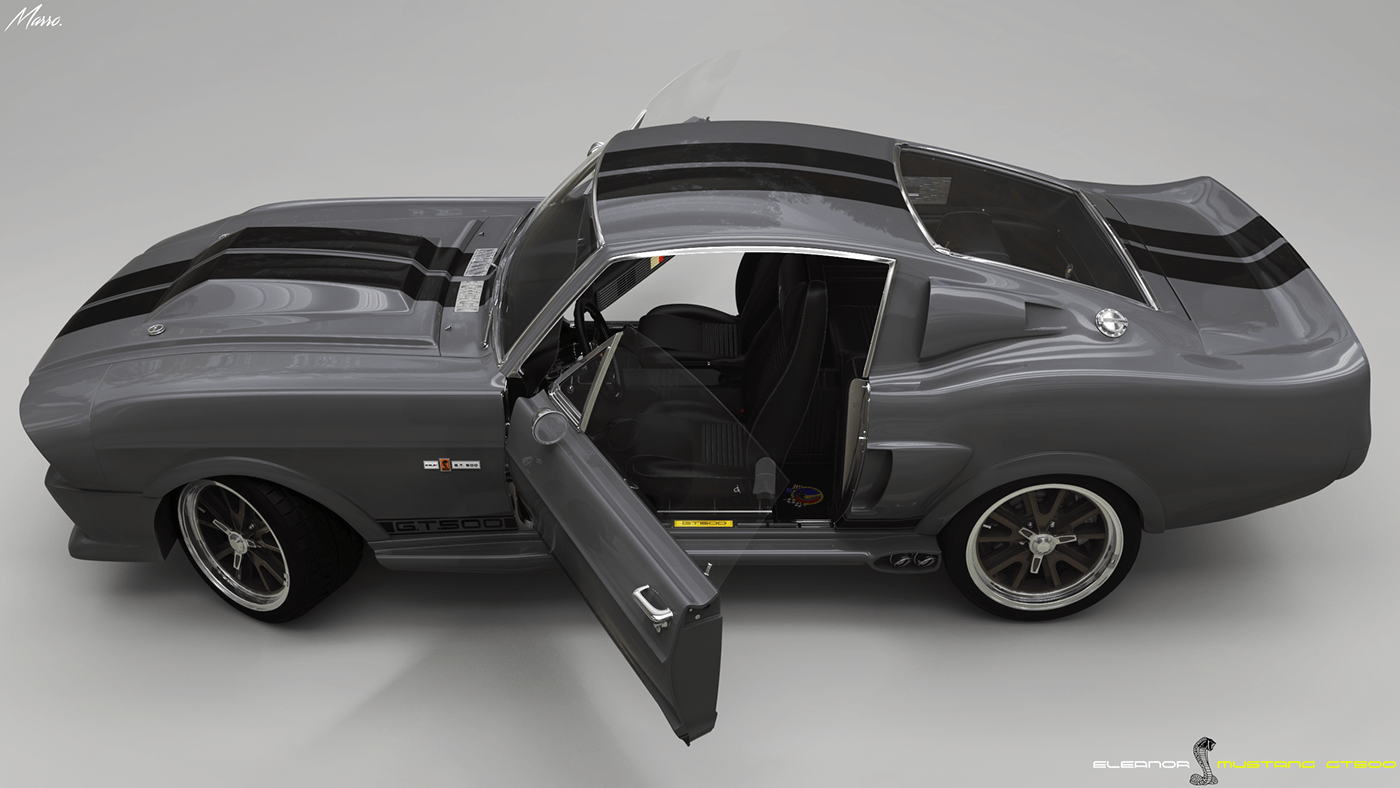
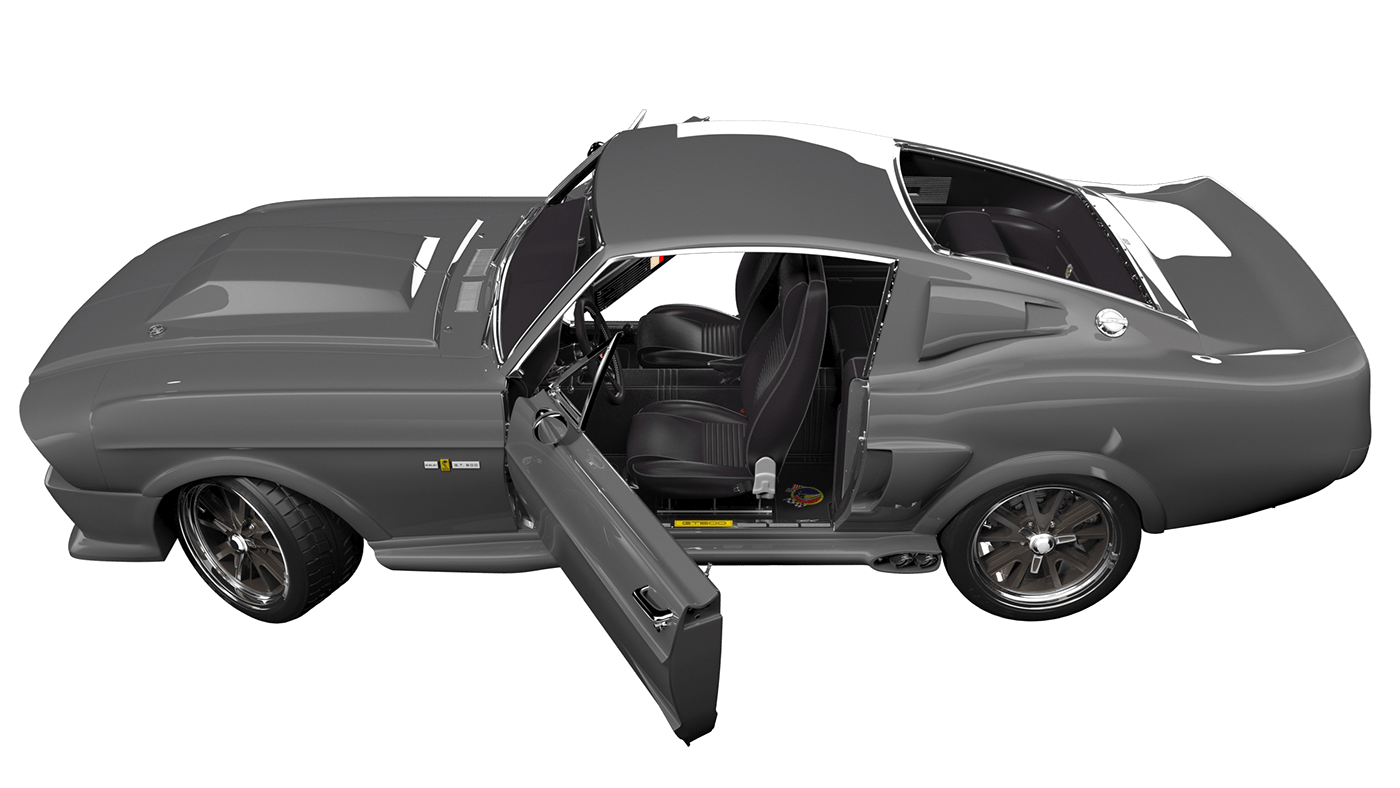
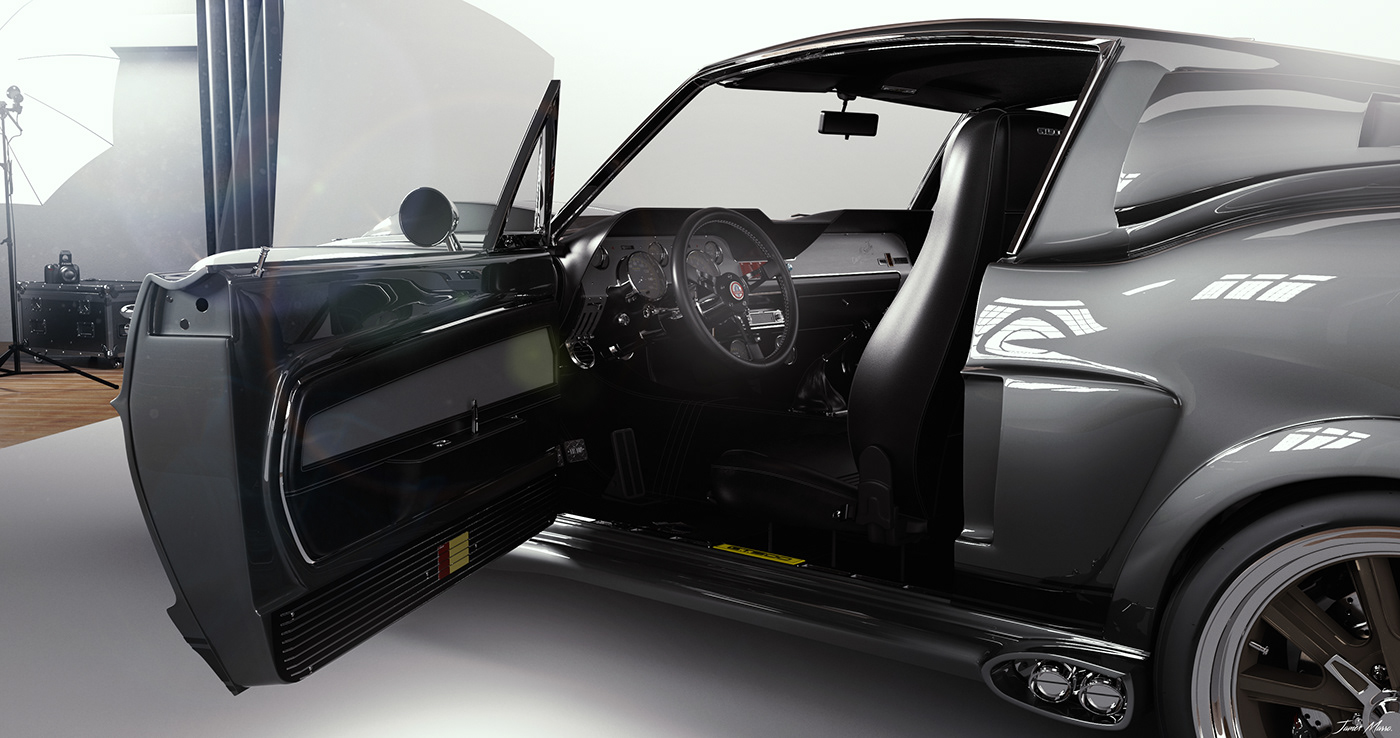
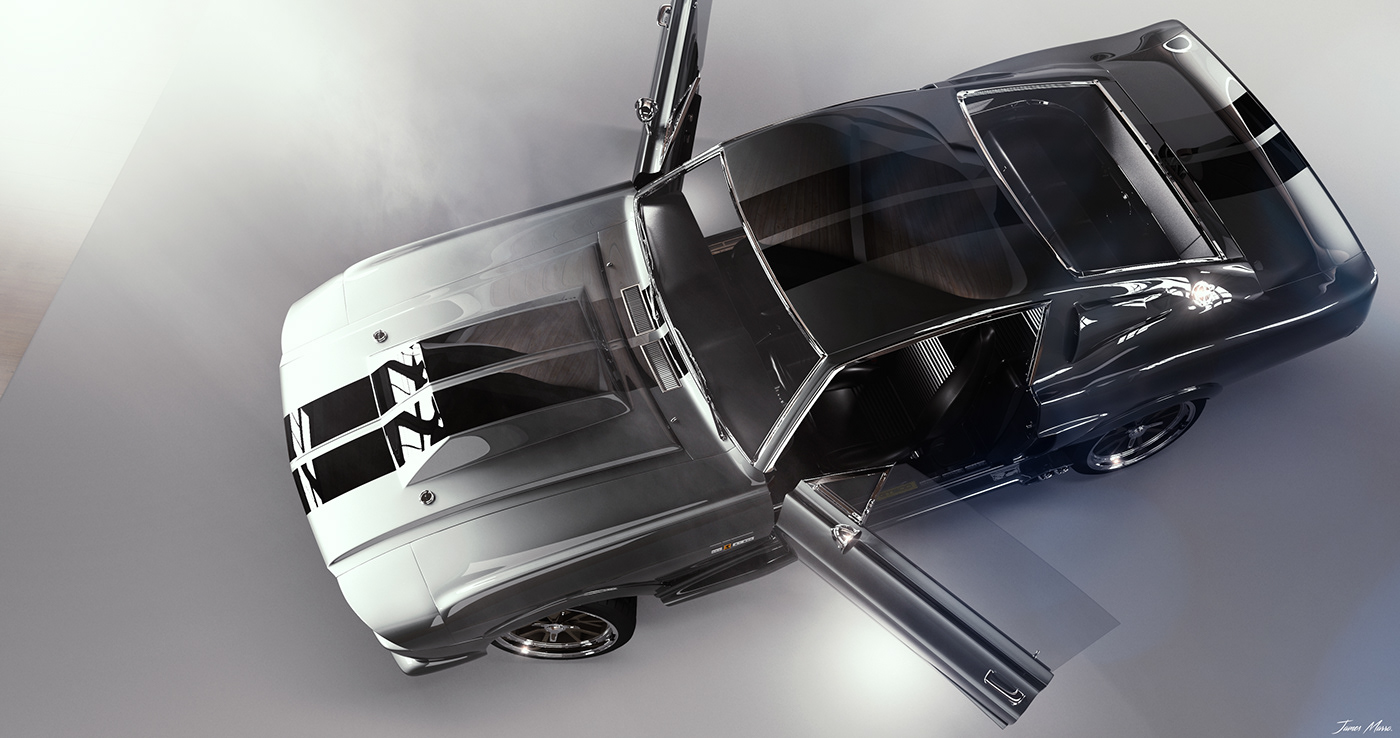
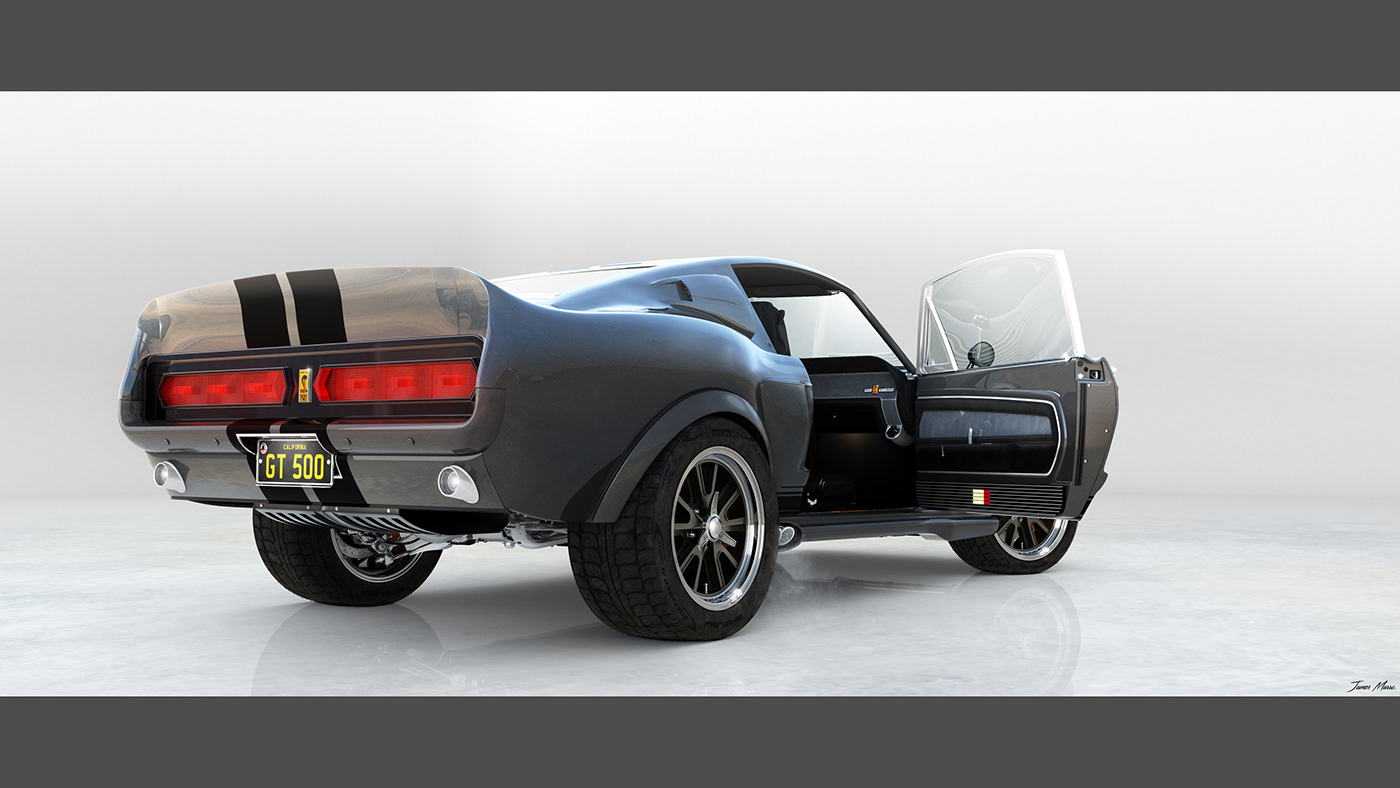
You would have noticed from the render above, that the doors fully open, revealing all of the components that would normally be covered up. This was not too bad to revisit for modelling, as I did most of the details first time around.
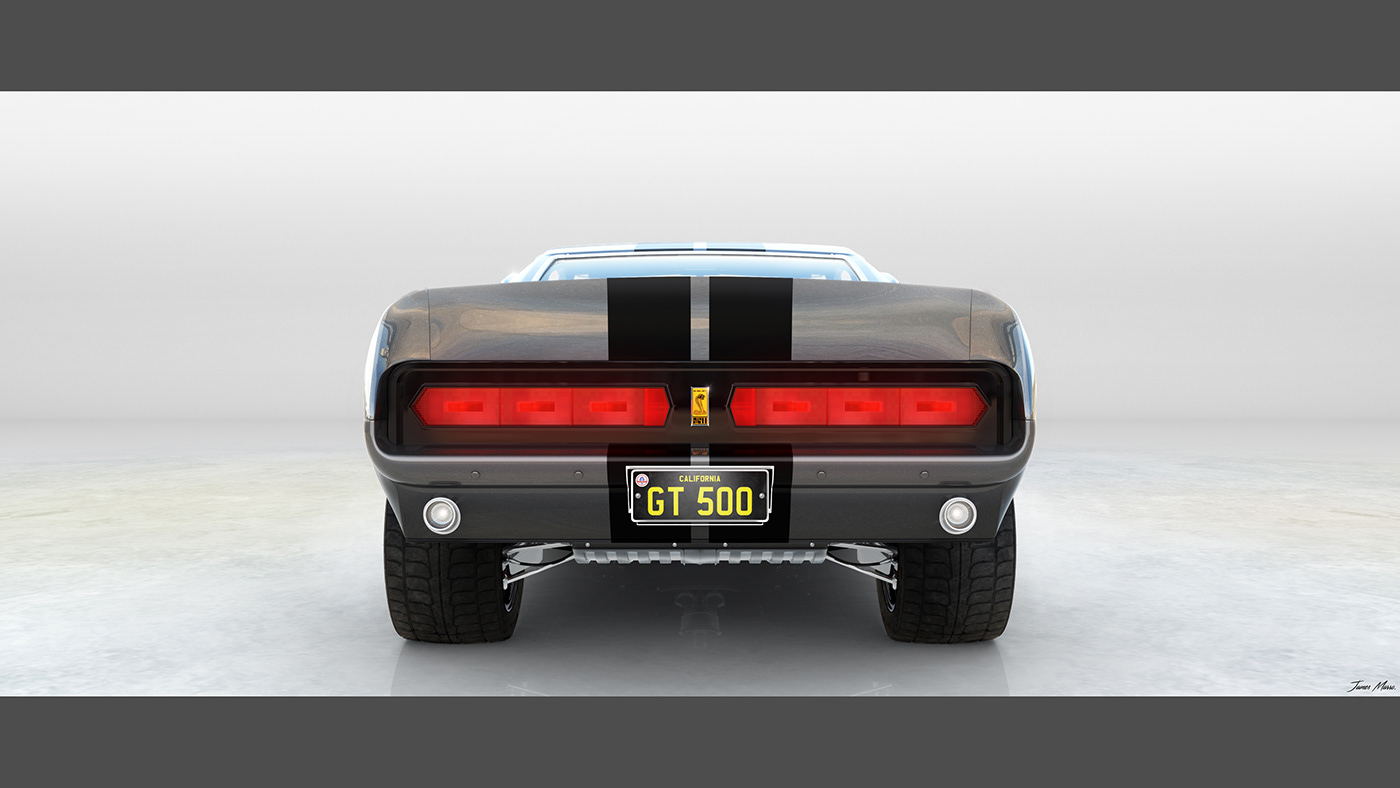
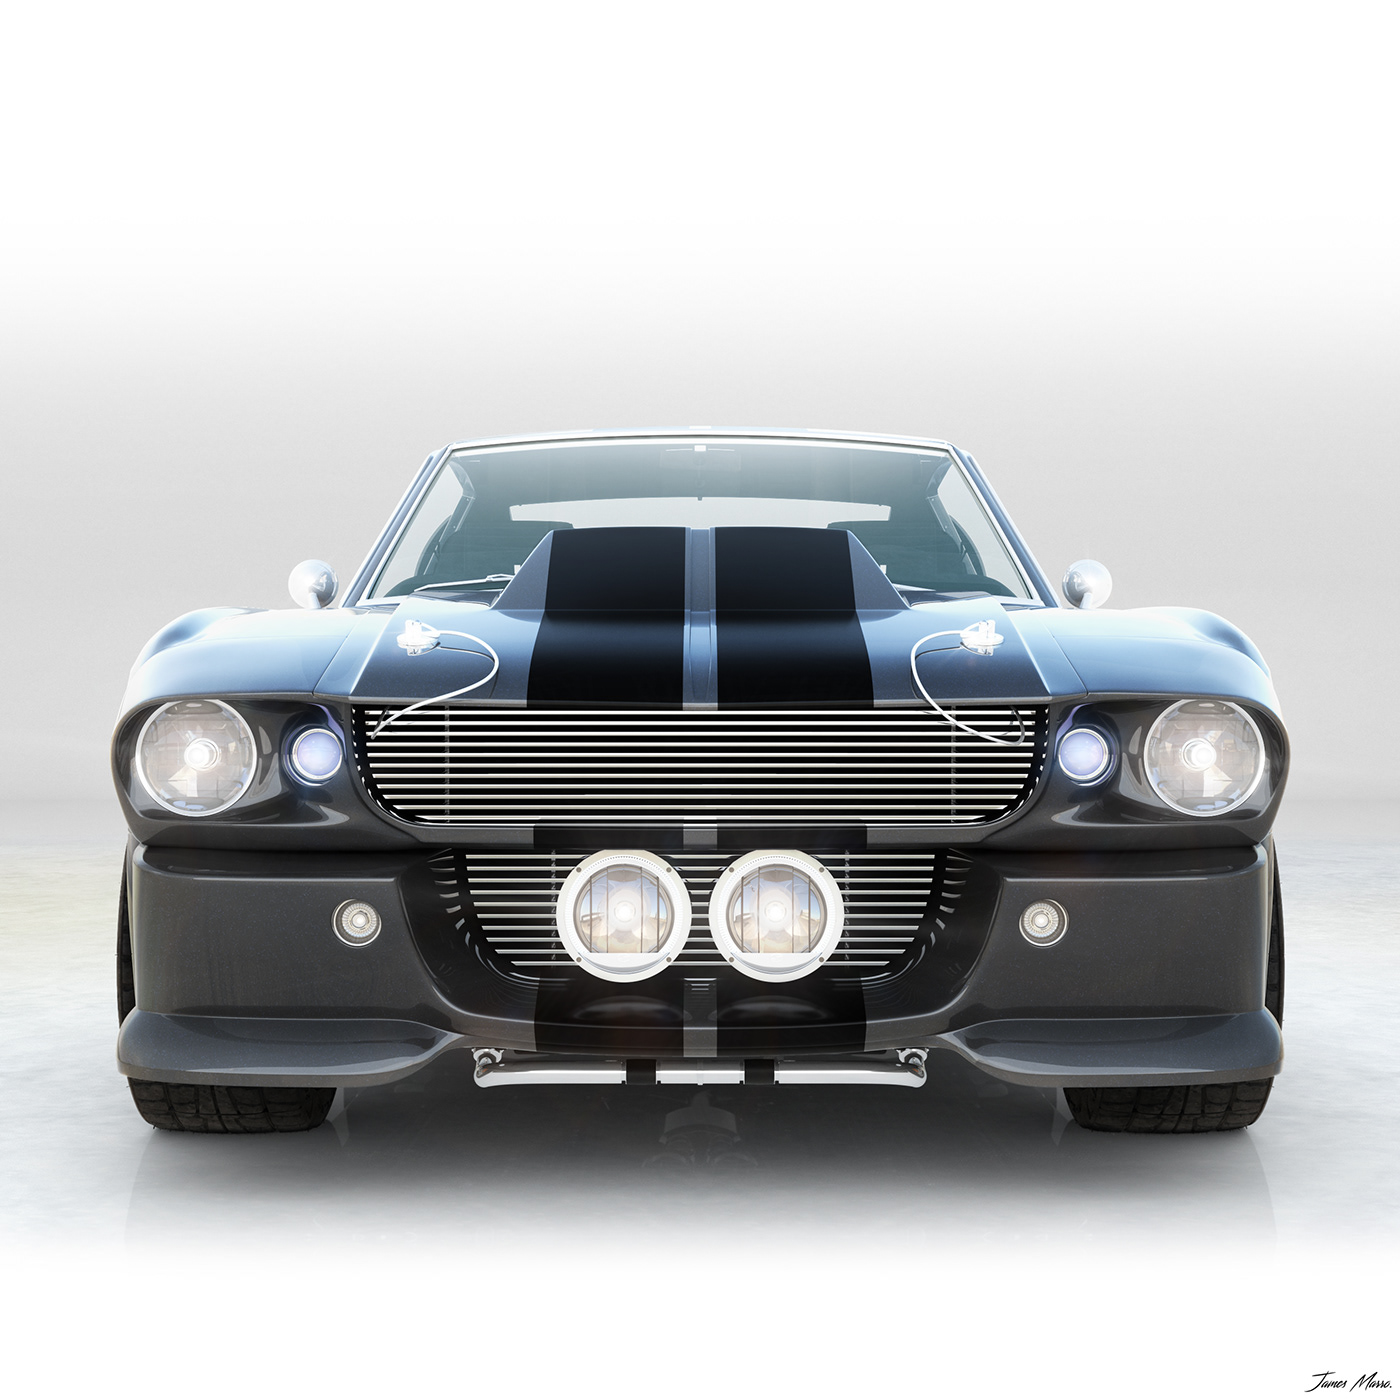
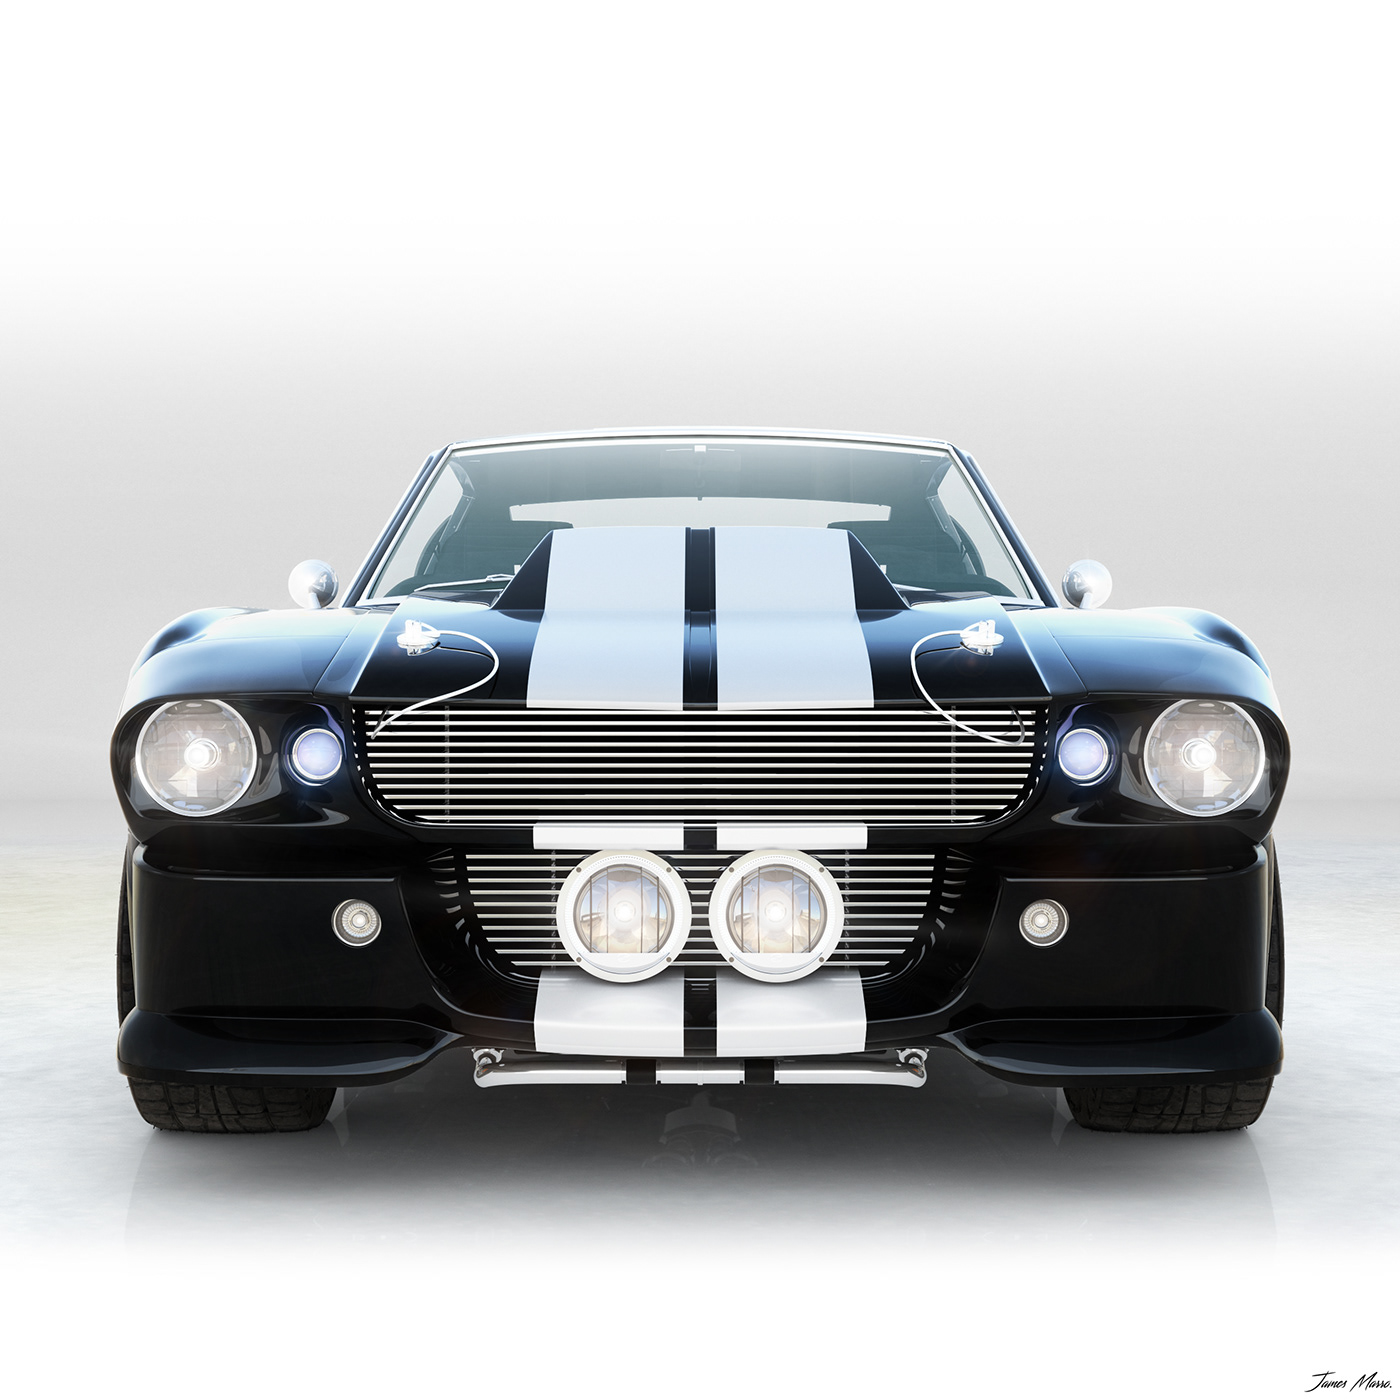
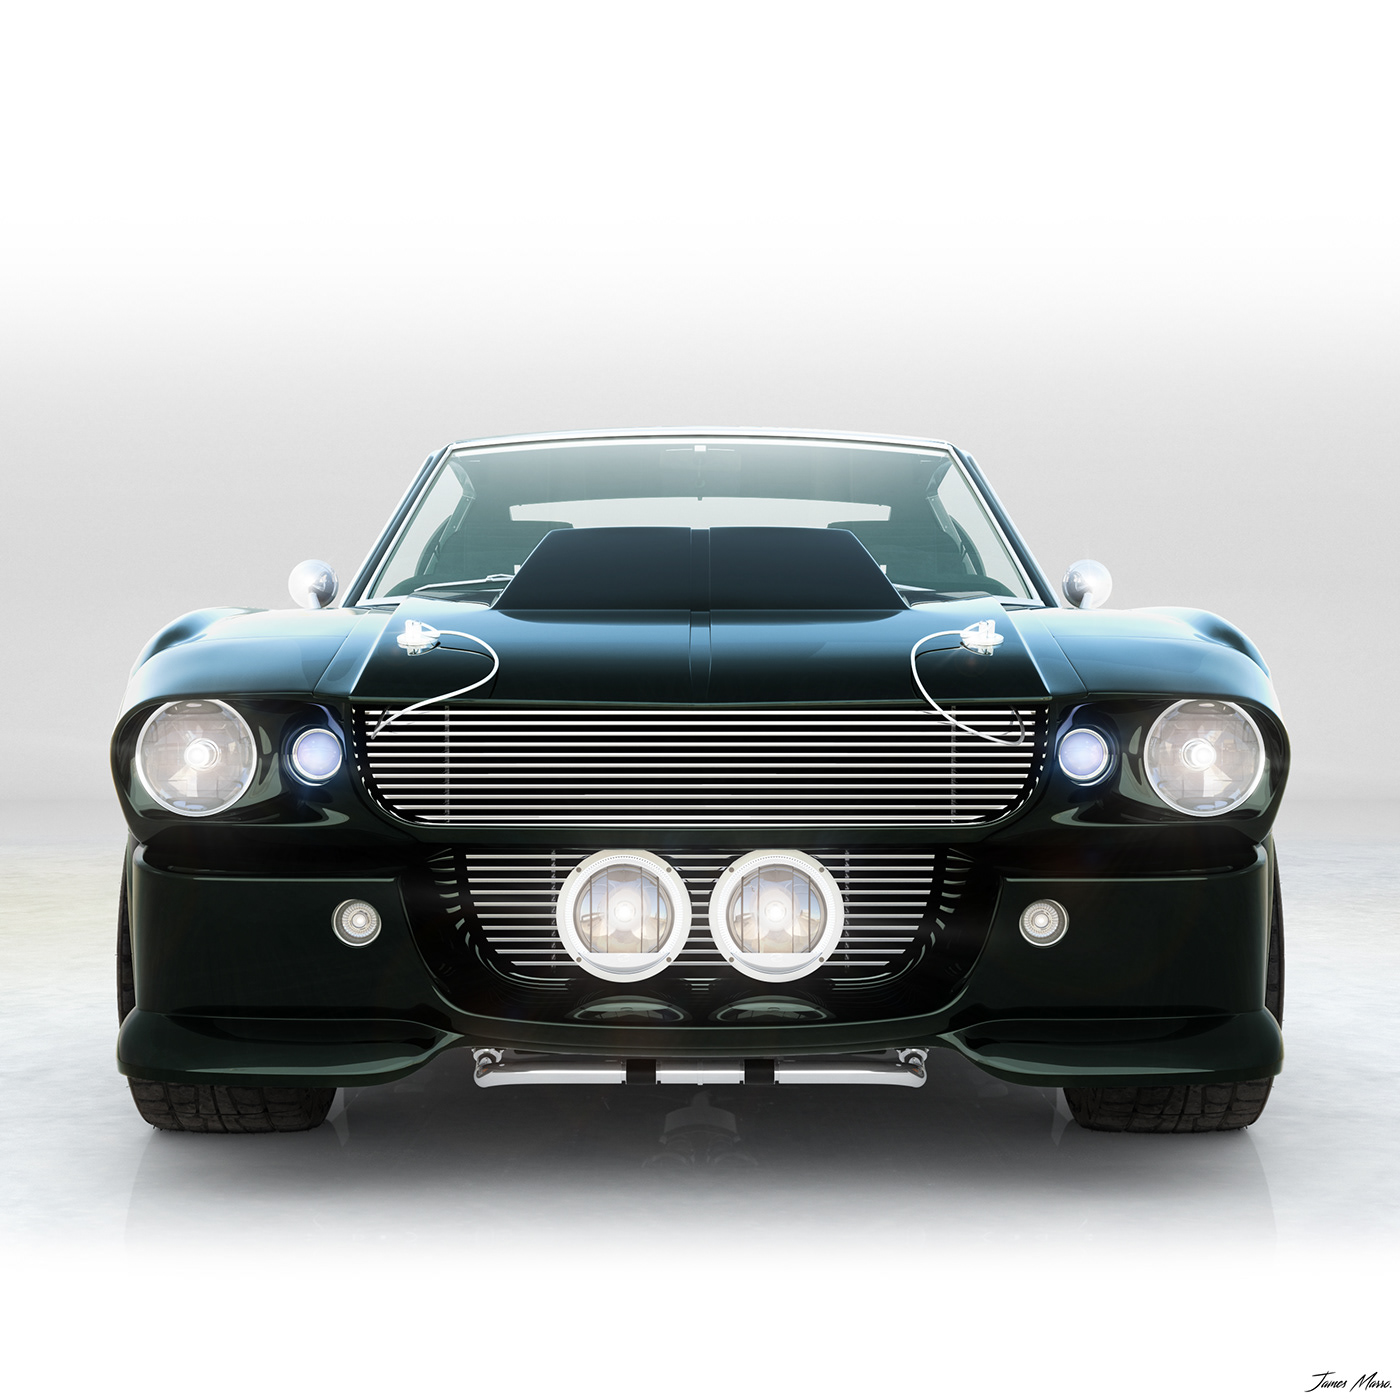
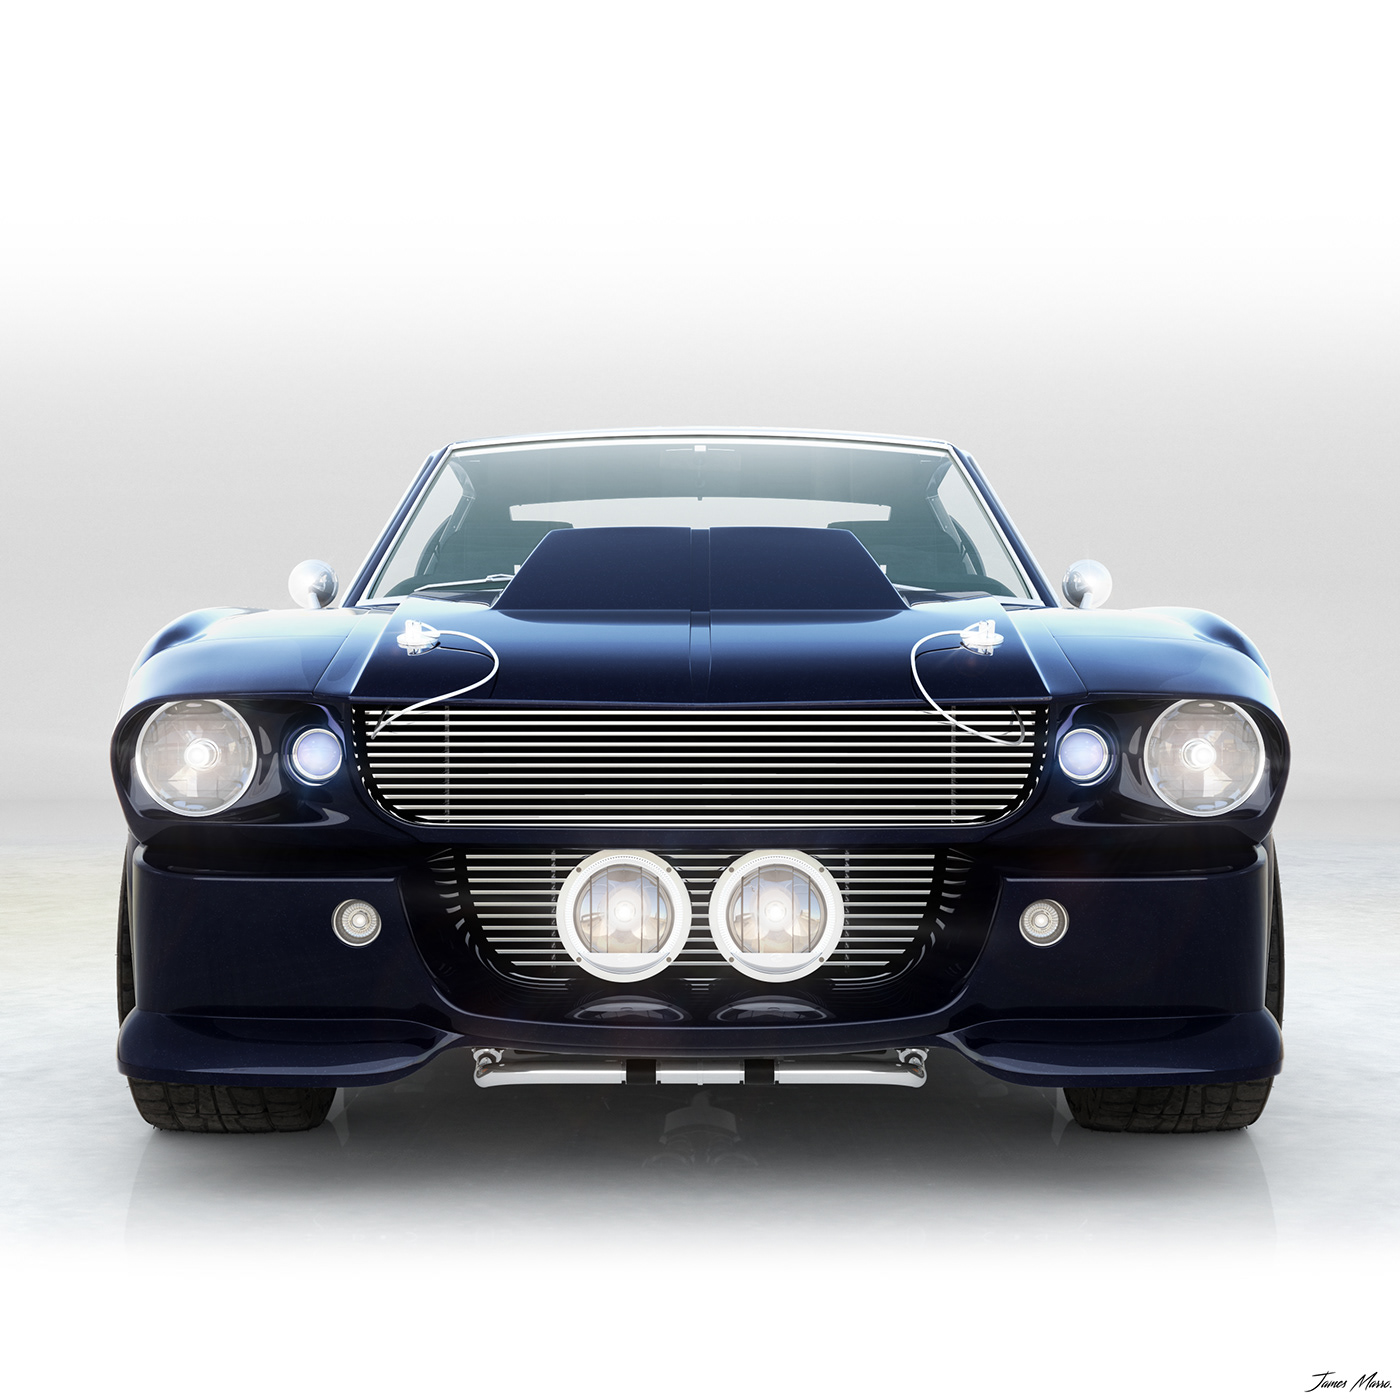
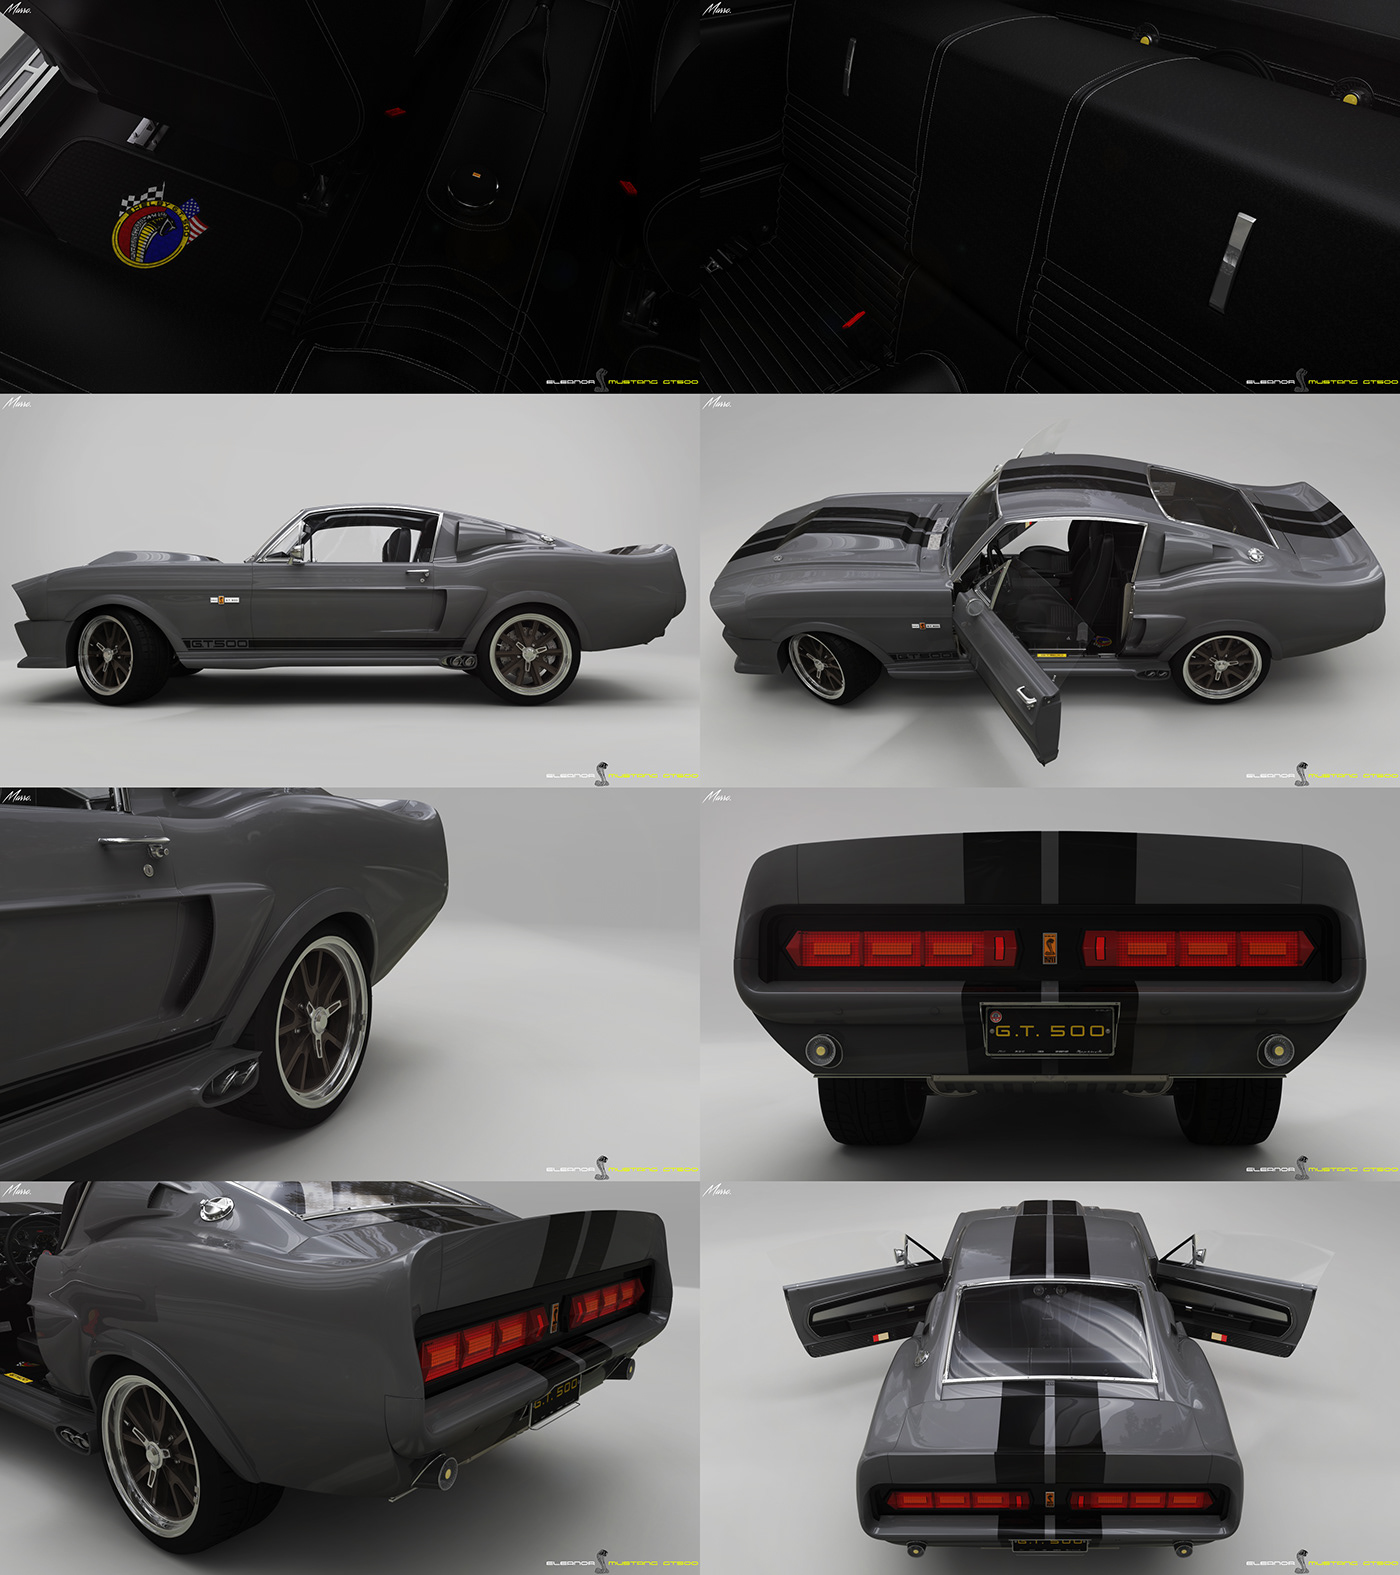
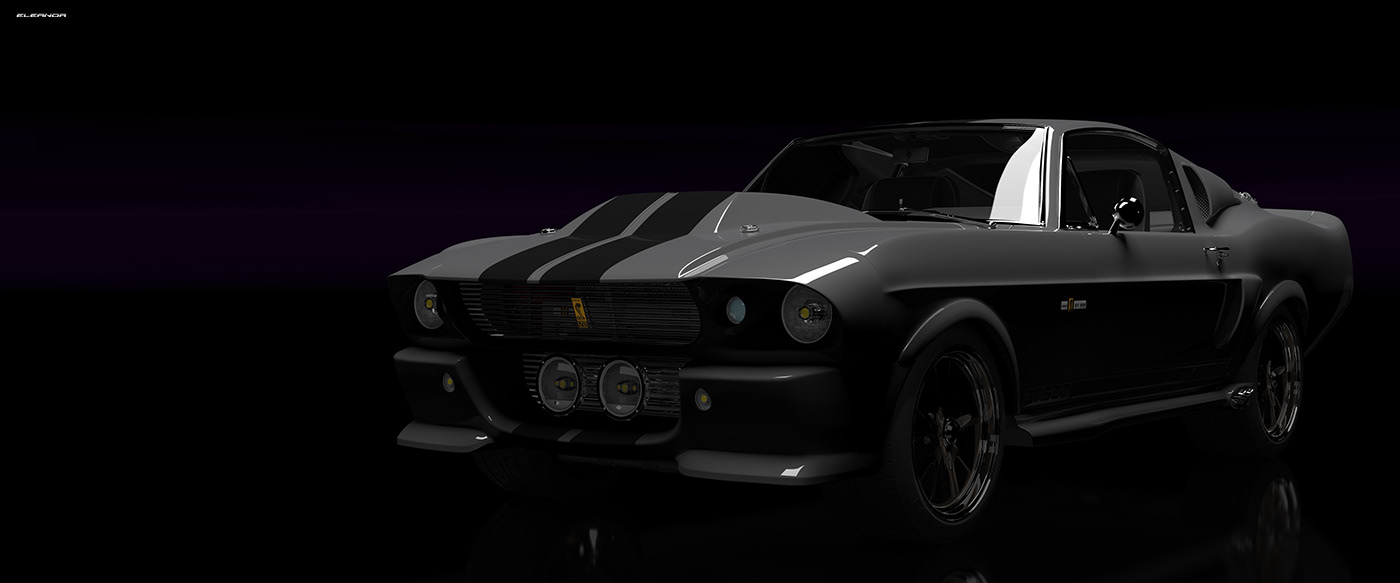
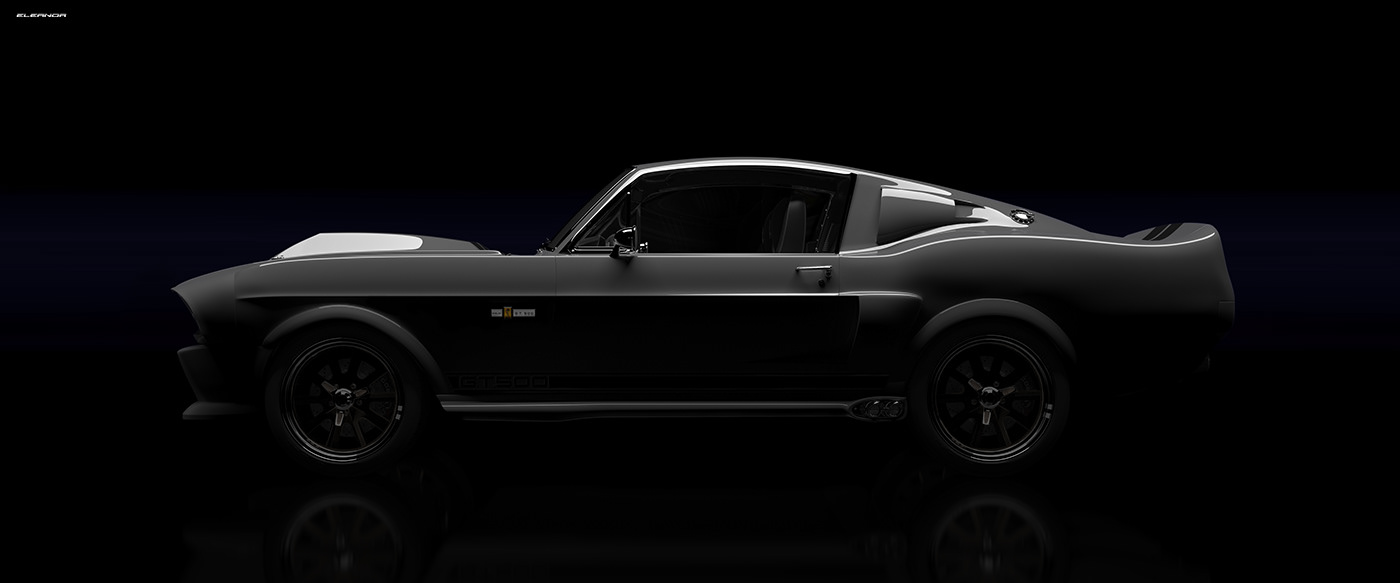
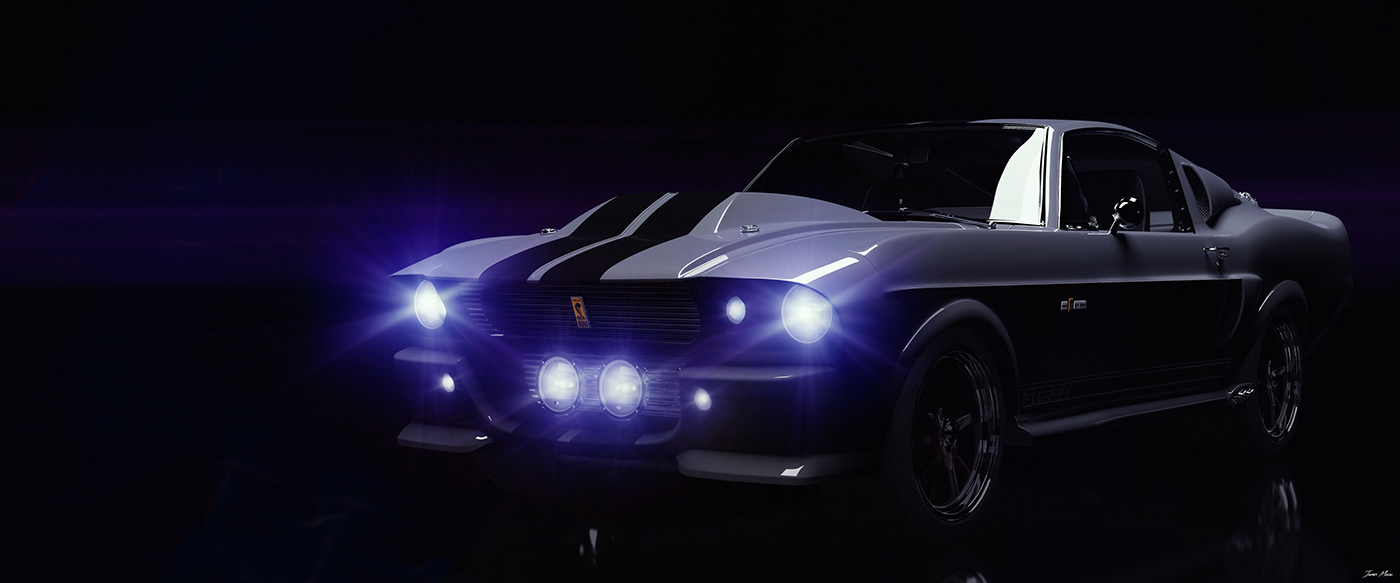
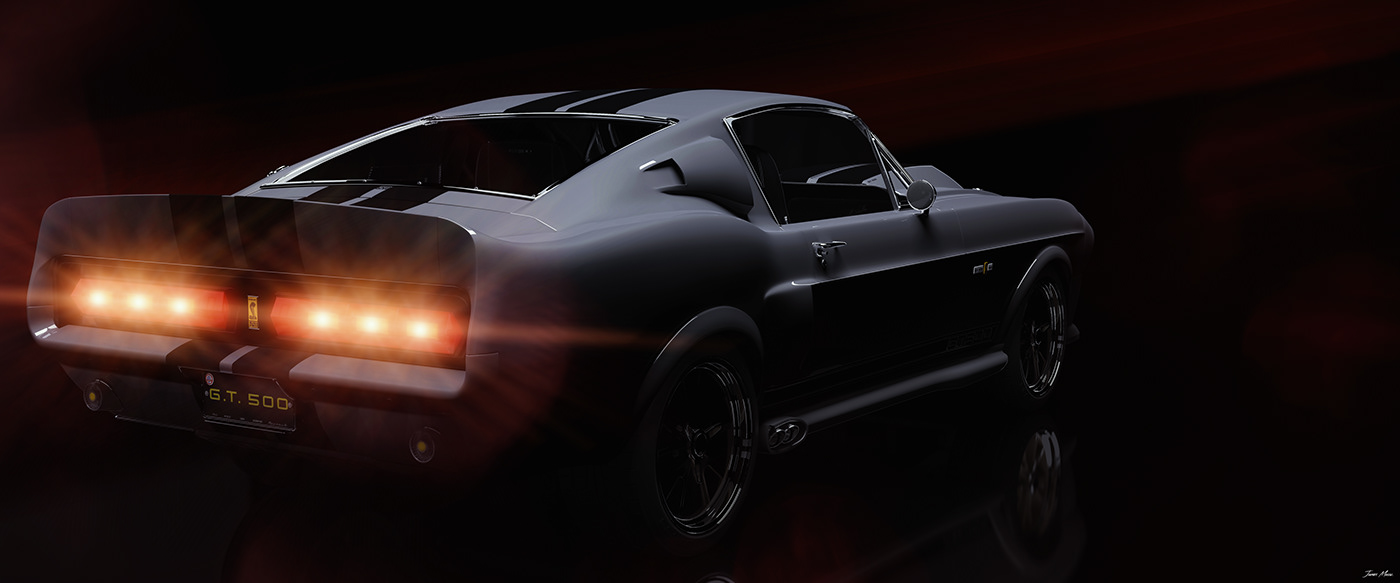
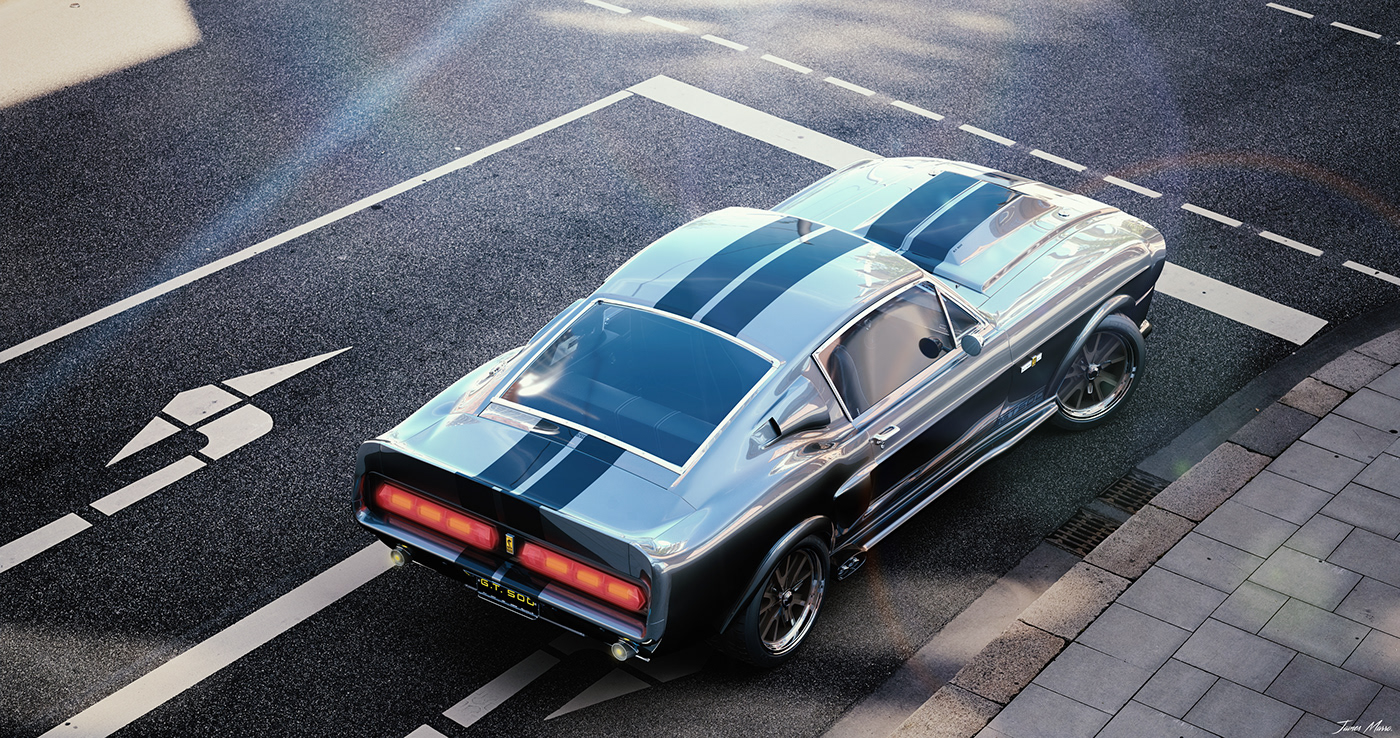
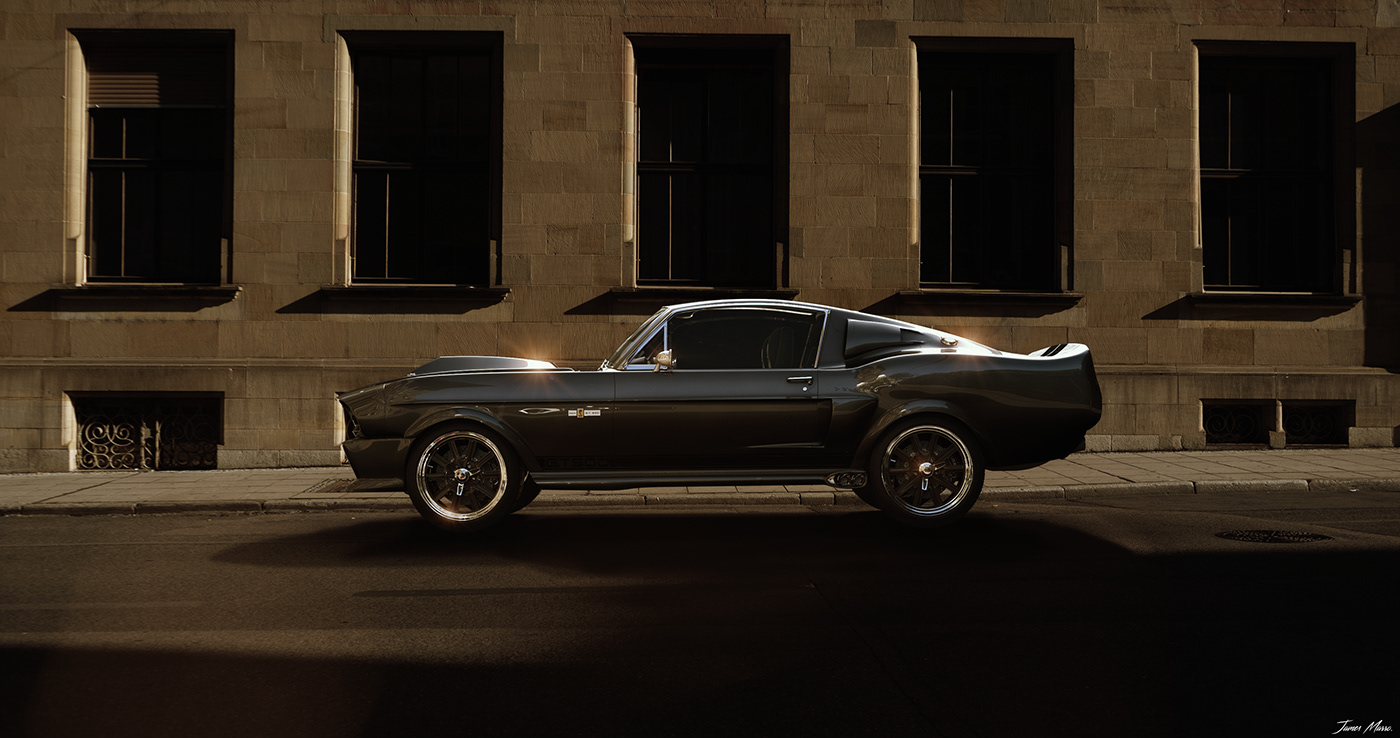
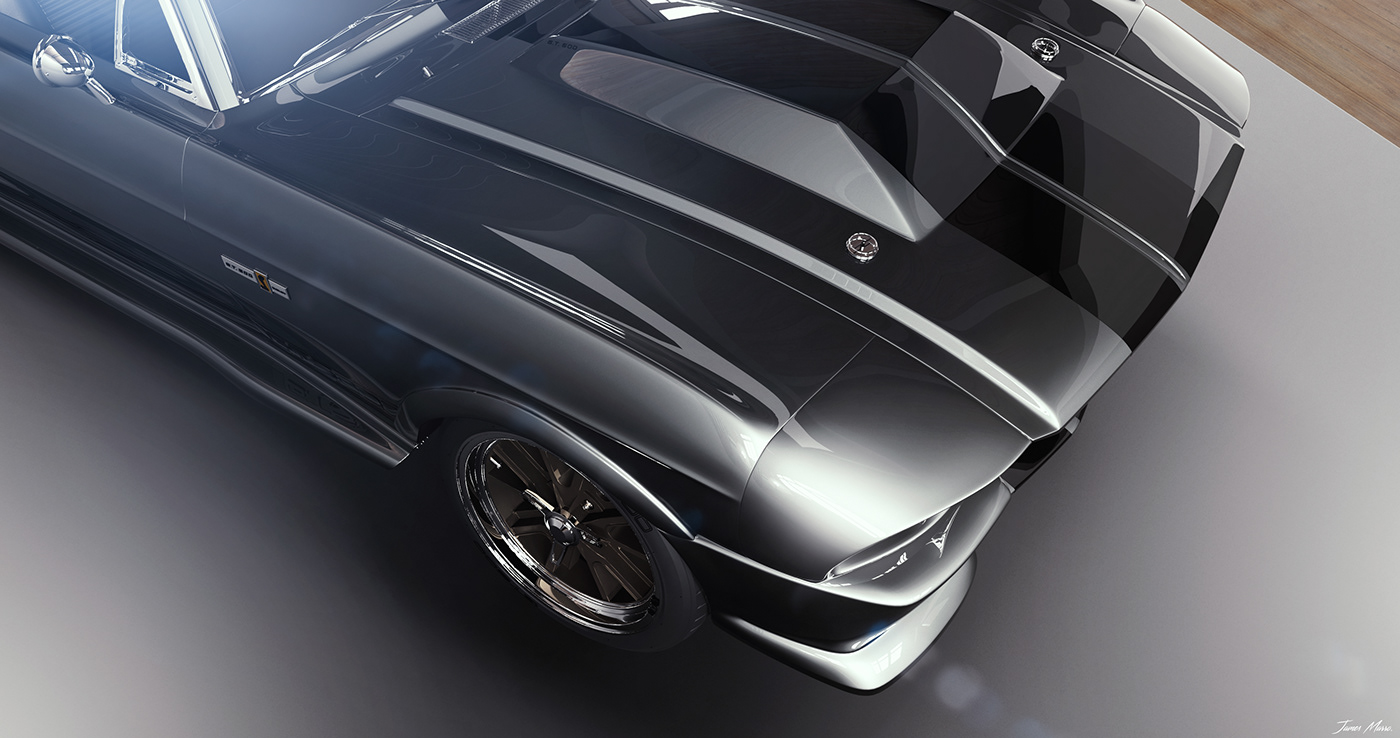
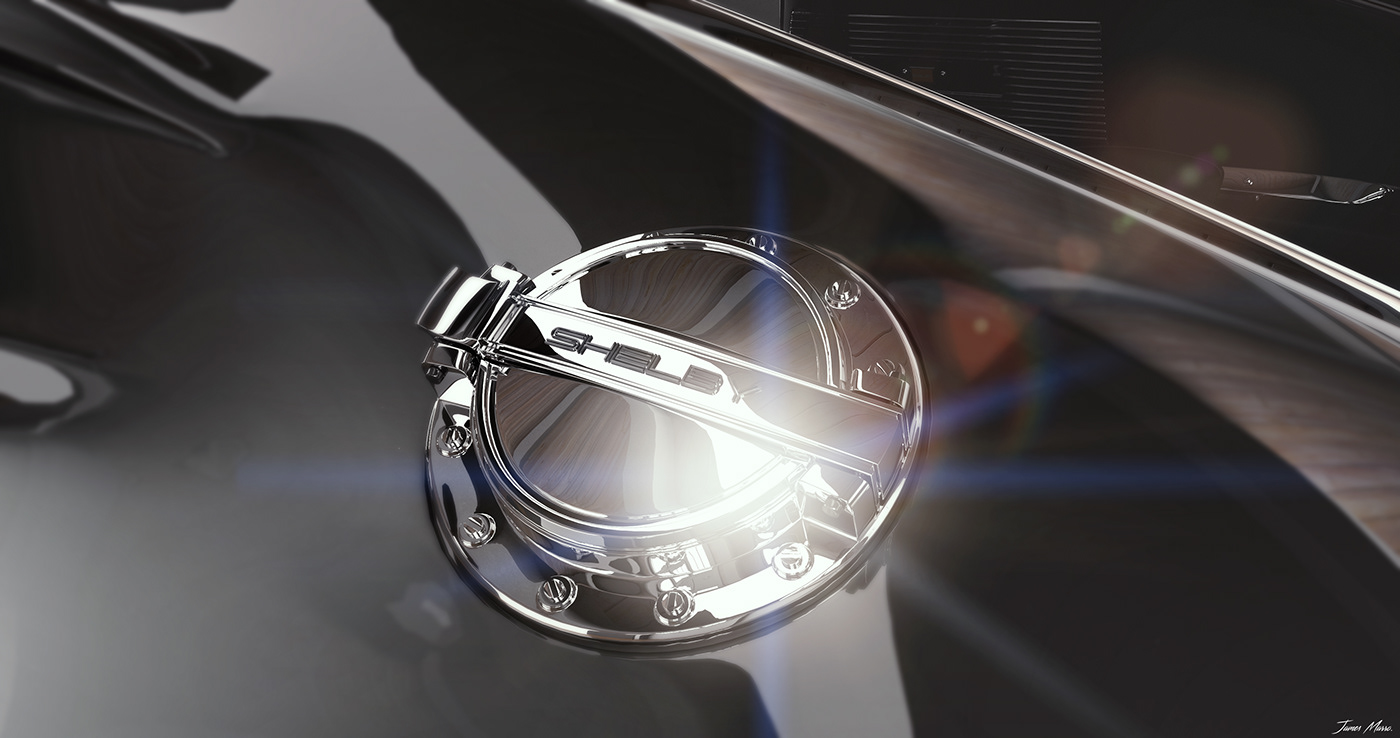
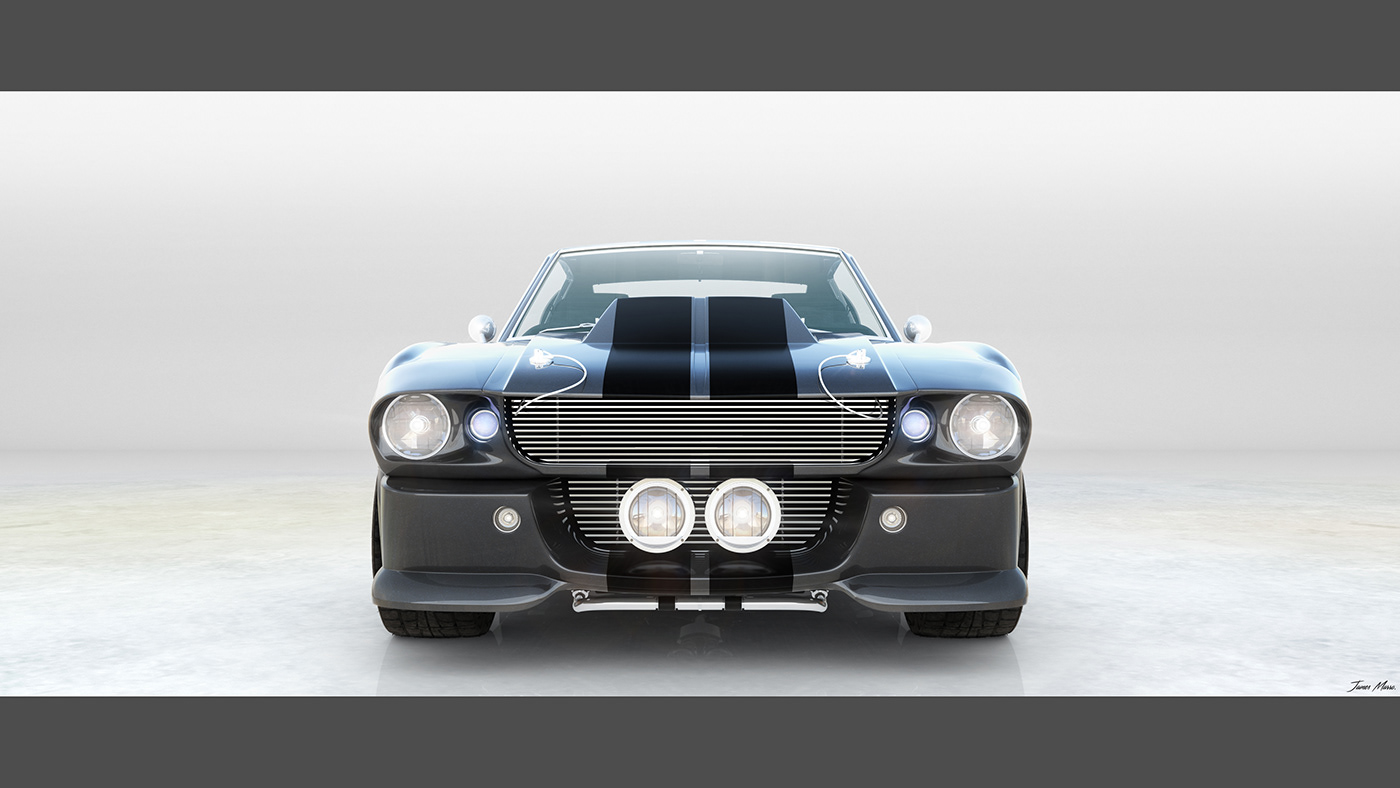
The Eleanor Mustang has always had a grey paint scheme, which I then added to with a blue flake; mostly noticeable on the closer up shots. Followed by black stripes across the entire car, top and sides. For this time around, I actually chose to splice into the geometry for the decals, rather than have them as decals that sit on top of the body panels. This can prove to be a bit of a challenge in terms of its creation, but once achieved; you have a completely flush finish that allows you to hide them, just by making them the same colour as the body panels.
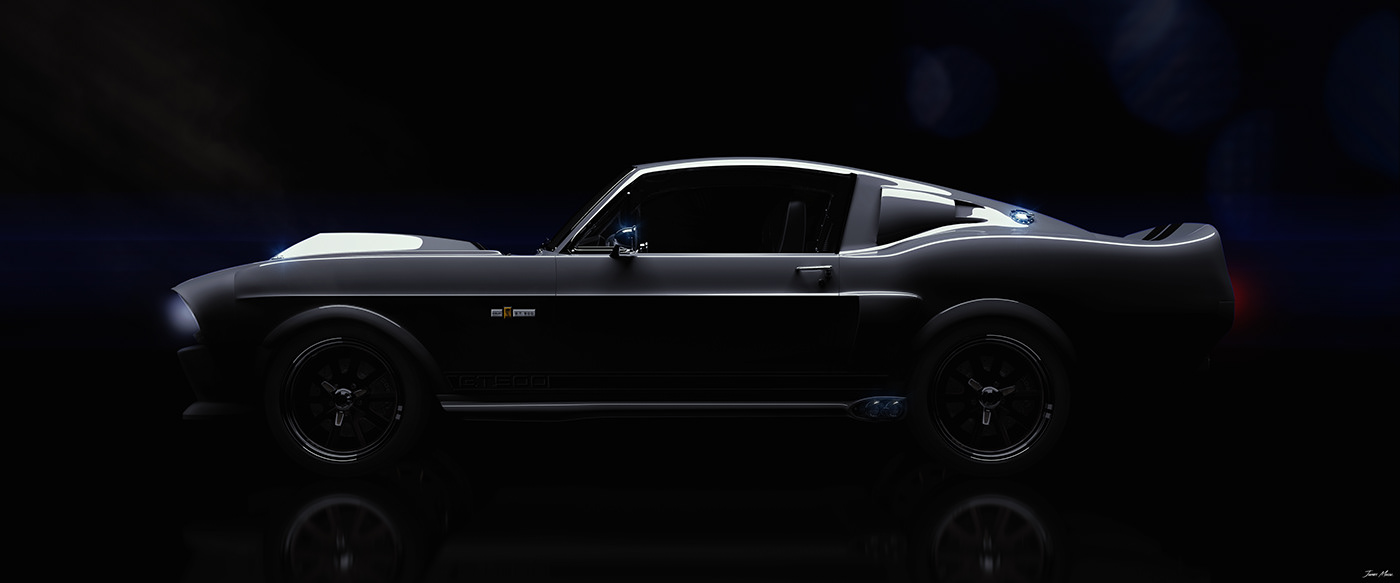
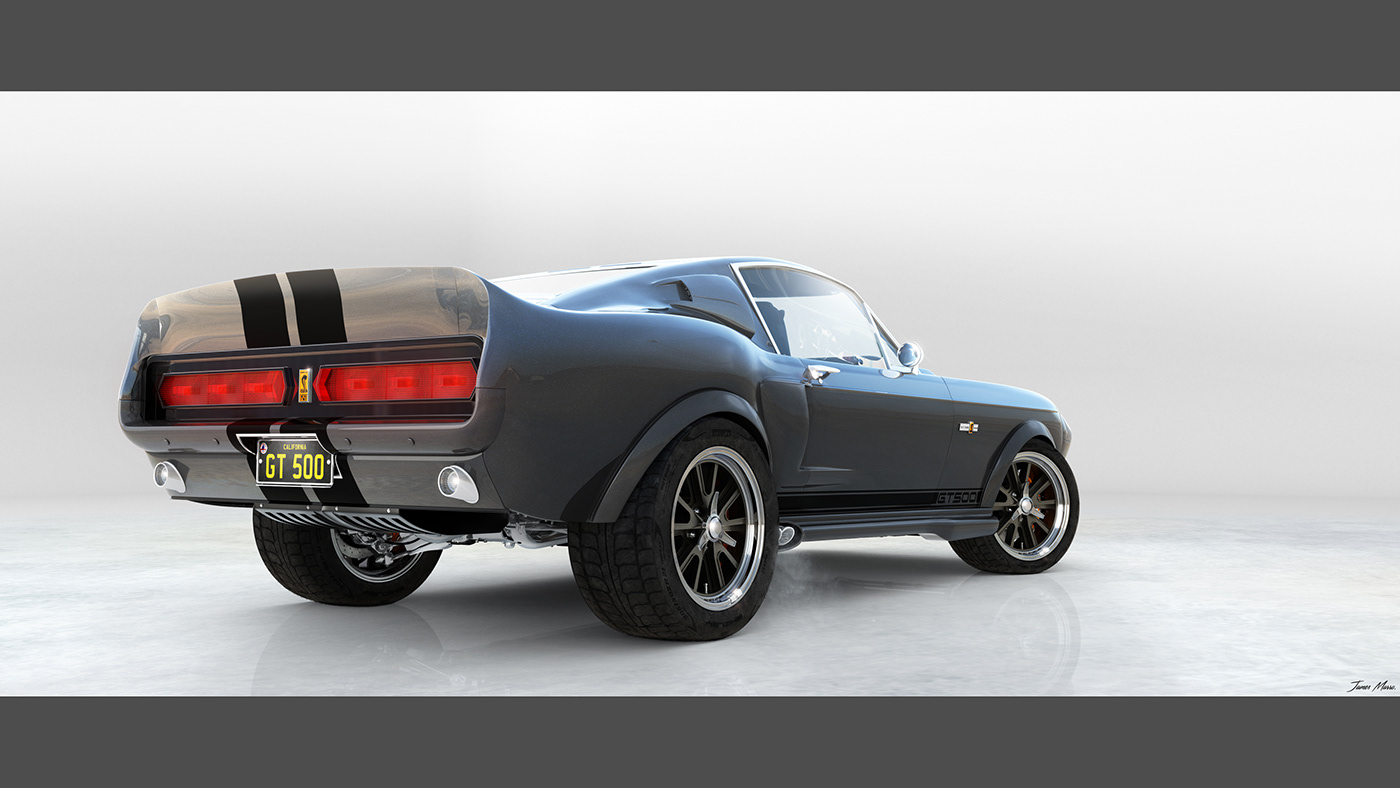
One thing to also note for the renders above, I actually decided to lower the car about an inch in real world space towards the tyres from what I newly modelled, just to give the car a more stanced look. I think this has pulled off well; as before, so much of your eyeline would jump to those massive rear tyres in terms of their profile and width. This is apparent on the side view, where you can really see the nose of the car tilting down. So with that additional height, it looked more as though they were hanging on.
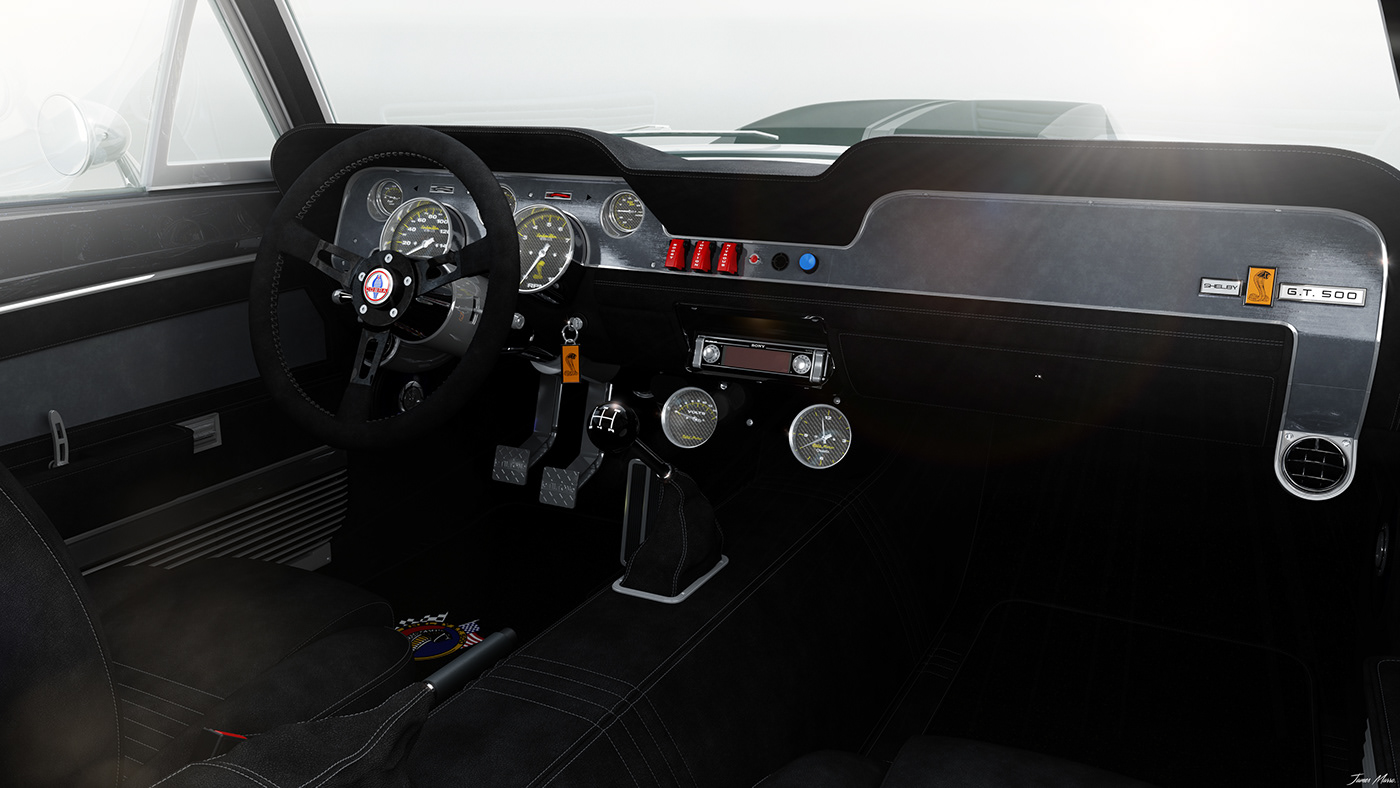
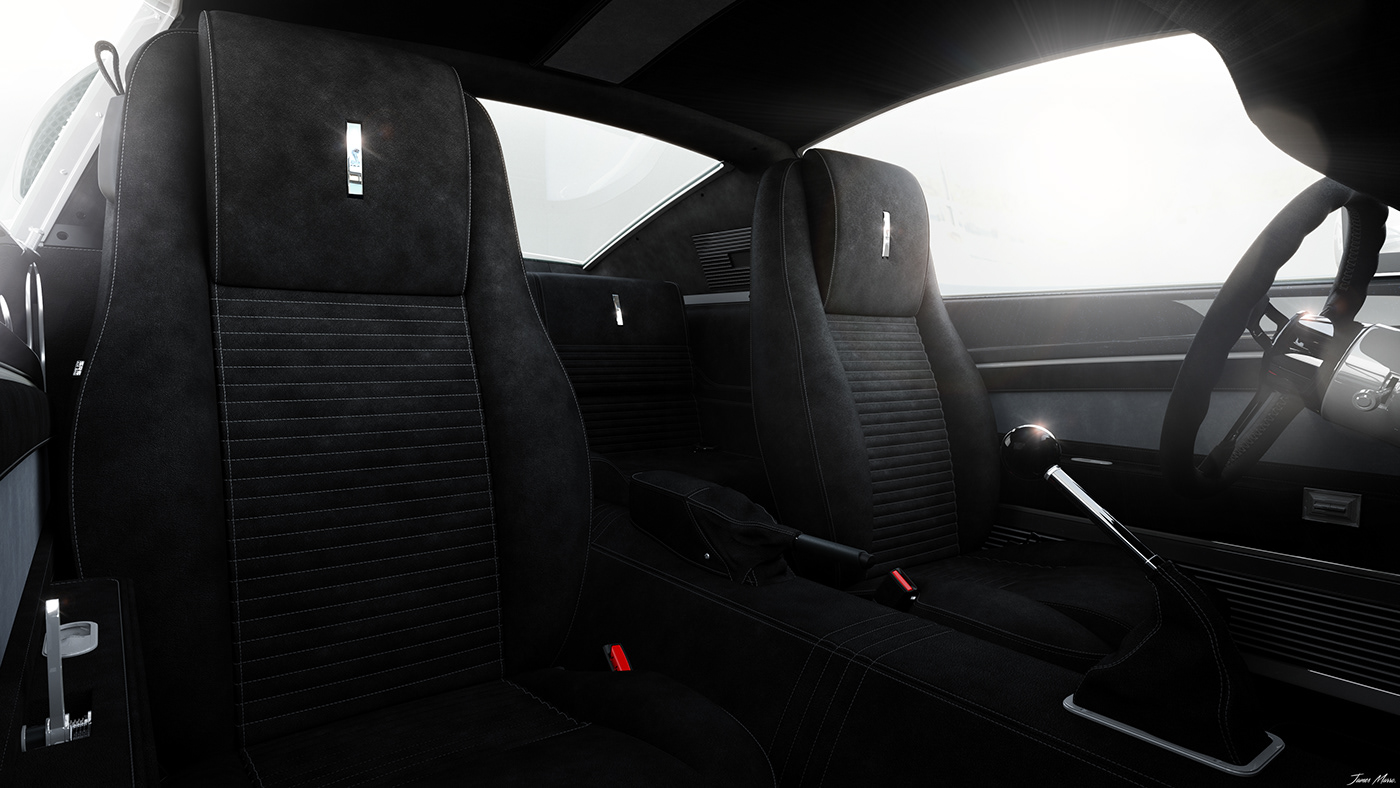
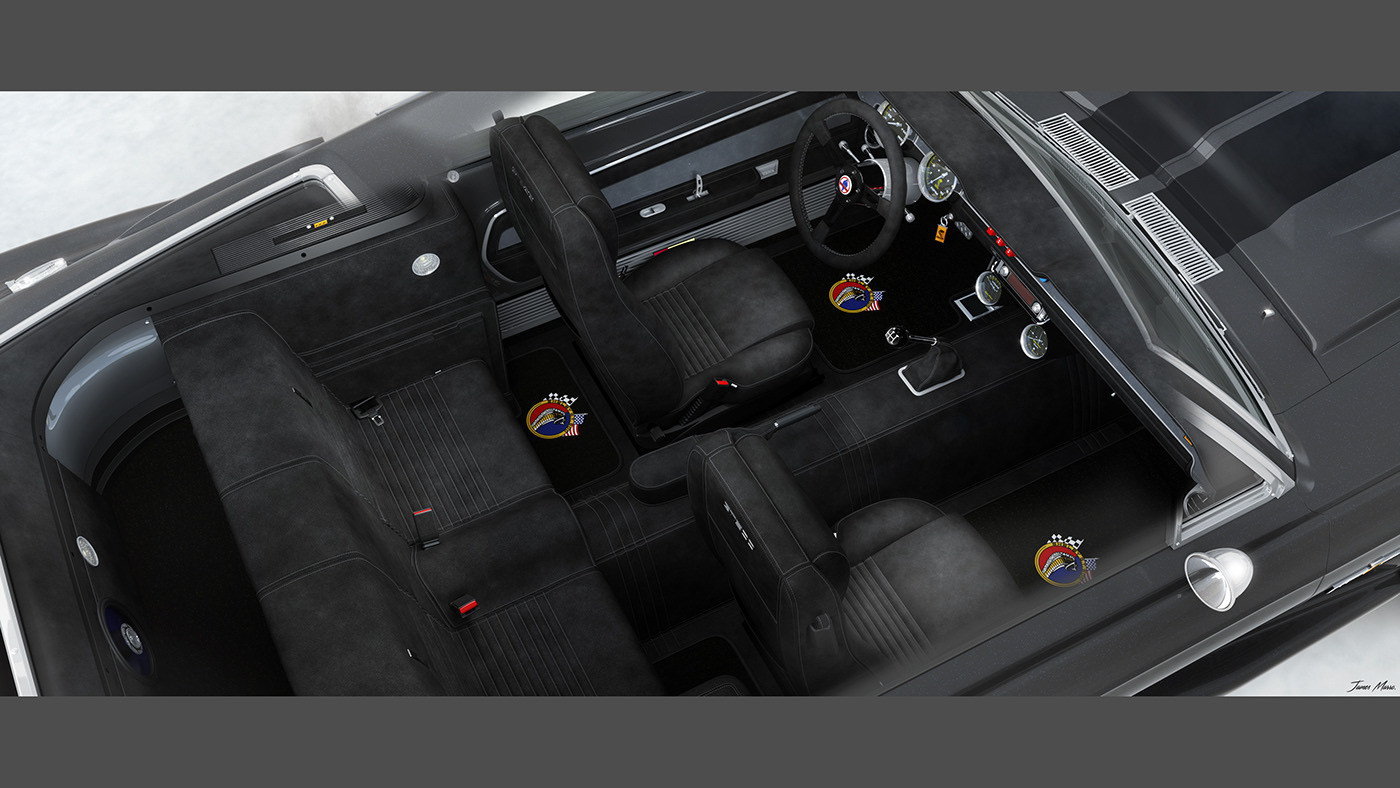
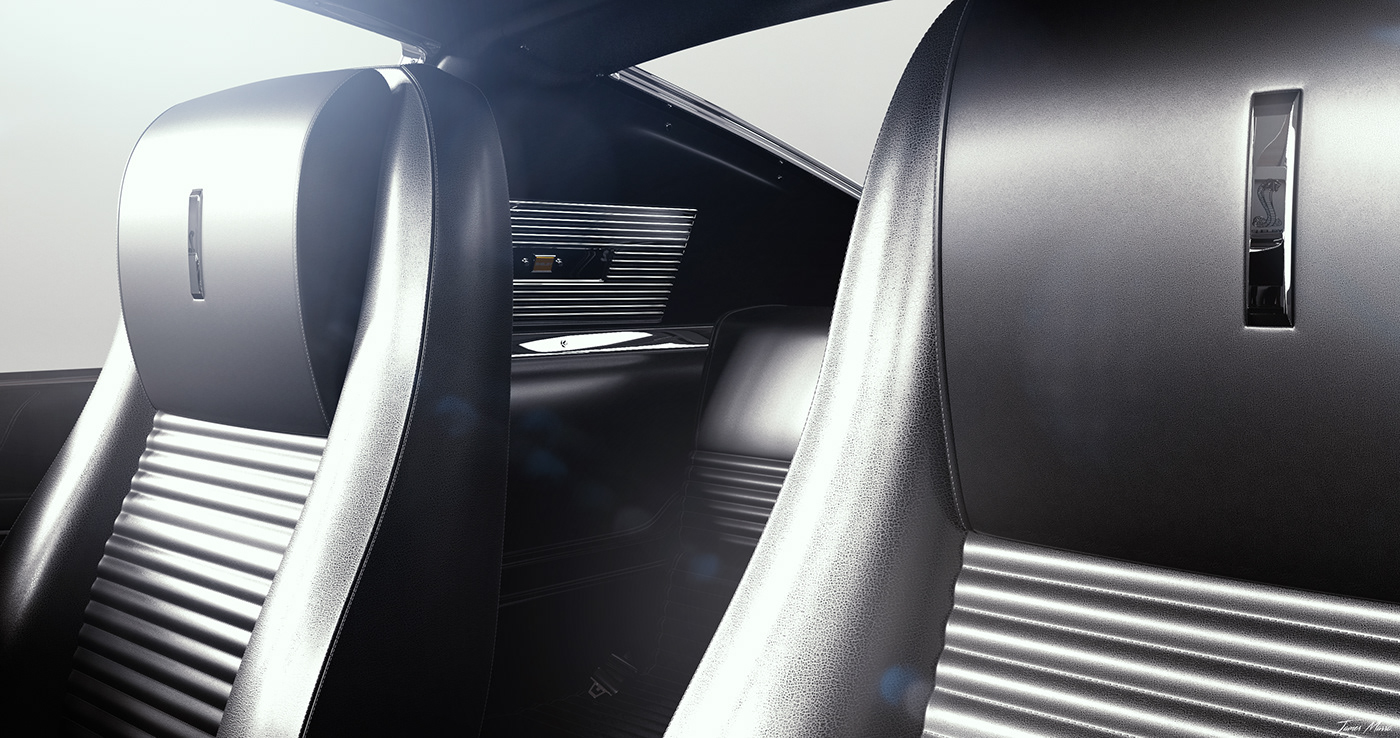
As for the interior renders below, I needed to opt for a 25mm focal length to be able to get everything I wanted in shot, as well as go for a 16.9 aspect ratio. Various parts needed to be hidden to achieve these shots, in addition to the ghosted side view, where I erased into the body panels of the car, to reveal the interior inside.
This was different from my exterior renders which I much prefered to have a wider angle on, specifically rendered at 5000x2813.
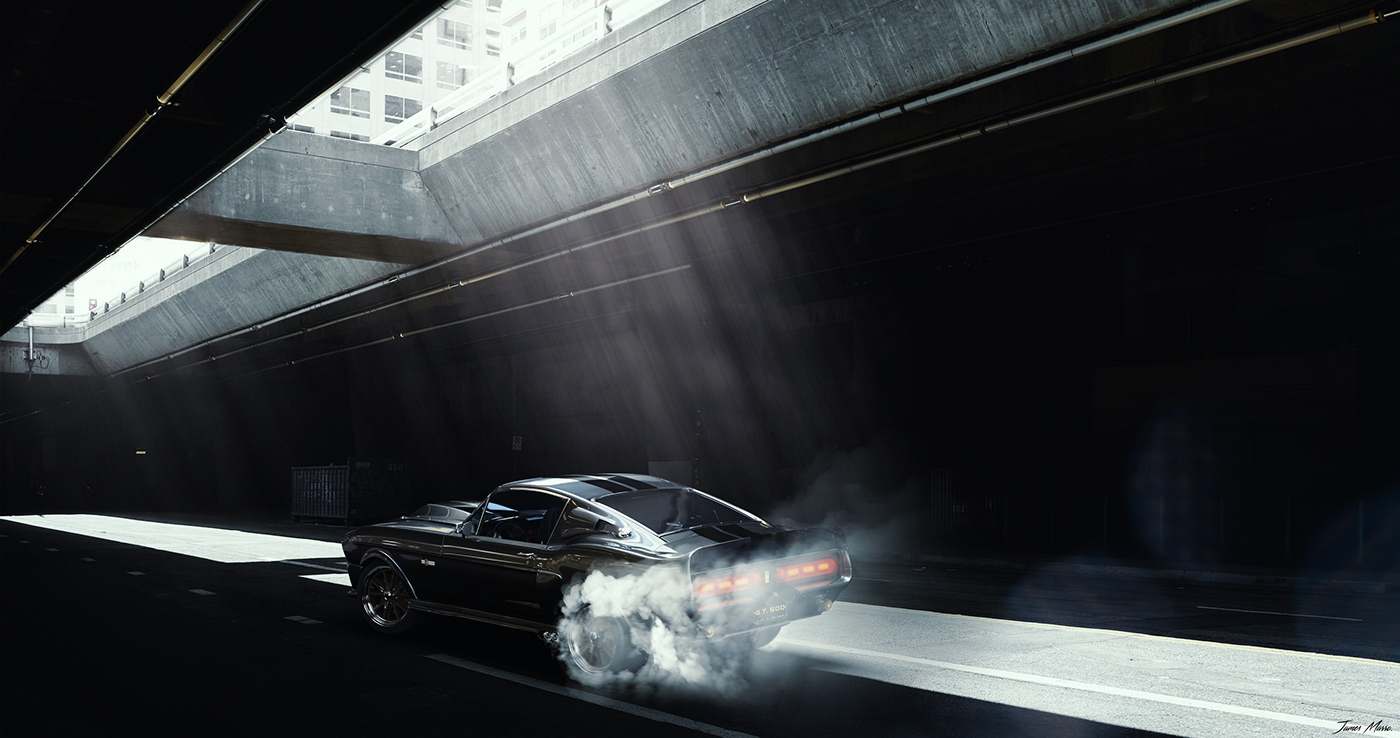
The flares and smoke used for the post-production work, was courtesy of the Nucly Starter Kit:
Nucly Link
Nucly Link


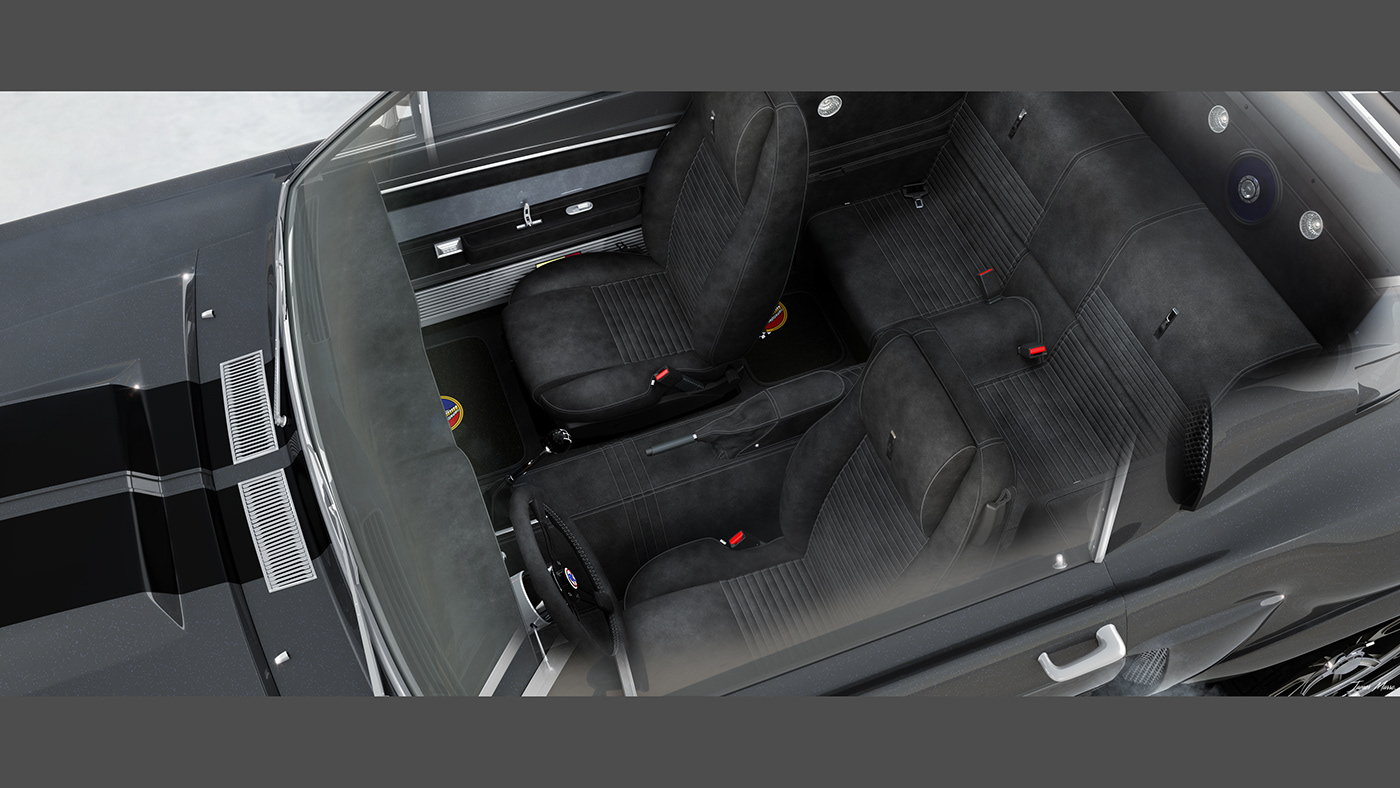
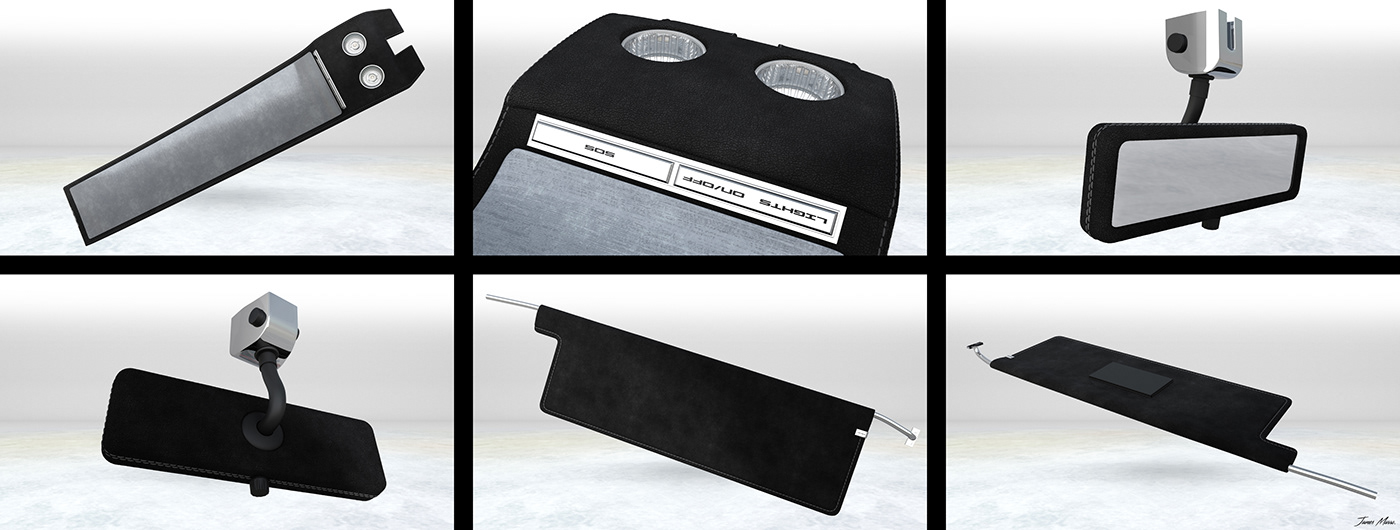
Below you will see some ghosted overhead shots that I have done, which reveals the interior. I really like these shots as it draws attension to areas that you would often not see. This is due to the camera always looking outwards when inside of a car, as apposed to being outside and getting any angle you want of the exterior.

Now you will see a bunch of see-through renders that contain the main sections of the Eleanor Mustang. These are the Powertrain, Chassis, Interior and Exterior.
If you would like to create a Juxtapose yourself, which is the ability to have a slide bar between two photos, then you can do so in the link below:
Juxtapose JS Link
Juxtapose JS Link


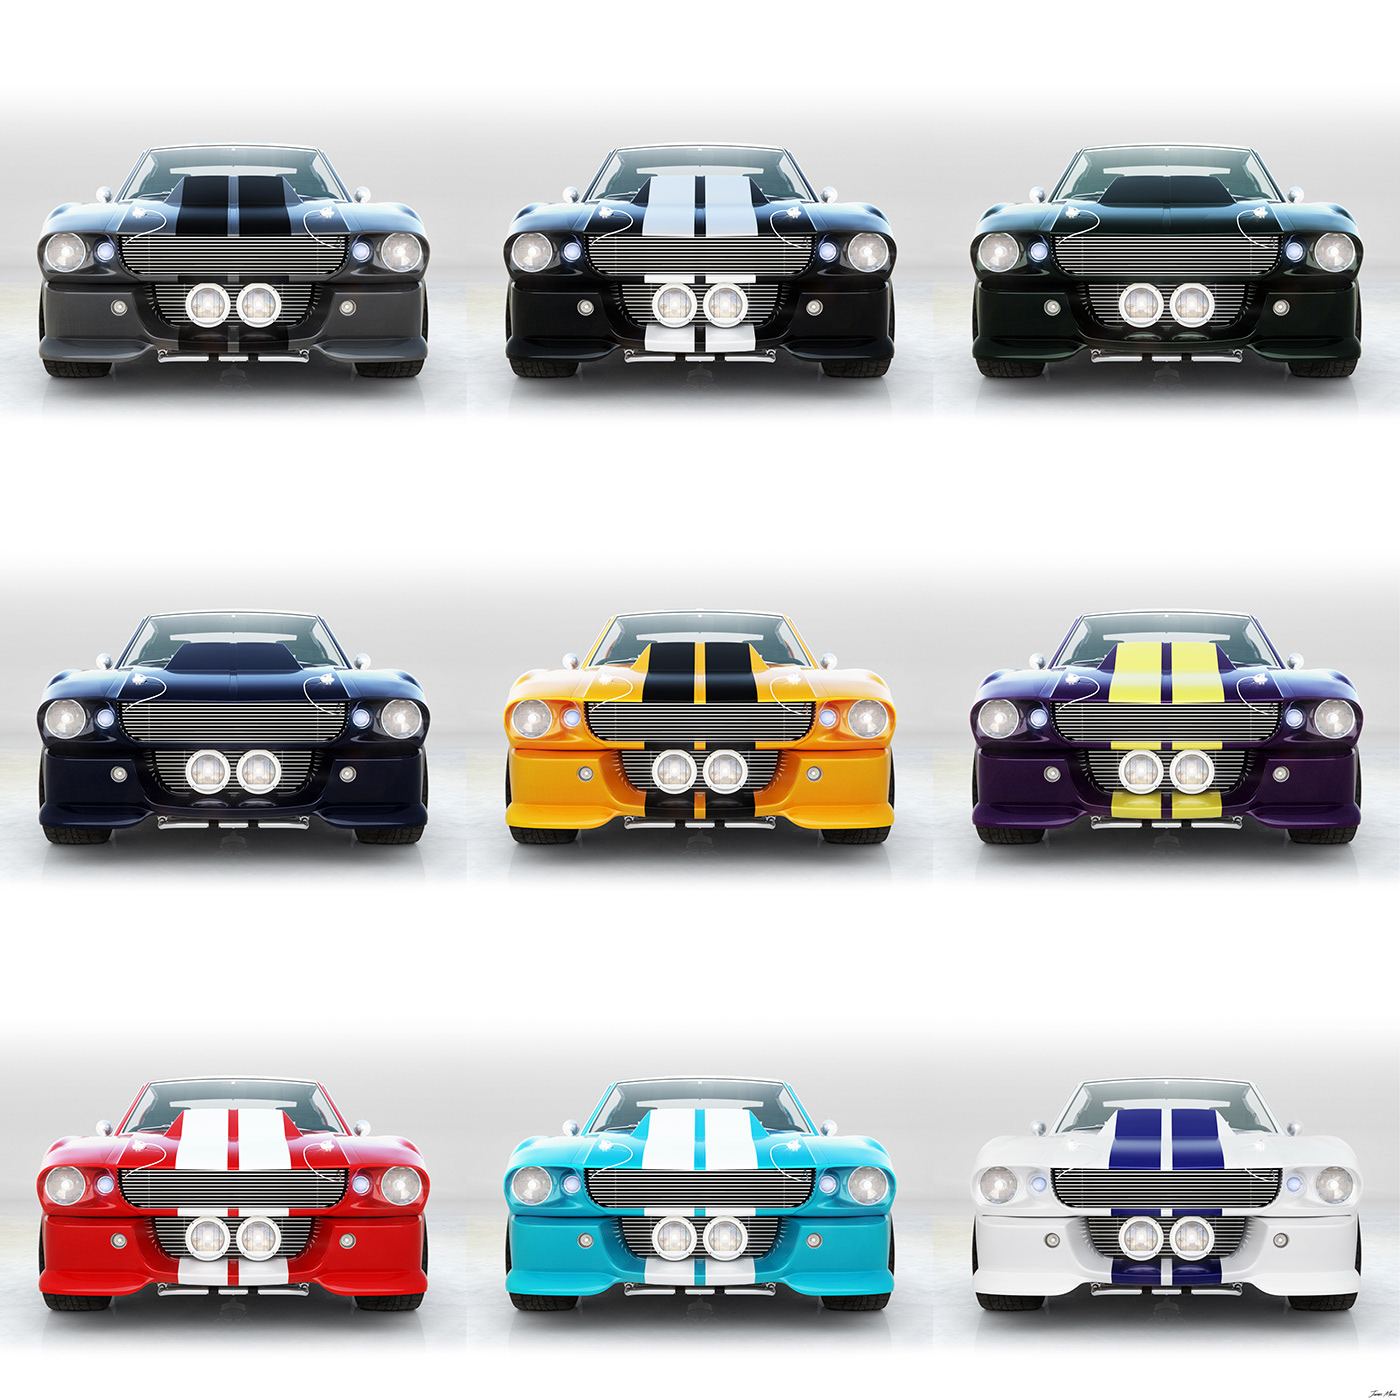
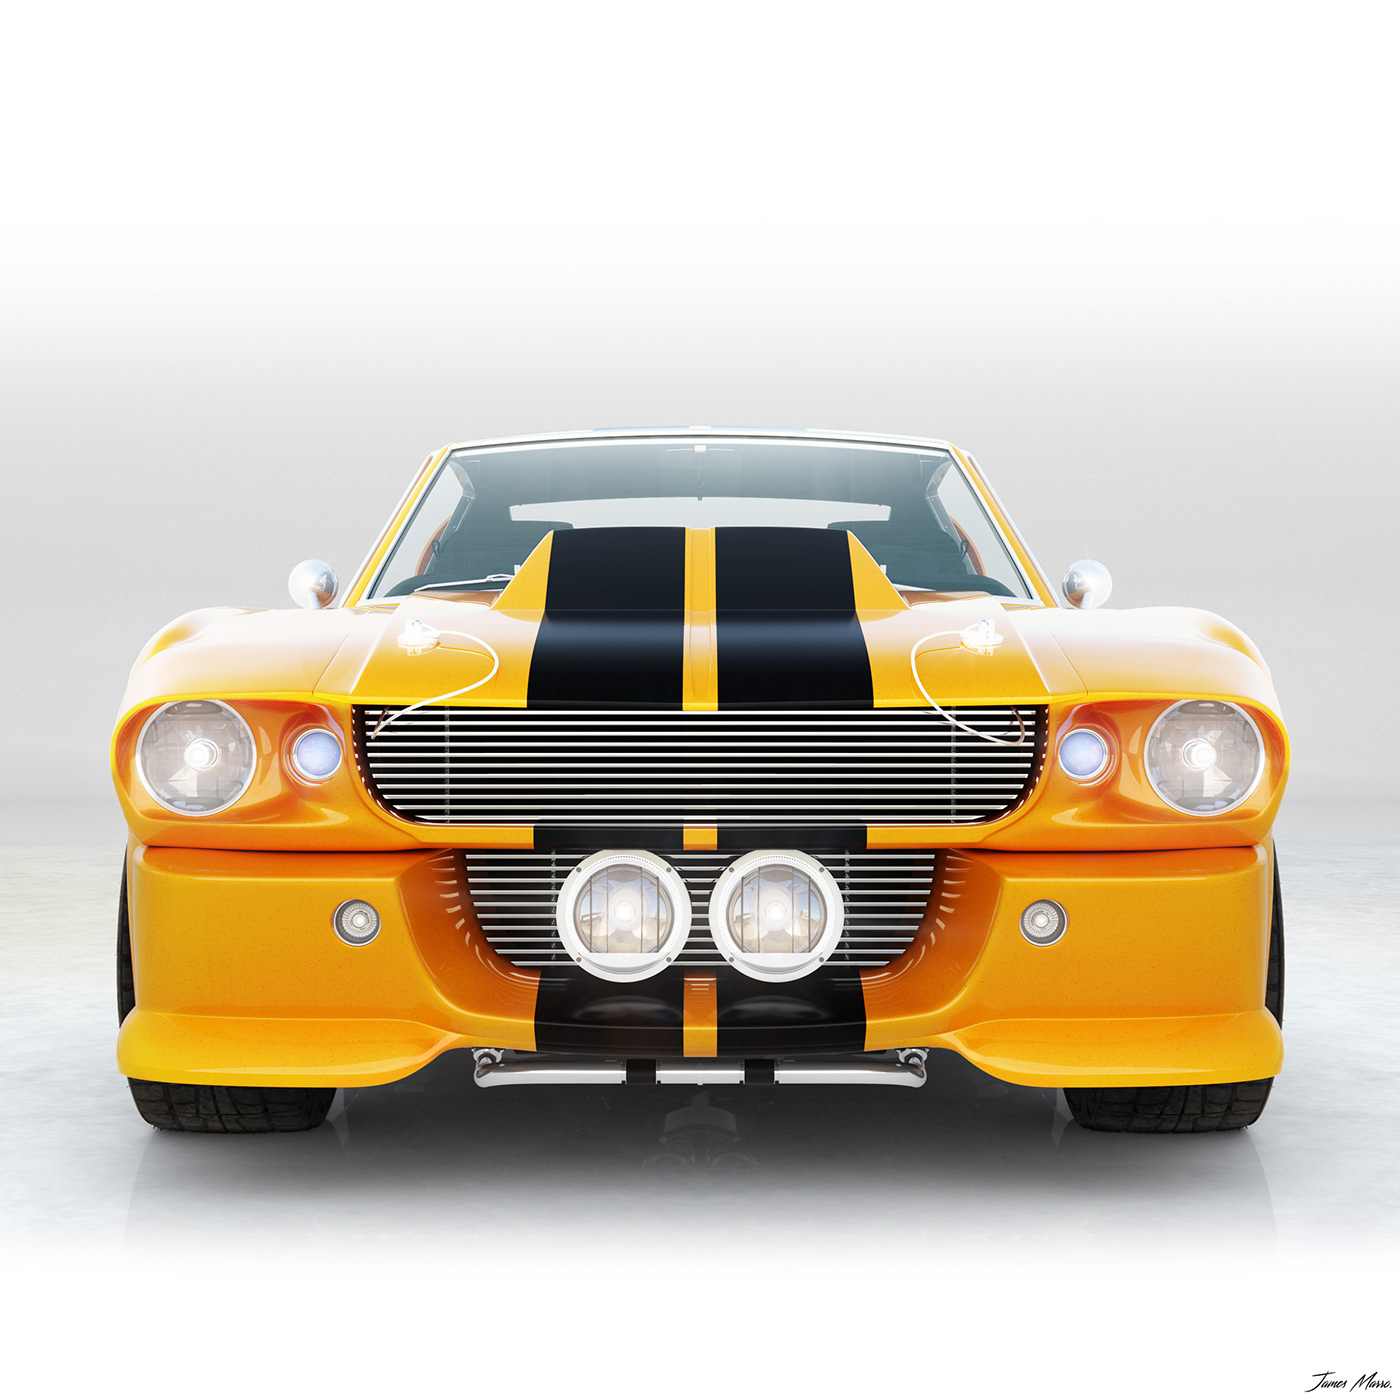
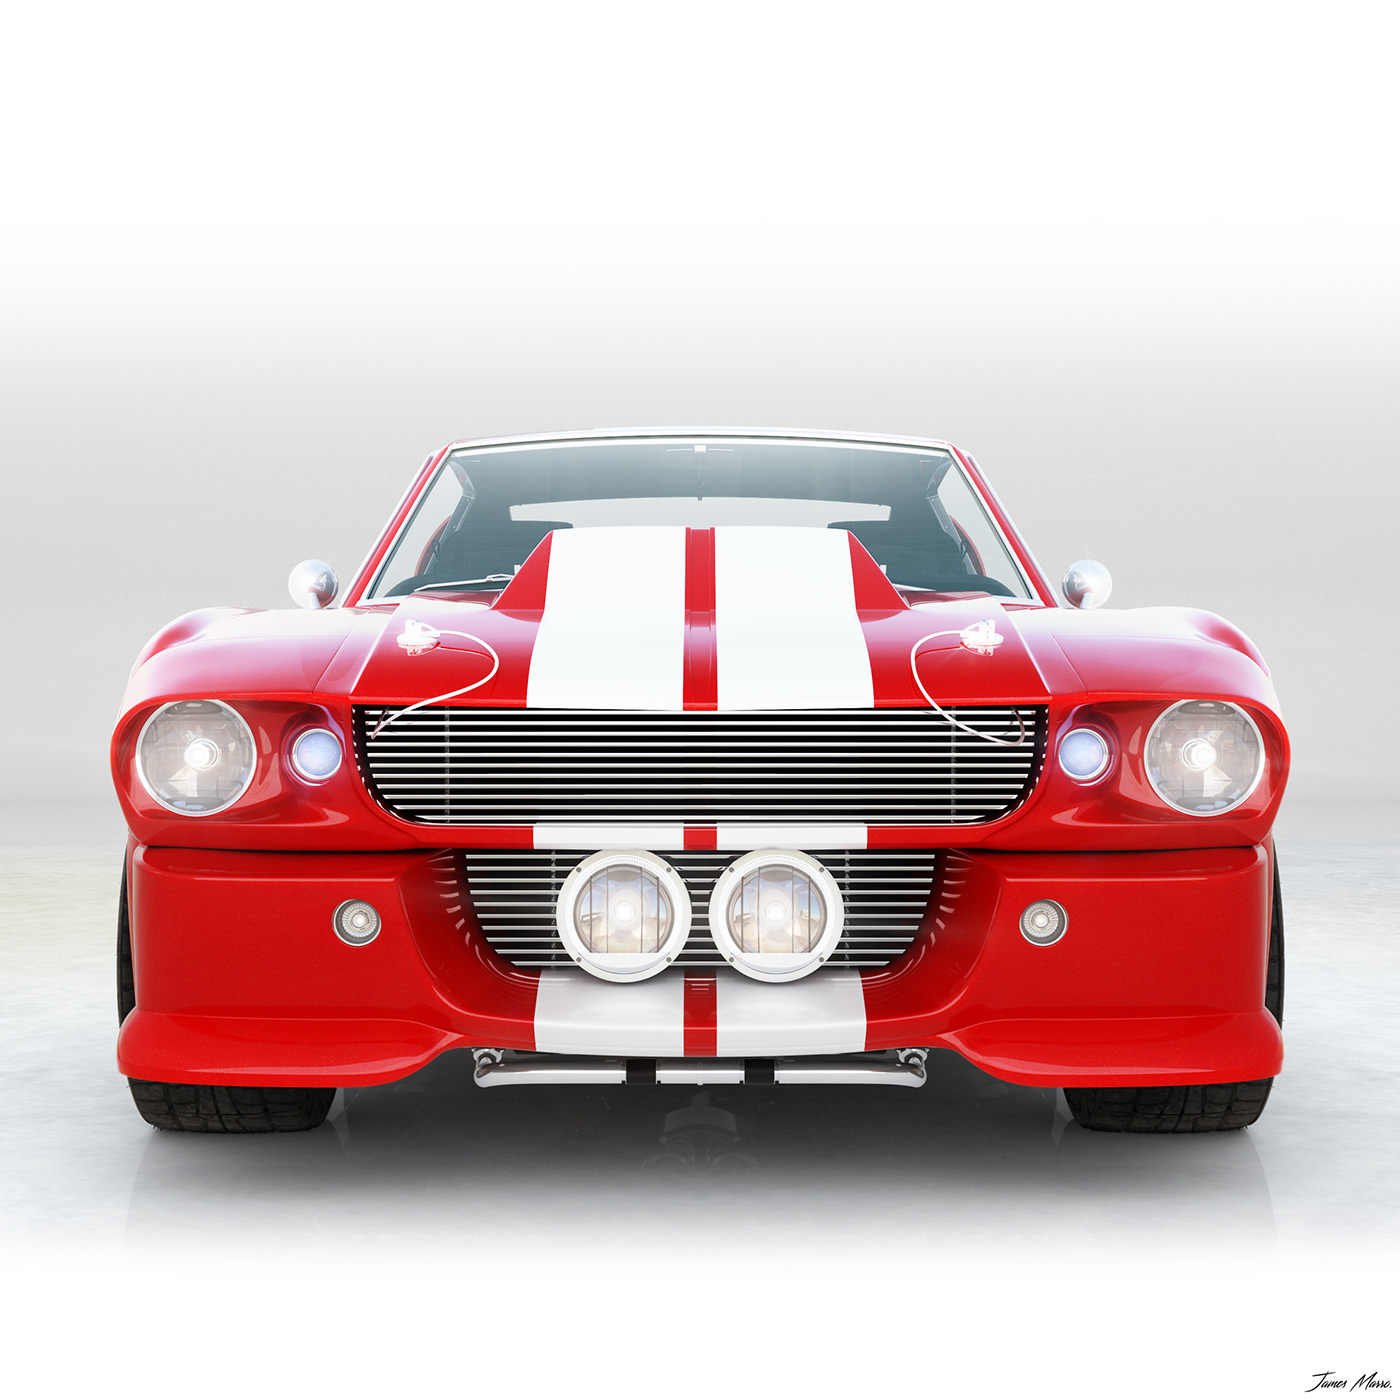
As I mentioned earlier, the Eleanor Mustang has grey paint with black stripes. A very minimalistic look, although be it, not overly eye catching. Therefore for a bit of fun, I decided to throw a bunch of different colours onto the car, as to see what else suits it from just the front view. I did this, so I was more able to easily swap between colours, whilst maintaining all of my existing post-production work on top.


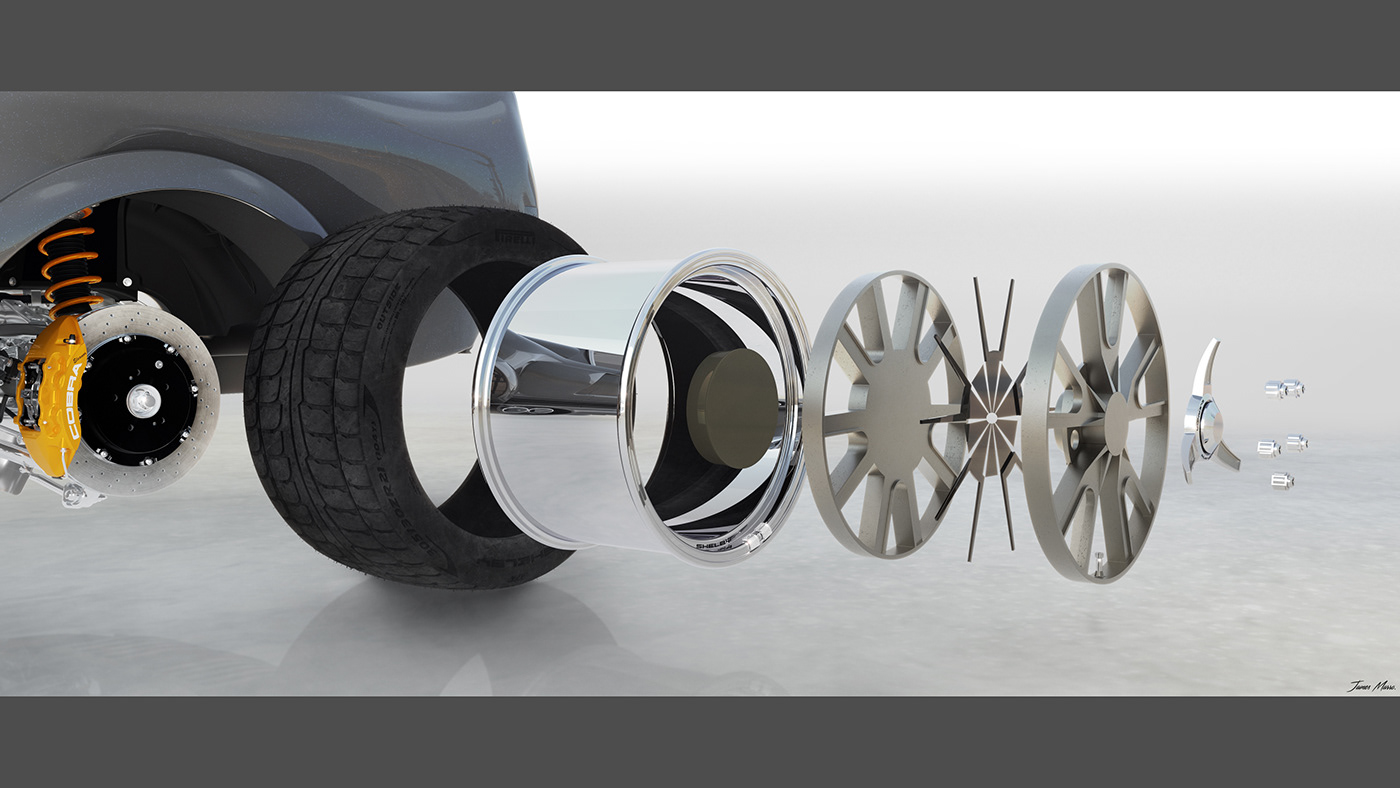
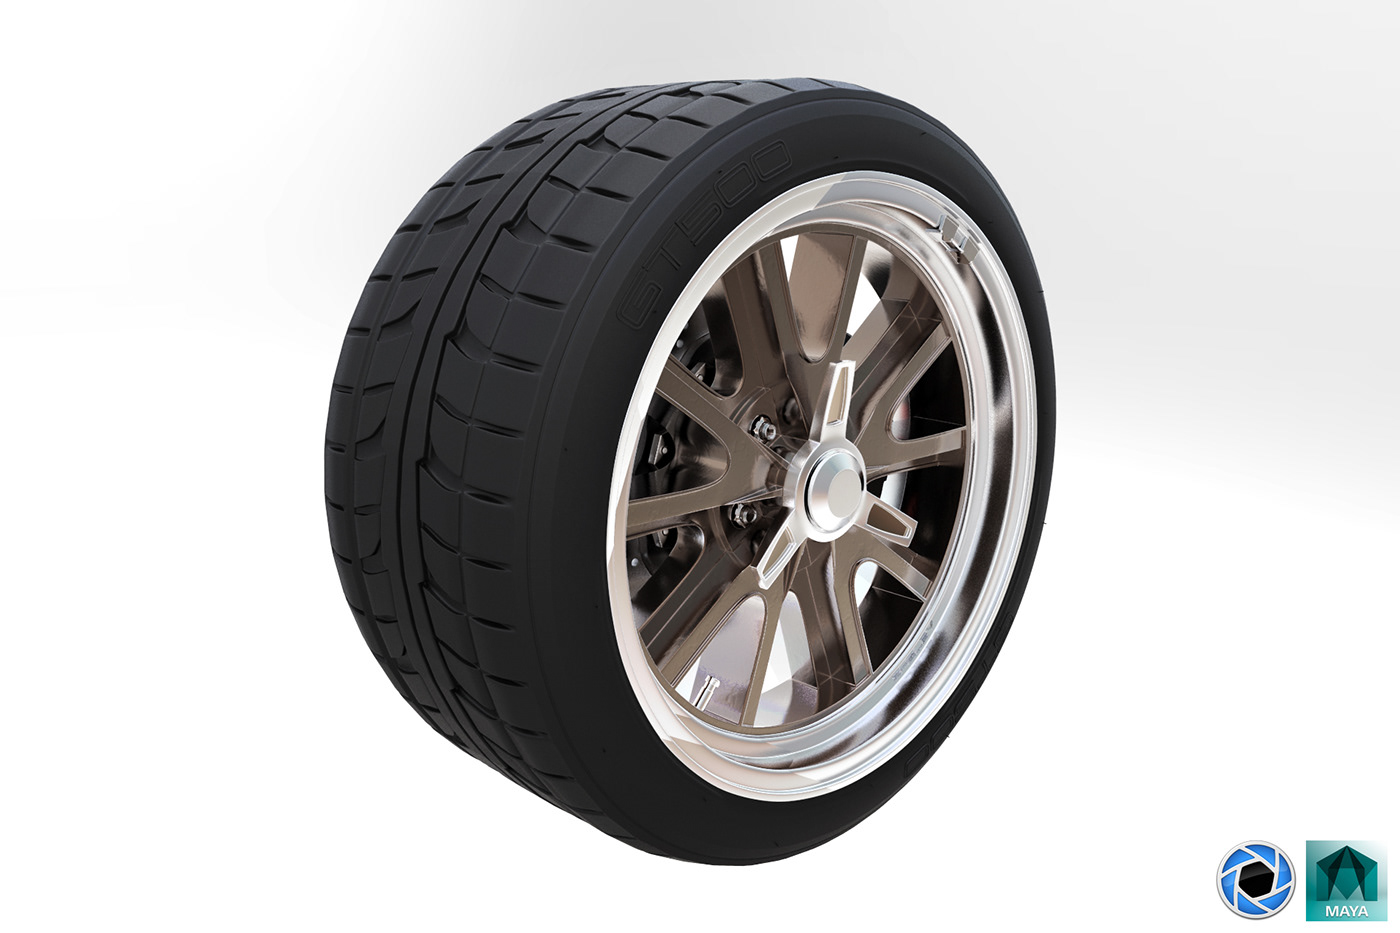
Below you can see a breakup of how the alloy wheels are assembled. Not exactly my favourite shot, but it does demonstrate the construction of them well. A mix of both chrome and bronze/ grey steel, depending on what reference you're finding online.

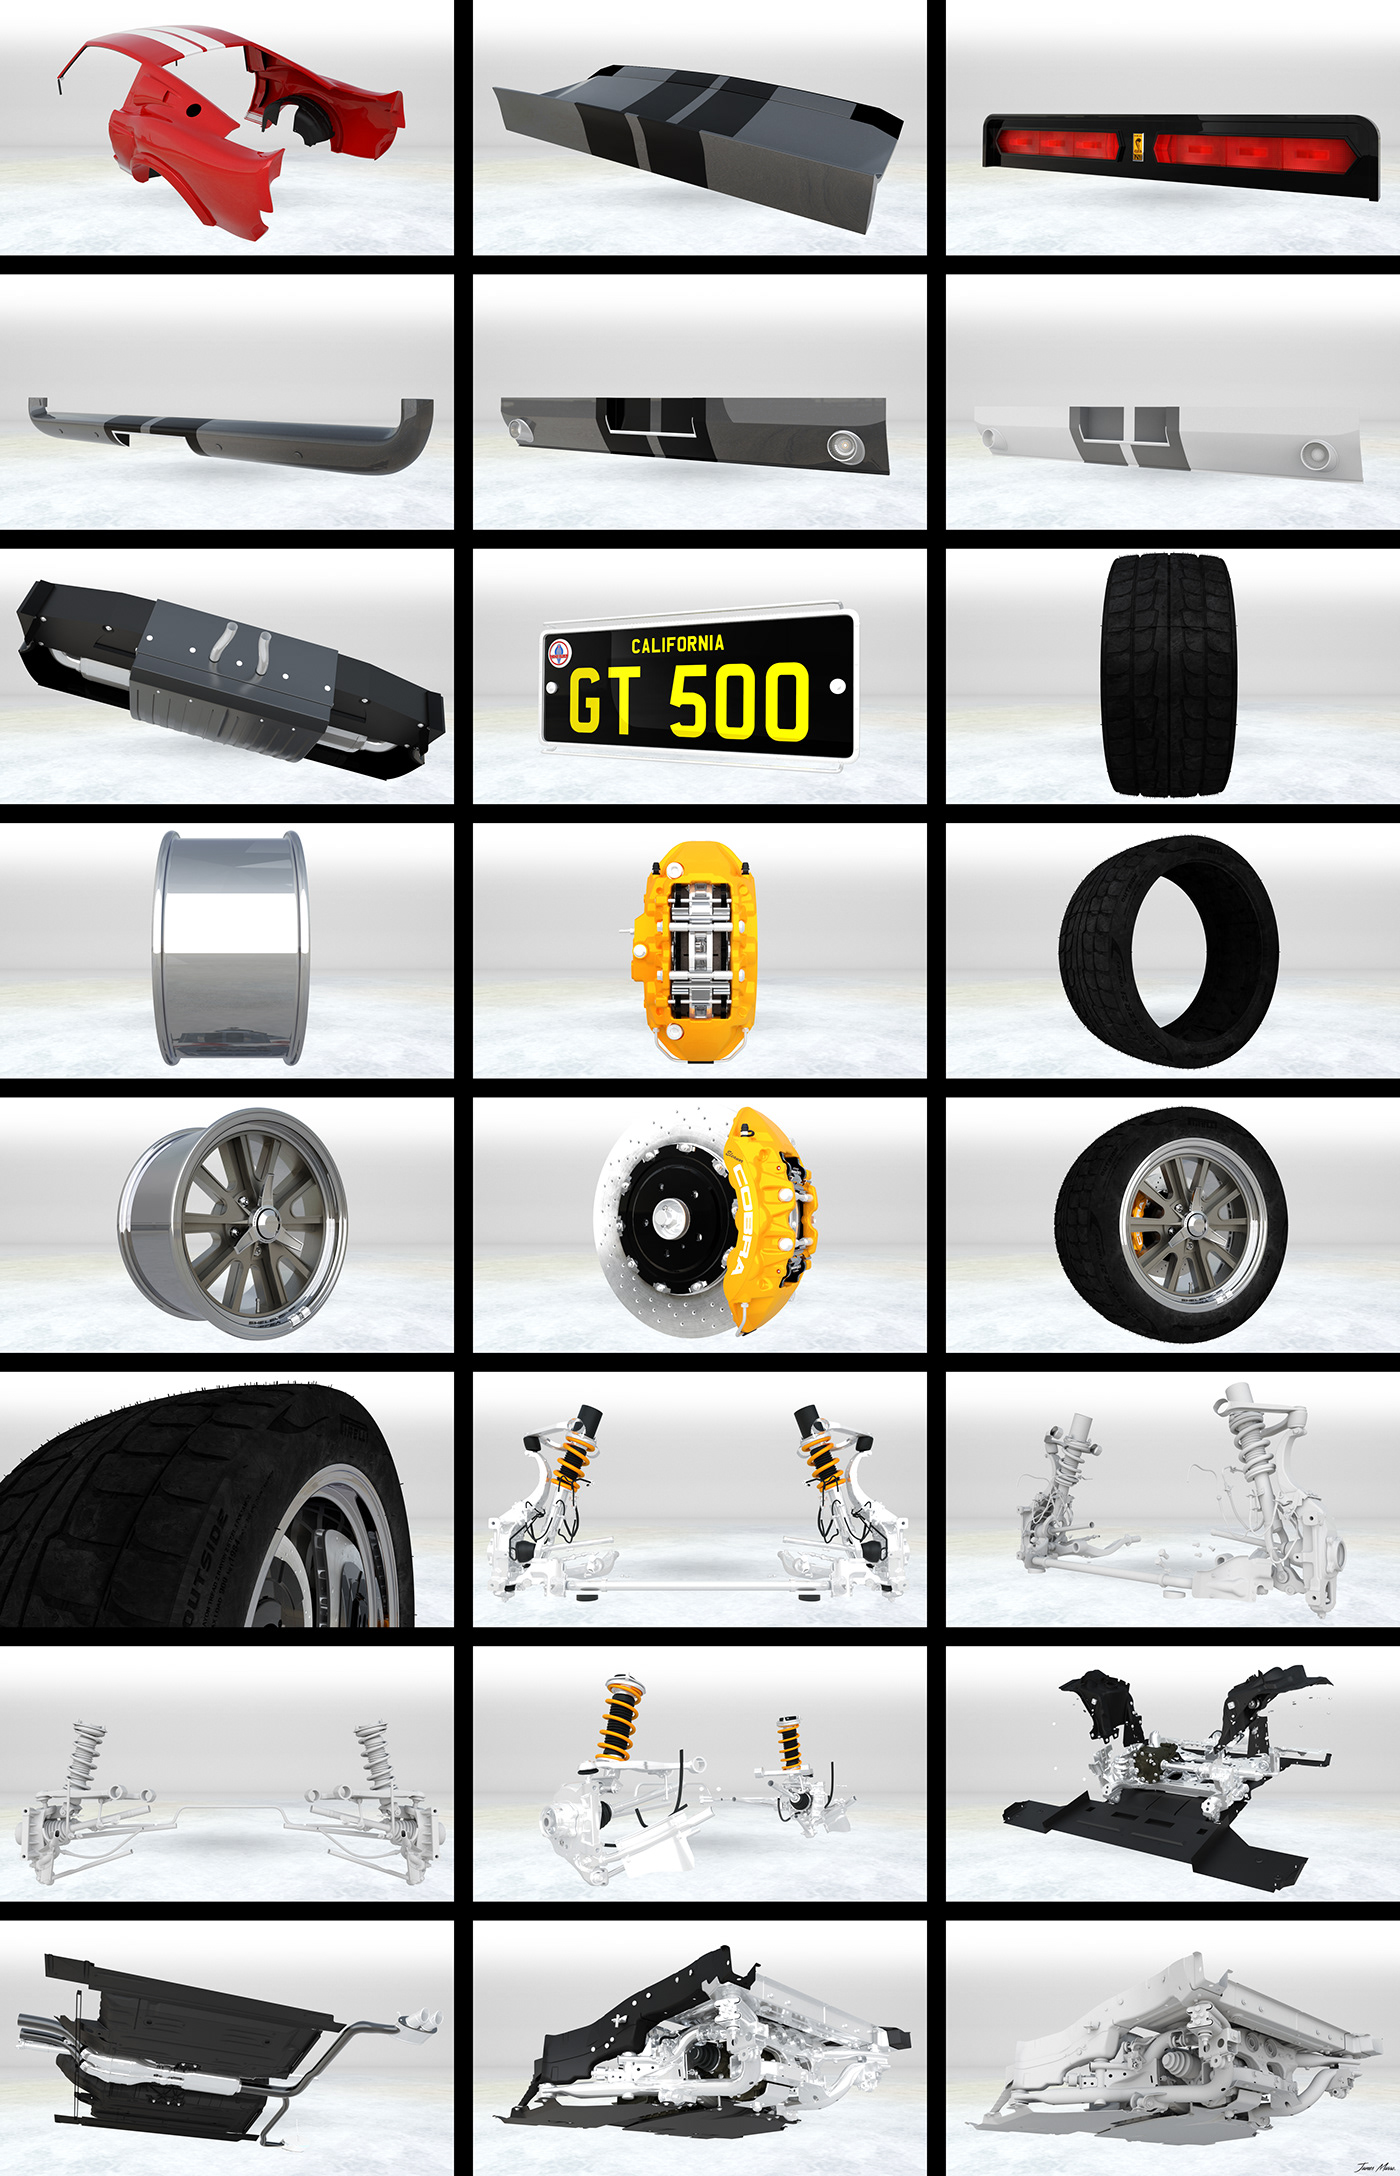
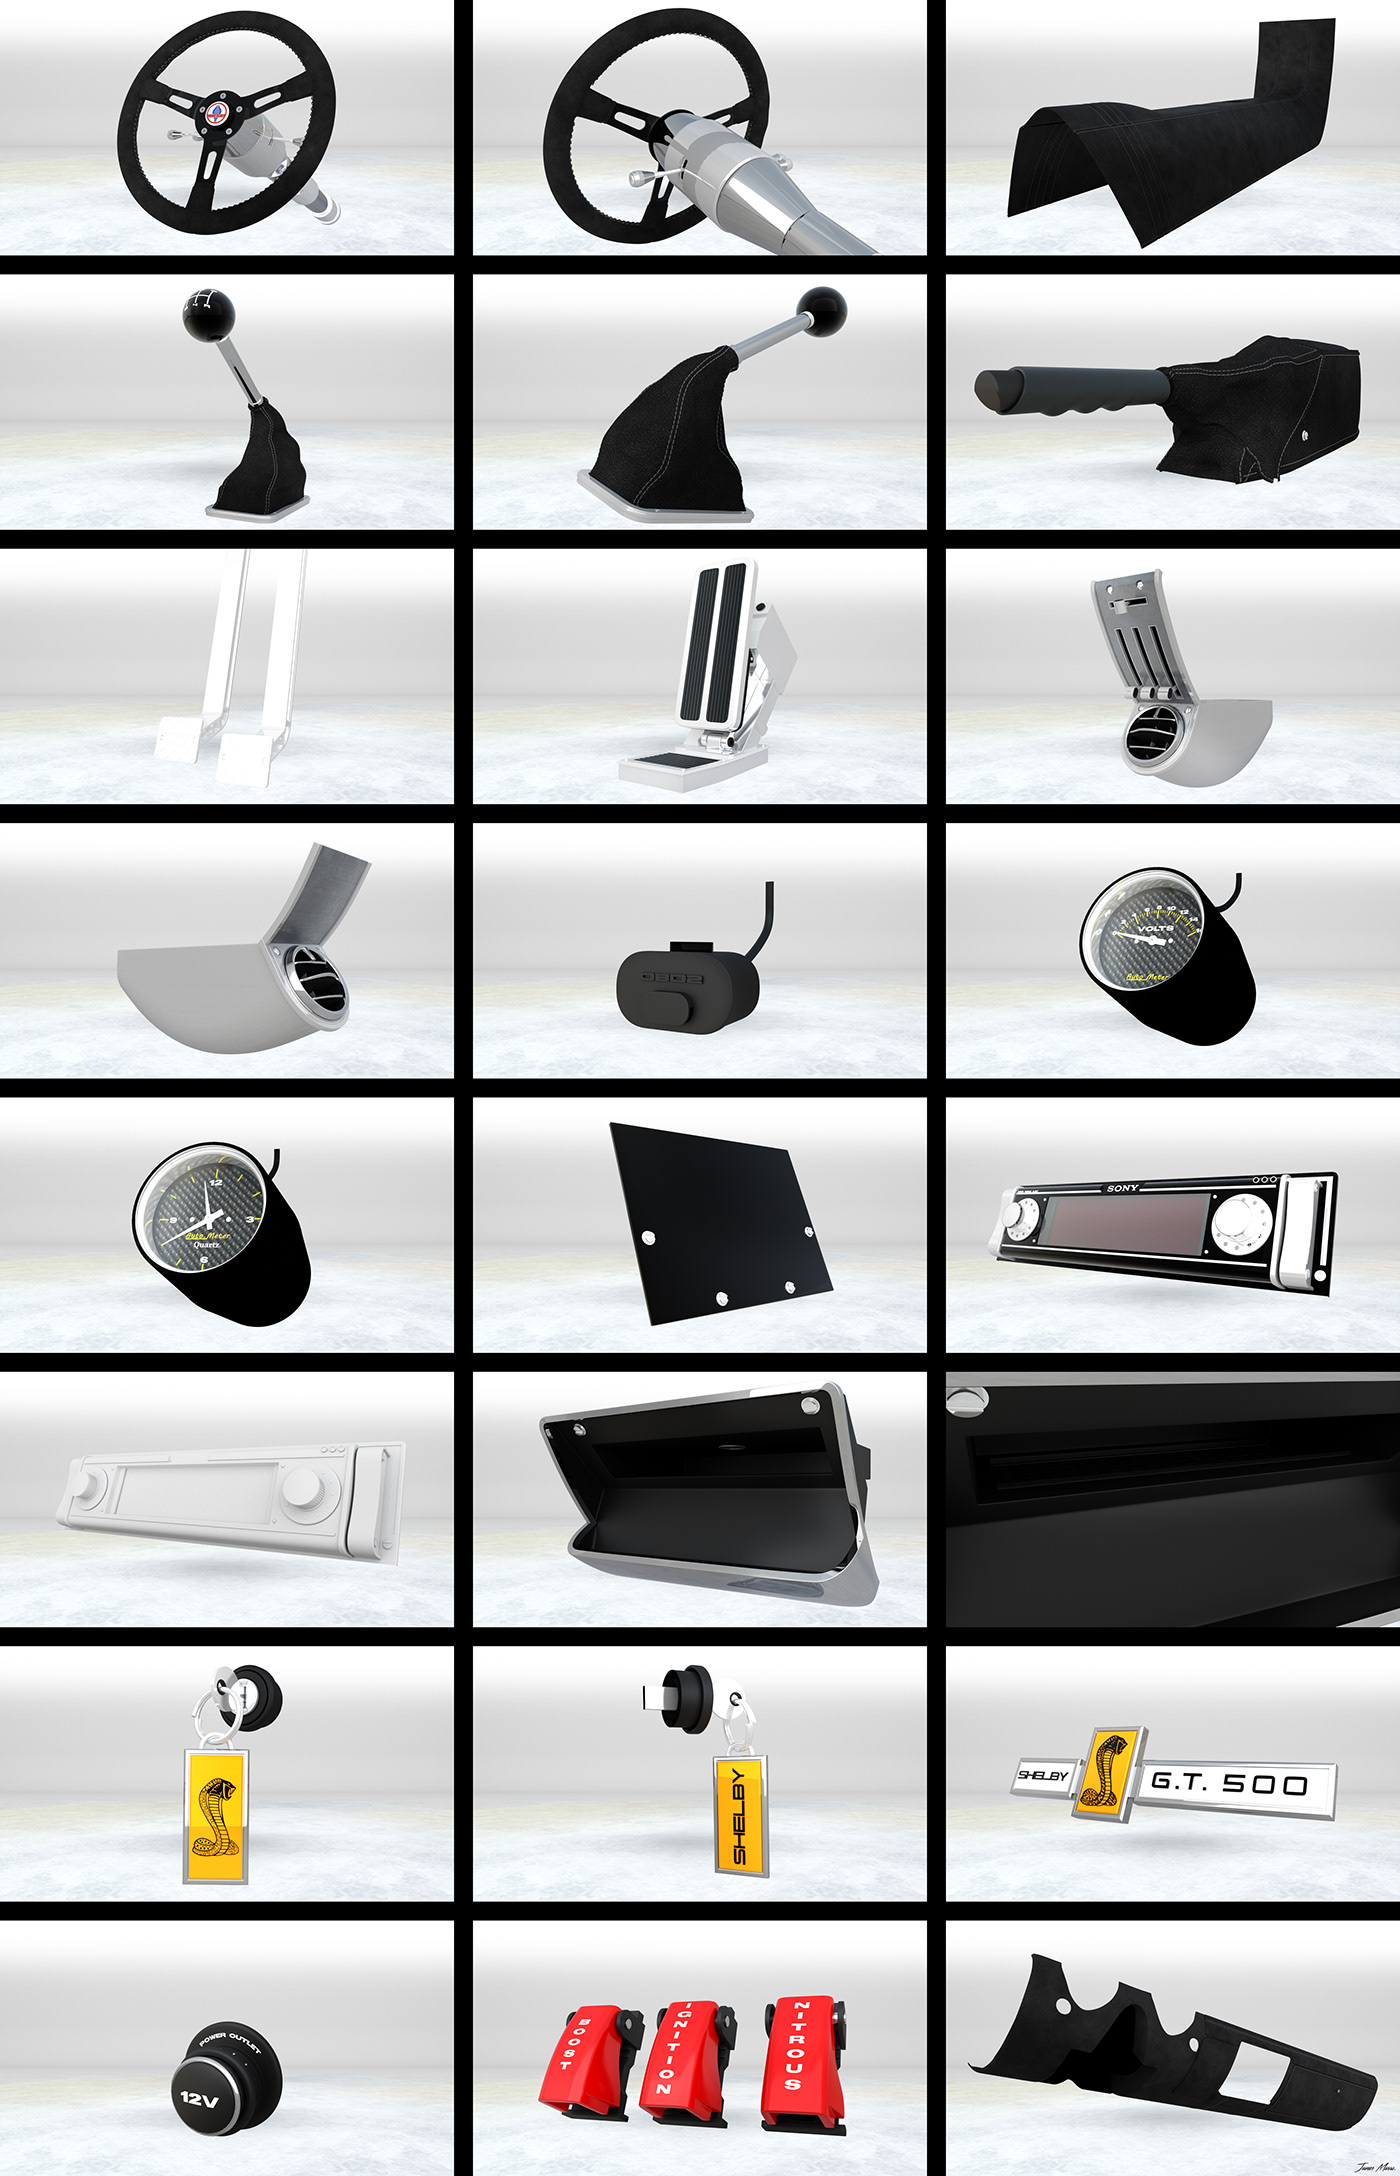
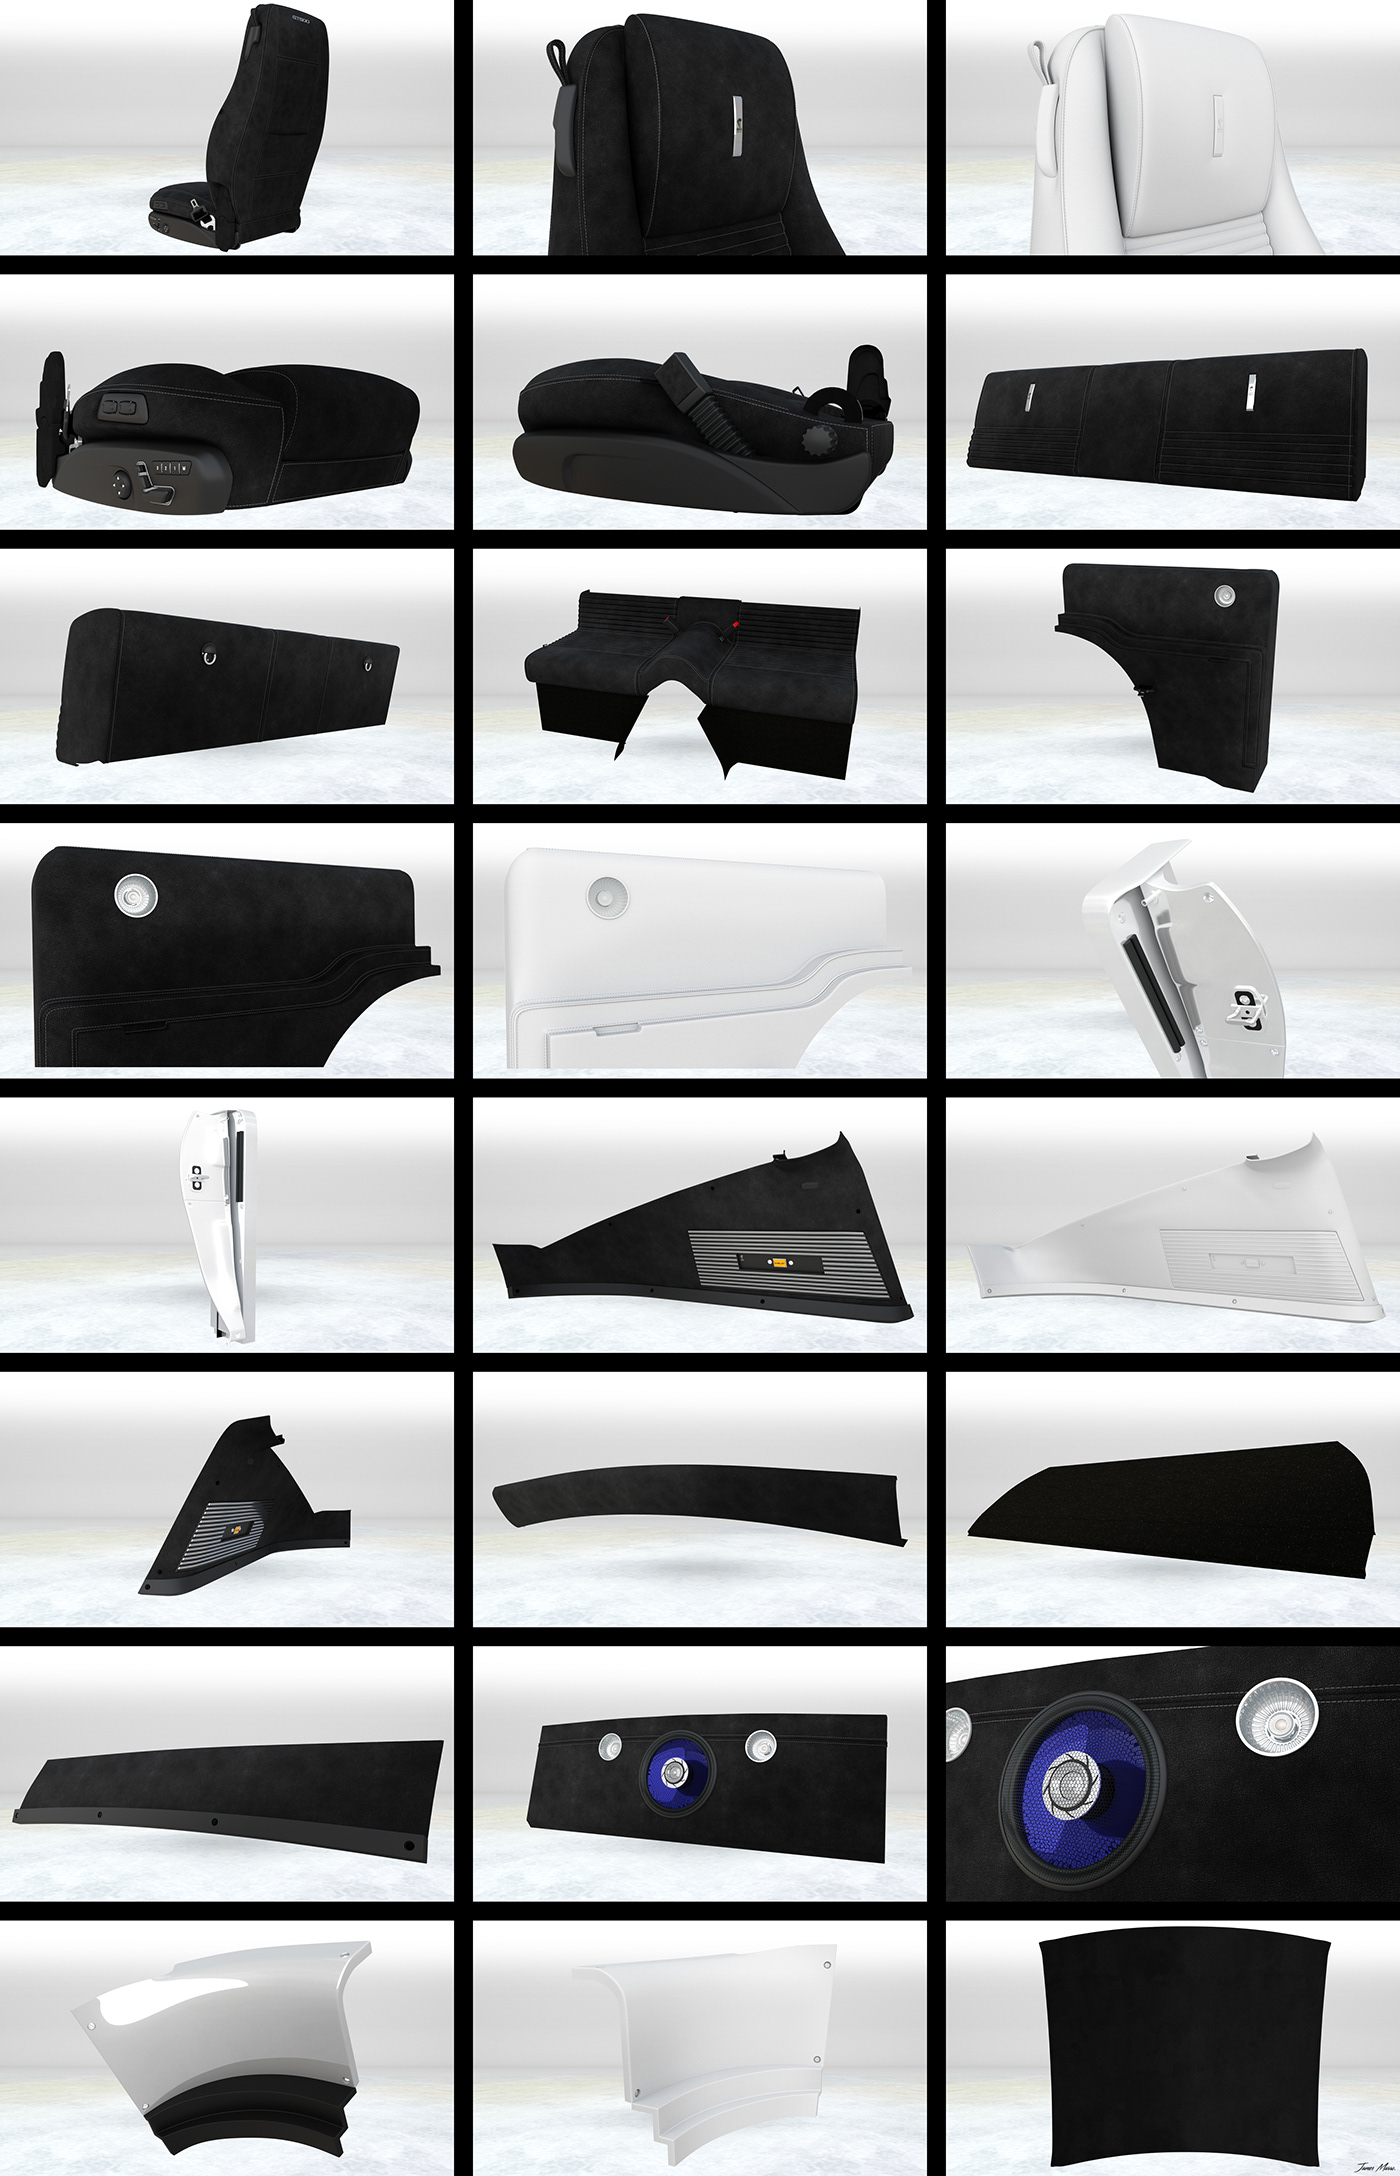
Now you will find a breakdown of all the components used to assemble the Eleanor Mustang. I call these my 'swatches', as they're all only rendered at 1080HD, but there are many of them. There are some multiple angles, clay renders and different paints here on the body panels. Only a light amount of retouching was done here, as my main focus is just showing off everything individually.
I would of honestly also like to of included others with dirt/ grime over the entire car. However, I do plan on creating more projects with this vehicle, so stay tuned for that then.


In addition to my 2023 year being spent on re-modelling the Eleanor Mustang, I also decided to upload all of my models that I like to Sketchfab. This has been good for many reasons, one of which is being able to give a breakdown of all the components to you viewing.
This however did present some issues; the first being that it was necessary to break down everything individually and not as one file. This is great for demonstration purposes, but also, it would of not been possible as Sketchfab has a 100mb file limit, only going up to 500mb with a purchased option. But also, the car was never designed for a low-poly version as such; so a lot of backwards engineering would have been needed if I wanted to achieve this.
In addition to reducing as many polys as I could to meet that 100mb limit, I also had to take into account blocker creation. This is because I want the viewer to be able to focus on everything that you're meant to see, not all of that parts that are not meant to be. Therefore a good chunk of time was needed in order to maintain the existing shapes, whilst covering up everything not intended to be seen.
Finally, not as much of a challenge but more repetitive, is the materials. So because the vast majority of the car is all modelled, even as far down as to the cobra logo on the badging and key. I wanted to maintain consistency between the materials across all 31 assets of the Eleanor Mustang. Unfortunately, Sketchfab does not support a material library or the ability to carry over materials as such. Therefore I had to go between uploaded parts in order to manually recreate all settings of a material, so that they were the same.
Sketchfab Eleanor Mustang Collection:
(To turn on HD textures, click on the cog in the bottom right corner of the Sketchfab UI and change it from SD to HD. There will be a blue bar at the top of the UI to indicate its progress into loading the textures on).


All of the above now concludes the new work of the Eleanor Mustang, atleast in the white studio environment.
Now I want to take you back to 2015, the year after I graduated from University, about four new projects into my portfolio at this point. So, I set myself the challenge of doing my best and most ambitious model to date. I quickly decided that a car would be a great way to push my skills and develop my portfolio, in order to get my first Industry job. Being an absolute petrol head too, really gave me the passion for trying to make something to the very best of my ability at the time.
So I had a look around the internet, because I wanted to do something that nobody at the time had really done before; and found that the iconic 'Eleanor Mustang' from 'Gone In 60 Seconds' had not got a highly detailed model that I could find. Therefore I thought this was the perfect project car, something that was not only recognisable, but also not new enough that a CAD era model would be around.
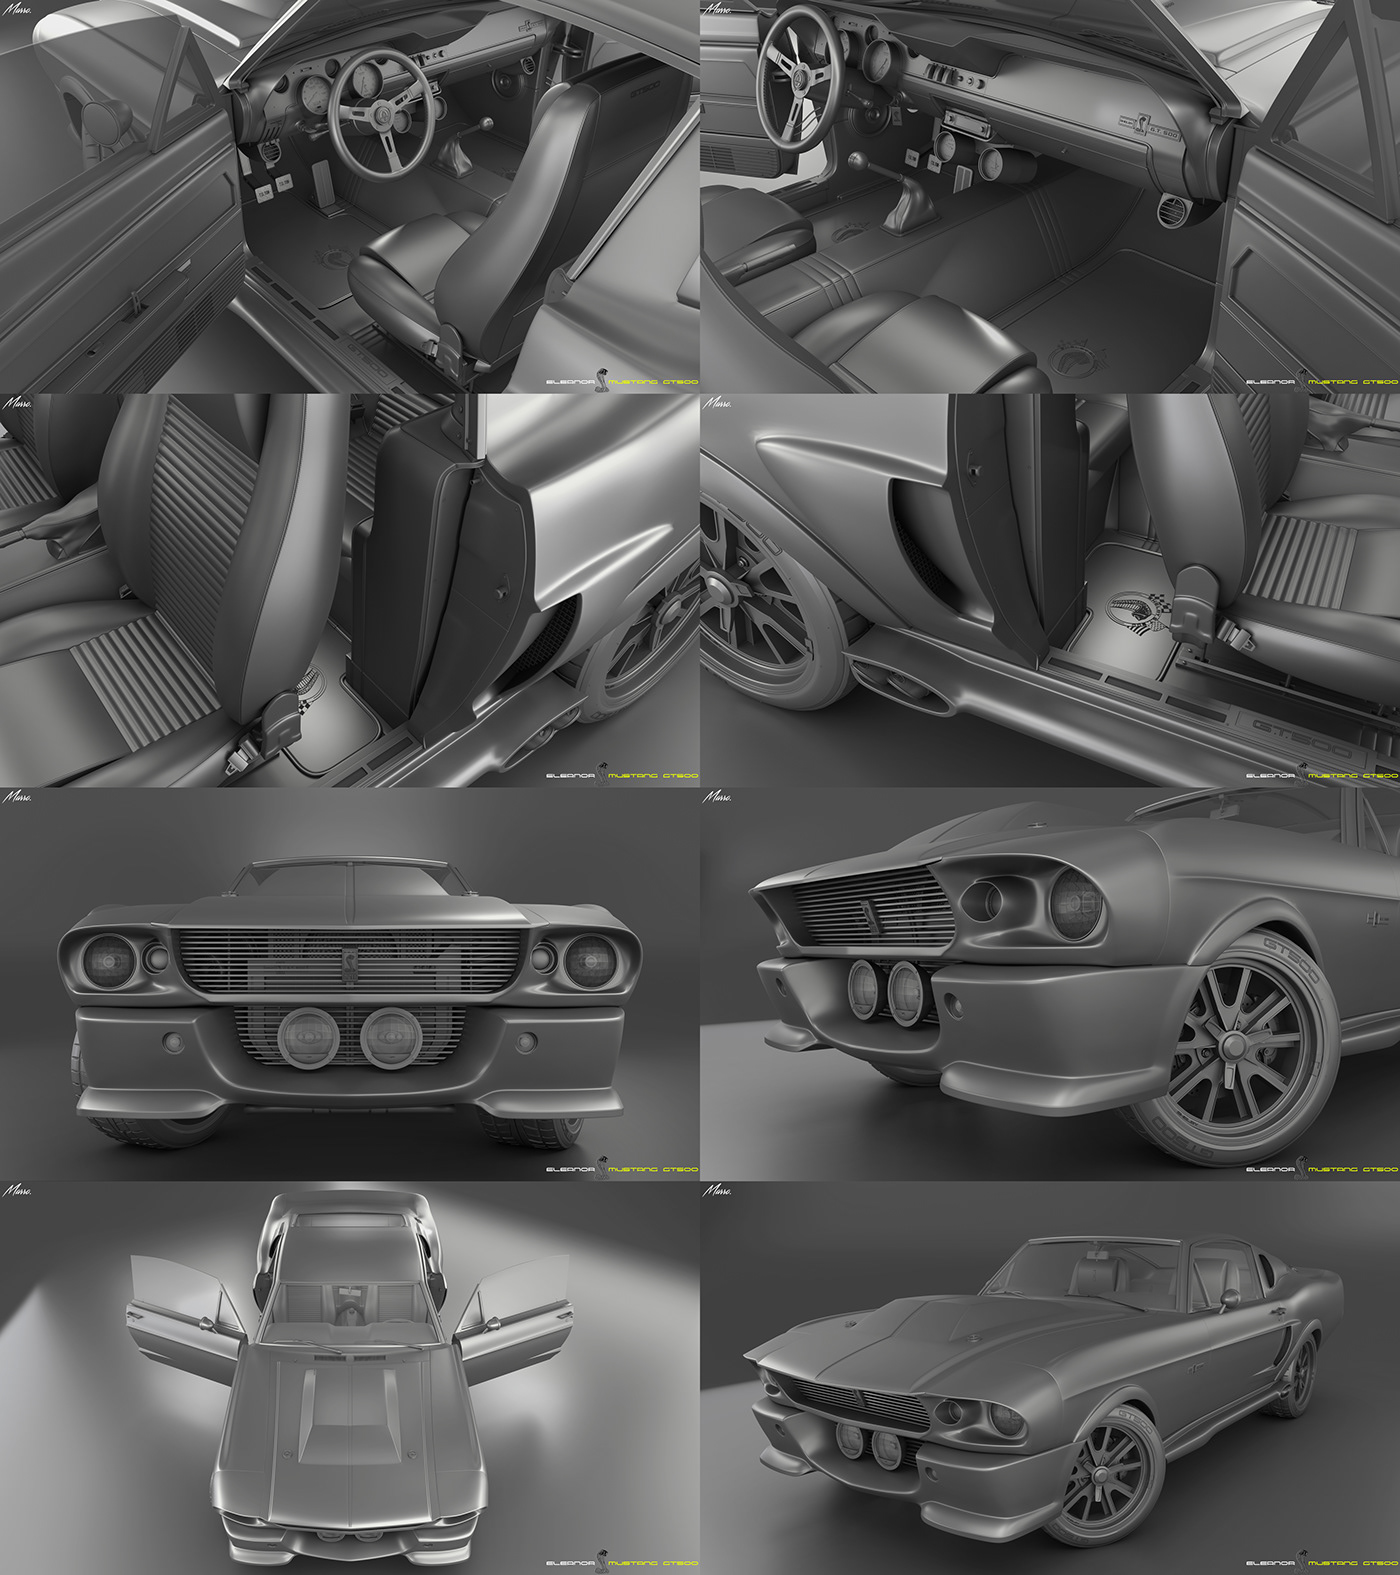
To begin, I first built all the wheels and headlights, This is because they had a relatively round shape, that the proportions were not as significant of a factor to alter once positioned. After this I began to model all the small exterior details, such as badging. Then once positioned, the body then soon took shape. At this stage I was just focusing on the exterior of the car; as I knew my interior soft modelling would require more practice, before I decided to take on that section of the car.
In terms of tools and techniques to achieve this model, I got blueprints of the car as image planes in Maya for proportions; I then looked at many reference images of the car and largely based it upon the version linked below.
From what I remember, the body panels and bumpers were the biggest challenge to get right. So now below would have been the first renders I did of the Eleanor Mustang. Modelled in Maya 2014 and rendered in Mental Ray for it's time. This was an era when I knew very little about both lighting and retouching, so I pulled as heavily as I could on my modelling ability, to be able to get the best result I could.
In hopes that it would be enough to get me my first industry job, which luckily, it did :)
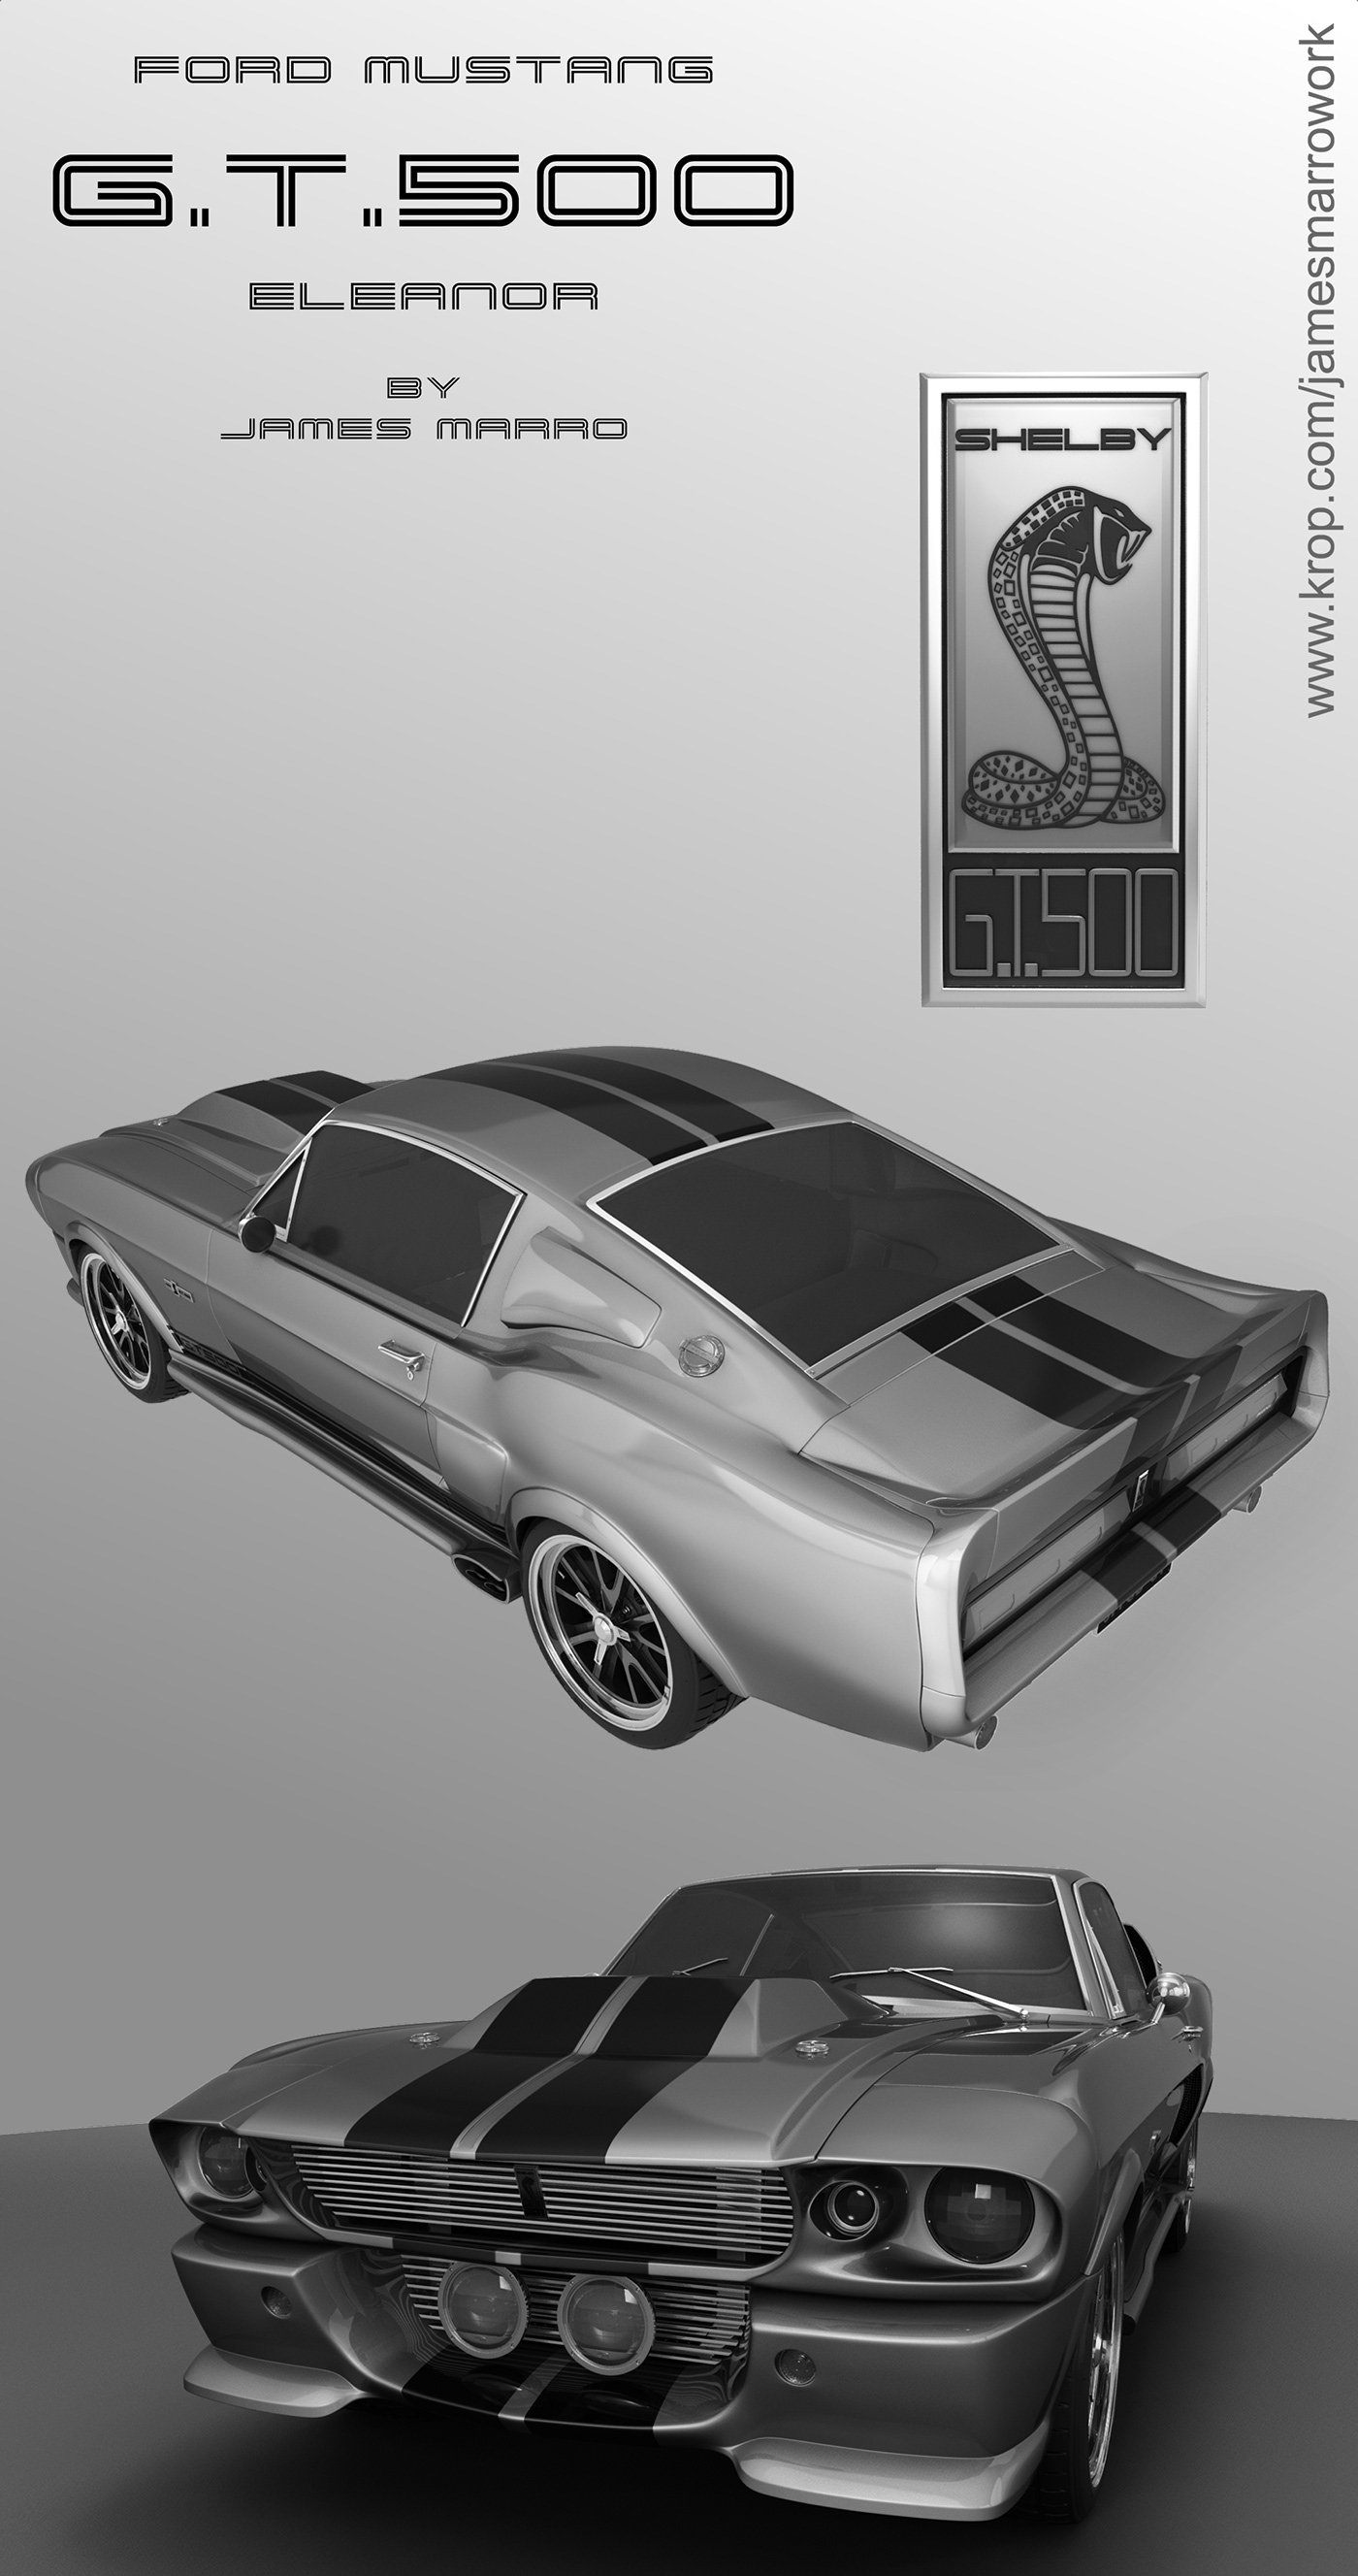

You'll notice that my work and prints were all done to have mostly a tall aspect ratio; this was because the website 'krop.com' that I was using at the time, took advantage of the pixel count in this way, more so than the side views as you were not able to zoom in back then. So more detail could be demonstrated by keeping that kind of aspect ratio.
I also did above, a turnaround of the Eleanor Mustang, rendered in Mental Ray. The camera angle movement was high because of render times back then. I believe only running on a quad core processor for the era.
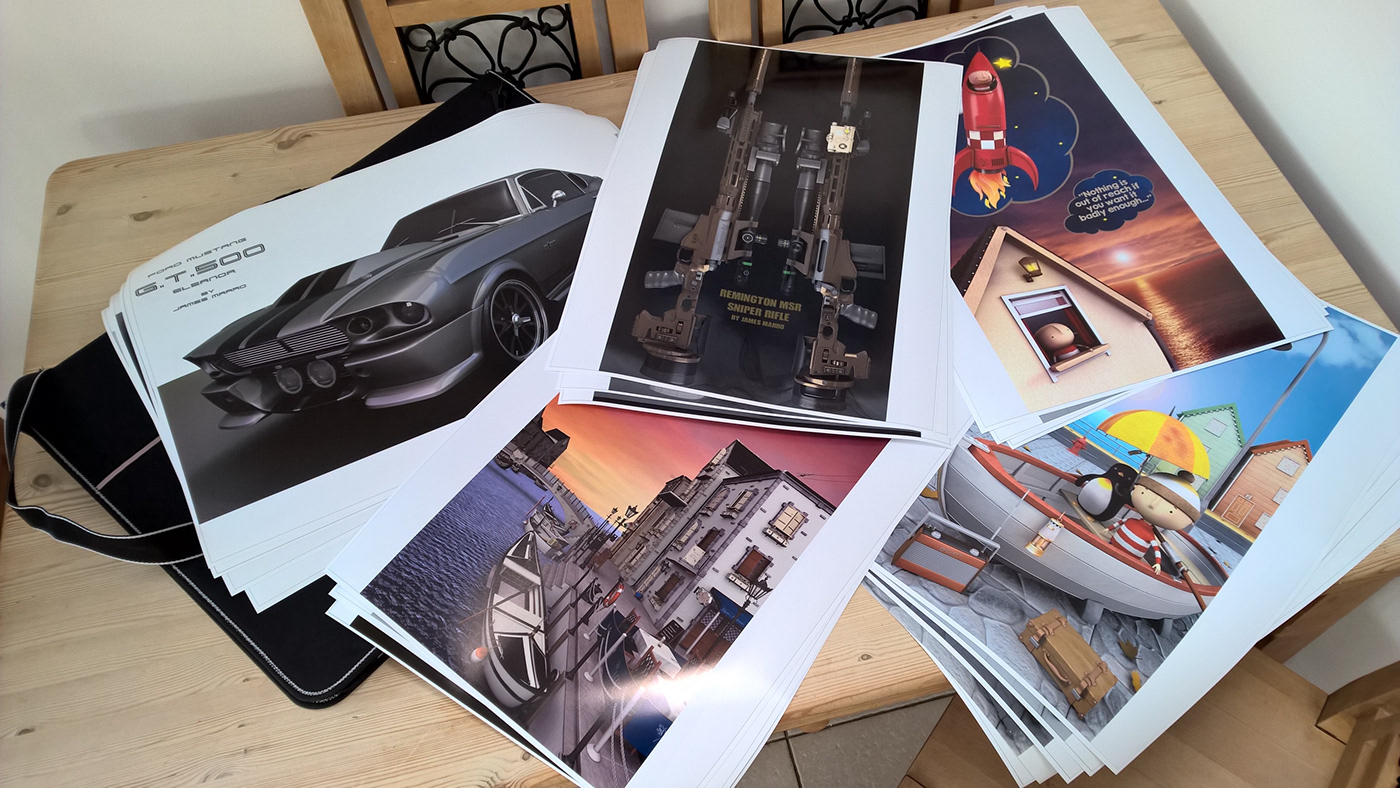
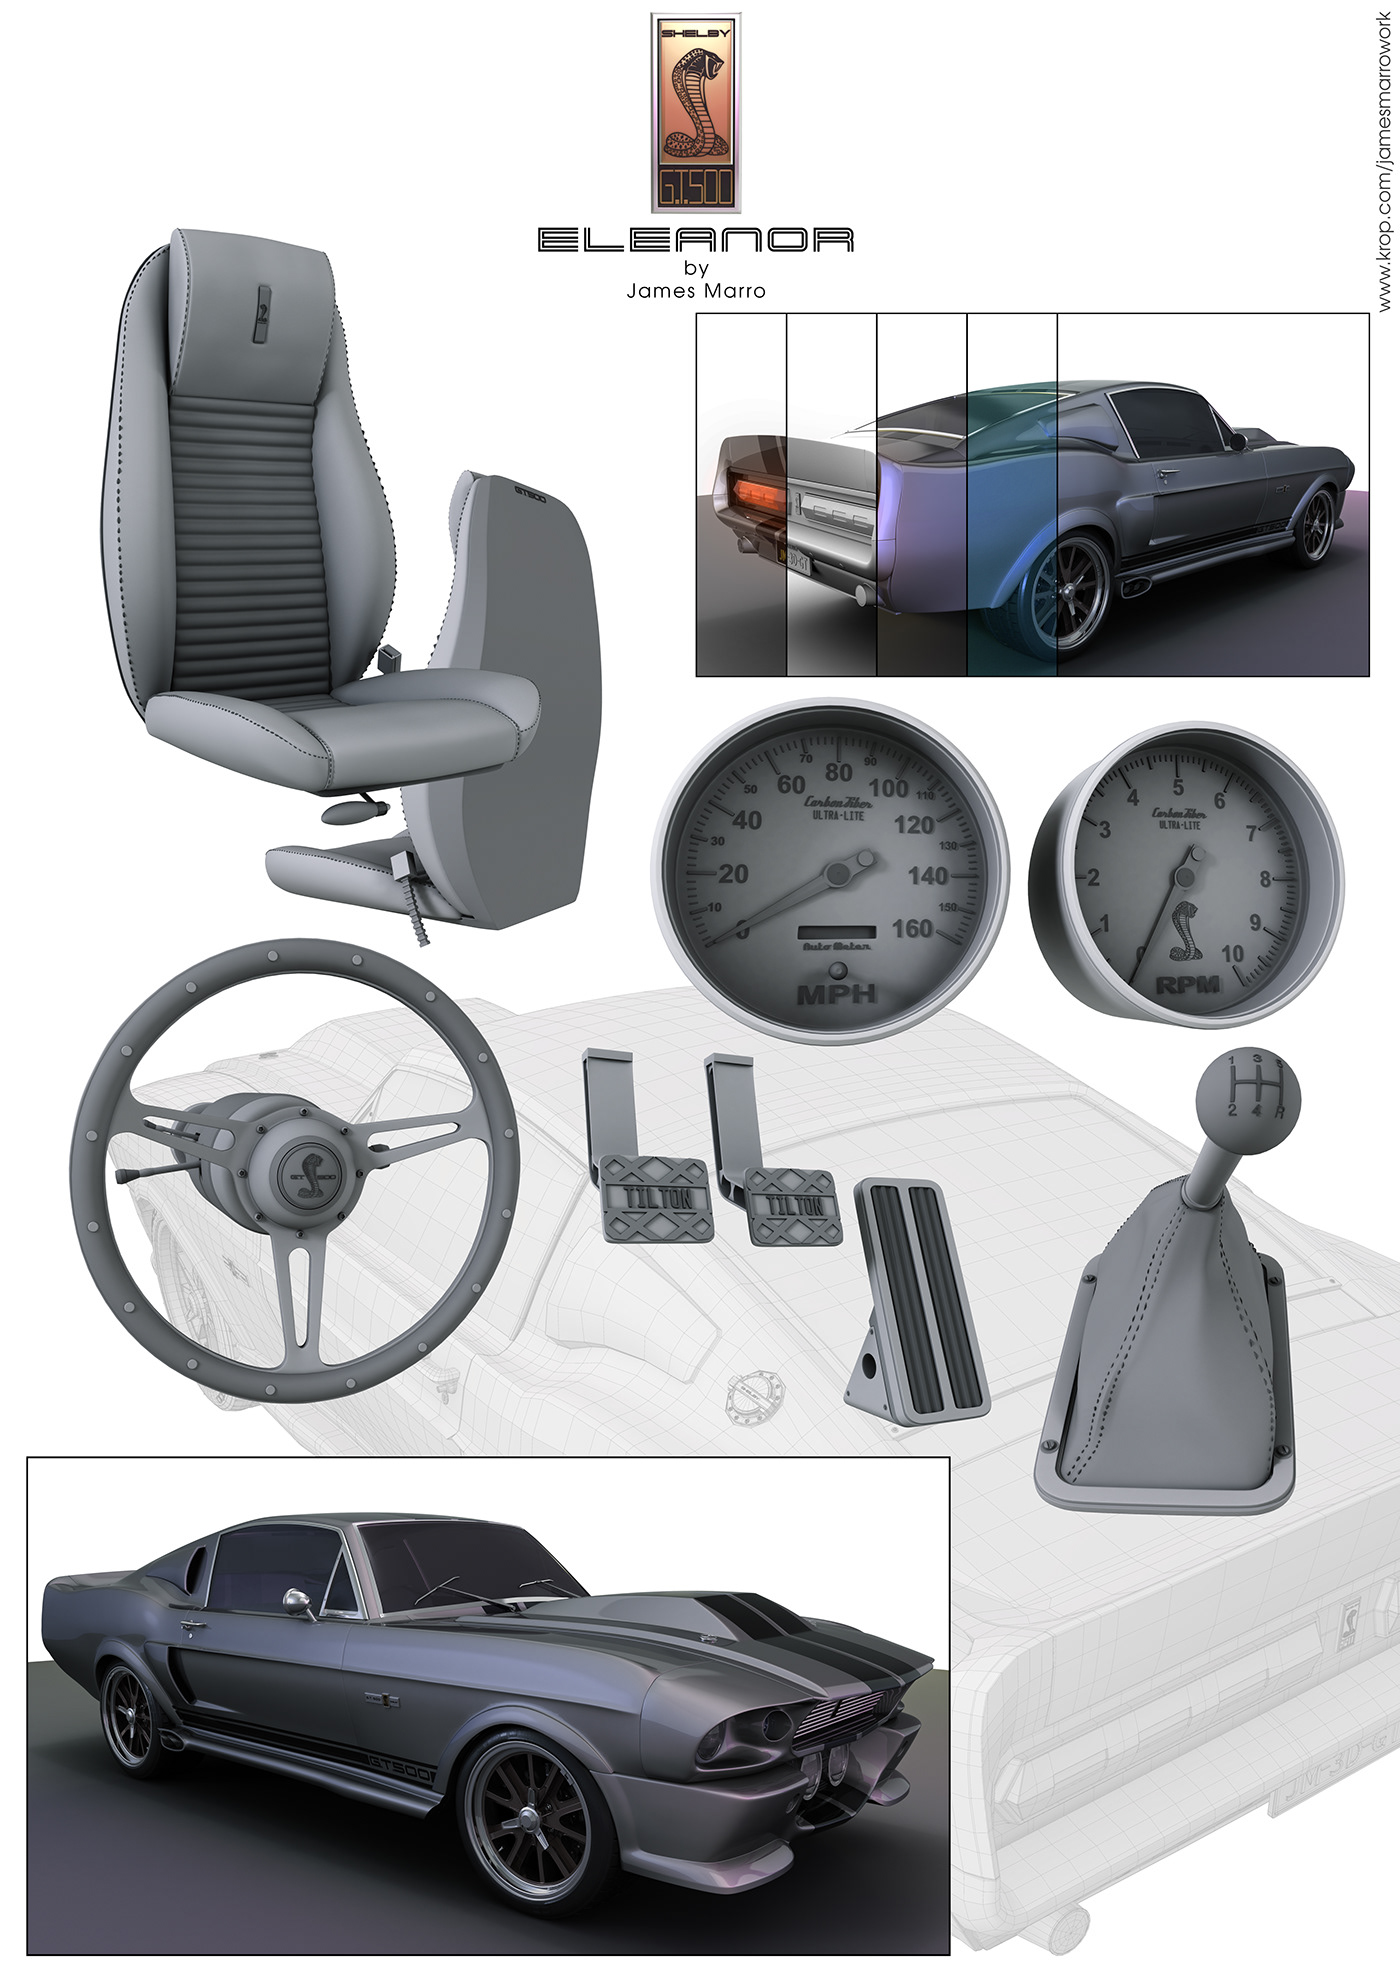
Lastly I just wanted to mention the large poster below all of these. So within a week of me getting an interview for my first industry job, I decided to model a bunch of interior parts, make a poster and have that printed and ready to go along with my others. I did this since I knew the agency did a lot of automotive work; and I wanted to increase my chances as best I could.
The funny thing looking back was the stitching. Back then, I had no idea a best way of doing it and even looking online, couldn't really find anything. So I manually had to position spheres to try and get it to try and be consistent. Obviously it was not and did not look very good. But with the time frame I had at the time, I wanted to be able to have that detail in.


Now about a year or so later in 2016, I began doing some tweaks to the exterior, in addition to modelling the interior of the car. This proved to be both challenging and rewarding to now see the car fully complete.
You will now start to see from these clay renders below, the parts that carried over to my 2023 version and those that needed improvements. For example, the front seat rails were replaced with a CAD version, in addition to the belt buckles.
There were also some weird quirks like this ball shape that sat on top of the rear of the handbrake. This was modelled because the photo reference showed it; yet I have no idea as to what it actually is all these years later, so it got removed from the current revision. The front grille badge also got removed as to emphasize the scale more of the car.
I also added in my own details, such as a tray that sits in the blank housing, just above the radio in the center console. I believe all of these clay renders would have still been done in Mental Ray, using an ambient occlusion pass.


So now we're in 2017 and this is where I made the switch to render using Arnold, now Autodesk's default renderer. So everything would need a re-material, in addition to all new cameras being made to demonstrate the model. Something which was a nice addition was removing some of the exterior body panels, as to then see the interior. This was a technique that I learnt on my current job at the time.


2018 was a bit of a quiet year for me on this project, as I had got some backplates that you will see above; that I planned on using with the Eleanor Mustang. This however did not pan out and I then decided that because I was learning V-Ray a lot at work, that it would be beneficial to drop Arnold completely. This then resulted in re-materialing the entire car again, so that it would take advantage of this.


After a bit of slow progress with the car over the years by this point, I really fancied the idea of doing an animation. But I wanted to do a clay version as to best show off the modelling aspect, rather than making something cinematic. Therefore I did two long videos, one of them being a turnaround and the other a series of camera pans. This took a very long time to render as I chose to do 4K 60fps on these.

I also thought it would be pretty cool to have printed and framed, a bunch of renders of the car for personal use. I had still only done, very little compositing work up until this point; so I didn't get entirely the look out of the car that I wanted to. But it seems a good foundation to build upon, plus adding in all the printed stickers and badges to the frame.


Now we're in 2020 and I wanted to finally start rendering the car with materials, on backplates, with a HDRI setup. But just prior to that, I decided to learn more on compositing in Photoshop. This was an incredibly valuable skill as I was able to improve by a good amount, the previous three angles of the car that I created the year before.

So now I was diving into the world of aligning my car into the scene with multiple render passes. Using and learning about backplates, domes and HDRI setups. I went to multiple places to acquire these, some of which are in the links below:
This was really a stage in my Automotive CGI Career, where I just wanted to get stuck in with experimenting on what works and what doesn't. Figuring out what I am good at and where I need to improve. So I wasn't entirely worried about creating the absolute best possible piece of CGI work up until this point, even for me. What was more important, was understanding the fundamentals, so that I can then build upon that for future work. After all, the main goal was to get this Eleanor Mustang, to be the best looking CGI version it could be online. To trying out different scenes, light, dark, outside, inside, colour or black and white, was crucial in terms of getting the best future look I could.

Over the years I have made various materials, backgrounds and animations of the car, but now I wanted to show it off in a fully modelled background; that I put together along with some V-Ray Fur for the grass. This was something that I would only ever end up rendering in clay materials however. Some normal maps were also used here to bring out materails, like the ground and tyres.
My main reason for this was that most of my previous clay renders had been very flat for lighting, this was just due to lack of experience and render times. So now I got the car to a point where lighting and shadows, really played a considerably better role in showing off the cars body shape.

Towards the end of the year, I decided to purchase a scene that was already modelled and materialed. I thought a studio would look pretty cool for the Eleanor Mustang. But honestly, I didn't really do any compositing on this work, or knew what I was doing as much with lighting.
The only real shot that I felt worked, was the top one, the front three-quarter. All of the others I essentially didn't touch the lighting on and just moved the camera about. This would have been rendered using V-Ray NEXT at the time. But like with some other attempts at getting some renders of this car to where I am happy with them; I still took this as a learning experience for the future.
After all, this was still the exact same model from 2015 to 2016 and materials from 2017. With my skill level, knowledge and expectation going up, year after year. I realised that in order for me to really get this car to where I truly wanted it to be. The project would really need looking at from the ground up. So I let it be for a bunch of years from 2020 to 2023. During this time I worked on many other projects and models, with the ambition that I would one day, be able to show off the car in the best way possible.


So now we're back in 2023 after many small projects and a large one, which was my Hawker Hurricane Cockpit. At the start of the year, I really thought that I would be 'improving' this model as such; but the more I looked over, the more I realised that I would be pretty much remodelling the entire car. Fixing up topology, adding in more details and parts that were absent from the original model; would all be needed for getting the renders out of this car that I know I could.
As back in 2015, I started working on the alloys and tyres, followed by the lights and badging. After this, the body panels got a lot of love with better shapes and edge flow. Also during this time, I was looking a lot at photos online of the car and really noticed how much different it looks compared to something modern. Whether that be outside in an environment or a studio, real life or CGI it didn't matter. To me, selling the shape in renders was going to be different from what I had seen on modern cars. It was like the Mustang shape is very boxy, but with a lot of curves on top. Compared to a modern day Porsche which looks very curvy, but with hard lines and shapes on top of that. So something to consider when rendering.
Below is the renders that you would have seen at the very top of this project.


Overall, I am very happy with how this project has come out this year in 2023. In terms of the modelling, materials, lighting, rendering and compositing. I really feel as though I have now truly achieved the result that I always wanted to with this car. This Eleanor Mustang has played a crucial part in me getting my foot into this Industry. As well as my personal development, moral and portfolio.
So why did I decide to show off everything, old and new, good and bad ? Well the reason for this, is I find it's important to remember where you've come from, in order to know where you're going to. Everybody is at different stages of their careers and life is a journey. So whether you look at this work and think about what you could do to improve it, or look at it and it serves the purpose of aspiration and progression; both of those are warranted and everything in between.
This is not just a collection of renders to me, this has been a fundamental part of my creative life, and I am thankful for it. There is always room for improvement, and I certainly plan on doing some more renders in 2024 with it. Whether that be backplates in V-Ray, environments in Unreal Engine or a series of Animations. Also one day, I hope to model in an engine and boot; I just hope I don't end up redoing the entire car again!
So if you have genuinely taken the time to look at my work and certainly read through everything that I have wrote. Then I would personally like to thank you for doing so. This project isn't over, just another milestone in my creative career. To all the readers, I hope that you're seeing your creative work in the same way. Something to improve on, something to be proud of and something where you can appreciate the journey, just as much as the destination :)
If you have any questions for me about my work, then please feel free to message me here on Behance.
All the best,
James.