For this project, I had to create a 3D model in Maya as close to the reference as possible. I work on this model throughout a month and had to hit certain checkpoints to get my final grade, and a finished model. I did the project it in peices and steps in order to achive clean topology and get the level of detail requested by the instructor.

This was my model I choose for this assignment. He had sort of wierd proportions which cause a bit of a headache later on.

Here is the first step to success! Blocking him out, making him 3D! As you can see, this is a very low poly, rought block out. But remeber, this is a lengthy process and I have to start somewhere.

Detailed hand with knuckes, wrinkles, fingernails, and most importantly, CLEAN TOPOLOGY! (Also I had to make sure I had a specific amount of verts on the rim of the wrist for attachment later on.)

The models torso, including a belly button, muscles and keeping an eye on the verts around the holes. (You may also notice that his head and neck are not directly in the middle of the neck opening, and also one sholder is higher then the other. Remeber those problems I mentioned... and so it begins.)

An arm. Nothing to spectacular, verts are matching up and I will mirror it over for the completed model.

A leg. Same as the arm, will mirror it over later.

The face. It wasnt exactly the same shape and size but I tweak it here and there later on.

A ear, ready to be mirrored over. (Also what is great about this ear is that Im able to reuse it for other models too!)

Finished model with all parts attached. It doesnt match up perfectly with the referance, and it has its minor differences, but over all a complete model ready for UVs, clothes, rigging, and animating!
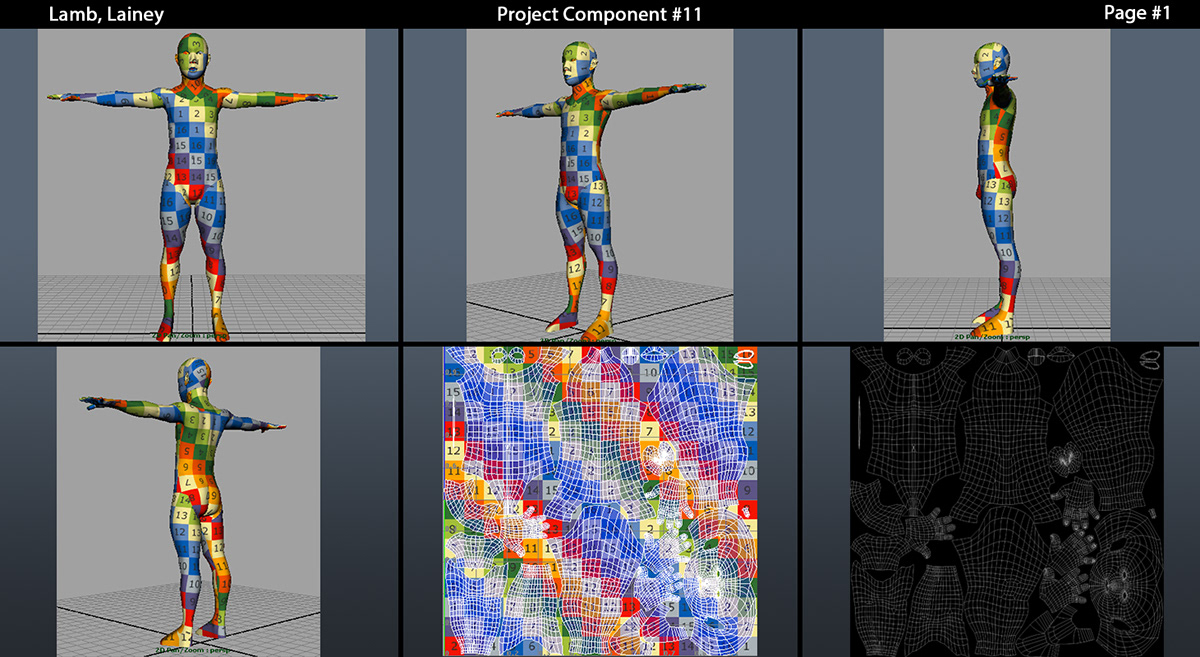
Speaking of uvs, I layed out a the map too. The reason for the checkers is to reassure that the texture created and imported in won't be streached to big or small compared to the rest or it the body, clothes, etc. If all the checkers are about the same size, then the textures will be in uniform in size and pixel density. The UV seam are strategically placed throught out so the wont be noticable and distracting.
Thanks for your interest and support! I learned a lot throught out the month and find myself applying these techniques frequently while working in Maya.

