Module 3: Disciplined Surface
To start Module 3 we were first asked to explore the various ways in which a flat surface can be altered to create a different shape or form while still maintaining a unique composition. A surface is defined as something that exists throughout the built enviroment, being able to be altered through the composition. Through the process of making, multiple iterations and process models should be made, a process as defined as "iterative making."

A compositional technique applied to the surface of a bedroom wall.

Alterations in a wall pattern.

Research in the folding technique.
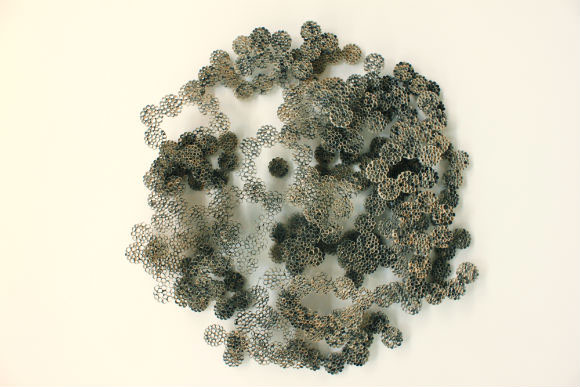
Exploration of the technique of overlap, shown above is the constant repetition and layering of rolled pages from various books.

Using weave to create and expand a surface to create a structure.
Before starting my task, I first researched patterns and designs online to get an idea of what I would be working with and what I could expand on. Pictured above are some photos saved from the research, exploring ways in which surfaces can be built and manipulated.
For the first iterations we were to use 400 series Bristol board to create a series of manipulations to the surface of the board all while integrating our design principle and compositional techniques. I made 32 models each varying in design and depth with the main techniques being weave, perforate, fold, and overlap with my principle being unity. Each small module in this beginning process is different in every way but similar in some of the techniques used to create them.

Models exploring the overlap technique.

Models exploring the fold technique.

Models exploring the weave technique.

Models exploring the perforate technique.
For the second part of the module we were to explore the possibilities of our models on a "S,M,L,XL" scale. The proportion and pattern were to be analyzed in a way that could be repeated and unified, but also enlarged and scaled upward or downward to fit the needs of the intended design area or criteria. Below are those explorations with the original size being descripted as "1A." They are then multiplied and turned in photoshop to create patterns and develop the possibilities of expansion.


Original models before photoshop manipulation and multiplication.

Exploration of a perforated model.

Resizing and development of a model using overlap and perforate techniques.
After investigating surfaces and the Bristol board material through the four series of proportion, aggregation, pattern, and rhythm I decided to move forward with the idea of overlap and perforate, the two I thought would lead to the most potential in surface compostion.


Two of the original compositional models that were used in final design.
For the final I used the two models from the original 32 models that dealt with the techniques of overlap and perforate, the two i decided in the second part of the module to expand on.
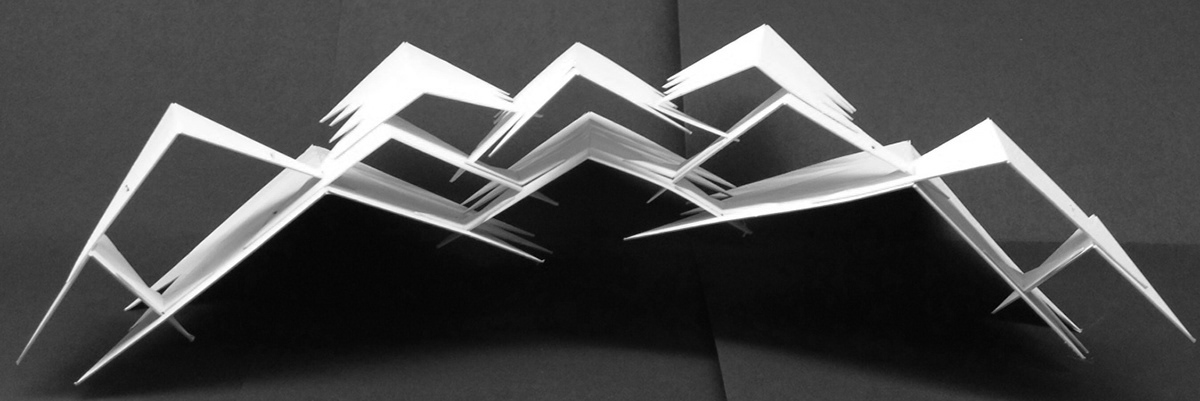
Final prototype before construction of the final model.
Using the two initial models I created the final prototype shown directly above from the beginning process, a series of perforated triangles layered upon each other through the technique of overlap with glue to further support the structure. I decided the best orientation would be horizontal, limiting it to the design of a roof or covering of some sort, possibly extending off of a building or placed in a park. The scale is still decided at a 1'' to 1' scale model with the possibility of being placed at a smaller scale. Using the process shown below I constructed the final model then showed after the process diagram.
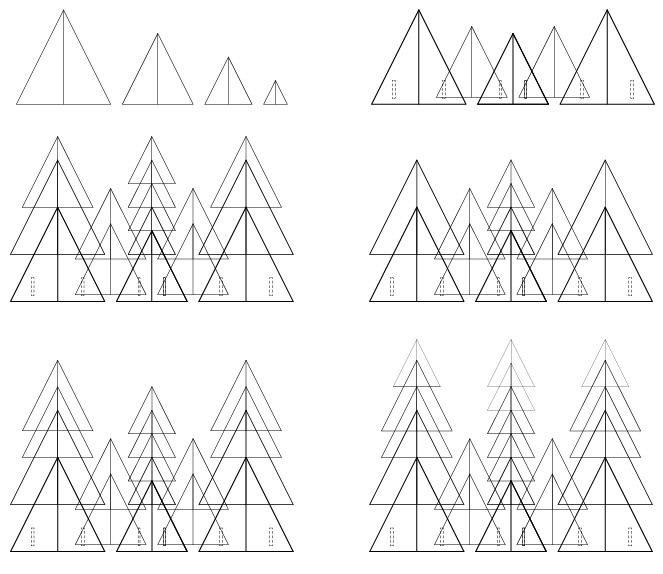
Diagram of the process of construction.

Picture of the final model.
After the final construction of the model I made multiple diagrams in rhino to able to further explore the possibilites of expansion and multiple iterations and expansion of the same module.

Plan view of the original model.
After develoing and expanding on the idea of "S,M,L,Xl" the next nodels show the multiple possibilties of expansion while doubling the model upward and mirroring the doubled model. The original model could also just be arrayed to create a circular covering.

Possibility of the structure being doubled in size by adding another module to the first.

The module doubled and mirrored to create a larger complex structure.

Final module arrayed to create semi-enclosed structure.

Unfinished rendering of the model from front view when multiplied by three.
The next diagrams show movement throughout the space in the multiplied and expanded iterations of the model.

Movement through the built structure as if it was mirrored.

Doubled canopy and how a person may move in respose to the space.
The final InDesign board created was comprised of all the files, showing the total process and completion of Module 3.
