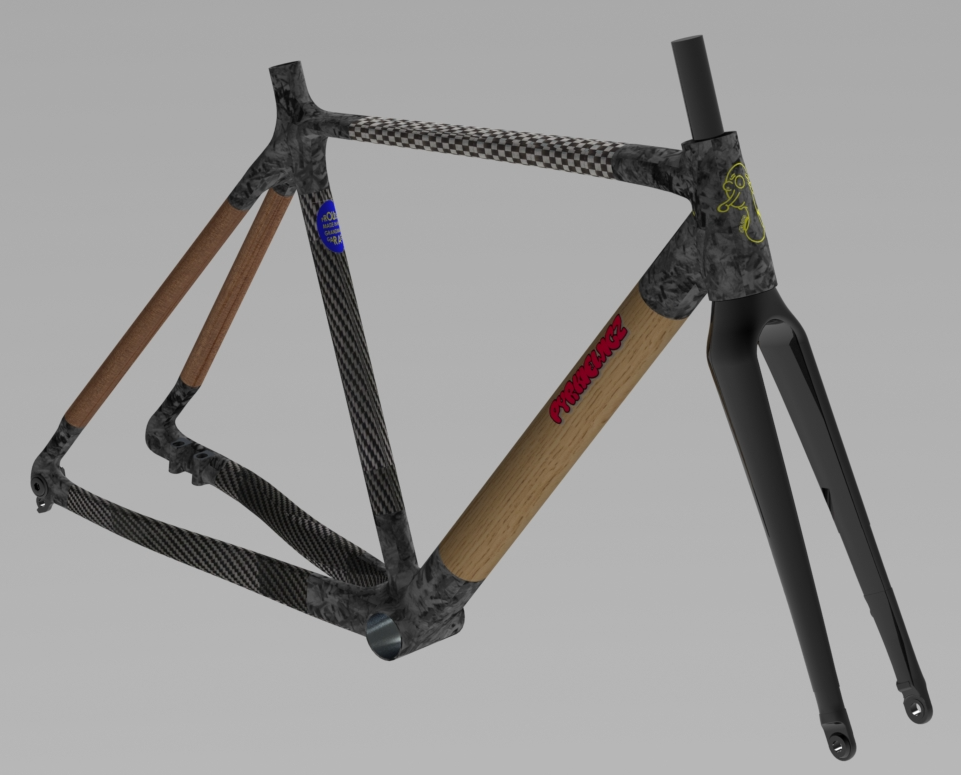
Handmade carbon fiber cyclocross frame
If you ask me why I make my own carbon frames, I don't have a definite answer. I would probably start babbling something about the pandemic, the fact that I was already bored of simply riding and that I was quite passionate about the subject of composite materials. I would also like to mention that I spent half of my youth at the scale modeling shop and in my adult life I got a master's degree in engineering. The big fascination with custom carbon frames began at the end of 2019. moving on to what I have recently managed to create:


A year ago, when I made my first ever bamboo frame, I was quite pleased with myself, but I felt that I could do better. I drew conclusions and collected guidelines for the next frame:
- carbon chainstay, which will solve the problem of fitting a cyclocross tire and a sprocket, which was difficult with straight bamboo poles
- Bottom bracket in T47 standard instead of pressfit. Although the pressfit worked well for me and did not creak, I wanted to use a screw-in bottom bracket for easier maintenance in the future
- carbon UDH dropouts instead of aluminum ones
- brake mount in the flat mount standard instead of post mount
- carbon seat tube laminated on the mandrel - this would solve the problem of fitting the seatpost
- carbon top tube with a flattened bottom for comfortable carrying on the shoulder when overcoming obstacles in cyclocross races
The top tube went first, because it seemed the easiest to do. The shape with ergonomic flattening was designed by my brother Leszek:

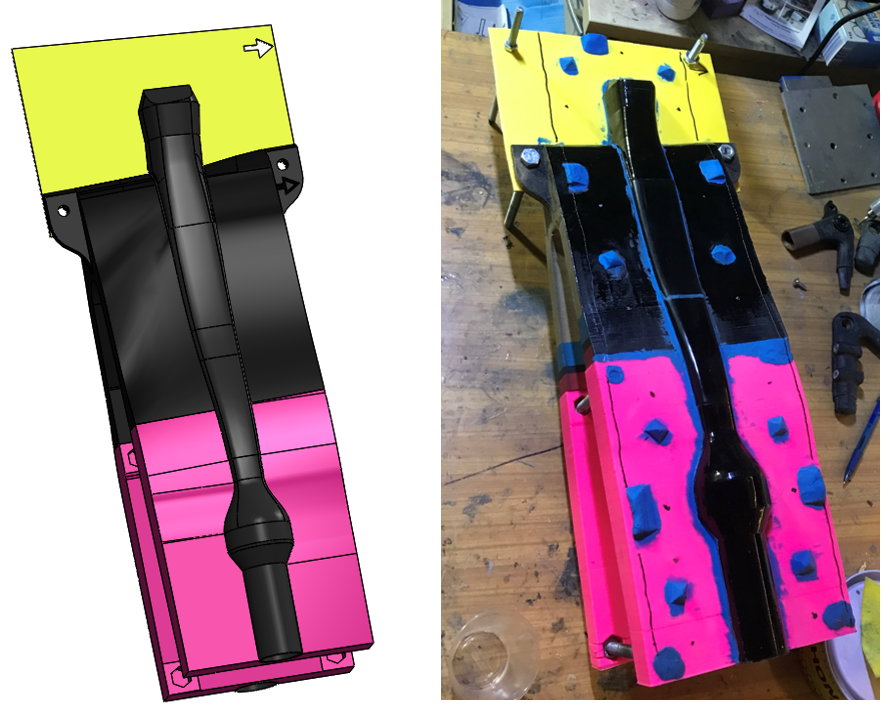
Unlike the mass produced frames, I decided to split the mold in the horizontal direction, not in the plane of symmetry. After all, when I sit on it and ride it, I want to see a nice carbon, not a splitting line. I printed the tube in three parts on my 3d printer

I placed the glued, sanded, primed and painted model on the bases to which I screwed the plate, which was used to create the splitting surface of the mold

On the plate, I made pyramids of technical plasticine, so that they positioned both halves of the mold relative to each other
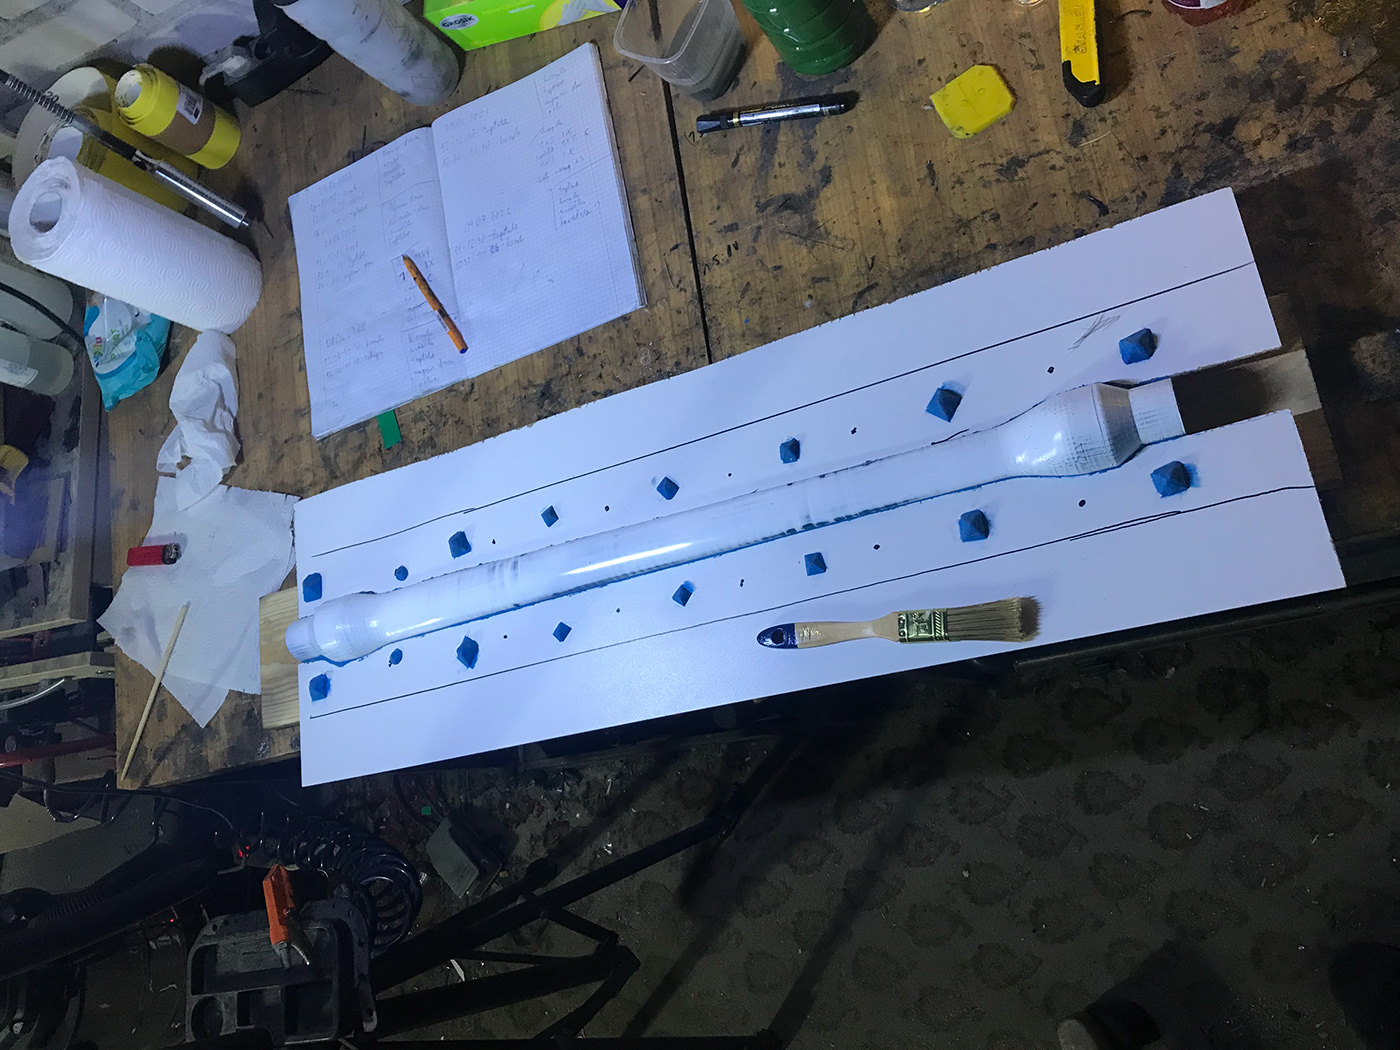
I covered the model together with the splitting plate with five layers of wax and proceeded to the procedure of creating molds from laminate: a dual layer of gelcoat and the next proven combination of mats and glass fabrics. Finally, I reinforced it with bamboo.

Using the benefits of the "bladder molding" technology, where the pumped bladder presses the material to the surface of the mold, I managed to make a tube. You can see a large flow of resin, I spread it too generously over the layers of carbon fibers
The entire "lower back" is a 3D design of my brother, Leszek. I separated the chainstays, which will be made also in the bladder molding technology, from the dropouts to which I will adapt the slightly tweaked compression molding technology
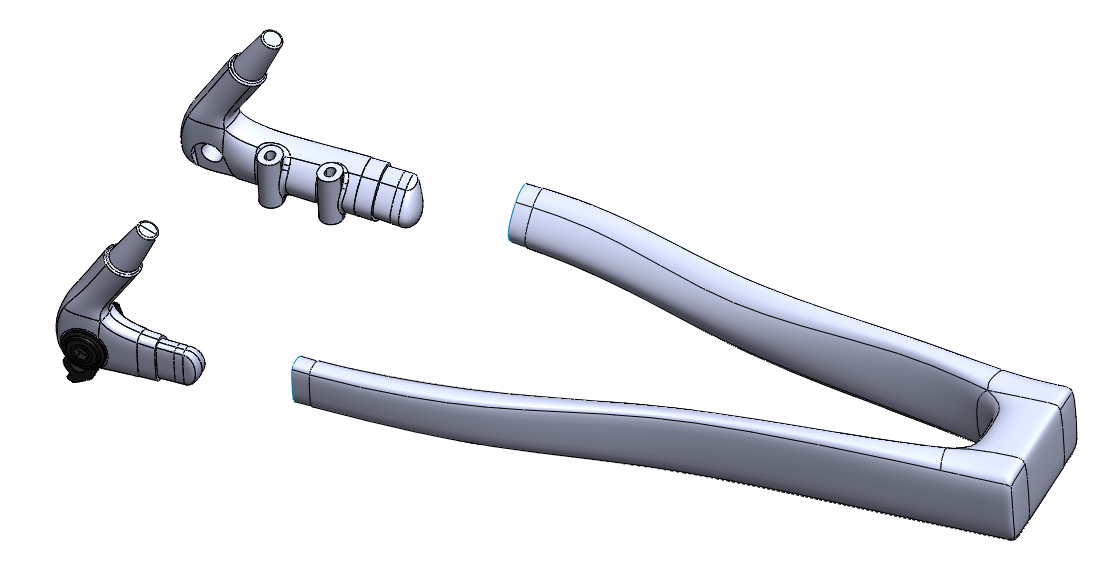
After several iterations and meeting my technology guidelines, we came to an agreement.
Here, for example, one of the corrections we had to make on the model. I insisted that the chainstay mold is three-part: left, right and center. In order to be able to slide the element out of the middle part of the mold, we had to eliminate the undercuts. Length 2 must be less than 1.

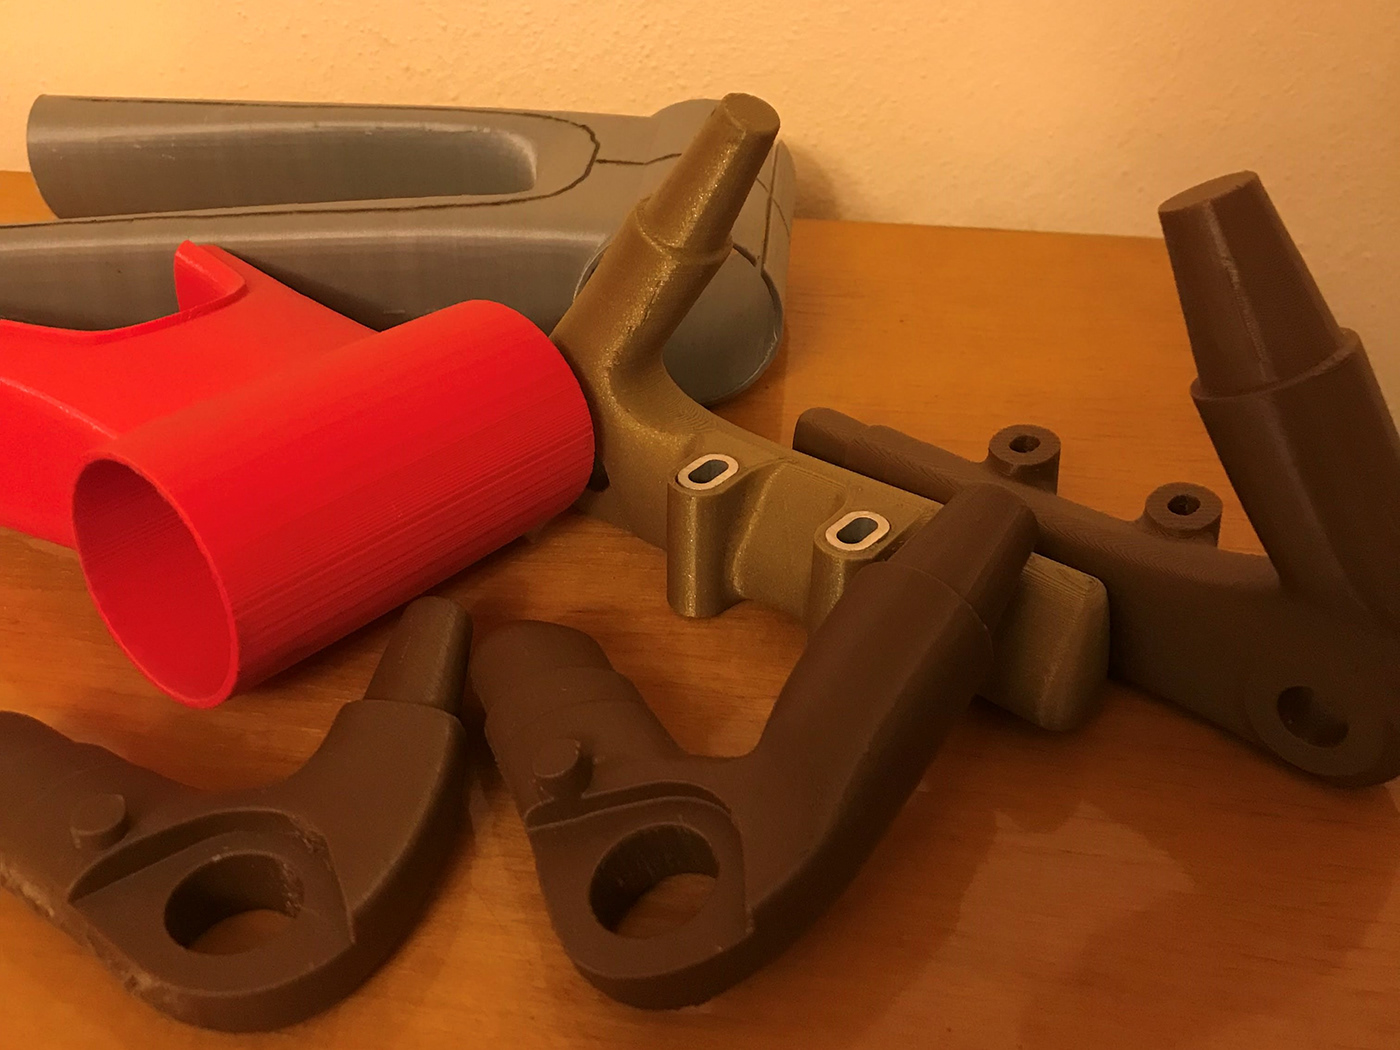
I printed the model with the subdivision surface. In retrospect, it was a bit crazy in terms of the amount of printing, but I just got free filament leftovers and I had covid, so the script for long home printing wrote itself
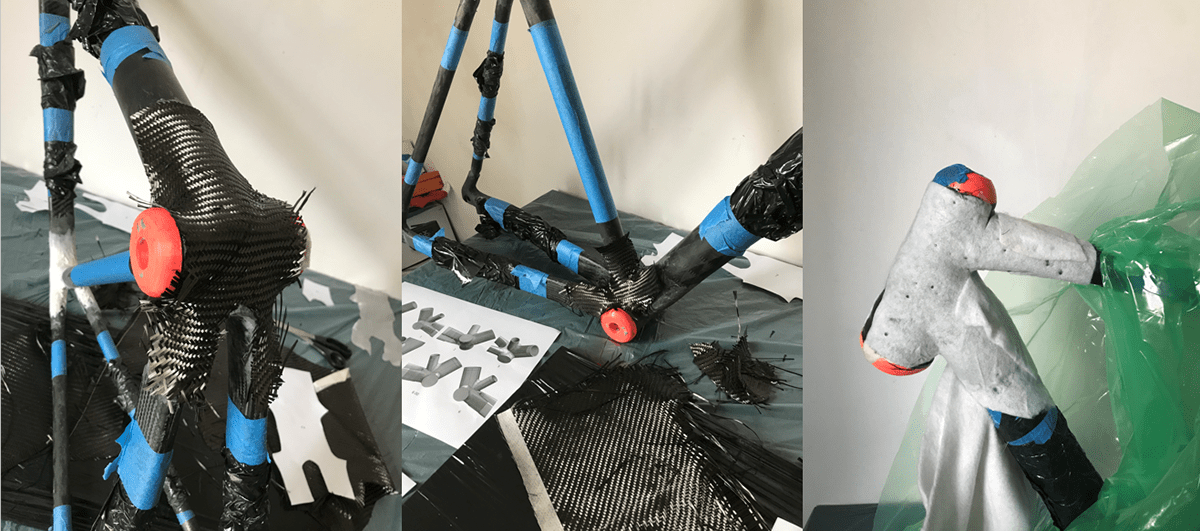
The challenge, of course, was to laminate the middle part of the mold, because there was not much space and with each layer I added, the space decreased.
Due to the complexity of this mold, I took maximum care when applying pressure to the mold for the first time

This is not a simple part to laminate without using prepregs, but the second attempt was satisfactory. I had to make myself a laminating manual and prepare everything properly before the resin cured. It was a long Saturday night of June 17/18. I finished around 2:30.
Dropouts was another story itself. I printed the mold from PLA. Guys, don't forget to leave a heart under this article. Heart for you:
The rest is pretty secret technology that I can't post here. I will write only as a curiosity that when closing the mold halves by its special constructions and additional elements, the pressure on the laminated undersized core was generated from every side. I also used kevlar in key areas. On the left dropout I used a followup to my other project (https://www.kickstarter.com/projects/xdcc/xd-carbon-fiber-bottle-cage-for-your-bike?ref=user_menu)
Of course, the inserts for the brake mount were laminated directly into the dropout, without any additional gluing
Of course, the inserts for the brake mount were laminated directly into the dropout, without any additional gluing
The head tube was laminated on a machined aluminum mandrel to meet accurate headset dimensions. To ensure that the element could be slid off the mandrel, the laminated element on the mandrel went into the owen. As aluminum has a much higher coefficient of thermal expansion than the composite, after curing and cooling down to room temperature, it is relatively easy to slide it off the mandrel. Dimensional compensation was taken into account when preparing the drawing documentation for the machining shop.

Regarding the machining of the bottom bracket, I asked my friend Adam for help. It was a long and successful cooperation :) Thanks to the T47 standard, it is possible to use a crank with an axle with a diameter of 30 mm and route the wires inside the frame.
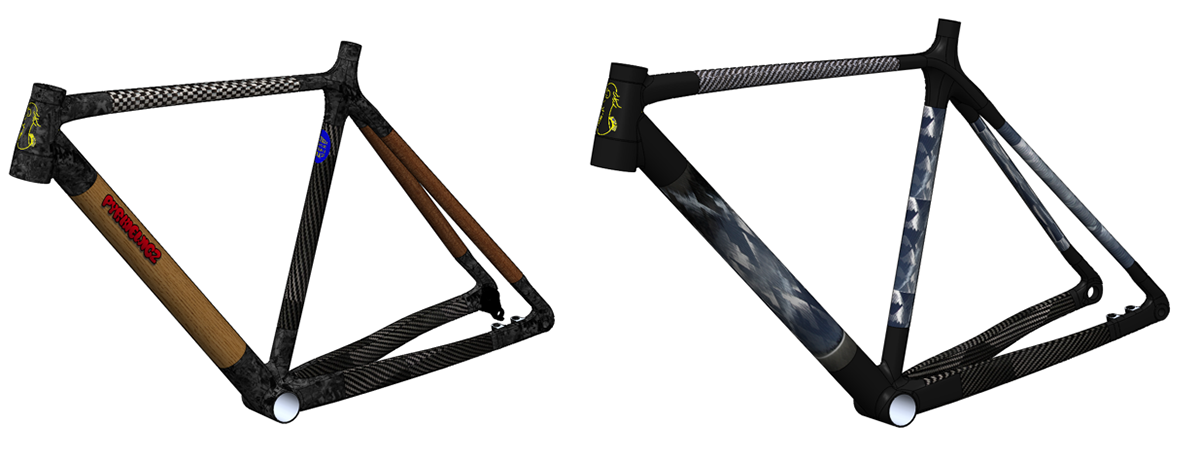
Time was rushing relentlessly , there was about 1.5 months left until the cyclocross season. I still had the seat tube to do. To save my work, I wrote to M.Carbo. I got a great deal on all the rest of the tubes - seattube, downtube and seatstays. It was then that a memorable transformation took place - I was no longer making a lifted bamboo frame with a few carbon tubes, but a full carbon frame. I believe this is the beginning of future cooperation. M.Carbo makes tubes in filament winding technology by winding carbon roving on the mandrel. The result is tubes with great parameters and original appearance. Similar as those are used by, for example, the Czech Festka or the American Bastion cycles. If all goes well, the team of M.Carbo will move production from Belarus to Poland in the near future.
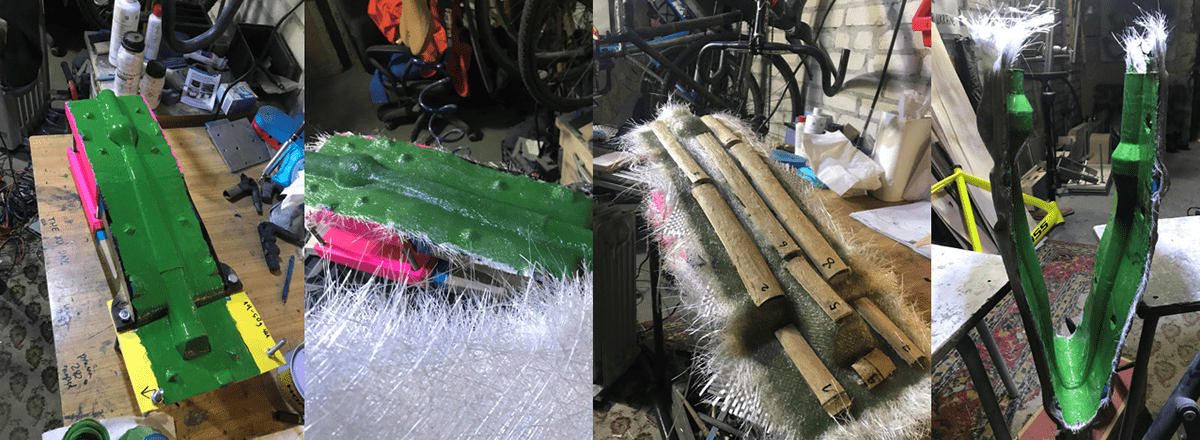
I printed templates for fitting the tubes then glued everything on a jig

A quick geometry check and I applied a light paste made of epoxy resin, glue and hollow glass microspheres with a density of 0.19 g/cm^3 to the joints. Then I sanded the joints so that it would be easy to reinforce them in the next step.
Joints lamination was quite an adventure. There was no time for many photos:
After laminating each of the joints, I covered the carbon fiber layers with the previously prepared peel ply templates. It is a nylon fabric that is used to absorb excess resin and prepare the surface for further operations. There was also a breather on the peel ply, which also absorbed excess resin and also helped to provide even pressure during resin curing. Everything was put in a vacuum bag for about 20 hours.

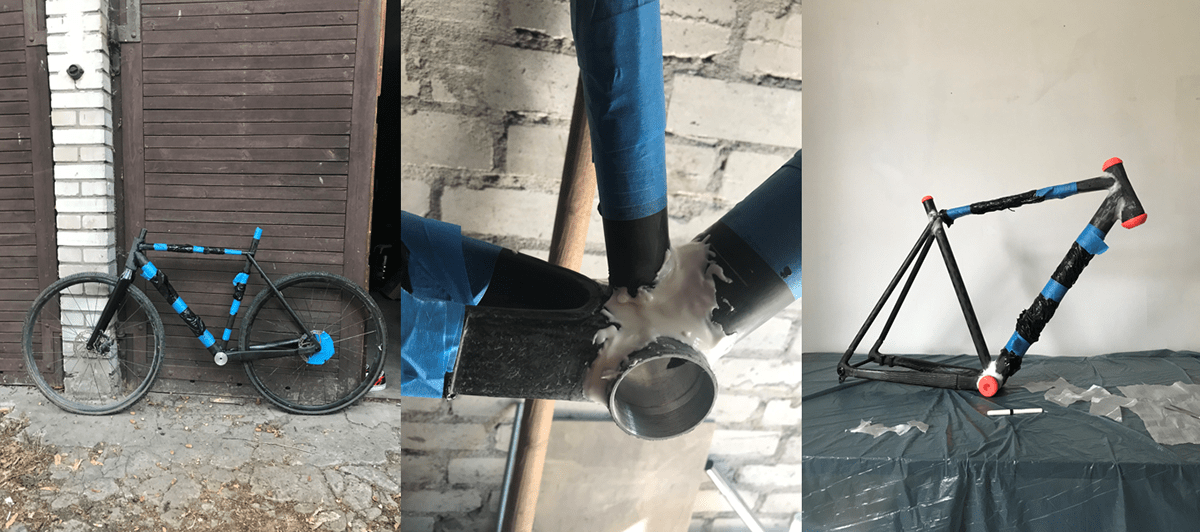
The joints were primed and painted black in the next step. Then I covered the entire frame with clear coat
All that was left was to put everything together and i was good to go for a test ride
The first start was at the Halloween race. I took advantage of this by purchasing a large inflatable suit, which in case of any defects was supposed to protect me from painful falls
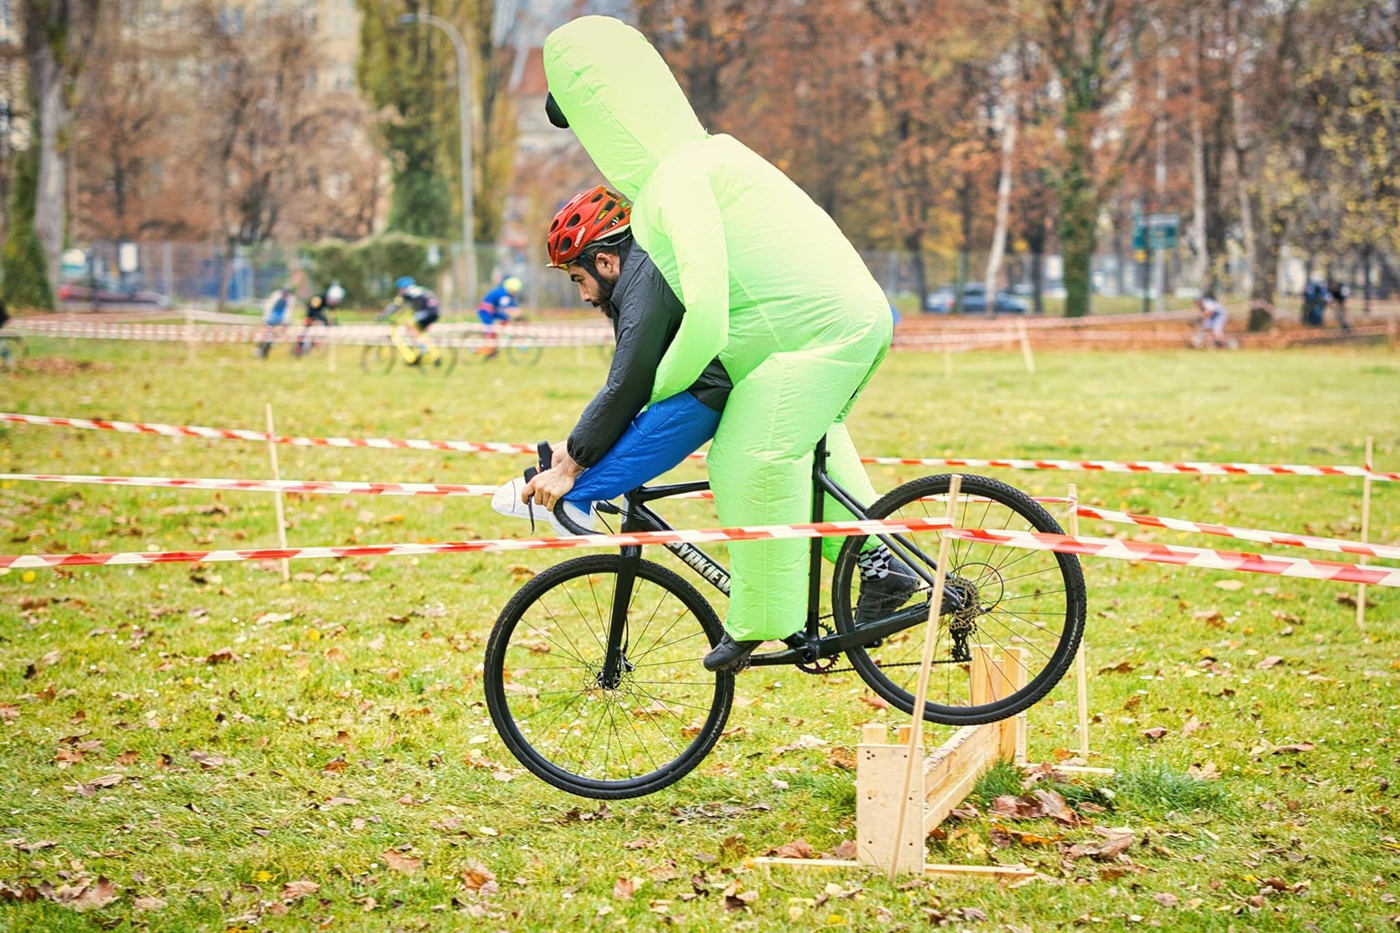
The next start was a more serious competition, the second Syrenka CX race in the season, where I managed to take 7th place out of about 70 competitors


