Wrist Mounted Flamethrower
Project Description
The wrist mounted flamethrower was designed to be a cheap secondary weapon in the event of a zombie apocalypse. In the event of global panic supplies are scarce and in high demand with everyone struggling to survive. This affordable backup weapon is light, compact, and fashioned from cheap everyday items. To use, simply pull down on the lever allowing the butane gas to flow out and press the ignition button located on top of the unit to ignite the gas, watching as a flame erupts from your hand like magic! To reuse, refill the two fuel chambers with butane gas and return to annihilating the zombie hoards.
The Why Behind the What
Ever since I was young, I loved disassembling items around my house and creating projects from the various components I collected. One of the projects I made was a flamethrower from an old barbecue and cigarette lighter. I was amazed by the invention created by modifying two everyday cheap items. When presented with deciding my first Hackathon project, I immediately knew I wanted to modify my previous flamethrower by challenging myself by keeping it cheap and compact in order to fit on my wrist.
Creation Process
I began planning the week before the Hackathon took place, sketching multiple iterations. I broke the project into two main aspects I knew were crucial in the flamethrower being a success in order to allot time for Hello Worlding each one. The first was a pressure rated chamber that could hold the butane, releasing the gas when a lever was pressed and the second was a way to ignite the gas once it had been released.
Here are the sketches:


Step one was creating the fuel tanks using cigarette lighters. I removed the limit rod by unscrewing the valve and emptying the it out of the container before replacing the valve. I repeated this step with another cigarette lighter supergluing both together and setting them to the side to dry. Second, I took a sheet of scrap styrene plastic and cut two 1"x2 1/2" pieces for the base, a 1"x1" piece for the backing, and a 1"x1 3/4" piece for the top. Next, I glued the two modified lighters to the base with the edge containing the valves facing up. The backing and top pieces were glued on as well with super glue. I proceeded to remove a spark generator from a barbecue lighter and sawder each wire to a paperclip with one end straightened out. I used ductape to fasten one paperclip to either side of the lighters and bend the straight ends towards each other. Next, the spark generator was attached to the top piece of styrene and two small zip ties were used to further fasten it down.
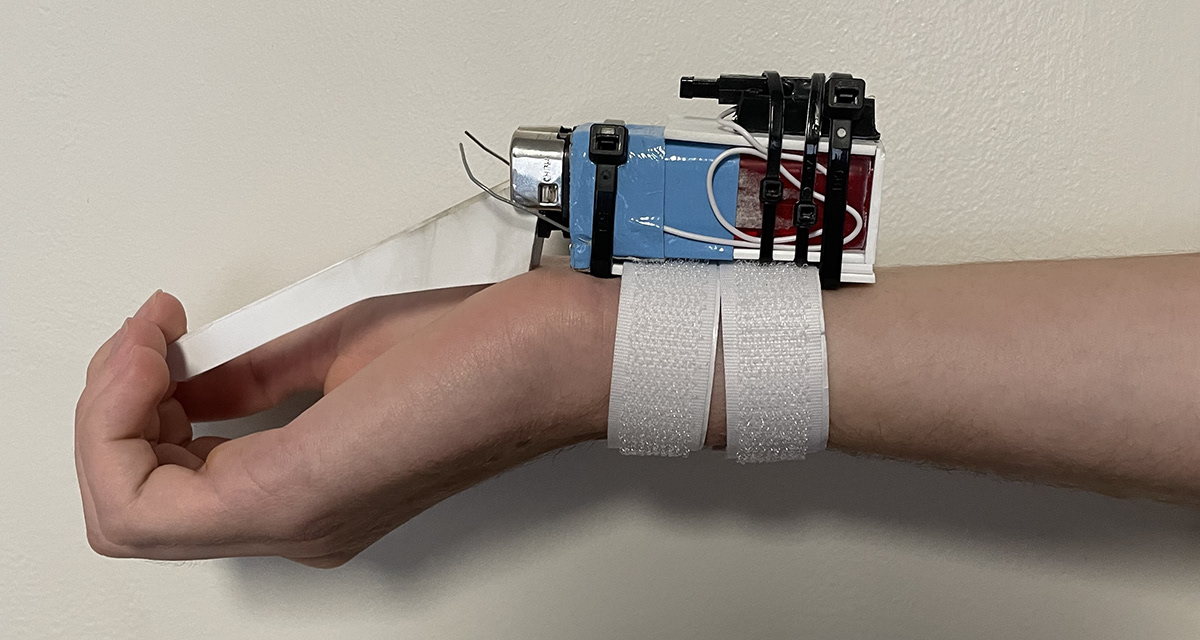
After allowing everything to dry, I sandwiched two pieces of Velcro between the base and the second 1"x2 1/2" piece of styrene using superglue. Finally, I cut two pieces of styrene for the lever releasing the gas, and sanded them until they fit my hand and wrist angle. I then attached them together at on end using superglue once more and drilled a small hole at the other end of each piece. They were secured to the modified lighters using two screws found in the barbecue lighter so that the levers laid across the built in cigarette lighter levers. Once everything was dry, I attached the device to my wrist using the Velcro straps and filled the flamethrower with butane.


Operating the Flamethrower
To operate the flamethrower, the user simply pulls on the lever by slightly flexing their wrist downwards allowing a slight amount of butane gas to escape. Next, they will press the built in button on the spark generator allowing an arc to pass between the two paperclips and igniting the butane. To increase the flame size, pull downward on the lever more until the gas is used up.
The total cost for this project was under $10 and completed in under four hours. I am satisfied with the work put in and the invention produced and hope to continue creating innovative projects.


