
Bath time
Architect: Cornerhouse Creatives
Location: Rotterdam, Netherlands
Software used: Autodesk 3DS Max, Corona Renderer 7, Adobe Photoshop
Conception
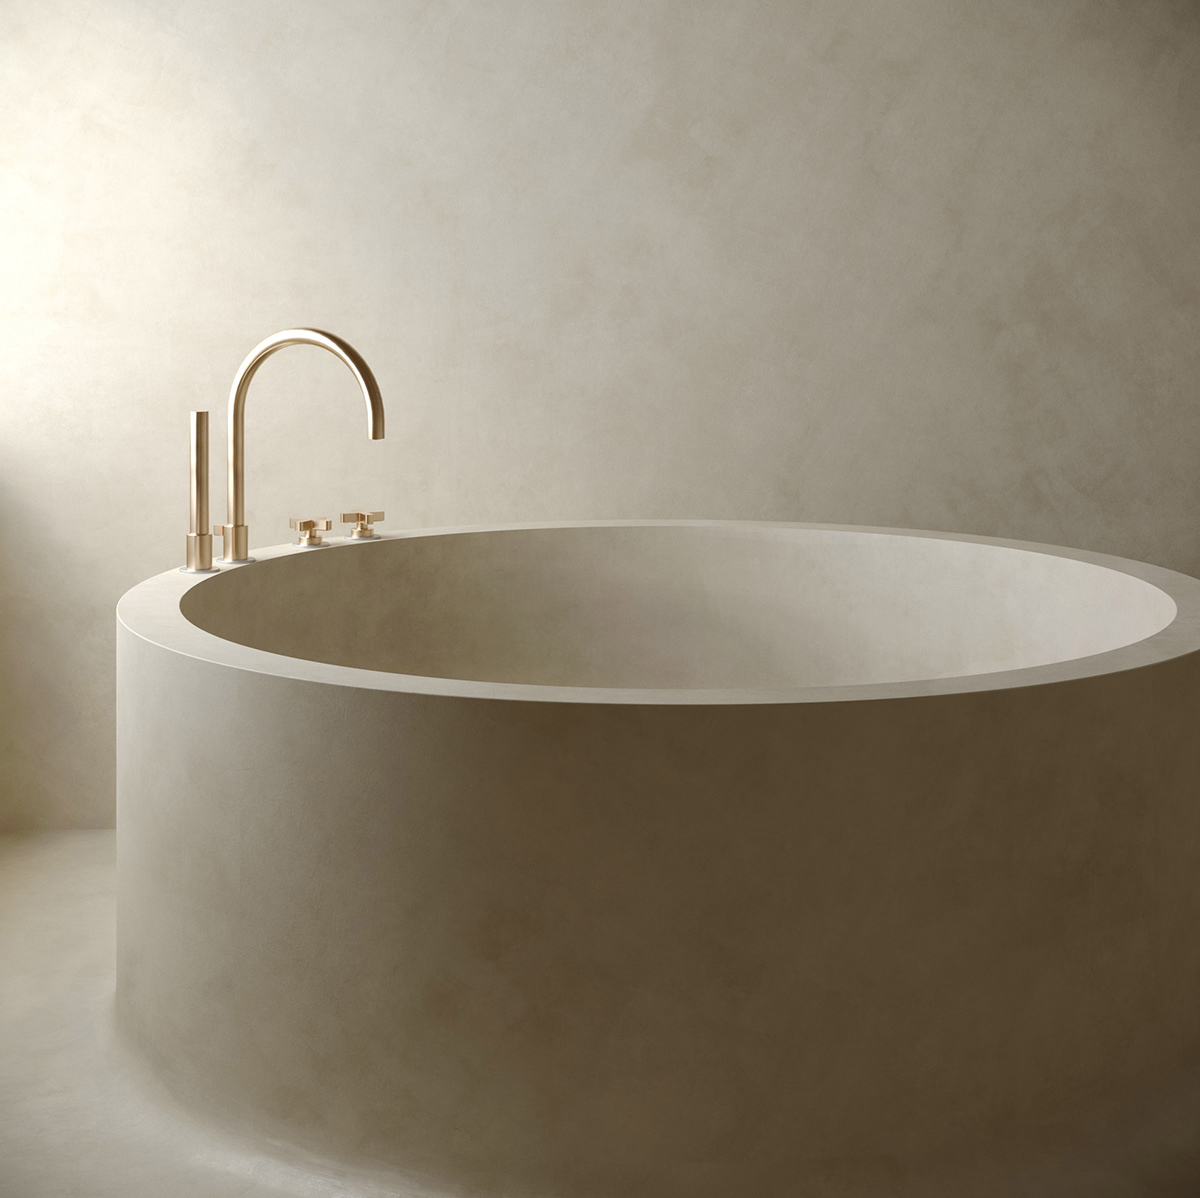
Before setting out on this task I wanted to create an immersive image, something the viewer could feel themselves slipping into figuratively. I wanted the viewer to have a previous understanding yet discover in my work something completely new. I used the familiarity and distinction of the bath to make the viewer feel at home and appreciate this modern approach on the timeless classic… The bath.
Production
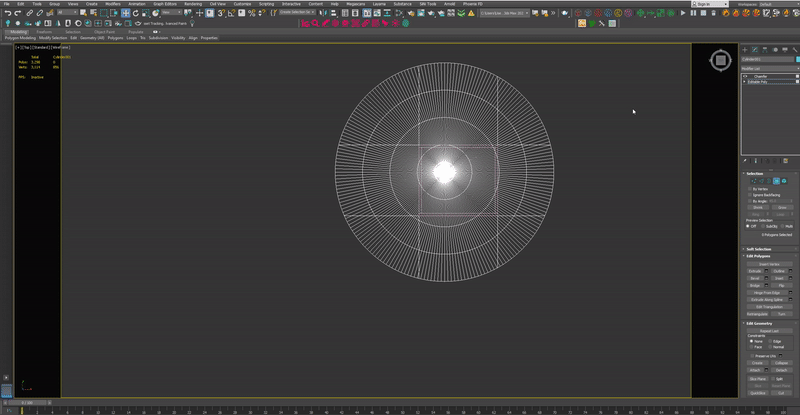
As all great works begin, it started from nothing, a blank canvas to portray the excellent work done by Cornerhouse Creatives. On this blank canvas in 3Ds Max a cylinder was created, from which all core geometry attached to the ground was to be built. The decision to use the cylinder to build the geometry was that of precision and care as the materials had to look flush and if functions were to be used such as *Booleans, this would almost certainly create discrepancies in the final materials.

*Booleans in 3Ds Max are essentially operands you can use to manipulate shapes, they can manipulate the shapes by adding them together or subtracting them from each other and much more. E.g imagine you have a cylinder and a box, you could cut a cylindrical hole in the box however when you apply a realistic material you will definitely notice that all is not what it seems as the program has been left to it’s own devices to create the shape and to understand how it all fits together. As the saying goes if you want something done right, do it yourself!
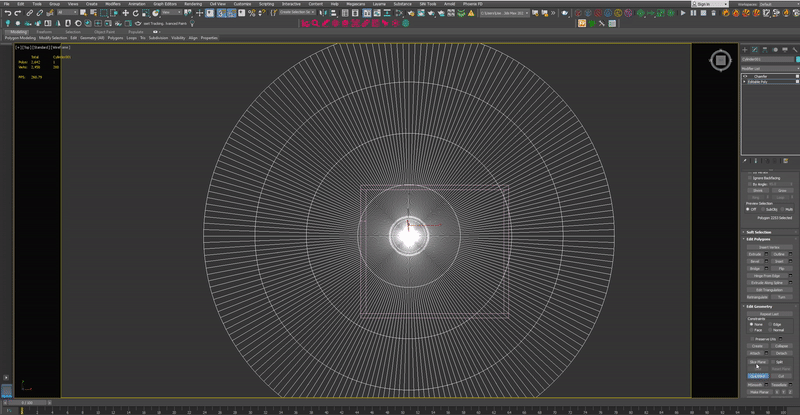
When creating the cylinder, it was important that it had many sides and was interpolated as much as possible (a smooth rather than circle made up of lines). It was also important that it was to scale, if it were not to scale the materials would end up looking very strange in the finished image, to do this visual predictive measurements were taken as well comparing this to the average size of a circular bath. These measurements ended up making the bath around 1.3 metres in diameter.
After the cylinder was formed and to the desired measurements it was then converted it into an *editable poly as this would provide the object with more maneuvrability.
An editable poly is essentially a simple editable shape in any 3D software that the user can easily manipulate.
Following this, the top vertices (points) were dropped then and scaled on one axis outwards until they were directly below the top vertices. These vertices would then go on to form the interior section of the bath.

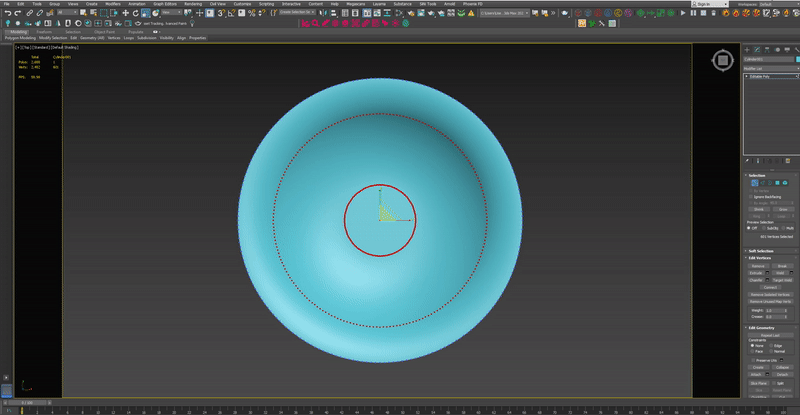
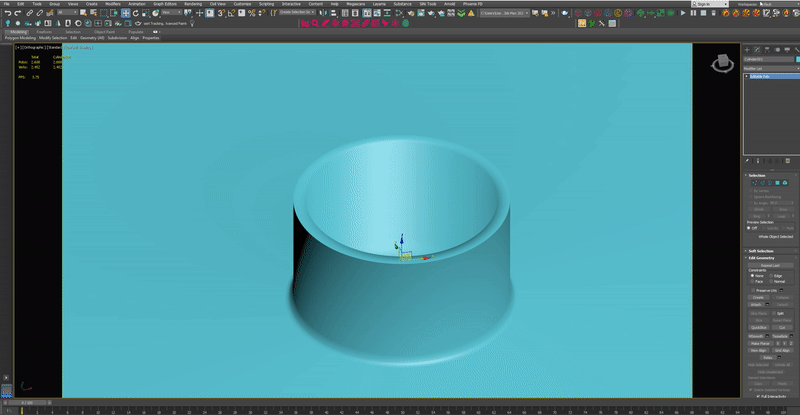
The outer vertices closest to the base were then scaled and made larger by one axis, this would then become the floor for the scene.The vertices directly above those in question were then lowered and scaled in the same manner but not to the extent, this was repeated until a visible curve was seen. As they were rather polygonal, a *chamfer modifier was then added to make it more lifelike.


A chamfer modifier smoothes the edges and subdivides them, this converts a sharp corner into a rounded edge. This was instrumental in creating a smooth flush, lifelike design.


As the main shape of the bath had now been created, what was left to do was the interior walls and the window to create an aesthetic shadow. For the walls, three simple boxes were created and put into place, these were then all converted to editable polys and attached together. For the window, three additional boxes were created, the process was repeated and the boxes made the shape around where the window light would enter.


As all the geometry had now been prepared, then what was left to do is cut the excess floor from the cylinder shape. To do this quickslice was used on the faces of the editable poly around the perimeter of the walls and the excess was then deleted.
Now that the geometry had all been created, what was left ot do was the materials and lighting. For the material a 3D scan of a wall material was used and exported and the uvw was then randomised in the material editor. For the lighting an HDRI (from Poly haven) was used as well as one or two complementary corona lights, this HDRI was then rotated duly and all the lights were configured using Corona Lightmix, then baked into the scene.

*Corona lightmix is Corona software that allows the customisation of all lights in the scene from one place and a once, saving render time and workload.
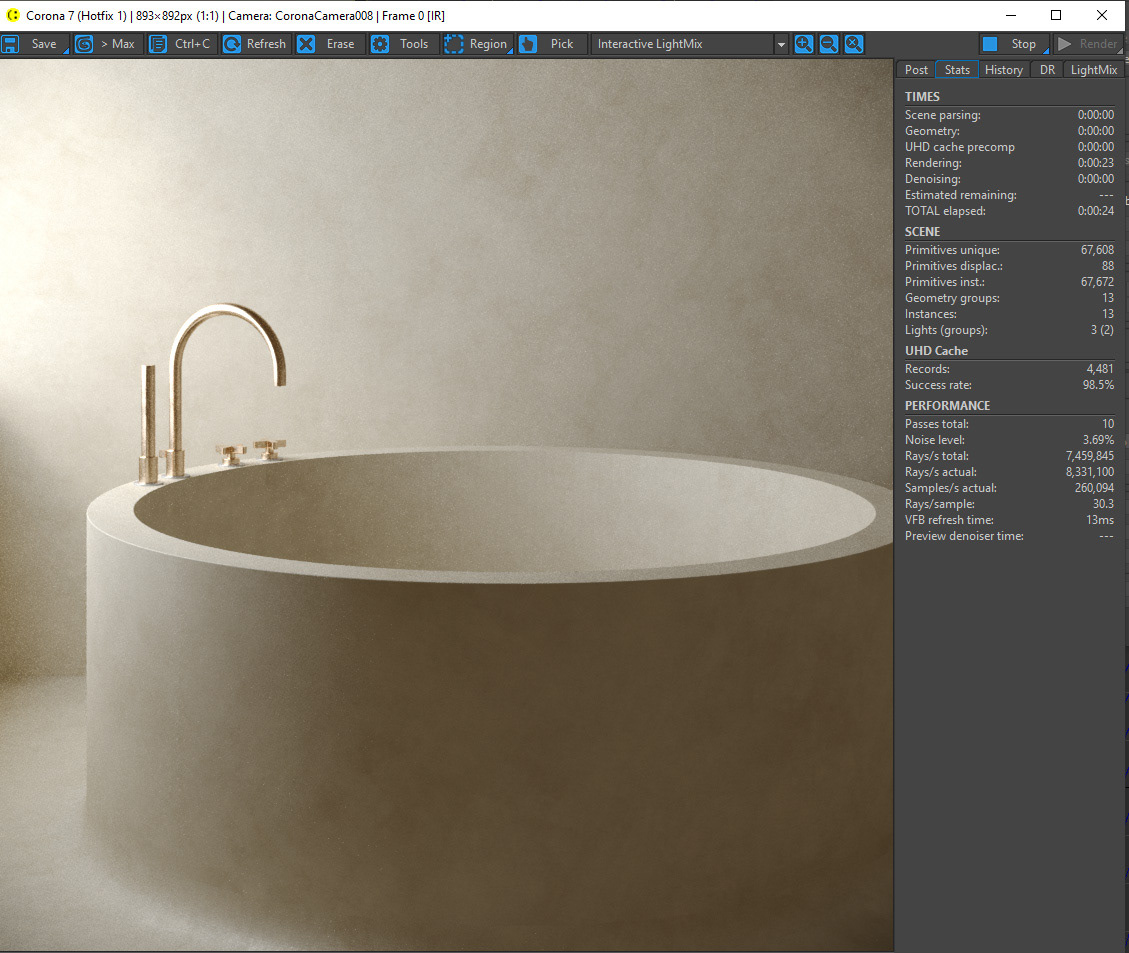
As the image was now ready to be rendered, a tea was made and the image was put on render. Once it was done, it was exported into Adobe Photoshop to add the finishing touches.
The adjustments made in photoshop were mainly touchups; ones of colour and reflections. To make the reflections photorealistic new layers were added, soft brush strokes of white were then added but not made fully opaque, this process was repeated until the image looked photorealstic.

The end.
Thanks for watching, please leave an appreciation and comment what you think. Any feedback is welcomed!


