Adobe Lights—100 Artists at Work
Brainstorming
When we began brainstorming ideas for the Adobe Logo Remix project, we started by asking ourselves a couple of questions. What does Adobe mean to us? What role have their products played in our personal and professional lives? Coming out of this exercise, we all agreed that we loved the fact that their products empowered us to express our creativity and ideas.
The next question we explored was the following: as creative developers, technologists and makers, what can we build that will express how we feel?
We finally landed on the idea of figuring out a way to show creativity as it was happening in real time. That’s when we decided that we wanted to capture a single pixel from a group of artists as they worked on their creative projects and manifest it in some way. We also knew that we wanted to build an installation that included physical, digital and interactive aspects to it, aspects that could represent the wide range of talents, interests and skill sets within our team.
We wanted the idea to be expressed in a dynamic and exciting way and settled on the idea of building a large physical installation made up of 100 cubes of light, with each cube being assigned to a specific artist.
We would also need to create a small piece of software and give it to 100 artists to run on their computers. As each artist goes about their day doing their work, expressing their creativity through the software and tools on their computer, the software communicates with their cube in the installation and changes its color to represent the color of the pixel that’s directly under their mouse cursor. We would literally be showing creativity as it was happening.
Planning and Prototyping
We started planning and exploring what the completed installation might look like, how we’d build each cube and, importantly, which key technologies, hardware and software we’d need to bring to the project to make it work the way we wanted it to.

We started exploring how we could control the color of the light using an Arduino.
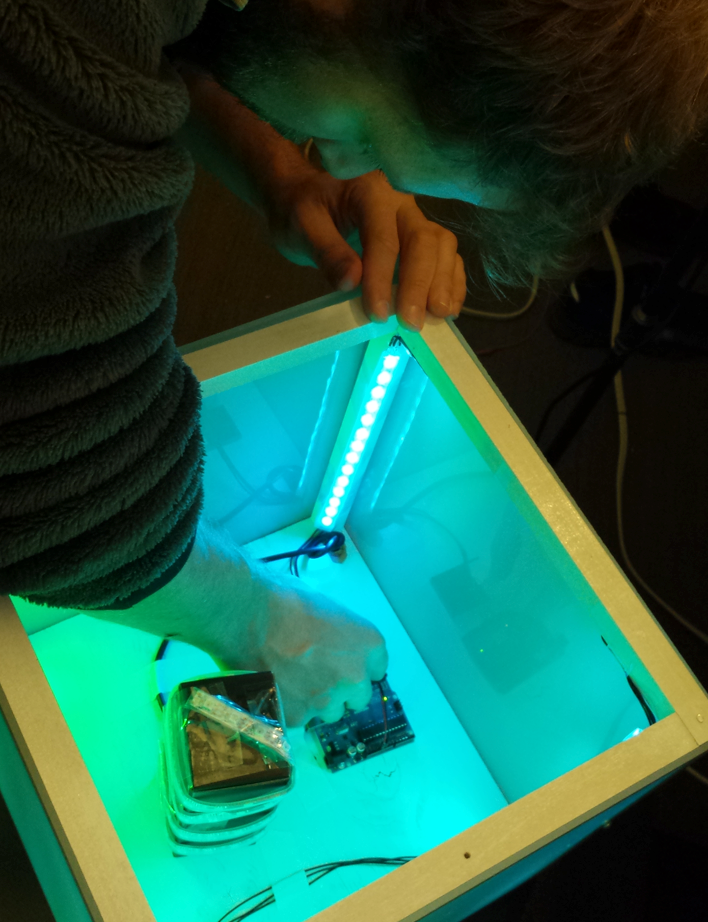
We tested the Arduino prototype with a stand-alone battery pack and one of our earlier LED lighting configurations.
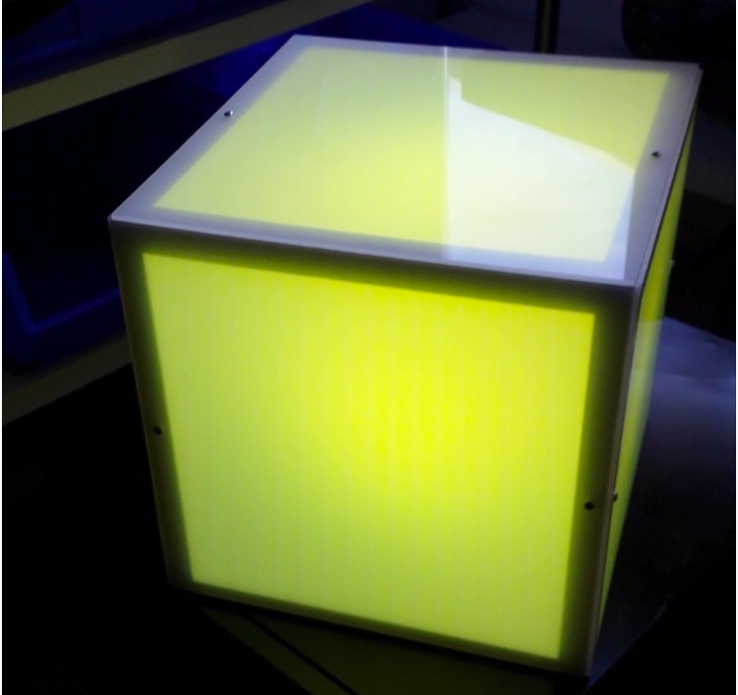
Here’s an early prototype of a cube. This version has acrylic paneling that stretches to each edge. We weren’t completely happy with how this looked; we felt it looked a bit cheap and too much like a toy.

In the next iteration of the prototype, we reduced the size of the acrylic panels so the wooden frame of the cube would be exposed, which we liked much better. Now we just needed to decide on the type of wood we wanted to use. We explored using poplar, cedar and walnut.
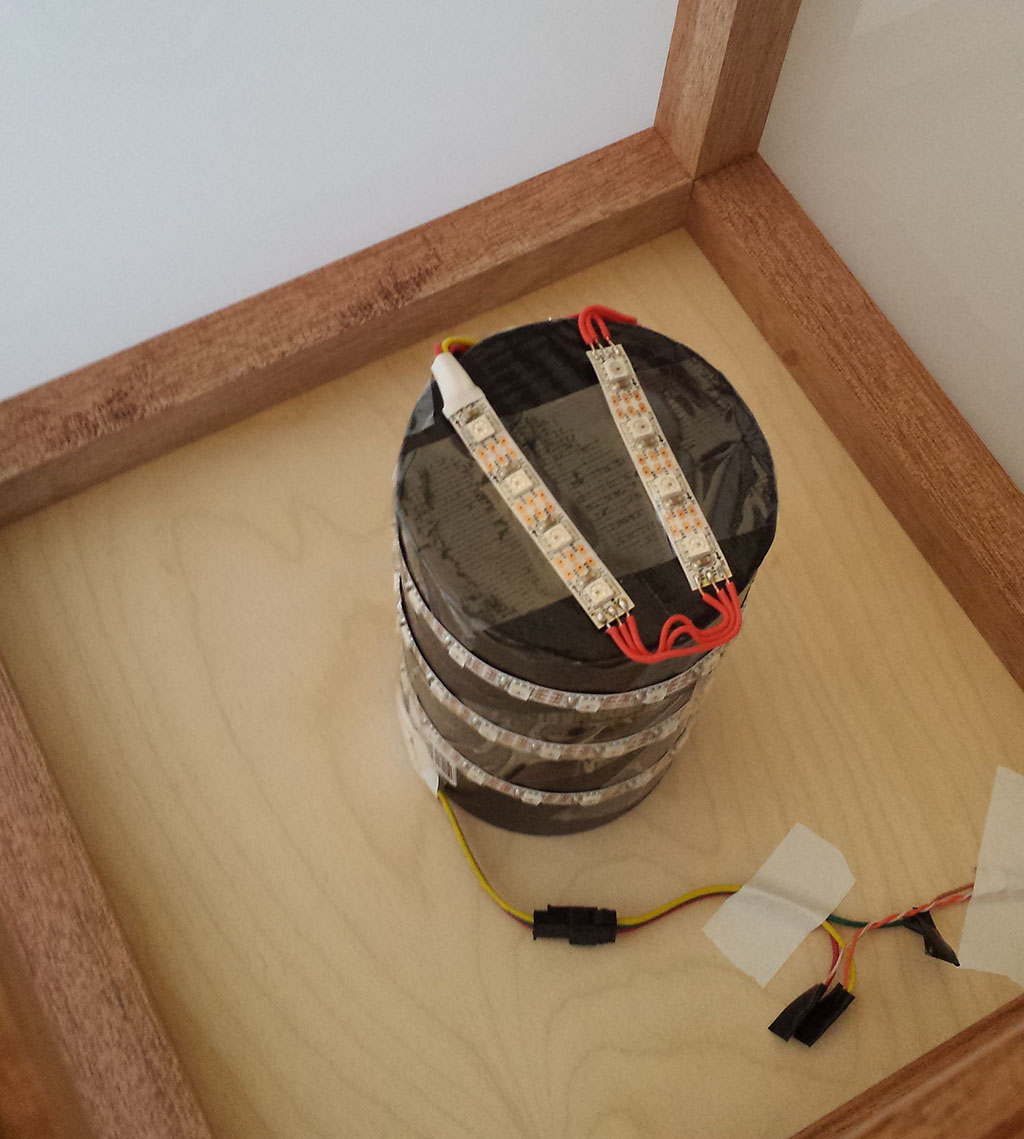
This is our final lighting configuration. The prototyping experience proved to us that we’d need 60 LEDs per cube in order to generate enough light with rich color.

Next, we started prototyping and designing the custom, hand-built power board we would need in order to control the flow of electricity and the data signal to each cube.

The power boards are complete! During prototyping and development, we realized that we’d need to build two boards, with each one powering and controlling 50 individual cubes.
Production
Once we had solutions figured out for the design and materials we’d use to build each cube and how each cube would be lit and powered, we started building the full set of 100.

We soldered all the LED strips, power cables and signal cables for the lights that would go into all 100 cubes by hand.

The first 50 cubes have been built and are all wired up!
Testing the Cubes
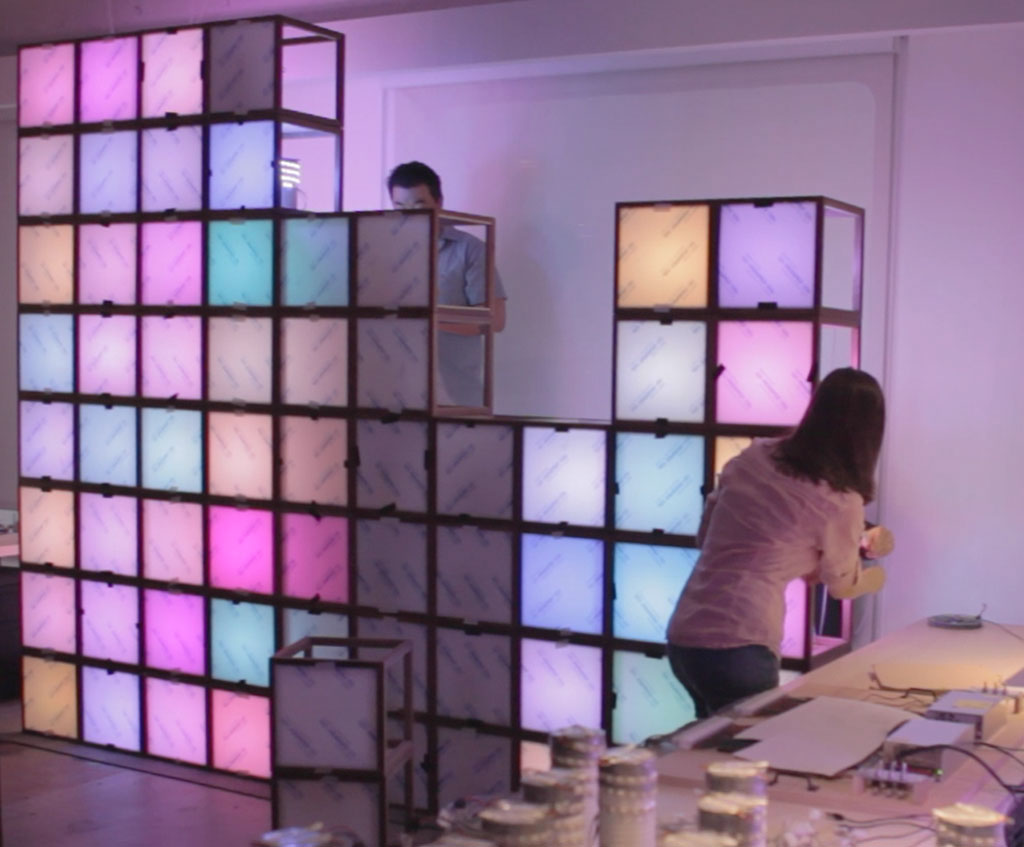
Here we are installing the acrylic paneling and building the wall for the first time.

Here’s a behind-the-scenes look at the back of the wall.
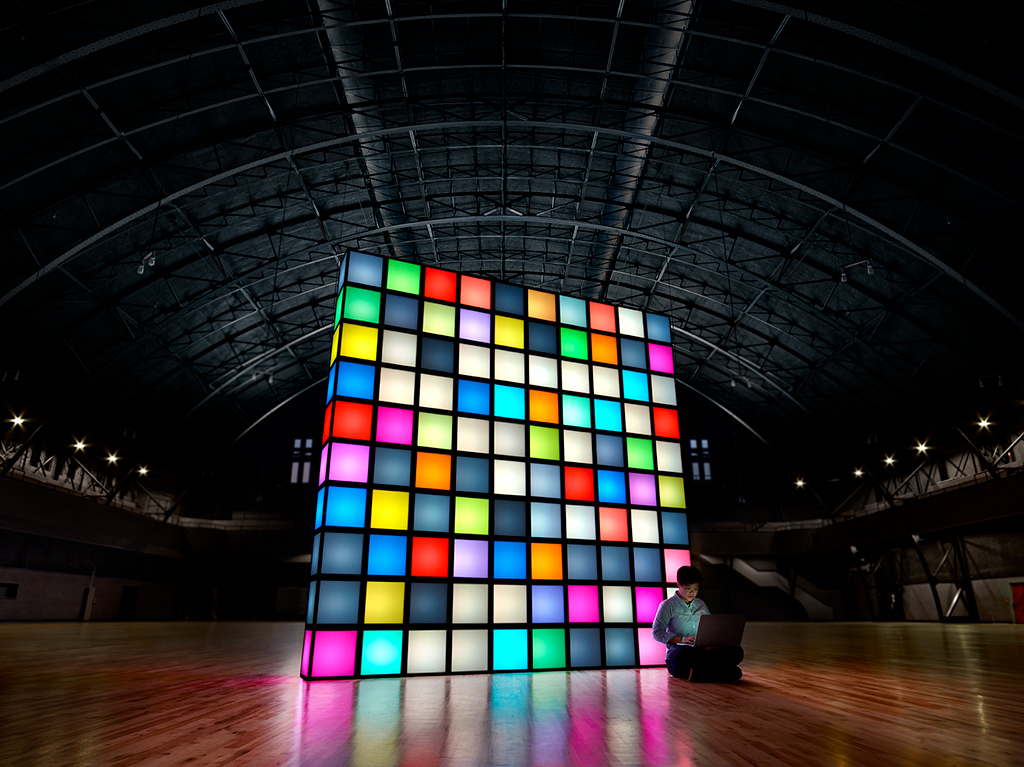
Photographing the Completed Installation
We took the installation to a large, beautiful indoor space here in San Francisco, where we would have enough room and control over the lighting to let the cubes really shine.
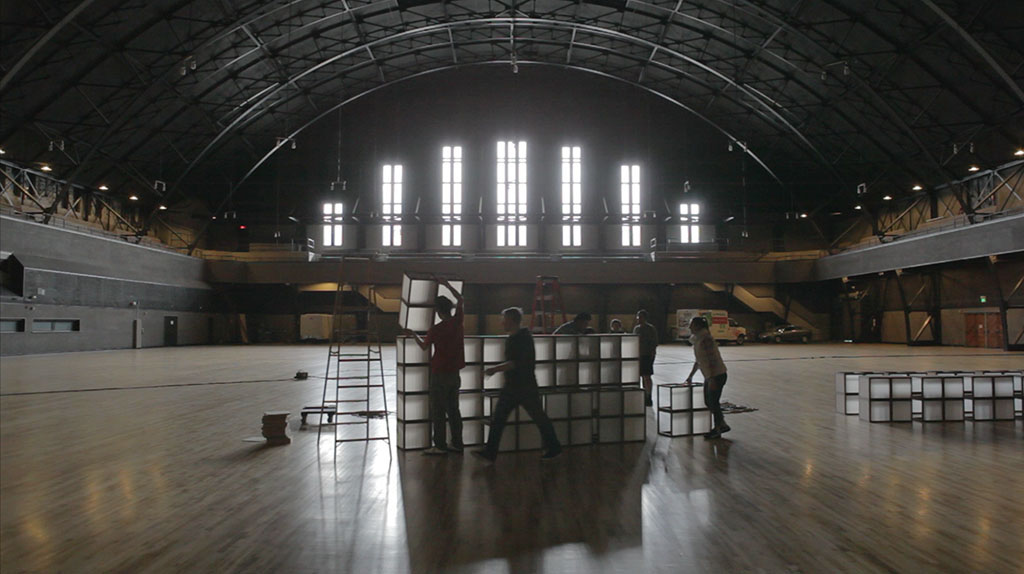
The BETA Group assembling the wall for our shoot.

The software and hardware we built into the installation allow us to control the colors and patterns of the lights. Here is the BETA Group’s version of the Adobe logo.
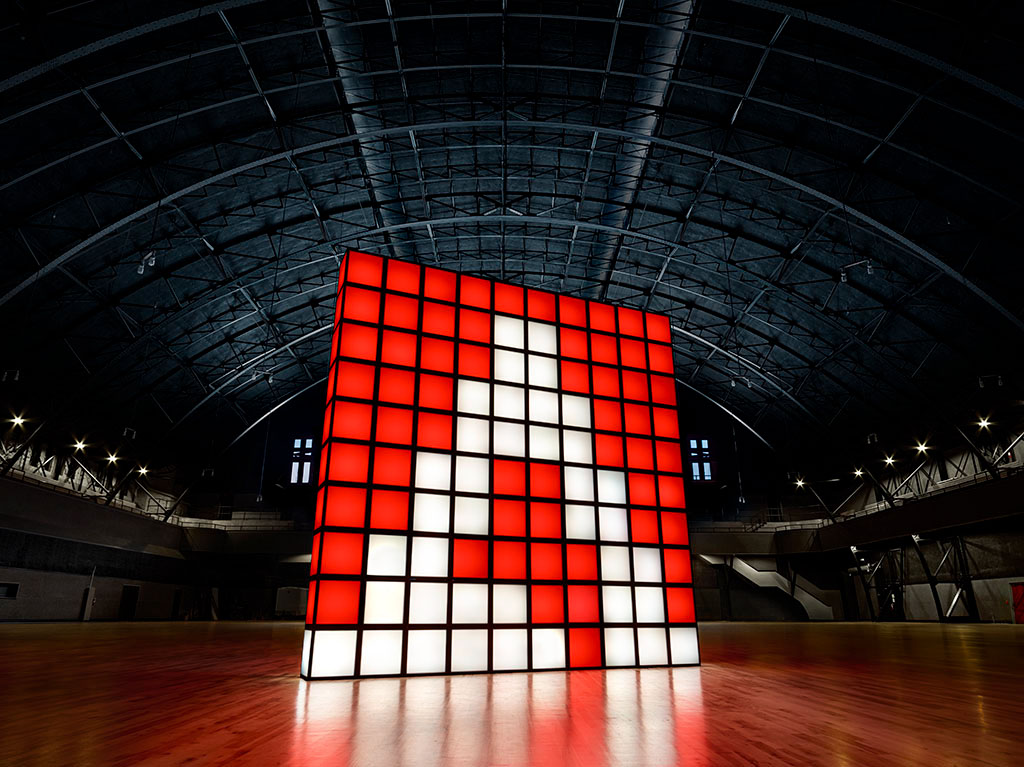
The installation displaying the Adobe logo.
3D Model of the Installation
Below is a working 3D model of the Adobe Lights installation we've created. Click the cubes below and discover the artists behind them. Note: In order to see the 3D model below you will need to be using web browser that supports WebGL (we recommend using Chrome).
Below is a working 3D model of the Adobe Lights installation we've created. Click the cubes below and discover the artists behind them. Note: In order to see the 3D model below you will need to be using web browser that supports WebGL (we recommend using Chrome).
The Future of The Project
We are in the process of setting up the Adobe Lights installation in the lobby of Adobe’s San Francisco office. The 100 artists who have signed up to be a part of the project will continue to share pixels from their work in progress with everyone who visits Adobe’s office.