
The easy guide below will explain everything about this amazing technique, which I pioneered and has been featured on Adobe Creative cloud. Just a heads up, the free brush sampler is available for download directly on Adobe Creative Cloud and not via the usual file attachment! These brushes are FREE for everyone and this technique is for creators of ALL LEVELS!

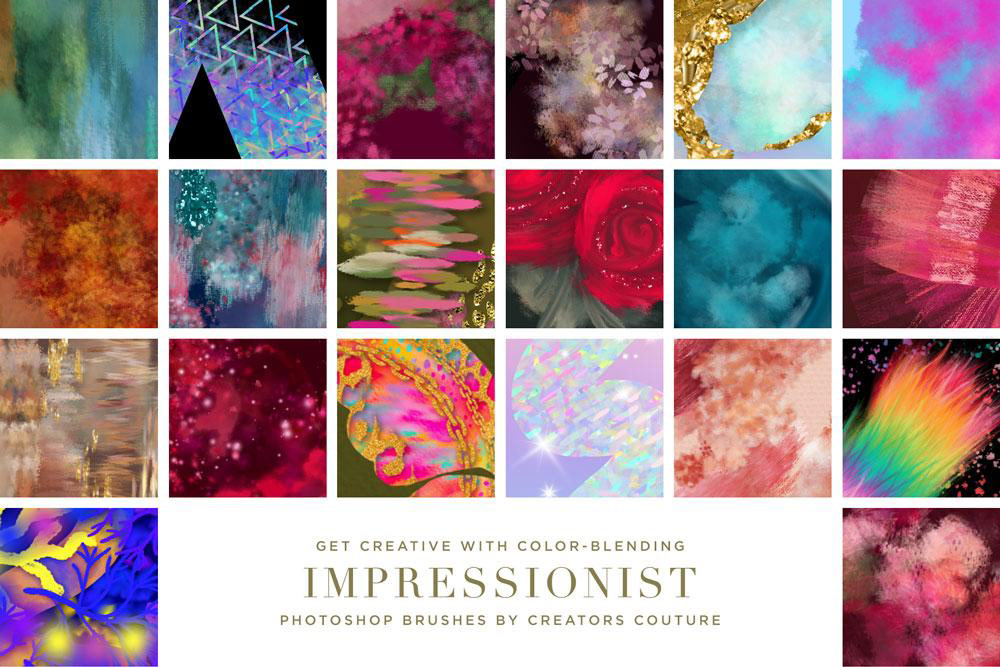
Hi friends, I'm really happy to finally share with you THE comprehensive guide to my color-blending 'Impressionist' painting technique for Photoshop. This is a great resource if you are new to this brush technique, or even just if you need a bit of a refresher. Even though I have video tutorials already for my products, it was also really important for me to create this guide so that my community members who speak languages other than English can more easily understand the fundamentals of this special brush technique!
The video above is an excerpt from a longer video about why I love to create and illustrate within Photoshop. In this short clip, I go over the principles of the color-blending Pattern Stamp technique and show some fun samples of the brushes in action!
Download a free sample of my Impressionist brushes on Adobe Creative Cloud!
This new color-blending Photoshop brush technique that I pioneered caught the eye of Adobe, and I've partnered with them to give a free brush sampler to ALL Photoshop users! If you haven't tried out this game-changing Photoshop brush technique out yet, be sure to head over to Adobe Creative Cloud and download your free set of brushes to get you started, then follow along with the instructions below!
Pro Tip: Even if you are very familiar with this technique, I have some new tips below about organization and workflow you might want to check out!
How to create color-blending brush strokes within Photoshop using the Pattern Stamp Tool
The pattern stamp tool is an often overlooked tool in the Photoshop arsenal. It's a powerful design tool that can help you make amazing color blending, multi-color brush strokes. You won't find this technique in the official guide to Photoshop! I am really proud to say that when I launched the Impressionist Brush Studio back in 2016, I was able to take advantage of an overlooked tool and translate my technique and custom brushes into a turnkey solution that would let designers and illustrators of all levels be able to pick up these brushes and start creating amazing effects!
In the video above, I talk about how my revolutionary, color-blending technique was inspired by the original Impressionist Masters!
So what's so great about the Pattern Stamp Tool? It's so simple -- the impressionist brush setting! When this setting is checked, whatever COLORS are in your currently loaded pattern will be 'spit out' of the brush as you paint! Now, don't get too excited just yet -- if you grab a regular Photoshop brush and try this, it will likely not look great. You will probably see unappealing bands of color as you paint. Not a great look.
However, if you tweak the Photoshop brush settings (as I discovered through months of experimentation), you can disperse the brush marks via spacing, scatter, texture, and dual brush settings so the brush creates an appealing blend of colors. What's cool about this feature is you can create a pattern that contains exactly the colors you want in your brush stroke; even if they are unrelated. This amazing technique gives you perfect control over your brush colors that you could NEVER get via the color jitter feature!
3 Easy Steps to Color Blending Brush Stroke Magic
Step 1: Install the Photoshop Brushes
My specially designed color-blending brushes are still delivered as a classic Photoshop ABR brush file. They have been carefully designed so that when you paint using them, it creates a beautiful, color-blending brush stroke effect. If you use this technique using most default Photoshop brushes, you will see an unappealing color banding, which isn't the result we would want to see! I opt NOT to save them with the pattern stamp tool settings selected to allow you MAXIMUM versatility when using your brushes. For example, you may not always want to use them with the multi-color technique. You can also use them as a classic 1-color brush! When delivering my tools and resources, I always have maximum efficiency and flexibility in mind!
3 Ways to install Photoshop ABR brushes:
1. Most of the time, you can simply double click on the .abr file included in your download package to install the brushes. First, make sure Photoshop is open.
2. You can also drag the brush file onto the Photoshop application icon.
3. Alternatively, you can open the Brushes window (Windows > Brushes), click on the menu in the top right corner, and select Import Brushes. Then navigate to your download location and select the ABR brush file.
Step 2: Load the Brush Color Palettes aka Photoshop Pattern (.PAT) File
Basically, the principle is quite simple. Whatever COLORS are in your Pattern file will come out of the brush stroke when you paint. As mentioned before, my 'Impressionist' brushes are specially designed so that the colors come out in all kinds beautiful ways, instead of unsightly color bands you would see if you tried this technique using classic Photoshop brushes. With all of my color-blending brushes, I've created a library of specially designed, pre-blended color palettes. These color palettes are provided as a Photoshop Pattern (.pat) file.
3 Ways to install Photoshop PAT Pattern Files
1. Most of the time, you can simply double click on the .pat file included in your download package to install the brushes. First, make sure Photoshop is open.
2. You can also drag the pattern file onto the Photoshop application icon.
3. Alternatively, you can open the Patterns window (Windows > Patterns), click on the menu in the top right corner, and select Import Patterns. Then navigate to your download location and select the PAT pattern file.

Step 3: Color-Blending Photoshop Brush Magic via the Pattern Stamp Tool
From the left side toolbar, select the Pattern Stamp tool. If you don’t see it by default, right click on the Clone Stamp tool to bring out the fly-out options, which include the Pattern Stamp tool. With the Pattern Stamp tool selected, select which color-blending 'Impressionist' brush you want to use from the classic Photoshop BRUSHES Panel.


Now we want to look at our Pattern Stamp Brush options along the top of the page. Most of them should be fine by default. You want to make sure the IMPRESSIONIST option is checked, and the aligned option is unchecked.
The final step is to select our color palette for our brush. Along the top, navigate to the Pattern Pop-up panel and select the color palette (either pre-made by myself or defined by you) you wish to paint with.

Now you are ready to start painting in beautiful, color blending brush strokes. Simply start painting and watch the color-blending magic unfold!

Creating your OWN Color Blends for the Impressionist Pattern Stamp Technique
My collections are always full of fun new color blends for you to use, and the best part is you can mix and match them between collections! But what if you want to create your own unique color blends?
Create Photoshop brush color palettes directly from images!
You can select ANY photograph, image or artwork and create a color-blend palette, pulling colors DIRECTLY from the image! PURE MAGIC!
Tip 1: Create a photoshop brush color palette from an entire image:
If you want to use the ENTIRE image as a color palette source, to go EDIT > Define Pattern. This will mean that every color in your image will come out of the brush randomly! You might want to resize your image to be as small as possible to create the best possible blending effect. I personally try to keep it under 500 pixels. Now that you have defined your image as a pattern, it's already loaded into your Photoshop since you just defined it. You simply select that pattern and start painting!
Tip 2: Create a photoshop brush color palette from part of an image:
If you want to use just a PART of your image as your color palette source, select your MARQUEE tool on the left hand side. Then select the area of the photograph that you wish to use as your source. Again, follow the guidelines regarding size of the area above. I try to keep the selection area between 200-500 pixels, I find that is my 'sweet spot' for the best color blending effects! Once you’ve made your selection, click Edit > Define Pattern to set this section of your image as the color source for the color-blending brushes. Now that you have defined part of your image as a pattern, it's already loaded into your Photoshop since you just defined it. You simply select that pattern and start painting!

Tip 3: Create your own color palettes from scratch:
To create your own color blends from scratch, I recommend starting with a Photoshop document size around 250x250. I like to create a new color fill layer to serve as a background layer, so that I don't have white in my color blends (unless I want white specifically). Then simply take ANY photoshop brush you like and paint colors you want in the brushstroke around the artboard. You can download a free palette maker set I created for myself HERE, there are different variations of the brushes built in, such as color jitter, to allow you to create color blends faster. I've also got a video tutorial where I create a color blend. Below is an example of what a sample color palette document of mine looks like, plus sample brush strokes created by that color palette!

Custom Color Palettes in Action...
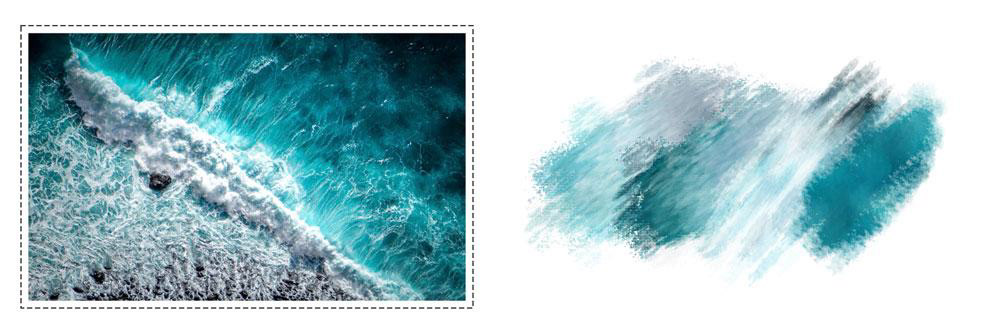
In the panels below, I created multiple color palettes for my project by selecting specific areas in each photo. Below you can see the original photographic pattern source in the first panel. In the second panel, you can see brush strokes created using my custom color palettes I made DIRECTLY from the photographs. In the third panel, you can see the brush strokes in action on a project!


Photoshop Brush Tip: Personally, I think it's a good practice to always paint on a new layer, so that you can work non-destructively.
Photoshop Brush Organization Tips
I get a lot of requests on how I organize my Photoshop brushes. Depending on the kind of work you do and your workflow, I definitely recommend using the folders feature in the Photoshop brush panel, and organizing them in a way that works best for YOU. But if you are curious and want to see how I have mine setup, you can take a peek below!
The Brushwerk brushes are my 'foundation' set, so they are right at top. Then I have all of my most used 'Impressionist' brushes, which all use my multi-colored Pattern Stamp tool technique. To make it easier for myself, I marked all of these folders with PS and grouped them together, in an order that works best for me. After that, I have the 2 'wet paint' brush sets, the Wet Paint Studio and 24K Gold Brush Magic together. Then I have a master folder with all of my various brush collections. I am always adding little collections and kits and growing my collections. For these less used brush sets, I put them in a master COLLECTIONS folder and alphabetize them. Every time I add a new set, I put it in it's spot alphabetically. This is what works best for me, but I encourage you to play around and find a system that works best for your workflow!

Color Palette / Photoshop Pattern (.PAT) File Organization Tips
Photoshop Pattern Organization Tip #1: Only load what you need
I always create my color palette / pattern file in small sizes (normally under 250 pixels or so), which allows for better color-blending, PLUS it keeps the file size down. We always want to not 'overload' our Photoshop with tons of presets, because eventually that can slow it down while you are working. To keep Photoshop light and nimble, I strongly recommend just keeping the color palettes you use frequently loaded into the Pattern window, or simply load them on a project basis as you need them. If you are using a newer version of Photoshop, be sure to take advantage of the FOLDERS feature, which allows you to group your palettes together for better organization. By default, when you import a palette collection, it will be saved in its own folder.
Photoshop Pattern Organization Tip #2: Keep a master folder of Color Palettes (Patterns)
I have a lot of my community asking me about Photoshop organization. With regard to patterns / palettes, I recommend creating one master folder for all of your color palettes (pattern files). A lot of you have many of my various brush sets and collections, and this way, you can keep them all together in one central repository and access them when you need them, instead of keeping them scattered around your hard drive! Personally, I don't even load them in the folder within the Photoshop application folder. I keep them in a handy location on my hard drive.

Pattern Organization Tip: Feel free to rename your palette (Pattern) files so that they are easier for you to remember and locate!
Mixing and Matching Brushes & Color Palettes
One of the most important tips is to remember that you can MIX and MATCH ALL of the Impressionist color-blending brushes and color palettes! You can use any brush from any collection with color palettes from another collection (or create your own)! Have some fun and experiment!

So there you have it! I hope you enjoyed this comprehensive guide to understanding my color-blending, pattern stamp Photoshop brush technique! If you like this kind of content, be sure to sign up for my (usually weekly) newsletter. Newsletter Insiders get first peeks at my latest creative collections, VERY special pricing (if you know, you know!), exclusive FREEBIES, and more! Happy creating! xx Jessica


