


PORSCHE TAYCAN TURBO S : PERSONAL WORK


WORK IN PROGRESS
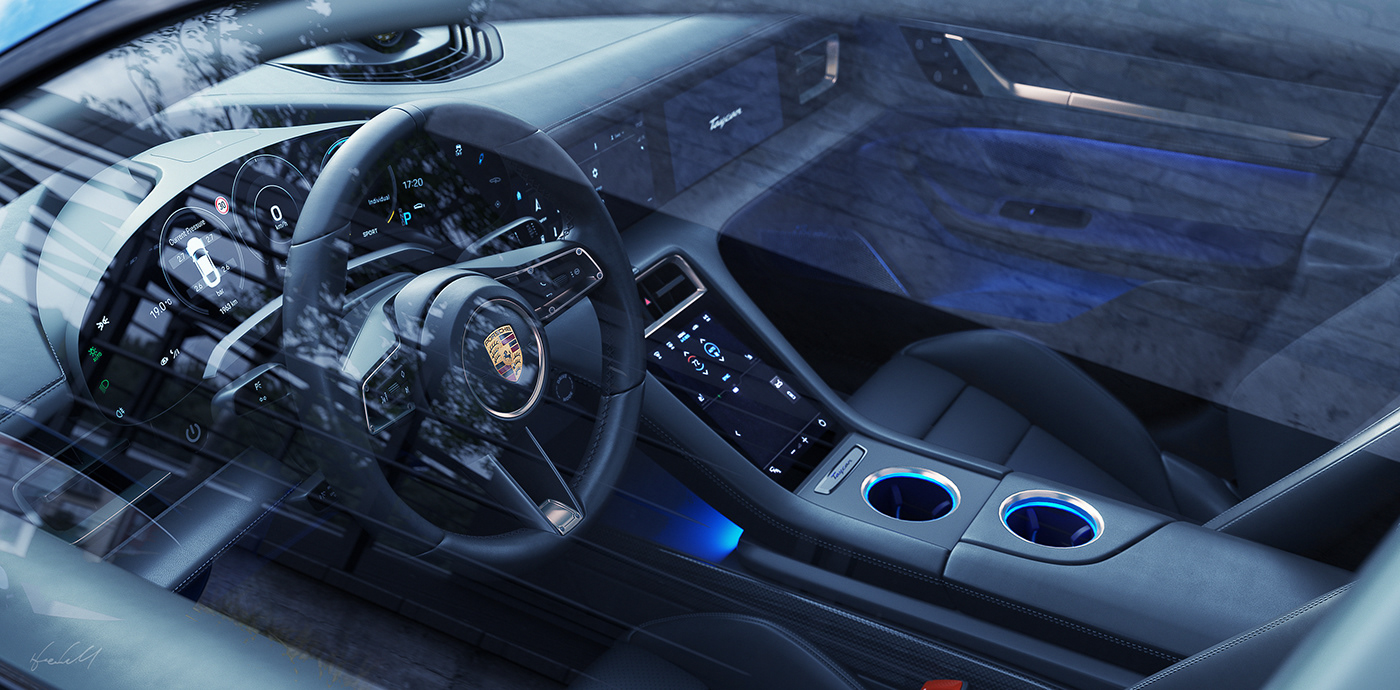
I have always wanted to practice interior rendering.
For this project, I wanted to include them and create images that fit the atmosphere of Taycan.
For this project, I wanted to include them and create images that fit the atmosphere of Taycan.
Collect reference images for model setup/modeling. Also collect mood boards to further improve the accuracy of the images you create.
Look for something close to what you want to create. If there are good references (lighting, buildings, atmosphere), I keep them as reference materials. I also try to keep as much stock as possible of things that I find beautiful because they help me in my work. Sometimes I get an image from music.
For car setups, I take pictures and collect images from the web. In the case of a car, the equipment differs depending on the grade and options, so set it up with care.
In this day and age of convenience, if you don't have detailed images, test drive videos on Youtube can be helpful.

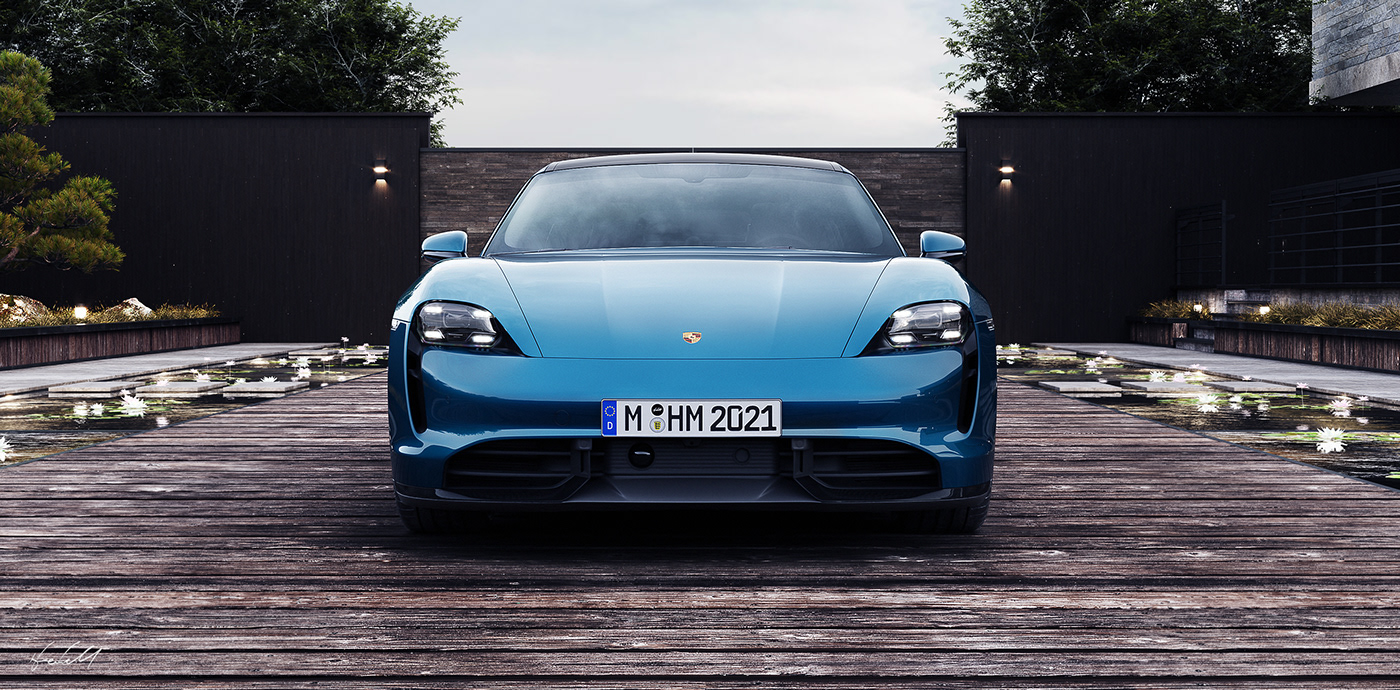
I gathered references to create a simple yet striking background for the car. I also had to be creative with the layout. For this reason, I looked deeply at photographs of architecture and works created by other artists.
There were two ideas that came to my mind in the early stages of the project. I had two ideas in mind at the beginning of the project: a wooden deck with an evening view, like Santa Monica, or the inside of a modern villa somewhere in Europe.
This was because when I was collecting references for the setup, I found some good images of Taycan in the evening and Taycan in cloudy weather.
Selecting HDR


Editing HDR / Controlling Reflection
I used HDRI LightStudio, but it can be done in Photoshop. I changed the texture to chrome to make the reflections easier to see.
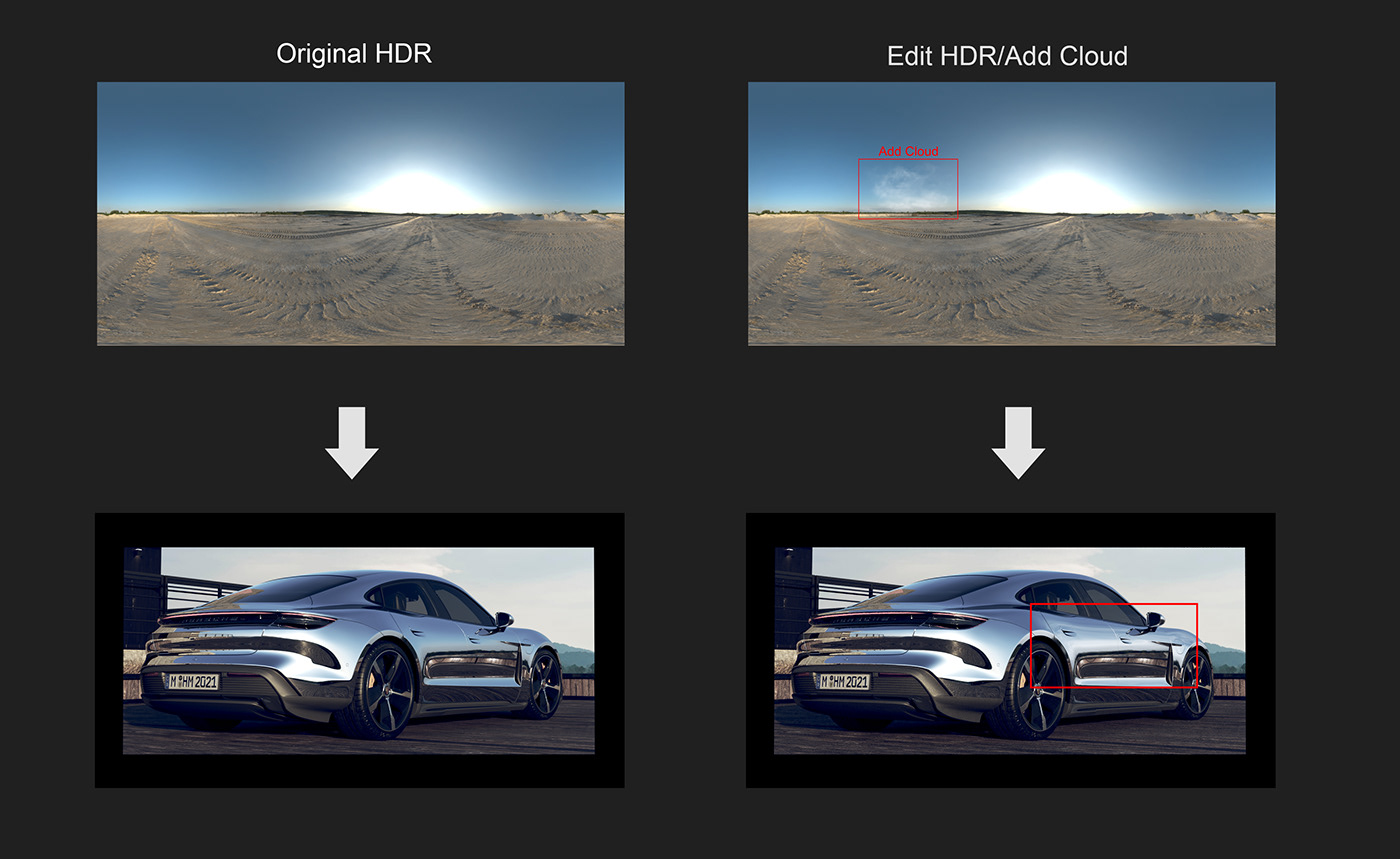
I created a red horizon line in HDRI LightStudio to see where the 3D reflections are coming from and where the HDR reflections are coming from. At this height of the horizon, you can see the red markings on the car body.
The blue markings are 3D and the red is HDR.
By controlling the height of the horizon line, you can also adjust the height of the reflection of the car body.
For simplicity, let's add clouds to the side of the car at the same height as the red reflection.
I prepared an HDR that can be downloaded from HDRI Haven. (https://hdrihaven.com/hdri/?c=clear&h=quarry_01)
I will export the HDR from HDRI Studio and overlay it on Photoshop to check it. Identify the part of the image that will be on the side and add the clouds in Photoshop.
In this way we can control the reflections entering the car body.

Why edit for HDR?
I don't know if this is the case with overseas car catalogs, but here are some tips I use when creating images for Japanese car catalogs.
I get a lot of feedback from clients about the reflections in the body of the car, and sometimes I have to revise them right up until the deadline.
This may be a cultural problem in Japan, especially with the reflection of clouds, cityscape, and lines on the body of the car (in the case of a studio, a black curtain may be projected). In the case of a studio, a black curtain may be projected. HDR is used to highlight the features of a car by following the press of the body.
HDR contains a large amount of information and a beautiful gradation, so it should be used without much modification. However, if the background of the car is a composite of various retouched photos, this method can be useful.
By raising or lowering the horizon, removing unnecessary clouds or pillars from the reflection of the body, or conversely, capturing the cityscape, you can control the reflections and make the body look neat and tidy.
Just be careful not to overdo it or you will lose the realism. Also, you need to be sensitive enough to correct the 32 bits. I'm not completely in control yet, so it's always a challenge.
In my experience at work, there are many changes to the reflections on the car body, and if you learn how to control them, it's easy to respond in a short time even if there is a sudden change.
However, I would not recommend this method if you are looking for realism. This method is only based on my experience in my work.
Change background and layout

In the early stages of production, I was thinking of about five shots. Also, since the main focus was on the car, I didn't want to make the background objects that complicated. However, as I started working on it, I enjoyed it so much that I decided to add seven more shots. The additional shots created a problem.
I had to think again about angles and background layouts that would not overlap with the cuts I had already made. I also needed to make the connection between the shots more natural. As the number of shots increased, I felt it was boring to have only wood decks. I also needed to improve this. I tried various types of concrete and stone pavement, but the impression changed considerably, and I felt uncomfortable with the connection between the shots. Therefore, we decided to use the wood deck I decided to use the wood deck as it was, but tried to find a different way. I thought I could manipulate the impression a little more by adding windows to the building and hanging light bulbs and vines from the top, but this was also a failure. In the end, I decided to add natural elements (water, trees, mossy stones) rather than artificial ones, because I thought it would give a softer feeling to the picture as a whole. As a result, I succeeded in reducing the impression of the wooden deck a little.
As a reflection, I didn't consider the number of shots in the early stages of production and increased the number of shots, which resulted in multiple problems with the layout and angles. I should have thought this through in the early stages.
I'm using DeepL, but if there are any strange translations, please tolerate them.
Thank you!!


