
The house originally had a flat roof, just like the green house on the left. The roof you see now was added in the early 60's due to the massive amount of leaking that occured when it rained.
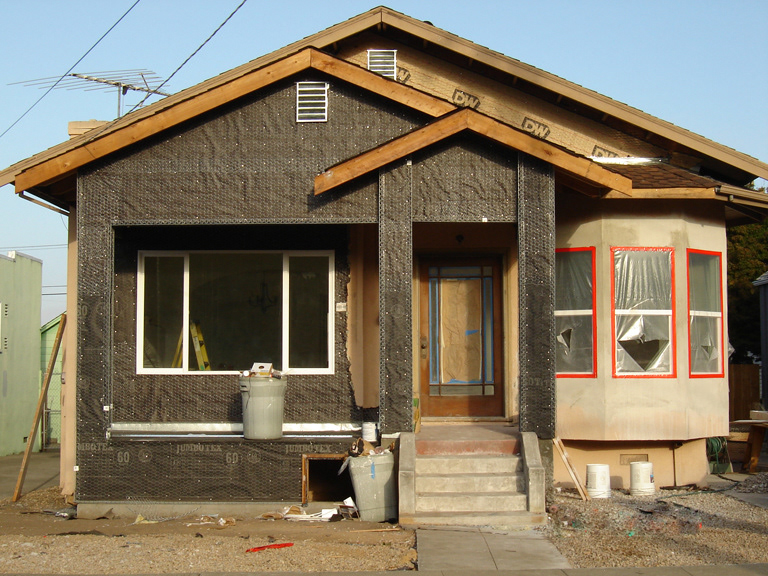
We decided to remove the metal awnings and add a front porch for a couple of reasons. One was that the front window had some leakage issues and the porch would help eliminate that problem. The second was that the client's father had always wanted a front porch to sit on when the weather was nice, so in his memory it was added.(the small rectangle that you see on the front bottom of the porch is the access to the water shut off as well as to some electrical outlets)

Here is the mostly completed house and front yard. We need to add some plants and do some painting to the trim (it needs to be darkened up a little more) We laid 12x12 black slate on the walkway and porch as well as wrought iron railings.

when walking in the front door, to the left is the living room, to the right is a wall separating the entry from the kitchen and straight ahead is a coat closet that wasn't deep enough to fit a coat hanger. We removed the coat closet to provide more space to the kitchen, removed the wall separating the entry and the kitchen and rebuilt the exhisting arch, as well as made a new arch into the kitchen.

Here is the new entry looking from the living room into the eat in area of the kitchen.

This is the original living room, which also includes a wall to wall built in and fireplace to the right.

Here is the finished living room. We reduced the size of the front window, added crown moulding and recessed lighting.

Here is the wall to wall built in. We still need to strip and stain the wood and the fireplace needs to be hooked up to the gas line and a fireplace insert installed. This is all orignial to the house.

A close up of the fireplace, we believe that the whole piece is a solid cast and the color was then added once it was installed.

We removed this built in because it was falling apart and it shares the wall with the bathroom. We wanted to enlarge the bathroom (the only one in the house), we decided on pushing the wall about 2ft into the dining room.

Here is the completed dining room. You will notice that the electrical panel is on the wall to the right (per code we were unable to place it in a closet so it ended up here, it is covered with framed art) The intake to the furnace is also right above it. And the coat closet that we removed from the entry is now located to the right.

Original bathroom, 5'x7'. (we didn't know this at the time, but the tub is actually a cast iron clawfoot tub that was framed in and plastered to look like a "built-in" tub.)

Original bathroom looking out into the hallway. We removed the floor heaters, patched the wood floors and installed central heating and air.

remodeled bathroom

All Kholer products.
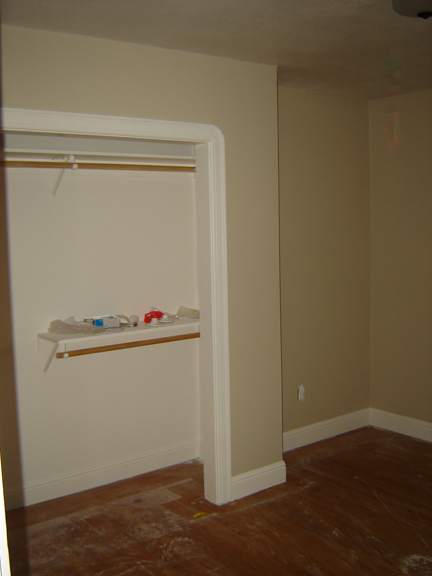
All three bedrooms originally had small single door closets. We pushed into each bedroom which allowed us to enlarge the closets. In this room in particular where the closet is located now, there were two windows that we removed.

This kitchen was remodeled in the late 50's, early 60's. This view is seen when you walk through the doorway leading from the dining room into the kitchen. To the right is a eat in area and to the left is a doorway leading to the laundry and the back door, which leads to the front of the house.

To the left in the same alcove as the door there is a side by side washer and dryer. Stepping into the actual kitchen the refrigerator is to the left.
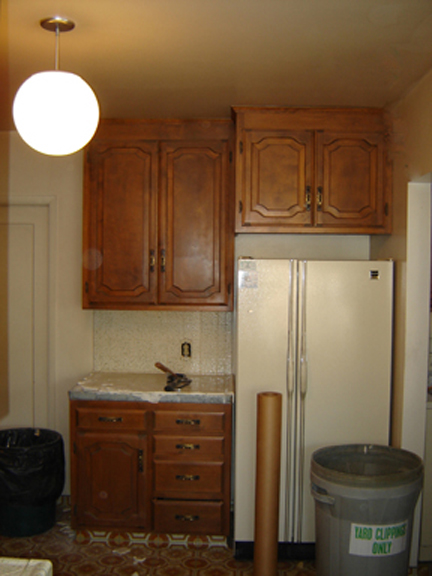
Here is the refridgerator and the door partially shown leads into one of the three bedrooms. The client wanted to keep the door there instead of sealing it off. It is used as a media room at this time. To the left is the range.

To the right is the refrigerator and to the left is the eat in area.

Eat in area. So now that I've taken you in a complete circle around the kitchen. I'm going to repeat the process showing you the remodeled version.

The sink and dishwasher stayed in the same place. We moved the window up so that we wouldn't have to worry about splash up from the sink. We removed a wall on the left side of the window and extended the counter out from that point. The back door was removed and flipped to the other side (next image) and the washer and dryer are now located behind the newly extended wall.
(The cabinets are cherry finish and the floors are 2" Red Oak, to match the original flooring in the rest of the house.)
(The cabinets are cherry finish and the floors are 2" Red Oak, to match the original flooring in the rest of the house.)

Here is the back door leading now to the back yard. The washer and dryer now sit where the old back door used to be.

The wall was pushed into the bedroom behind it about 2ft. We shifted the refridgerator over to the left about two ft from its previous location and you can see the new door that leads out to the back yard.
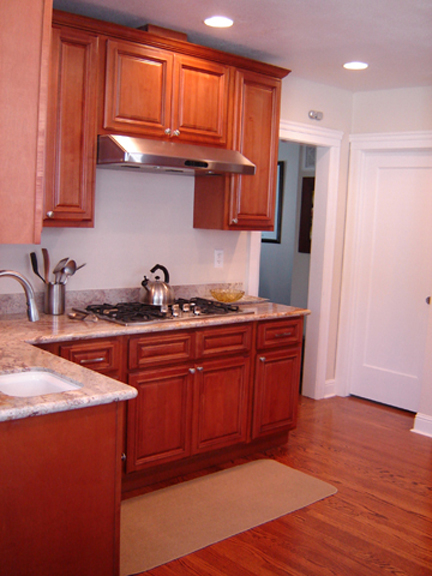
We relocated the range from the left to the right and added a prep sink in the range's previous location.

The eat in area.

