
The Goal
- The goal of my project was to construct a backpack for an 18-24 year old college student.
Research
- The first step was to analyze the backpack.
- What are its flaws, benifits, how did users use their packs, where were the backpacks used, for what purposes were the backpacks used for, when are backpacks used most often, what do people want in a backpack, etc.
- I gathered information, through interviews, online surveys, photo documentation, observation, and through my own experiences.

The majority of the bags I photographed were only using the main compartment for larger items and a secondary compartment for smaller objects; pens, keys, phone, etc.

Results
- In general my research revealed that college students need a backpack that is durable, with limited clutter/fewer unnecessary pockets and an aesthetically pleasing.
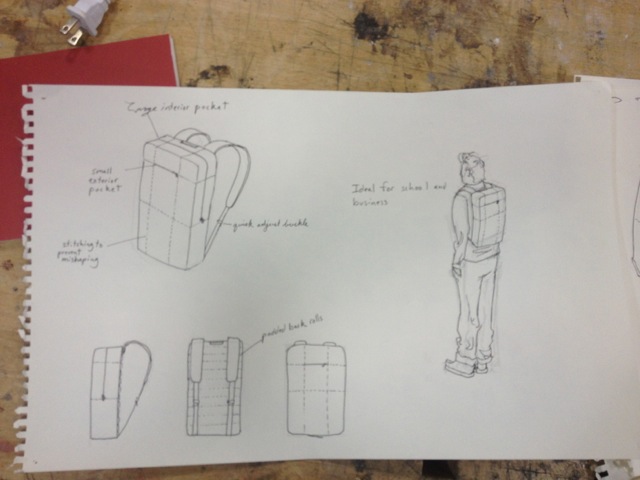
Sketching
- The build process began on paper with a few quick sketches to develope an idea of where I would start.
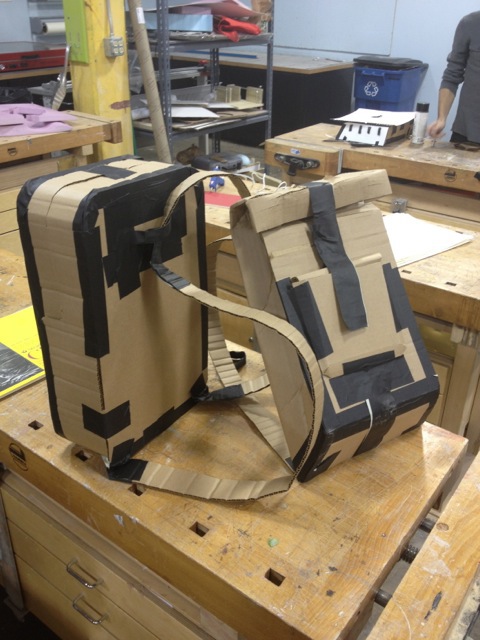
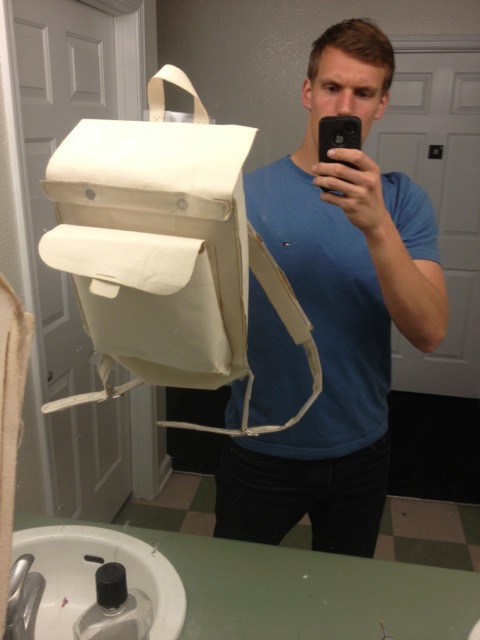
First Prototypes
- The first prototypes were built to give me an idea of proper sizing and fit for future bags.
- These two bags fit a 15" laptop.


The low profile design seemed to fit what the standard student would carry with room to spare.


Testing
- A third prototype was built to test outside of the classroom. Extra slots for the straps were positioned higher and wider on the pack for a snugger and more comfortable fit. I was very pleased with how comfortable the bag was in backpack mode and messenger bag mode. Great for walking around and riding the bike.

A third prototype reinforced to withstand use outide of the class. This was worn for a few days in order to understand how the bag would function in the real world.
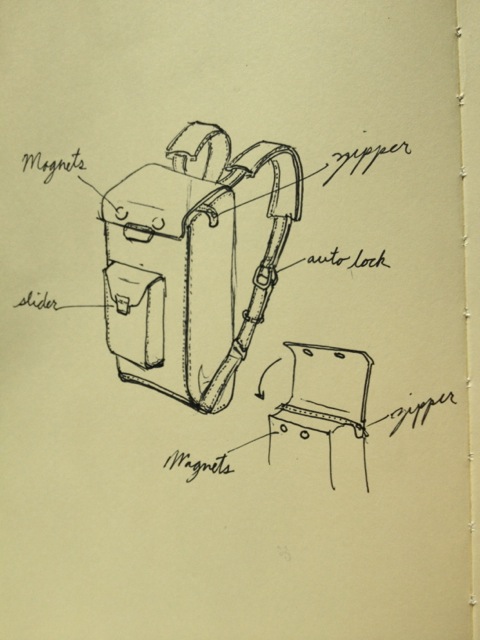
More developed sketch featuring a magnet and zipper closure.
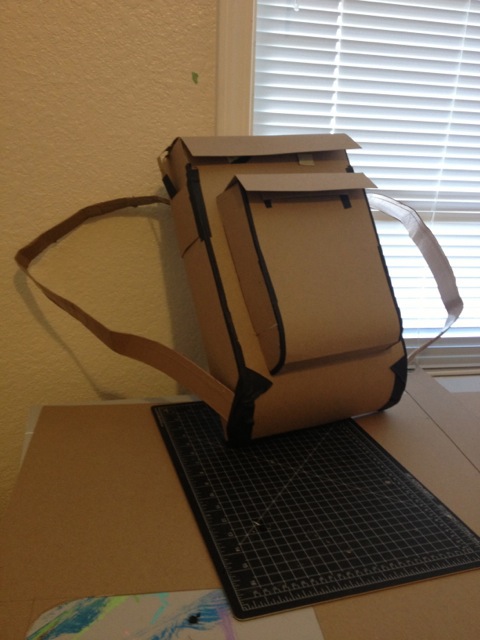
Prototype number Four. Getting closer to a final shape and starting to develope my stitching layout with the tape strips.

potential zipper mock-up.

The prototypes are getting better from the first on the left to the final carboard mock-up on the right.
Laser Cutting
- My inspiration for laser cutting my bag is from MAKR Goods.
- Using the laser cutter made hand stitching a breeze and helped me to create a perfectly symetrical bag.
Testing
- The laser cut template was first testen on canvas before the final leather cut.
- Very few changes were need after finishing the canvas bag.
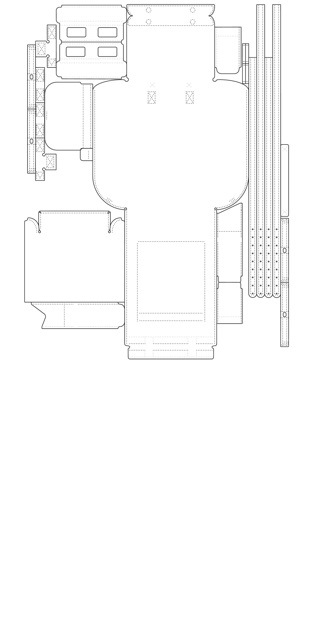
Template for the final laser cut bag.

Final prototype before starting on the leather. After experimenting with numerous strap configurations I decided that the more simple the better.
Very pleased with the final prototype.

The whole gang.
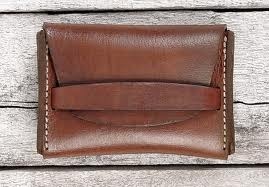
Insparation
-My materials insparation is a sunglass case by MAKR
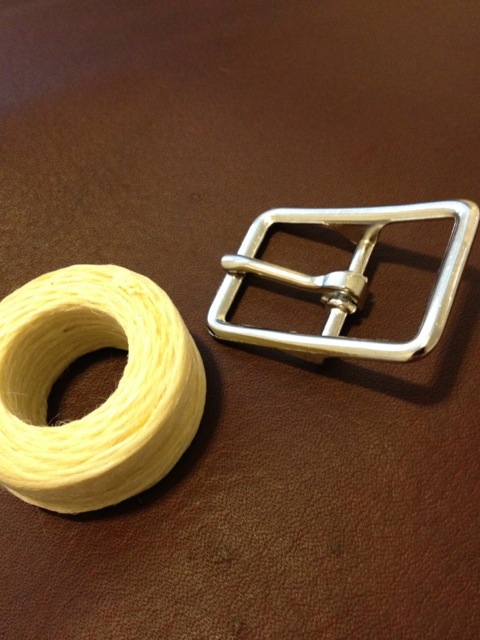
4 oz. oil tanned utility leather, waxed thread and nickle plated hardware from Tandy Leather Factory for this bag. It was a pleasure working with Tandy Leather Factory.
Stitching
- I decided to hand stitch the leather for extra durability.
- This method of hand stitching is much stronger than the lock-stich method produced from machine.

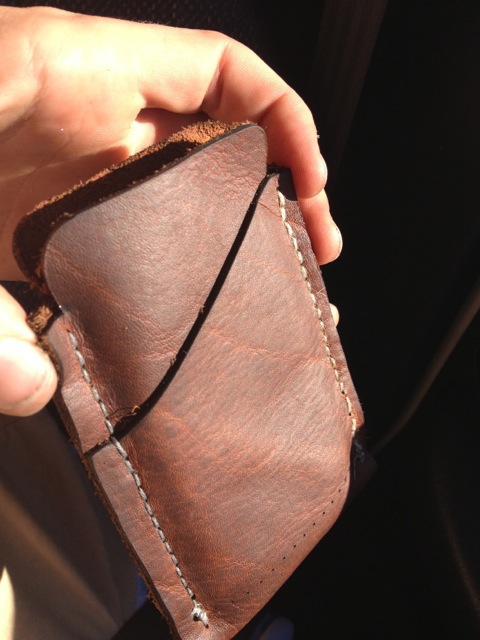
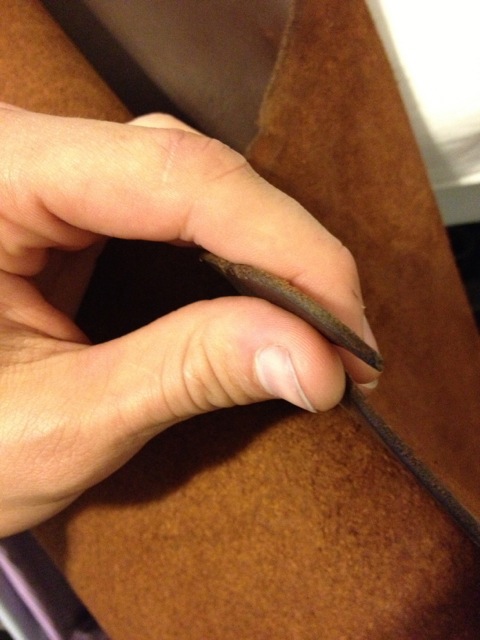
Testing my stitching and making a nifty phone case before attempting the bag.

Very pleased with the material combination.

Final componentry attached. Time to finish stitching the bag shut.
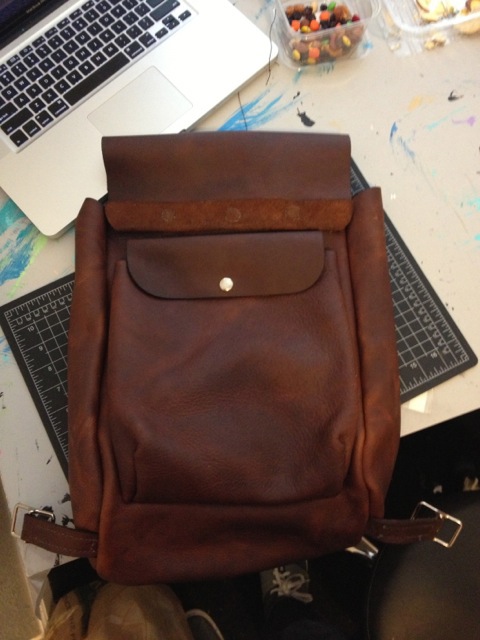
Large secondary pocket for smaller items.
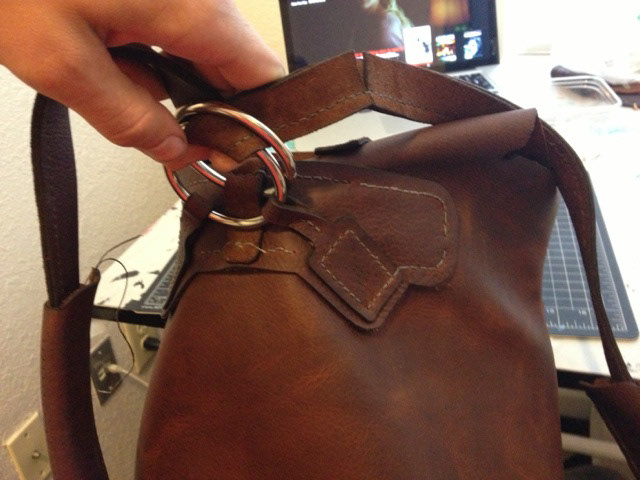
We have a problem...
- The bag looks great...until the straps are pulled and the bag sags too much from the center out.
- I decided that the best option for my time constraints would be a rigid plate behind the strap connection.
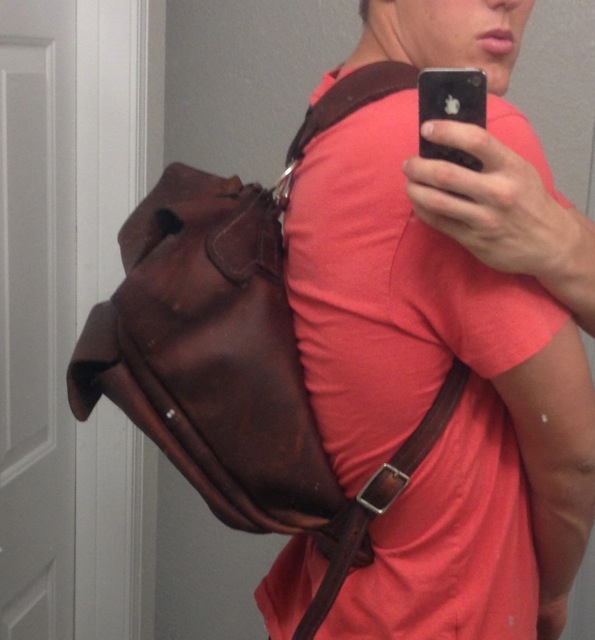
Too much sag.
potential backplates.

lightest strongest option for now.

Much better profile with the backplate, and the added weight isnt noticible.

final back

final front

