Embedded Computer Vision Platform with PandaBoard
Hello everyone,
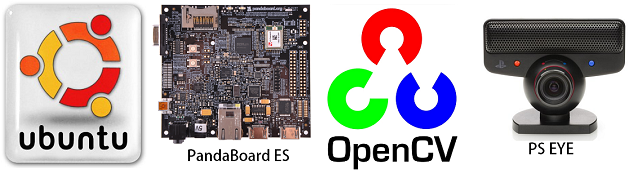
In this page I explain how to install and configure PandaBoard with Ubuntu Server, OpenCV, Boost C++ Libraries and Playstation Eye camera. The objective of this work is to develop embedded computer vision algorithms with the PandaBoard.
The PandaBoard-ES was an interesting choice because:
a. Small board (~11x11cm)
b. Two ARM Cortex-A9 cores with Symmetric Multiprocessing (SMP) with Enhanced CPU speed up to 1.2 Ghz.
c. Low power (5V 1.5A~4A)
d. Low cost (~$185,00).
Software version:
* Ubuntu Server 11.10 (is more faster than desktop version)
* OpenCV 2.3.1
* Boost C++ Libraries 1.46
* Ubuntu Server 11.10 (is more faster than desktop version)
* OpenCV 2.3.1
* Boost C++ Libraries 1.46
Tip: I recommend to use sd card class 10 for better performance.
First, download ubuntu-11.10-preinstalled-server-armel+omap4.img.gz (Preinstalled server image -> Texas Instruments OMAP4 preinstalled server image).
Check for newest ubuntu version for OMAP4 here: https://wiki.ubuntu.com/ARM/OMAP
Copy the image to SD card, see instructions here: https://wiki.ubuntu.com/ARM/Server/Install (TI OMAP4-based platforms).
Setup a serial terminal, see instructions here: http://omappedia.org/wiki/Minicom.
Connect a keyboard and mouse.
Connect your board on internet using Ethernet port.
Connect your board on internet using Ethernet port.
Insert the SD card in your platform and turn on the board, wait a few seconds for boot, install and configure the operating system.
The Ubuntu Server has no graphical interface (GUI), so install LightDM and Ubuntu Desktop:
sudo apt-get install lightdm
sudo apt-get install --no-install-recommends ubuntu-desktop
sudo apt-get install lightdm
sudo apt-get install --no-install-recommends ubuntu-desktop
Install OMAP4 Addons, see instructions here: http://omappedia.org/wiki/Ubuntu_PPA
SGX Video Acceleration
https://wiki.ubuntu.com/ARM/OMAP/Graphics
https://wiki.ubuntu.com/ARM/OMAP/Graphics
Install the following tools:
* chkconfig
* GIT (for OpenCV)
* SVN (optional)
* SSH Server (optional)
sudo apt-get install chkconfig git-core subversion openssh-server
* chkconfig
* GIT (for OpenCV)
* SVN (optional)
* SSH Server (optional)
sudo apt-get install chkconfig git-core subversion openssh-server
Instructions for PlayStation®Eye Camera
Connect your PS EYE camera, and run lsusb, make sure it was detected.
You can use guvcview to test the camera and display the frame rate:
sudo apt-get install gtk2-engines-pixbuf guvcview
guvcview -d /dev/video2 -p 1
sudo apt-get install gtk2-engines-pixbuf guvcview
guvcview -d /dev/video2 -p 1
Check if guvcview can display camera capture.
Tip: gtk2-engines-pixbuf is for solving Gtk-WARNING **: Unable to locate theme engine in module_path: "pixmap".
Instructions for Boost C++ Libraries
Install Boost C++ Libraries running:
sudo apt-get install libboost.*1.46.1 libboost.*1.46-dev
sudo apt-get install libboost.*1.46.1 libboost.*1.46-dev
Test if all is ok compiling this sample code (copy and paste in main.cpp file):
//////////////////////////////////////////////////////////////////////////
#include < boost/thread/thread.hpp >
#include < iostream >
//////////////////////////////////////////////////////////////////////////
#include < boost/thread/thread.hpp >
#include < iostream >
void thread_function(){
std::cout << "Thread" << std::endl;
}
std::cout << "Thread" << std::endl;
}
int main(int argc, char **argv){
std::cout << "-------------------------" << std::endl;
std::cout << "Test Boost Library v1.46 " << std::endl;
std::cout << "-------------------------" << std::endl;
std::cout << "-------------------------" << std::endl;
std::cout << "Test Boost Library v1.46 " << std::endl;
std::cout << "-------------------------" << std::endl;
boost::thread mythread(&thread_function);
mythread.join();
return 0;
}
//////////////////////////////////////////////////////////////////////////
For compile, run:
g++ -o main main.cpp -lboost_thread
./main
}
//////////////////////////////////////////////////////////////////////////
For compile, run:
g++ -o main main.cpp -lboost_thread
./main
The output should be:
-------------------------
Test Boost Library v1.46
-------------------------
Thread
-------------------------
Test Boost Library v1.46
-------------------------
Thread
Instructions for OpenCV
The instructions below is a summary of:
I've adapted the tips above to compile OpenCV in Pandaboard.
* Step 1
sudo apt-get update
sudo apt-get remove ffmpeg x264 libx264-dev libvpx0
sudo apt-get update
sudo apt-get remove ffmpeg x264 libx264-dev libvpx0
* Step 2
sudo apt-get install libgstreamer0.10-0 libgstreamer0.10-dev gstreamer0.10-tools gstreamer0.10-plugins-base libgstreamer-plugins-base0.10-dev gstreamer0.10-plugins-good gstreamer0.10-plugins-ugly gstreamer0.10-plugins-bad gstreamer0.10-ffmpeg
sudo apt-get install libgstreamer0.10-0 libgstreamer0.10-dev gstreamer0.10-tools gstreamer0.10-plugins-base libgstreamer-plugins-base0.10-dev gstreamer0.10-plugins-good gstreamer0.10-plugins-ugly gstreamer0.10-plugins-bad gstreamer0.10-ffmpeg
* Step 3
sudo apt-get install build-essential checkinstall git cmake libfaac-dev libjack-jackd2-dev libmp3lame-dev libopencore-amrnb-dev libopencore-amrwb-dev libsdl1.2-dev libtheora-dev libva-dev libvdpau-dev libvorbis-dev libx11-dev libxfixes-dev libxvidcore-dev texi2html yasm zlib1g-dev
sudo apt-get install build-essential checkinstall git cmake libfaac-dev libjack-jackd2-dev libmp3lame-dev libopencore-amrnb-dev libopencore-amrwb-dev libsdl1.2-dev libtheora-dev libva-dev libvdpau-dev libvorbis-dev libx11-dev libxfixes-dev libxvidcore-dev texi2html yasm zlib1g-dev
* Step 4
Download and install x264
Get the most current source files, compile, and install.
git clone git://git.videolan.org/x264.git
cd x264
./configure --enable-static --enable-pic --enable-shared
make
sudo make install
Download and install x264
Get the most current source files, compile, and install.
git clone git://git.videolan.org/x264.git
cd x264
./configure --enable-static --enable-pic --enable-shared
make
sudo make install
* Step 5
Install libvpx
This is used to encode and decode VP8 video (WebM).
git clone http://git.chromium.org/webm/libvpx.git
cd libvpx
./configure --enable-static --enable-pic (--enable-shared only supported on ELF for now)
make
sudo make install
Install libvpx
This is used to encode and decode VP8 video (WebM).
git clone http://git.chromium.org/webm/libvpx.git
cd libvpx
./configure --enable-static --enable-pic (--enable-shared only supported on ELF for now)
make
sudo make install
* Step 6
Download and install ffmpeg version 0.7.x from http://ffmpeg.org/download.html (version >= 0.8.x is not compatible with OpenCV 2.3) and extract it to a folder. Then enter the folder and configure and build it:
cd ffmpeg
./configure --enable-shared --enable-libvpx --enable-pic --enable-gpl --enable-libfaac --enable-libmp3lame --enable-libopencore-amrnb --enable-libopencore-amrwb --enable-libtheora --enable-libvorbis --enable-libx264 --enable-libxvid --enable-nonfree --enable-postproc --enable-version3 --enable-x11grab --disable-ffserver
make
sudo make install
* Step 7
Download and install libjpeg by entering the following command:
sudo apt-get install libjpeg62 libjpeg62-dev
Download and install libjpeg by entering the following command:
sudo apt-get install libjpeg62 libjpeg62-dev
* Step 8
Download and install install v4l (video for linux)
Download v4l-utils-*.*.*.tar.bz2 from http://www.linuxtv.org/downloads/v4l-utils/ (I've used v4l-utils-0.8.5.tar.bz2)
Build v4l by entering the following commands in a terminal:
make
sudo make install
Download and install install v4l (video for linux)
Download v4l-utils-*.*.*.tar.bz2 from http://www.linuxtv.org/downloads/v4l-utils/ (I've used v4l-utils-0.8.5.tar.bz2)
Build v4l by entering the following commands in a terminal:
make
sudo make install
* Step 9
Download and install gtk by entering the following command:
sudo apt-get install libgtk2.0-0 libgtk2.0-dev
* Step 10
Download and install OpenCV.
Download and install OpenCV.
First, download OpenCV 2.3.1 from http://sourceforge.net/projects/opencvlibrary/files/ and extract it in your working directory. Then enter in the OpenCV extracted folder and build it following the steps below:
mkdir release
cd release
cmake -D CMAKE_BUILD_TYPE=RELEASE -D CMAKE_INSTALL_PREFIX=/usr/local -D BUILD_NEW_PYTHON_SUPPORT=ON -D BUILD_EXAMPLES=ON ..
mkdir release
cd release
cmake -D CMAKE_BUILD_TYPE=RELEASE -D CMAKE_INSTALL_PREFIX=/usr/local -D BUILD_NEW_PYTHON_SUPPORT=ON -D BUILD_EXAMPLES=ON ..
Check that the output of cmake includes the following text:
¦GTK+ 2.x: YES
¦FFMPEG: YES
¦GStreamer: YES
¦V4L/V4L2: Using libv4l
¦GTK+ 2.x: YES
¦FFMPEG: YES
¦GStreamer: YES
¦V4L/V4L2: Using libv4l
And next:
make
sudo make install
sudo make install
* Step 11
Configure Linux – add the following line to your .bashrc in order to tell linux where the shared libraries for OpenCV are located without having to enter it everytime. So, you start a new terminal and run:
export LD_LIBRARY_PATH=/usr/local/lib
Configure Linux – add the following line to your .bashrc in order to tell linux where the shared libraries for OpenCV are located without having to enter it everytime. So, you start a new terminal and run:
export LD_LIBRARY_PATH=/usr/local/lib
Using any text editor add the following lines to the end of your /etc/bash.bashrc file:
PKG_CONFIG_PATH=$PKG_CONFIG_PATH:/usr/local/lib/pkgconfig
export PKG_CONFIG_PATH
PKG_CONFIG_PATH=$PKG_CONFIG_PATH:/usr/local/lib/pkgconfig
export PKG_CONFIG_PATH
* Step 12
Reboot.
Reboot.
* Step 13
Test OpenCV with this example code (copy and paste in main.cpp file):
///////////////////////////////////////////////////////////////////////////////////////////////////////////////////////////////
#include < stdio.h >
#include < cv.h >
#include < highgui.h >
Test OpenCV with this example code (copy and paste in main.cpp file):
///////////////////////////////////////////////////////////////////////////////////////////////////////////////////////////////
#include < stdio.h >
#include < cv.h >
#include < highgui.h >
int main(int argc, char **argv)
{
CvCapture *capture = 0;
IplImage *frame = 0;
int key = 0;
{
CvCapture *capture = 0;
IplImage *frame = 0;
int key = 0;
capture = cvCaptureFromCAM(2);
if(!capture)
{
fprintf(stderr, "Cannot open initialize webcam!\n");
return 1;
}
{
fprintf(stderr, "Cannot open initialize webcam!\n");
return 1;
}
cvNamedWindow("result");
while(key != 'q')
{
frame = cvQueryFrame(capture);
{
frame = cvQueryFrame(capture);
if(!frame) break;
cvShowImage("result", frame);
key = cvWaitKey(1);
}
}
cvDestroyWindow("result");
cvReleaseCapture(&capture);
cvReleaseCapture(&capture);
return 0;
}
///////////////////////////////////////////////////////////////////////////////////////////////////////////////////////////////
Compile and run:
g++ `pkg-config --cflags opencv` main.cpp -o main `pkg-config --libs opencv`
./main
}
///////////////////////////////////////////////////////////////////////////////////////////////////////////////////////////////
Compile and run:
g++ `pkg-config --cflags opencv` main.cpp -o main `pkg-config --libs opencv`
./main
_____________________________________________________________________________________
Here is the final result of the installation and configuration of PandaBoard ES (16GB SDHC class 10 memory card) with Ubuntu Server 11.10 (minimal desktop) + OpenCV 2.3.1 + PlayStation Eye Camera (running at 25~30 FPS). I've tested with the famous Canny algorithm for edge detection.


Basic Vehicle Counting in PandaBoard ES
~1.000.000 (one million) of frames processed in 24 hours
11.5 FPS using 70% of CPU and 2.7% of RAM (~25MB)
~4000 lines of source code (24 classes)
Developed in C++ using Boost, cvBlob and OpenCV
~1.000.000 (one million) of frames processed in 24 hours
11.5 FPS using 70% of CPU and 2.7% of RAM (~25MB)
~4000 lines of source code (24 classes)
Developed in C++ using Boost, cvBlob and OpenCV
