Handheld pH Scanner
Design Process

Applications
pH Meters have a broad usage base including industrial food processing, pool maintenance, general research in lab environments, and horticulture, to name a few. Below are examples of where certain everyday liquids fall on a pH scale.

The Problem
Current pH Meters are finicky devices that need to be calibrated often using buffer solutions, have to be stored in a liquid solution in order to prevent damage to the electrode, are extremely fragile due to a glass probe, and are subject to signal drifting causing inaccurate measurements.
A New Technology Platform
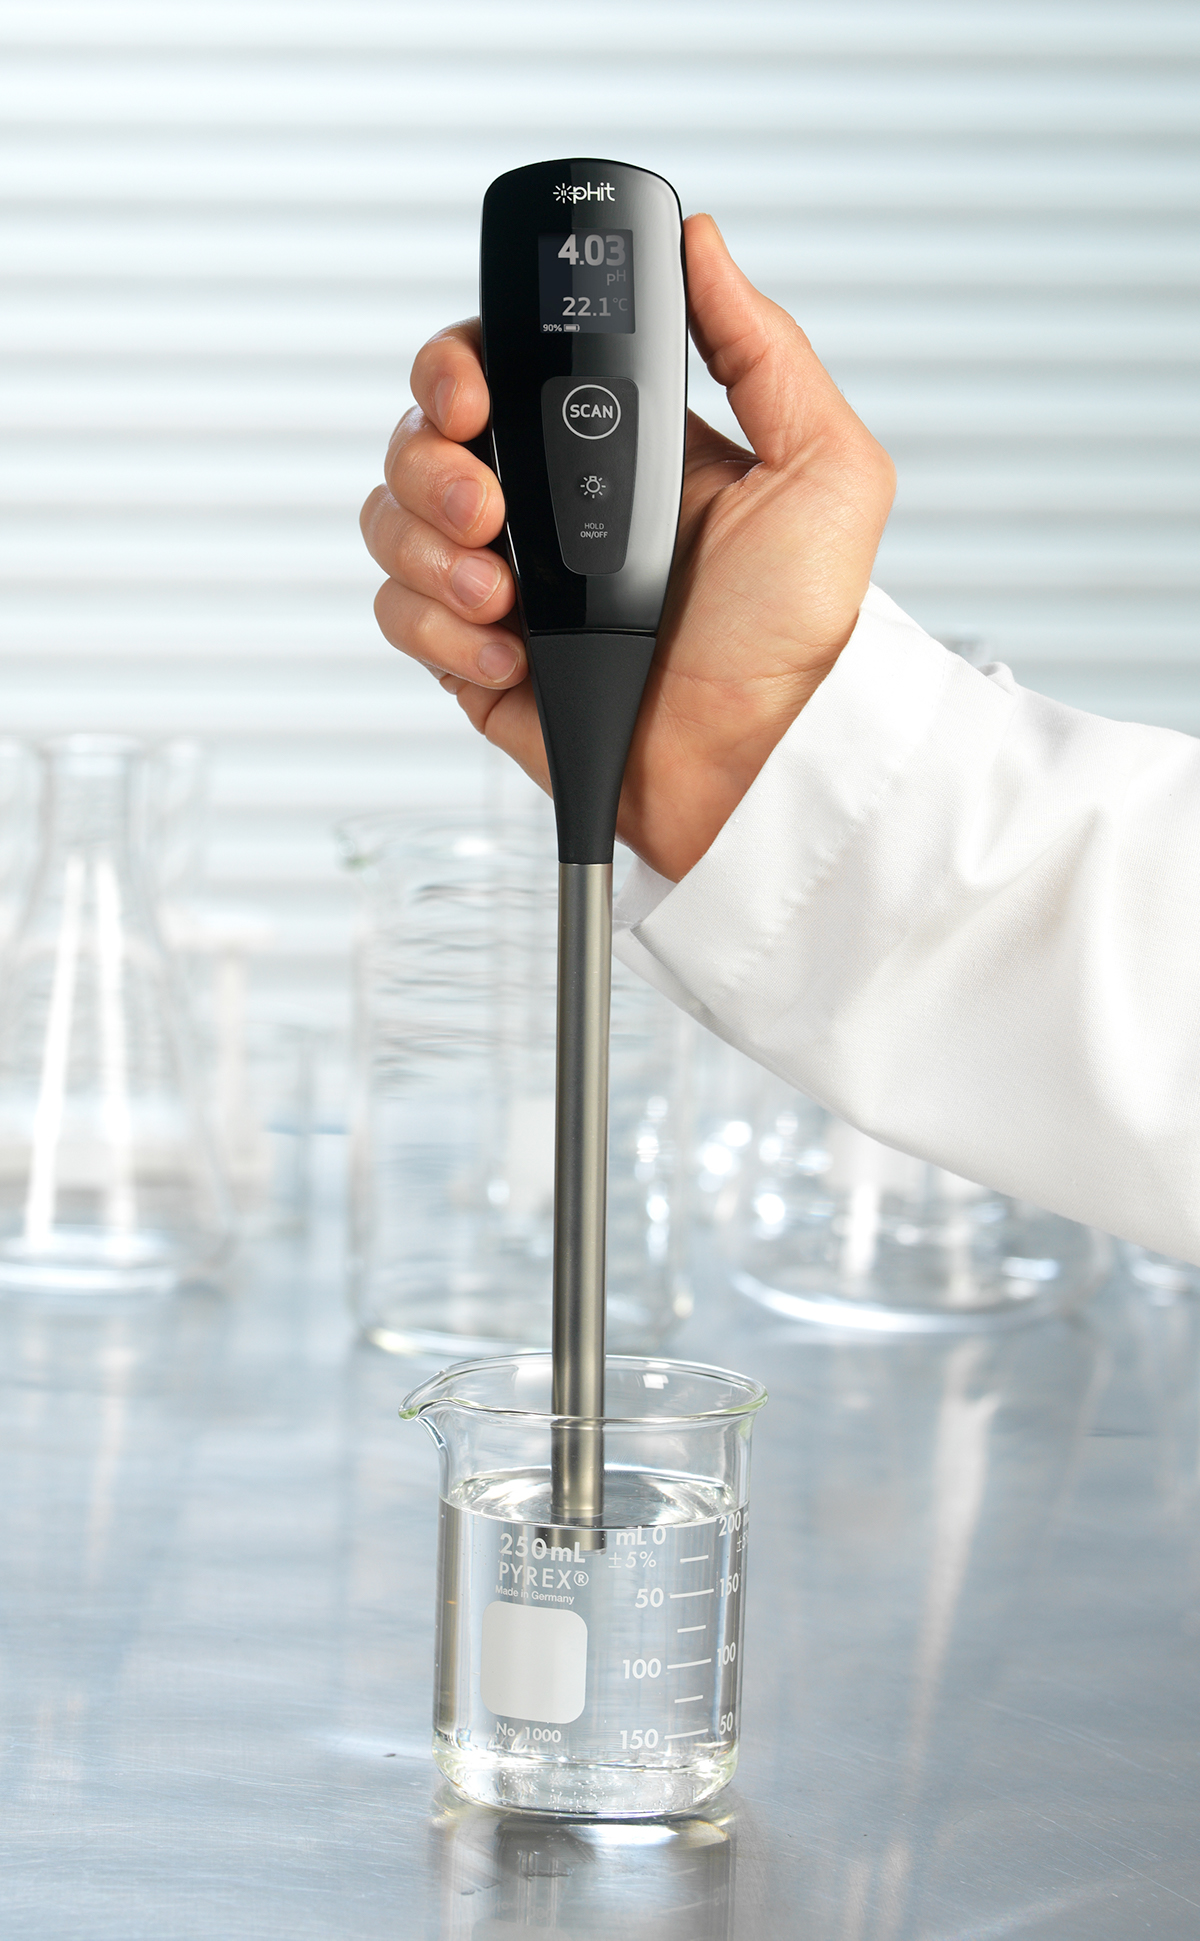
We worked with the start up, Senova Systems, to help them to design a device, from the ground up, for pH measurement based on a new technology platform that they had licensed. The technology allows for a robust pH scanner contained in a stainless steal tube that simply needs to be turned on and used. No calibration, no need to be stored in special solutions when not in use, doesn't suffer from signal drifting, and doesn't have a fragile glass probe. My goal as design lead was to complement this technology with a modern, progressive design, to provide a clear, concise user interface, and to consider the myriad use cases and device applications in the process. Our team consisted of a group of mechanical and electrical engineers, me as the design lead, a project manager, and a group of craftsmen/model makers.


Process
Below is an overview of the design process for this device. Concurrently, there was an electrical and mechanical engineering team. We worked together very closely over a tight timeline to produce the result below.
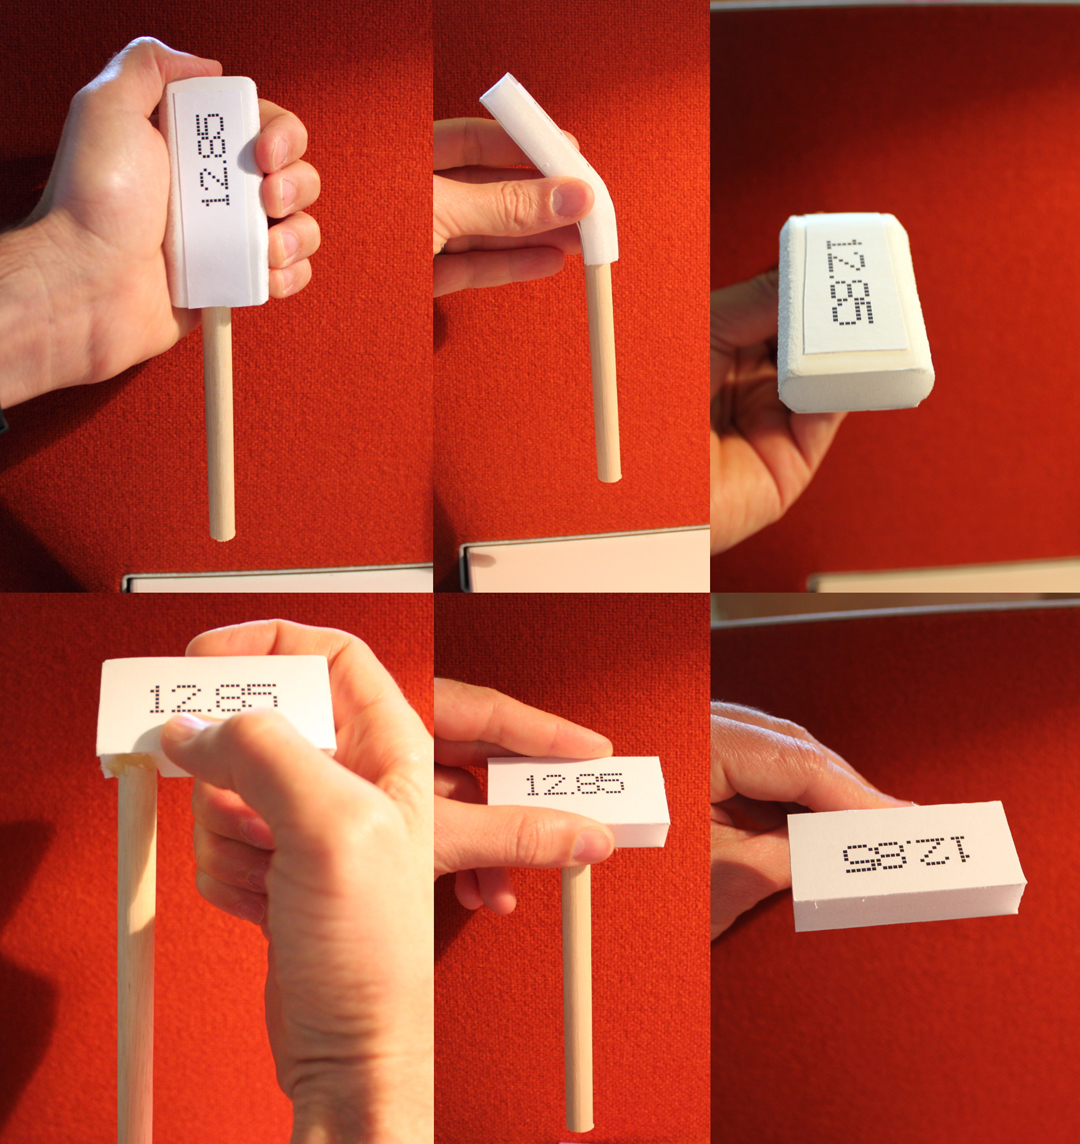
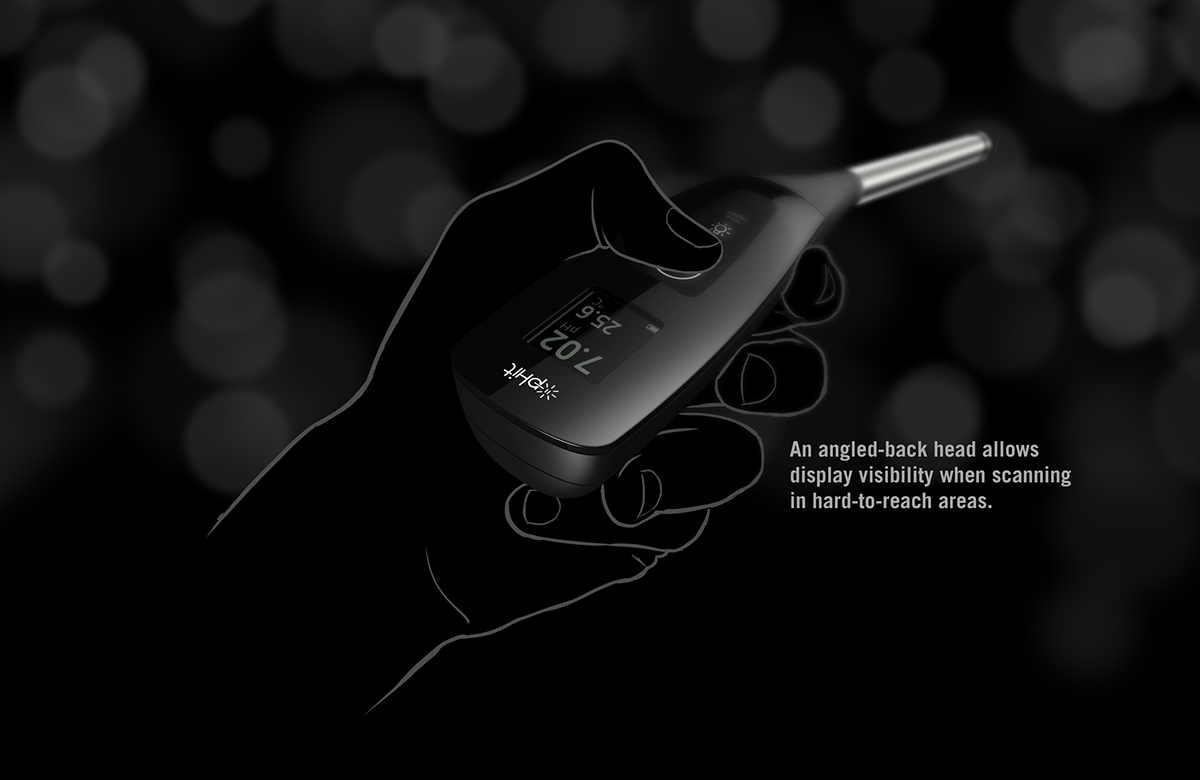
Quick and Dirty Mock Ups The first thing I did was make very quick, very rough mock ups to get a sense of scale, how one would interface with the device, and any opportunities to optimize the interaction. One thing we came across was the advantage of having an angled "head" - being able to see the display both from the front and the top (an advantage when reaching into something such as a wine barrel to test pH levels).
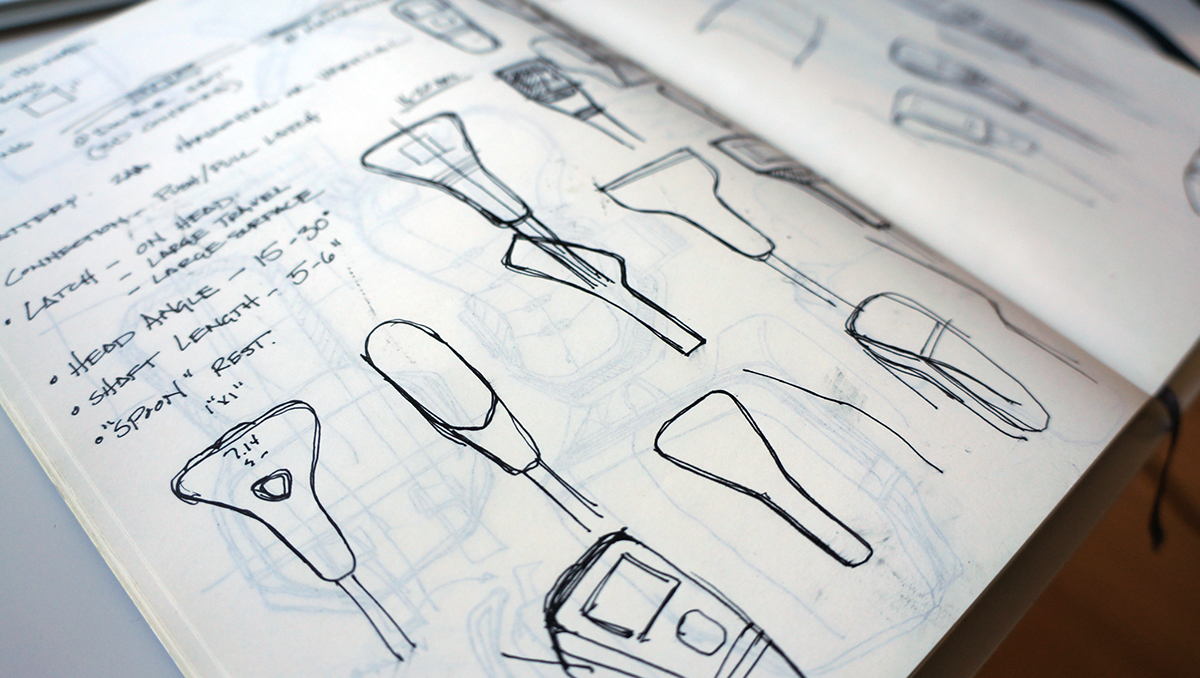
Initial Sketches The above is one of the aspirational concepts before we had made any of the tough decisions around display type, components, batteries, etc. In this sketch you'll find a dead-front LCD display, a capacitance touch interface, and a pulsating indicator light around the "Scan" button. Many of these wish list features had to be replaced as we began to dive deeper into the use case and power use and pick components.
Defining the Internal Components
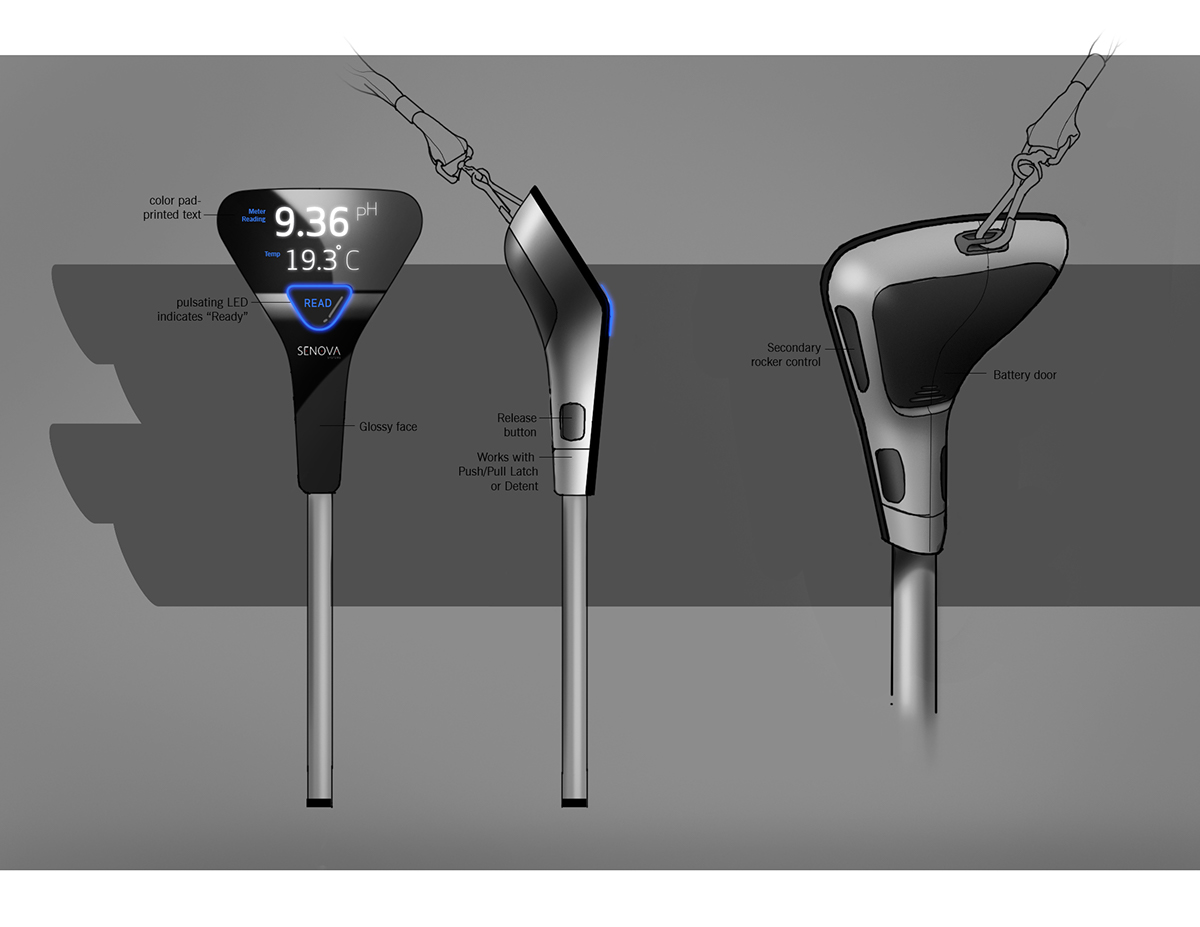
We spent a considerable amount of time and effort in deciding on the right components, particularly for the display. Due to power consumption, the software/electrical engineering team recommended we move away from an LCD display and consider a low power, transreflective display - the display you find in digital watches that gets brighter when there's more surrounding light. In the above sketches, we were looking at various silhouettes designed around a couple of different display sizes, a horizontal display on the right, vertical display in the center, and a smaller horizontal display on the left. We couldn't see a huge advantage in the larger, horizontal version (lots of empty space on the right and left plus not ideal for a hand held) and determined that the smaller more vertically oriented transreflective display served our purposes well.
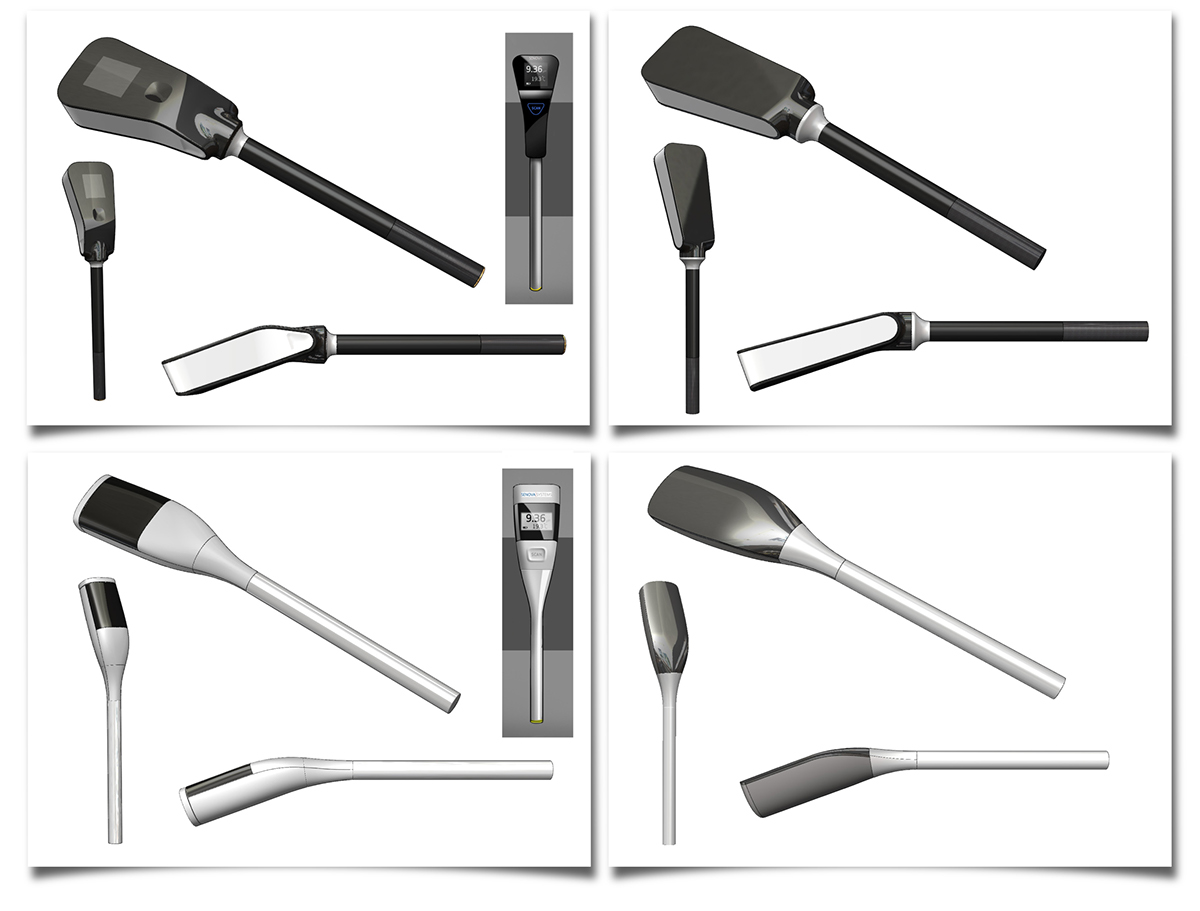
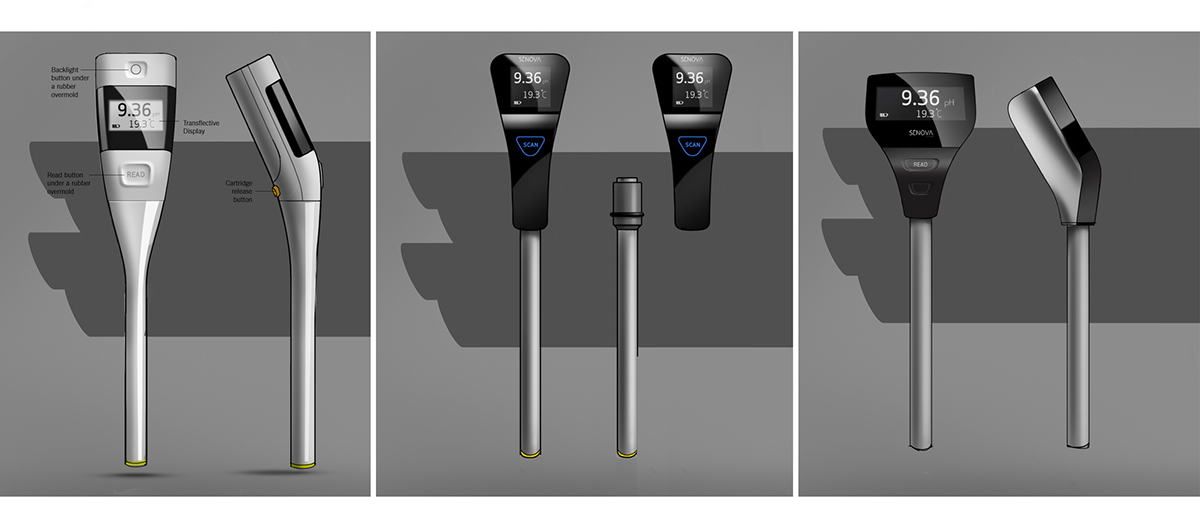
First Pass This was a first look at translating the initial sketches from a 2-dimensional illustration to a 3-dimensional object around the components. Even though the forms are rather primitive first passes, one of the things we noticed right away was the considerable disconnect between the sketches and the 3D embodiments after we accounted for the components. We moved ahead with redesigning and refining in CAD and landed on the three concepts below for our concept review.
Details and Refinements
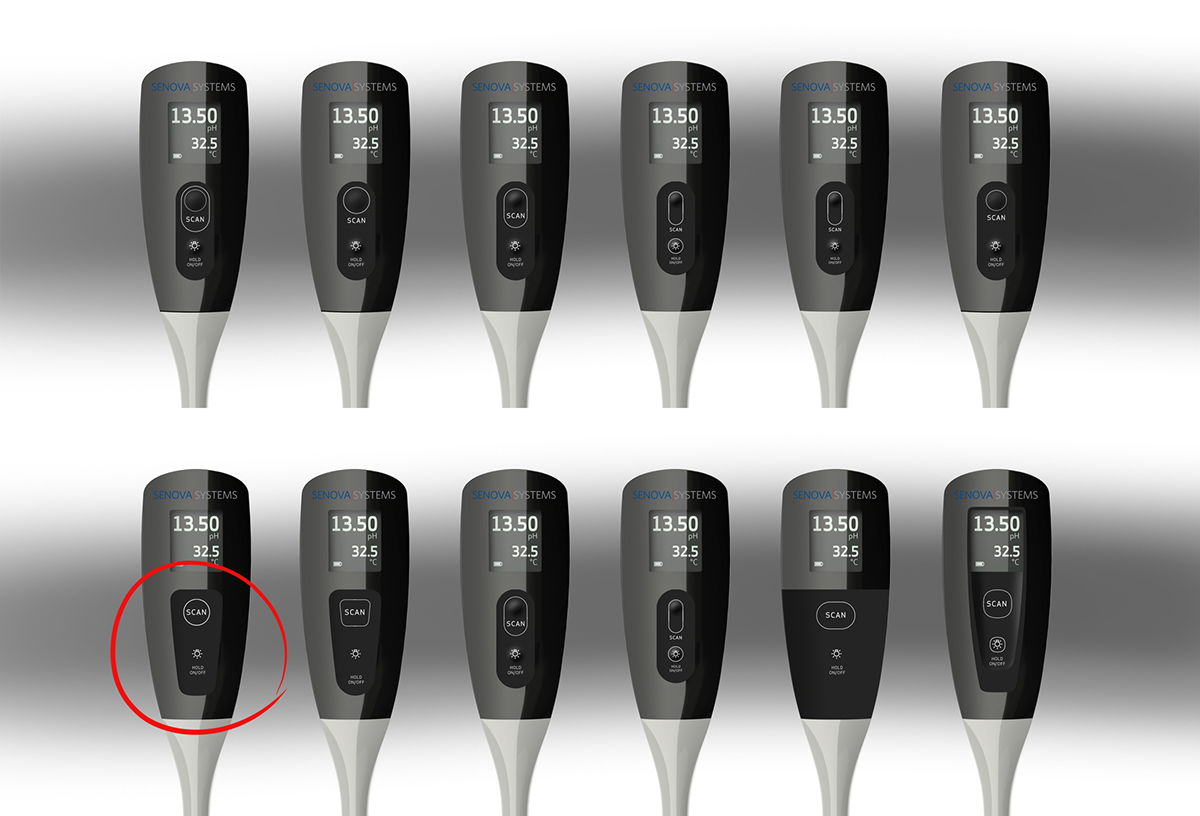
Getting the right design for the buttons became quite a challenge, in part because of the strict limitations of the IP 6 liquid ingress qualification. This meant that every open seam on the device needed to be sealed to prevent water from seeping in. Because of this, the approach to the button interface that we decided to take was a two-button elastomer overmolded interface - a primary button to initiate the scan and a secondary button that served a dual purpose of both back lighting and, when held, turning the device on and off. The challenge became to adhere to the mechanical engineering team's overmolding requirements and getting the right level of hierarchy between the display read-out and the buttons.

Button Breadboard Above is the breadboard made from a piece of acrylic and rubber flat sheet close in durometer to the rubber we'd be overmolding the buttons with. Various widths were tested to help define how much rubber we'd need around the button landing zone in order to allow it to flex. We had already determined that a 2mm bonding flange was needed.

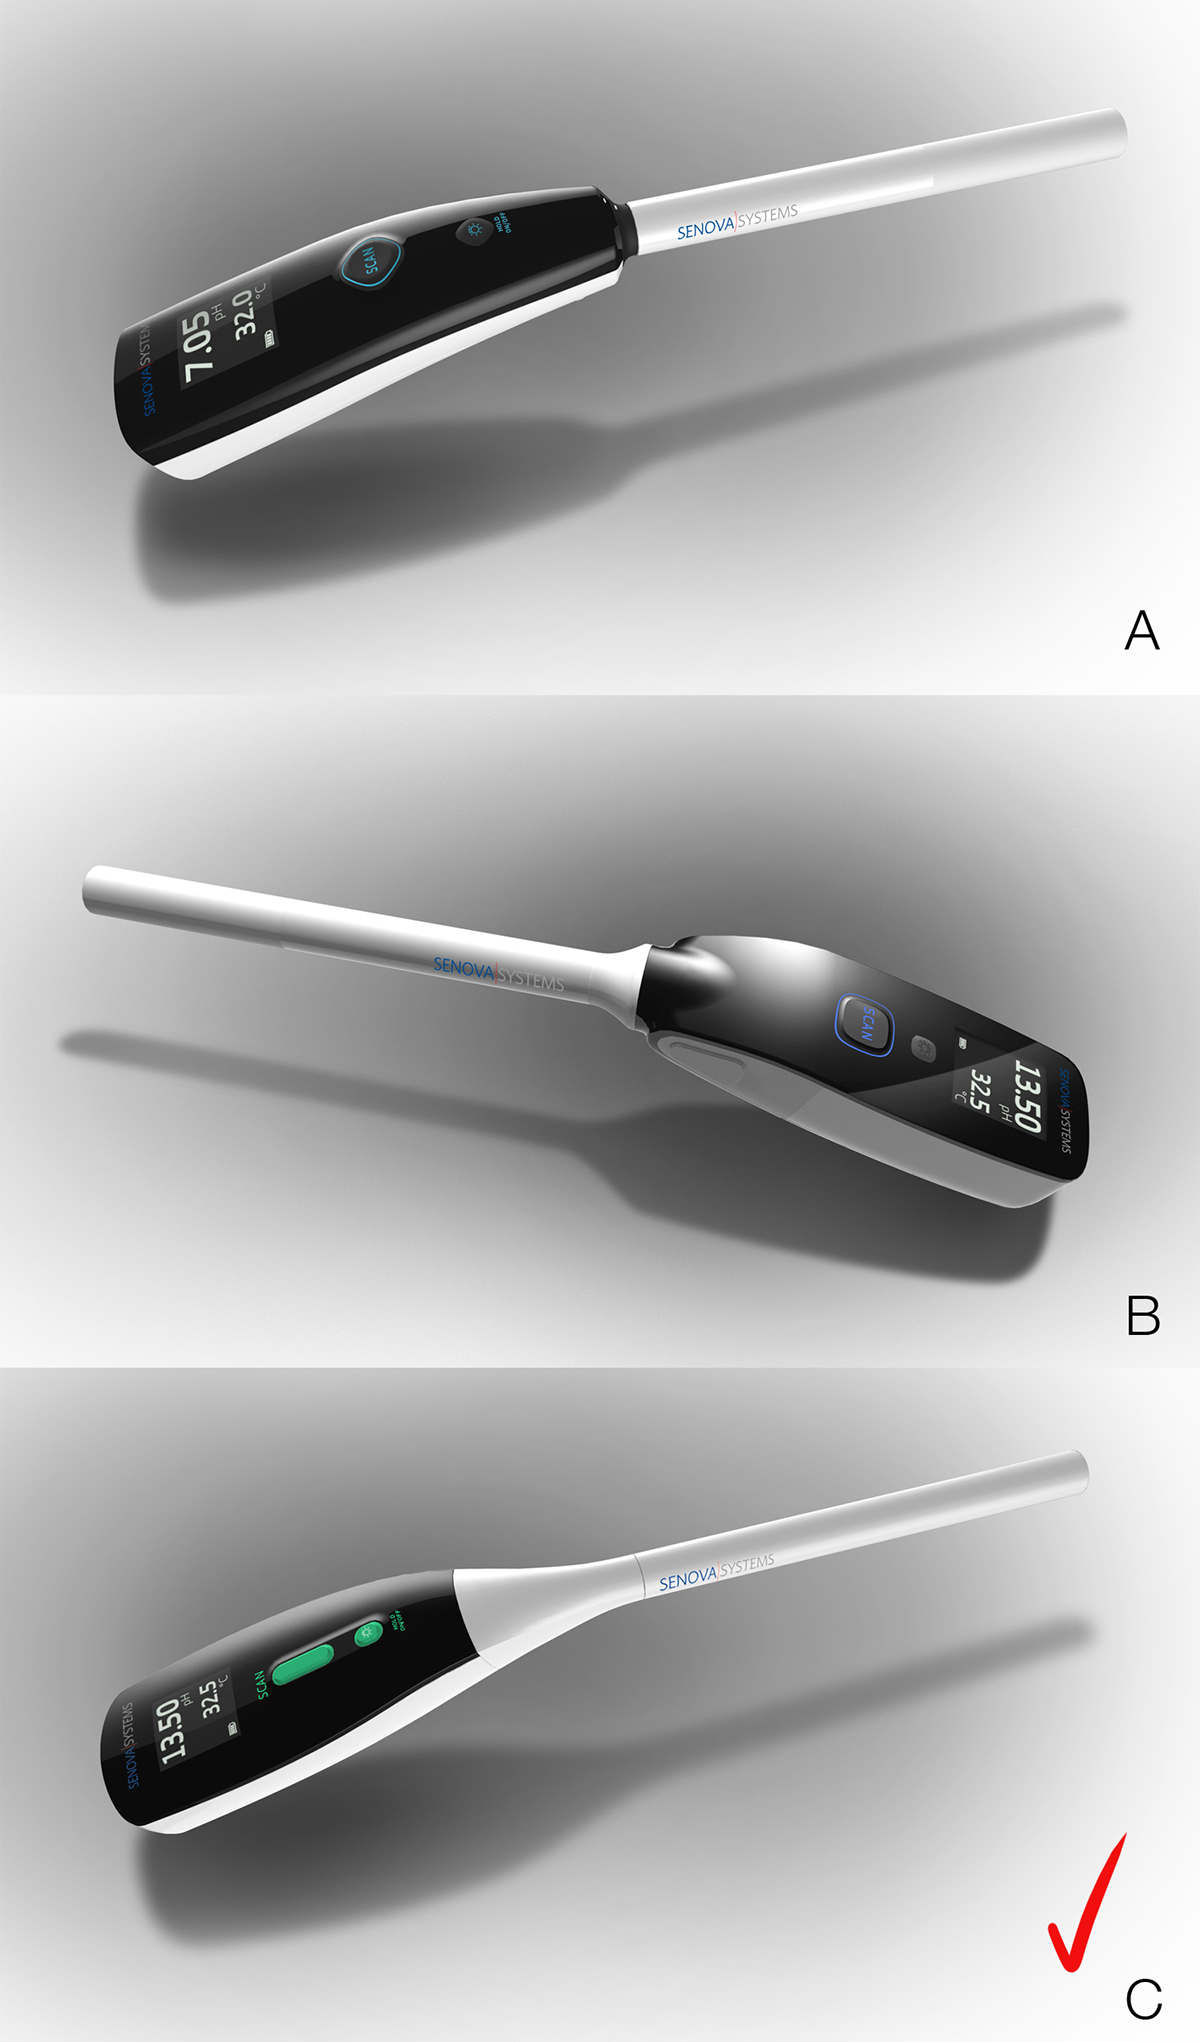
Visual Prototype In order to flush out the right button interface, we looked at a couple of different options considering separate buttons with markings and an integrated button panel containing both buttons. The trick was to create buttons that didn't over power the visual hierarchy of the dull, transreflective display and to adhere to the needs of mechanical engineering team in having a flexing, overmolded button.

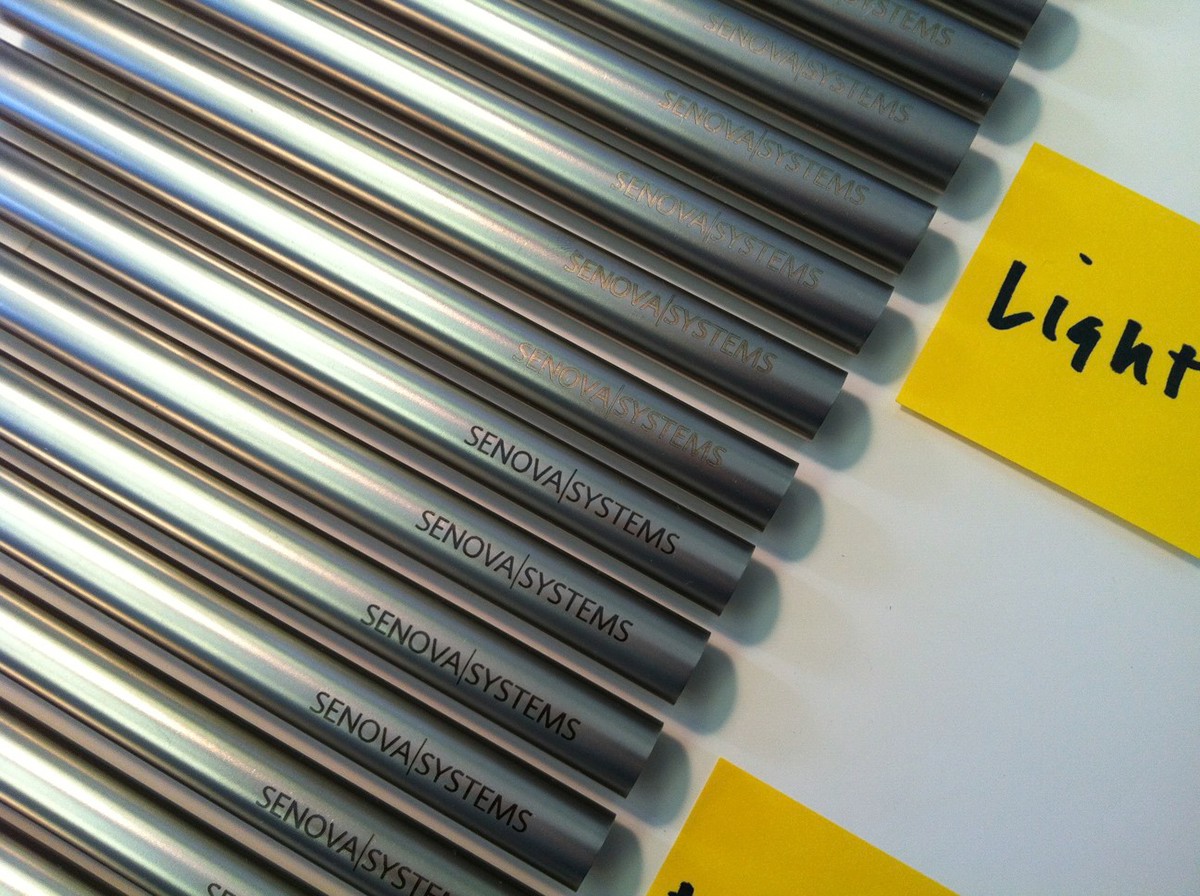
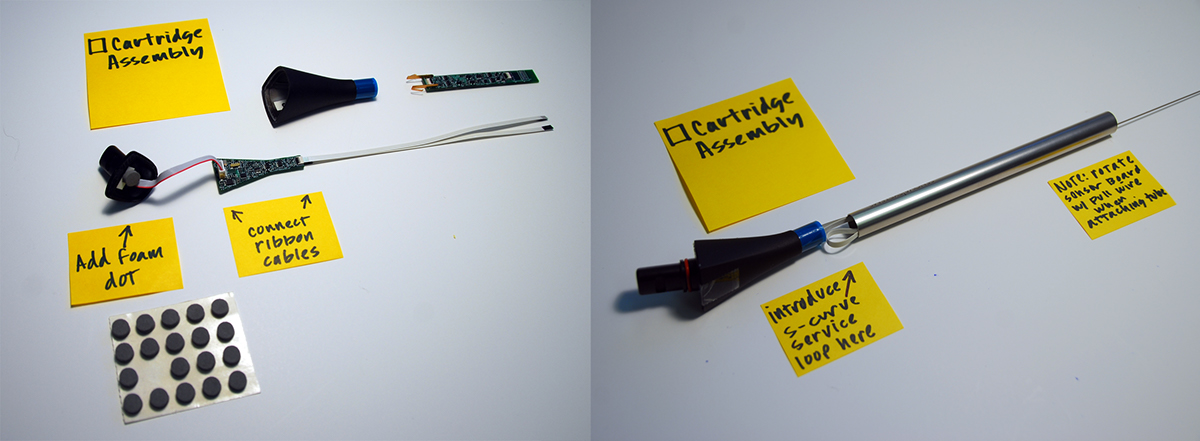
Alpha Build
Our final deliverable was an alpha build of 16 fully functional devices. Below are some pictures taken by Rich, Continuum's incredible model shop director.
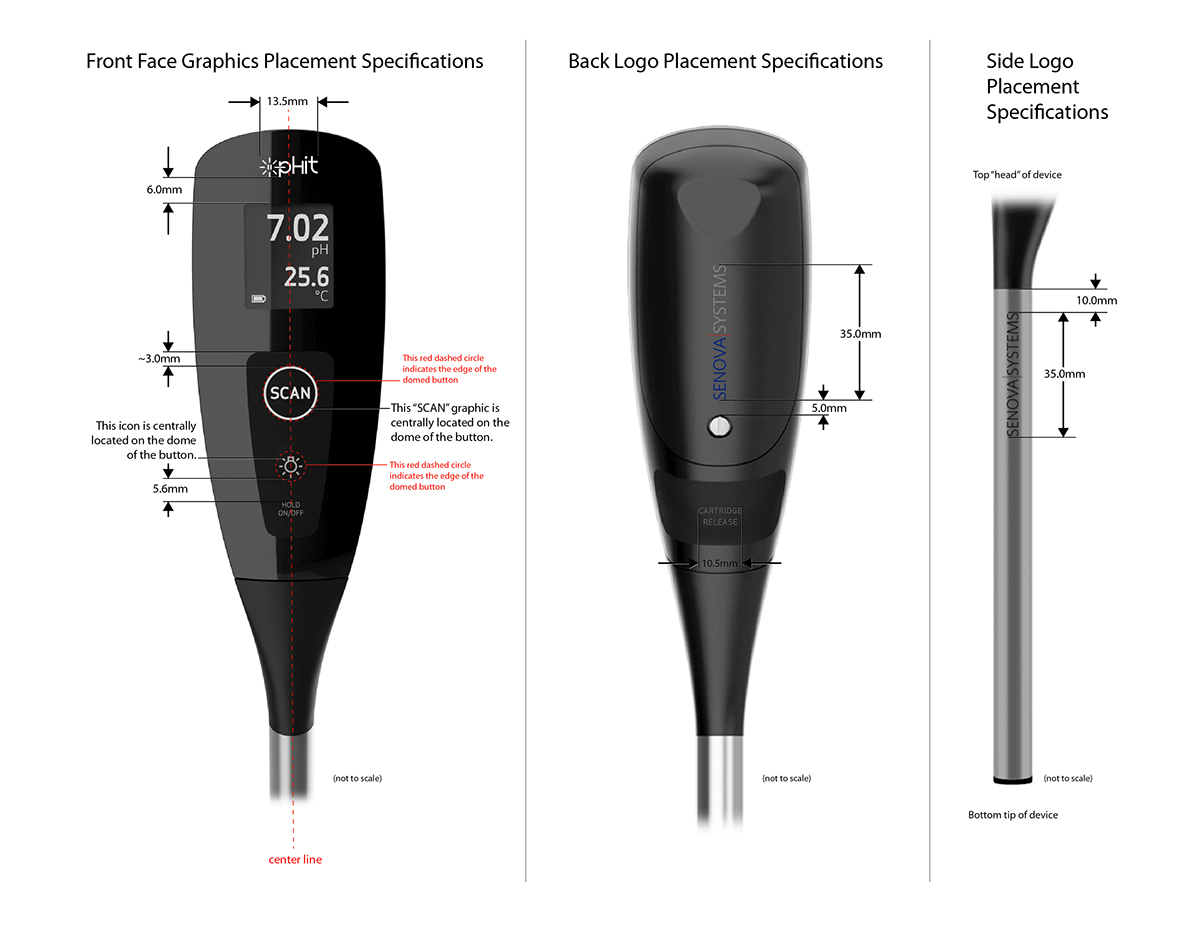
The above is the spec I created around the decal placement for our model shop to use.