
Initial sketches for this project - the top left is the original thumbnail. This project was done for my thesis at the RCA in 2006. The basic concept emerged from my dissertation which was on the perceived linkages between F1 teams and mass produced cars (Win on Sunday, Sell on Monday)...

Sketch Model; Done to 1/10th scale, this was done just to prove out the basic shape and see it from all angles in skletal form. It's a very unusual platform, but I wanted to suggest something that had direct links to F1 racing that could be used on the road. It is also intended to be a hybrid - and I've always thought that hybrids should be very distinct in their look - to cut a long story short I made use of "duality" as a metaphor for this design to infer the 2 aspects of the powertrain.

Me in the studio - I mocked this up out of scrap cardboard just to prove out some ergonomic details. The seating position in the concept is unusual so I wanted to assure people that this worked. I'm about 1.78m tall, and I also tested this buck with a bloke who was 1.85 and another who was 1.7m. It was actually surprisingly comfortable. This also gave me a pretty good idea of sightlines and how narrow the cockpit should actually be. Note the "student look" - unshaved and grotty. You can just barely see the Royal Albert Hall just outside the window - What a place to study!!!

The beginning of the quarter scale model. This is an unusual way to build - usually you would use hard-styling clay and then carve it (as many did) or mill it from a computer file - as mine was very open, clay was impossible, and I simply couldn't afford the milling route. This entire model was done almost exclusively by hand (with the exception of some small rapid prototyped pieces) and cost me the equivalent of about £300. I achieved this by using scrap where I could find it and only paying out when it was absolutely necessary. It's a bad way to build a model as you have to make compromises, but I was skint, so, this is the way I went...

I've added some of the driver's side cockpit here. The material I was using was acrylic - it's bonded by something called "solvent" - I believe that this is methylene chloride - nasty stuff - but you simply paint it on the edges and hold them together - in about 10 seconds it's solid. Edges must be very clean and must fit flush, though, and if you let your skin touch the solvent, you leave unsightly bits of skin on the model surface... ouch.

Passenger side and rear done - this was painstaking. I was cutting the pieces to fit from tape drawings I'd done of the car, but there was a lot of trial and error. Note measurements on the board beneath - this is so you can always check for accuracy. The centre part of the frame appears slightly discoloured - this is because I injected expanding foam in it to "pressure" it out and give it a bit of a convex bend. This was key, because cars tend not to be absolutely "planar" as mine mostly was.

Wheels in for placement (not the wheels I'm going to use - just there to see approximate fit). The "white" you can see on the car - mostly in the joints - is body filler.This was used to soften interior edges and to smooth out any inconsistencies. The engine will fit in behind the seats between the 2 vertical arms. This caused me a problem because there is still another body piece to apply above - and it had to be removable so I could work on the "engine" throughout the modeling process.
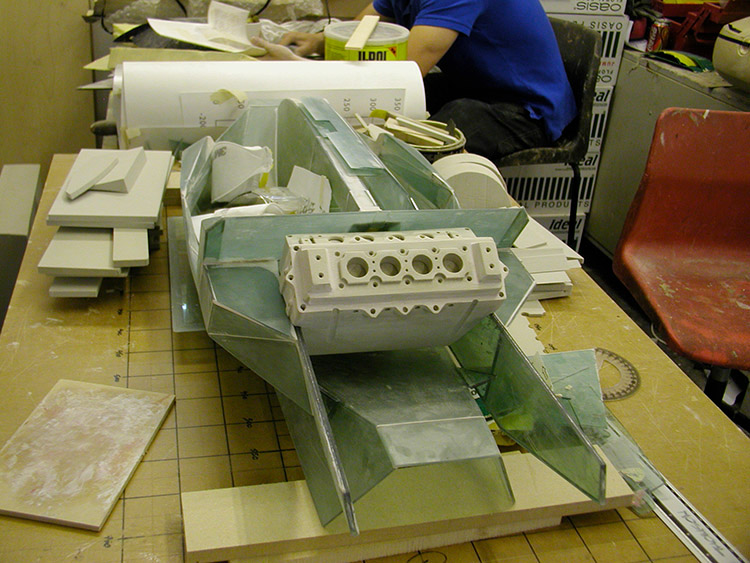
The engine, about half constructed. Again - this is supposed to be a hybrid - this is obviously the "gas" part - it's not "designed" per se - it is meant to be representative of an engine, without being precise from an engineering view point. The grey stuff on the left is the foam from which the engine is made - lovely stuff to work with - sands like a dream. The engine was modeled using Xacto knifes, band saw, drill press and a little dremeling. The "slip on cover for the engine can just be seen leaning up against the central column in the passenger (offside) seat.

...and this is the cover on. This simply slips on the top of the seat-backs like a sleeve. Keeping this "square" side to side was a nightmare... but it's important because if there is an obvious inconsistency you can see it from a mile off... So far I've used nothing but foam, acrylic sheet and body filler to develop the model. It was a little distressing though, as people kept walking past and saying "nice boat"... Didn't look very car like yet, I suppose.
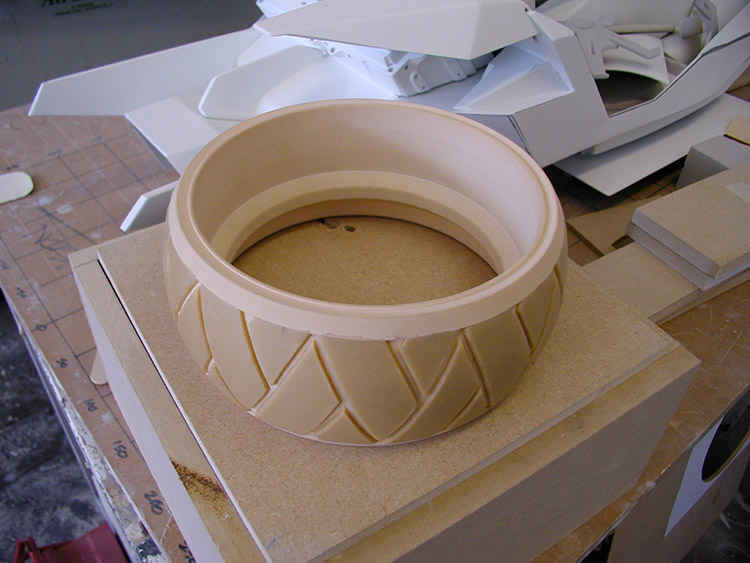
After all the "boat" comments I knew I'd have to get some wheels on - I lathed this one out of a block of Renshape (a high density grainless modeling board). Tragically, I had to pay for this... curses. It's sitting atop the box I will mold it in. The "treads" were achieved by lathing a precisely measured depth into the outside of the "tyre" and inserting self-adhesive beeswax strips and then cutting them out. This was torturous - looks easy, but the beeswax didn't want to stay "crisp" and getting the geometry right was a nightmare. Note model primed white in the background.

Rapid prototyped piece inserted. This again, I had to pay for - I knocked this up in Alias (not my favourite part of the modeling process) and had a friend save it through Solidworks to prepare it for prototyping. I printed 1 out for each "wheel" - "casting" it in place would have been nearly impossible.

...and the first cast wheel. You can see the "sprues" on the shoulder of the wheel - this is where the modeling material was "poured" in. I had hoped that these would come out cleaner - this one needed a LOT of finishing - sanding and bodyfiller - to render it smooth. This was the first and also the least well cast. I guess I got better as I went along...
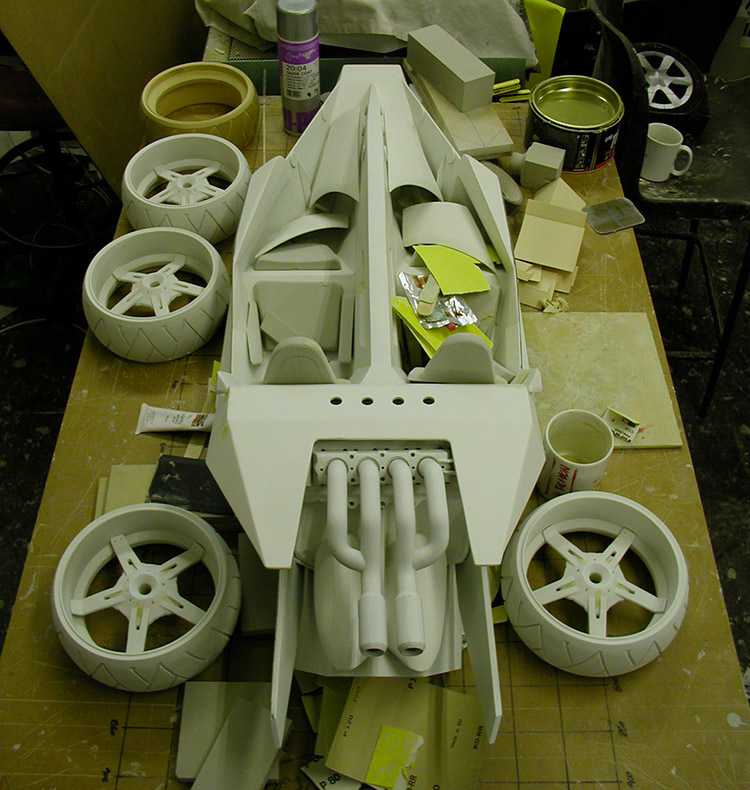
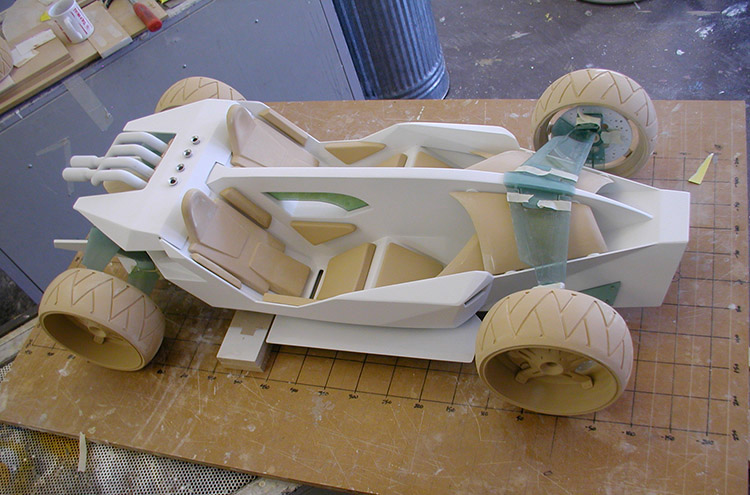
All the wheels cast and finished. Seats are in (again, carved and sanded from high quality foam). Pipes are rapid-prototyped (a favour by a mate in first year at the time - Thanks Flavien!). Foam body parts have been carved out and are primed and ready for placement - these are sitting in the cockpit. After all my efforts to keep everything "square" I found that the engine was "seating" slightly off - hardly noticeable - until you put the pipes in. I did a little adjusting, but this was getting late - so I had to be willing to accept that the pipes would not be perfectly centred.
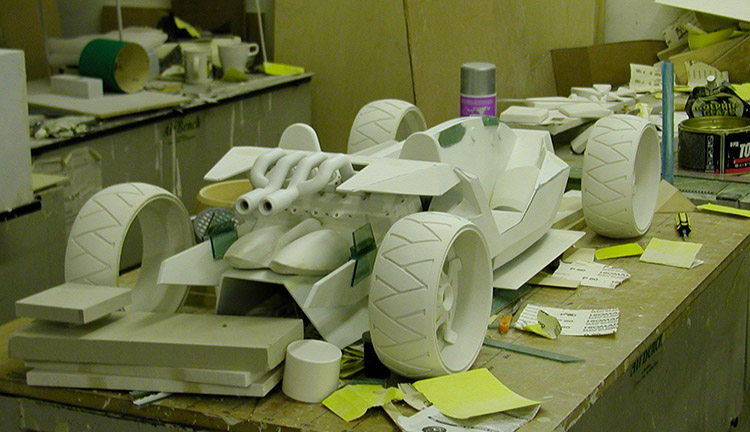
Yeah! No one was calling it a boat anymore. Most everything primed, and now I am back to acrylic and am developing the "suspension" pieces. You cannot imagine the amount of sanding I did. It really did seem a never-ending task. The thesis show was less than a month off at this point so the pressure was really on. Any major mistake would have been disasterous.

And a side/above view of same. You can see the front "body panels" inset in the front over the footwells. These were pressure fit against raised spacers. The "breathers" just in front of the pipes were lathed out of aluminium tube by the shop steward - I had been planning on prototyping them, but he surprised me with these - took him a lunch hour - would have taken me a day and I would have buggered it up! It's always nice to have some examples of "real" materials in your model.
Different primer for the wheels and seat covers. They were a different material and needed a heavier primer that would fill tiny gaps. More sanding of course. This is a good shot for seeing the way that the rear deck slides onto the seat upright. I was thinking of priming and painting the suspension pieces, but I began to think it would be nice to keep them as polished sheet acrylic.

Same thing, viewed form the back. You can just see the brake discs mounted in the wheel - these were sheets of styrene cut out and then taken through the drill press to make the venting holes. Again, getting the geometry right was tedious and time consuming.

Pieces of the model shotly after painting. I had decided that the model reminded me a little of the mid sixties Honda F1 cars - so I thought I would "brand this" a Honda. So when coming up with the paint scheme I stuck to red (details), black (chassis) and Honda white (body panels). Again - had to pay for paint and it was surprisingly expensive. This was sprayed with mixed paint in a spray booth using a professional grade spray gun. Problem though - I still haven't done the windshield - and time is running out (money too...).

Assembled. It was exciting to see it reach this stage. I was very disappointed in the windshield though - in the end I had to vacuum form it out of polyethylene which is simply impossible to polish up to a decent standard. Acrylic won't do complex forms like this - if I were to do it again, I'd manufacture the windsheild out of sheet acrylic, polish it and ignore the bond lines as much as possible and try to go for more of a "stealth" look. You can see part of the presentation sheet behind, with some of the renderings. I entitled this "Deus ex machina" or "God from the Machine" - it's an acting term, but I liked it's connotation vis-a-vis the the positive aspects of hybrid power.

Rear view. I said that the chassis was "black" but in fact it is a very very dark warm brown, which helps it blend with the Honda White (which has beige tones) and highlights the faceted nature of the chassis. Note that the body "panels" are all, white, soft, and sail-like, in direct contrast to the rigidity of the chassis - so again - duality... eh? eh?
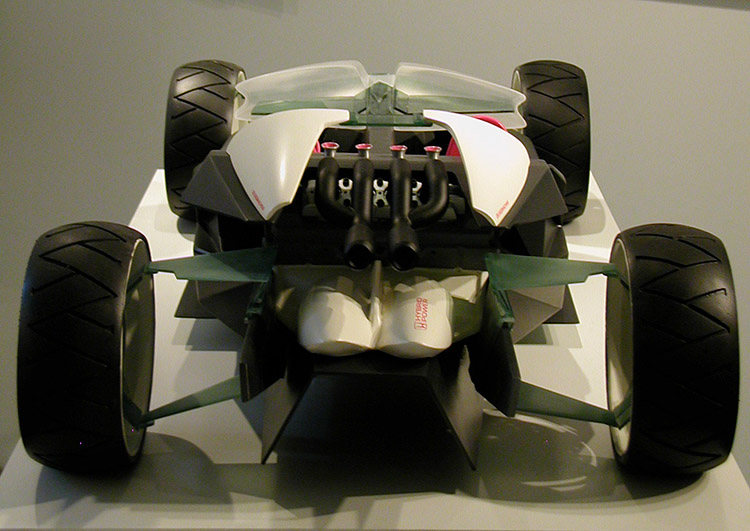
Centre rear view. In the end, I was quite pleased as to how it lined up side to side. You can still see that the pipes are still slightly off at the back, veering a bit to the passenger side, but when looking at the model in person, it was not something that one would notice. Ideally I would have liked to have made the suspension piece more "shaped" and less planar - but that would have required more money or more time - 2 items I ran out of...

Driver's side. The "Automark" on the plinth is the "group I was in - our thesis class was split 4 ways, each group being picked for the student's apparent interests and merits... "Automark" was centred on branding and marque development.

...and a parting shot.
Notes about this project: This was started in January of 2006 and finished in early June of 2006, at the Royal College of Art in London, England. The course is a 2 year course, with the first year being devoted primarily to ensuring that all your skills are up to snuff through doing practice and Industry-sponsored projects. You are also required to complete your dissertation in the 1st year - this is a 10,000 word essay which is generally used as a jumping off point for your thesis. The dissertation generally (though not necessarily) serves as a background to make the thesis defensible. First semester of second year is spent developing your thesis project - sketching and research, and sketching, sketching, sketching. I also did quite a bit of freelance work through this period as the course is very expensive. The dissertation needs to be supported by expert opinion and I was lucky enough to make contact with ex-McLaren and Ferrari designer, John Barnard, who kindly allowed me to interview him at his studio outside of Woking.
The model was shown at the 2006 Vehicle Design Thesis show. I was very fortunate to be hired by Ford/Europe at this show. Being at the "RCA Thesis show" was brilliant - a dream come true for me. I was later hired by Humber College in Toronto Canada, a chance that I jumped at as it allowed me to be closer to my family... I now teach Industrial and Automotive Design.
The thesis model? It lasted 3 weeks. I was getting married in Kuala Lumpur in August of 2006 ( I had met my wife in England, but she is Malaysian), and was then moving to Köln, Germany - and as I said - at this point I was FLAT broke. So I couldn't ship the model anywhere, and the RCA has exceedingly limited space... after all that work? It ended it's life in the RCA dumpster. But it had done its job...
I estimate that the model took me a grand total of about 1300 to 1400-odd hours. I know that this may sound like an exaggeration, but these are incredibly time-consuming items to create - especially when you are doing them virtually unaided. In the final 2 months I worked 7 day weeks, 14.5 hours a day Monday to Friday (School opened at 7:30 and closed at midnight). Sunday the school was closed - so I'd sleep in 'til 9 and then do flatwork (graphics, sketching, digital images) from noon to midnight. Admittedly, there was time for the odd pub-night worked into that! In the final week I completed 2 "all nighters" and estimate that I got 20 hours of sleep total. The payoff? The model was done 1 week early, which allowed me to do some final tweaks to the boards and to prepare my presentation... and of course - to sleep in. :-)
I estimate that the model took me a grand total of about 1300 to 1400-odd hours. I know that this may sound like an exaggeration, but these are incredibly time-consuming items to create - especially when you are doing them virtually unaided. In the final 2 months I worked 7 day weeks, 14.5 hours a day Monday to Friday (School opened at 7:30 and closed at midnight). Sunday the school was closed - so I'd sleep in 'til 9 and then do flatwork (graphics, sketching, digital images) from noon to midnight. Admittedly, there was time for the odd pub-night worked into that! In the final week I completed 2 "all nighters" and estimate that I got 20 hours of sleep total. The payoff? The model was done 1 week early, which allowed me to do some final tweaks to the boards and to prepare my presentation... and of course - to sleep in. :-)
Thanks for taking the time to browse these pics. Cheers - Bruce.

