making of... Scirocco
Project started at the same time when one of the clientsapproached me with the project that included all aspects from modeling,shading, lightning and rendering. One of the biggest tasks was creatingmaterials that were somewhat similar to car paint. With this in mind I did some researchregarding studio lightning and what kind of setup is in use when talking aboutphysical sets.
If you think that light setup inside 3d package is tough, check the actualphysical sets. That is what I call heavy lifting. It is not pretty that is forsure.
If you think that light setup inside 3d package is tough, check the actualphysical sets. That is what I call heavy lifting. It is not pretty that is forsure.

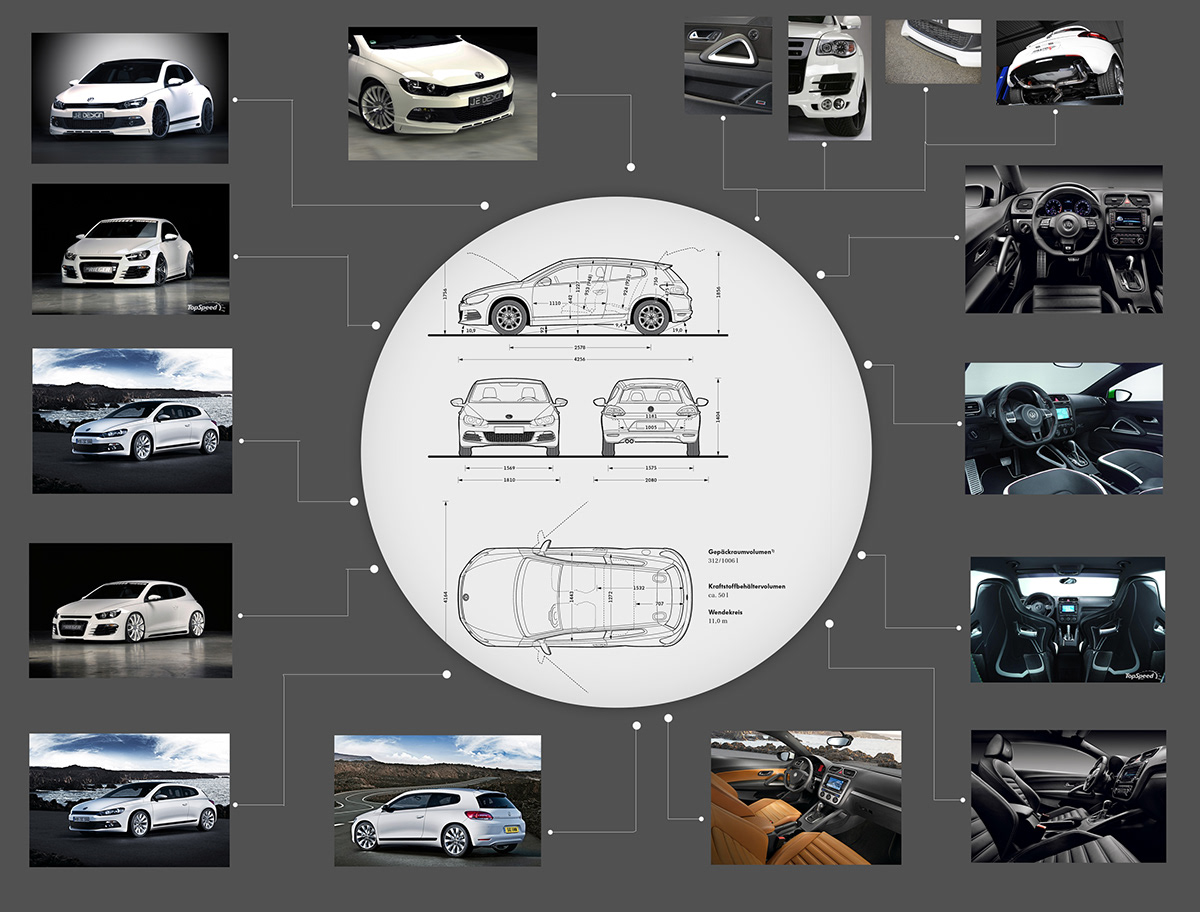
Before the actual modeling, as in most of the cases I liketo gather a lot of reference images, details and some material references. This is something that I call reference mapand it’s usually just one huge canvas where I have all needed material.Sometimes I have couple separate ones but that really depends of theproject. From the image bellow you cansee what I mean.
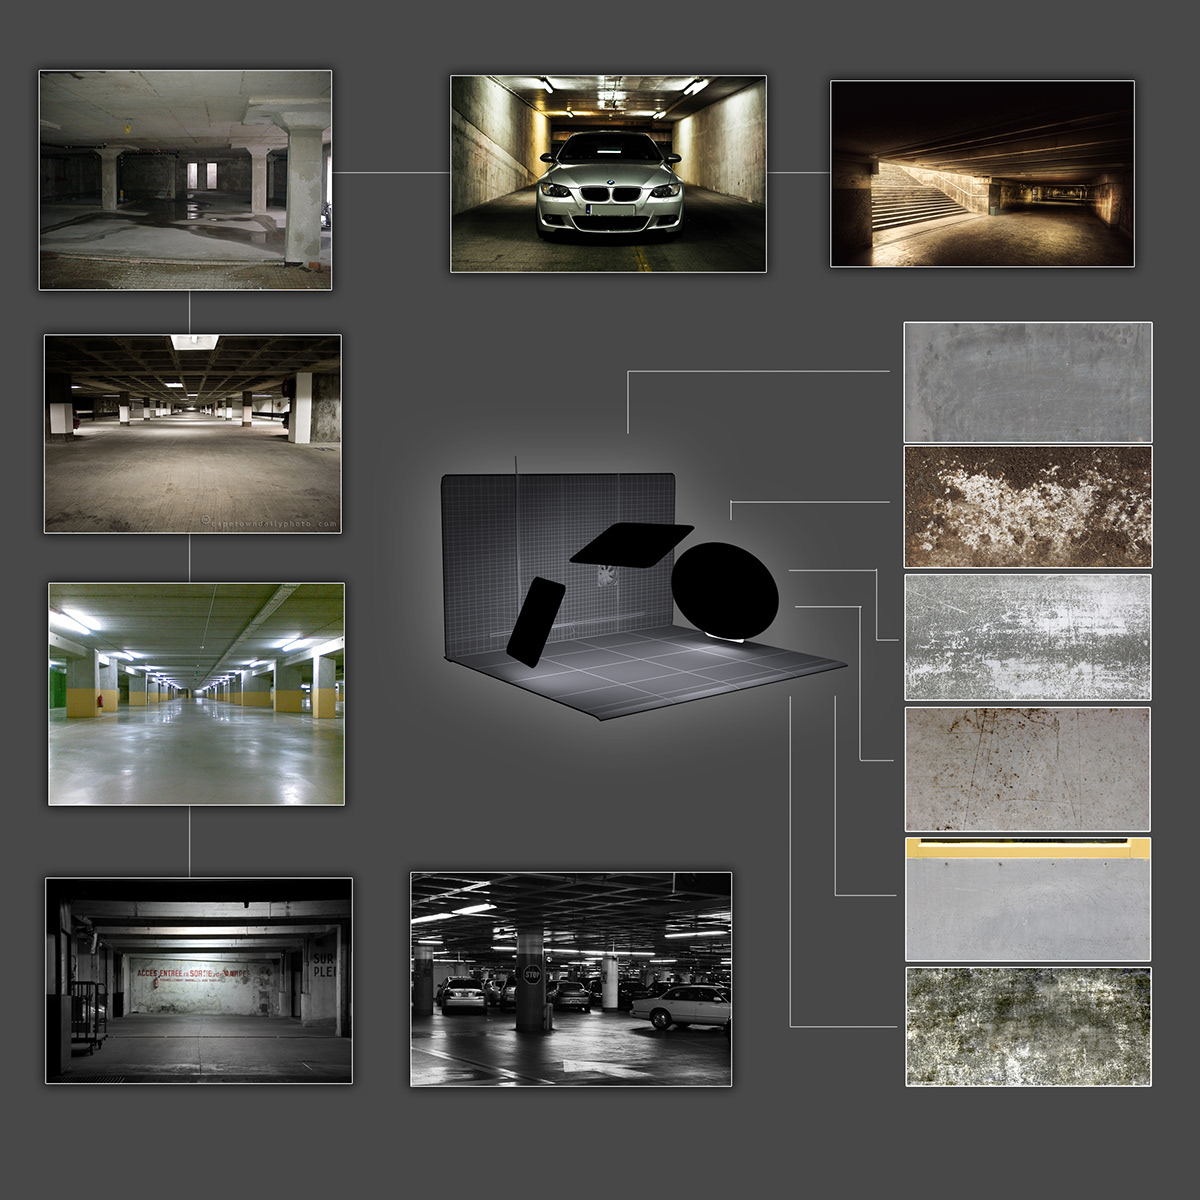
Another map that I made was all about locations and textures that I could use for stage and environment. This helps me locking the mood and color space for entire shot.

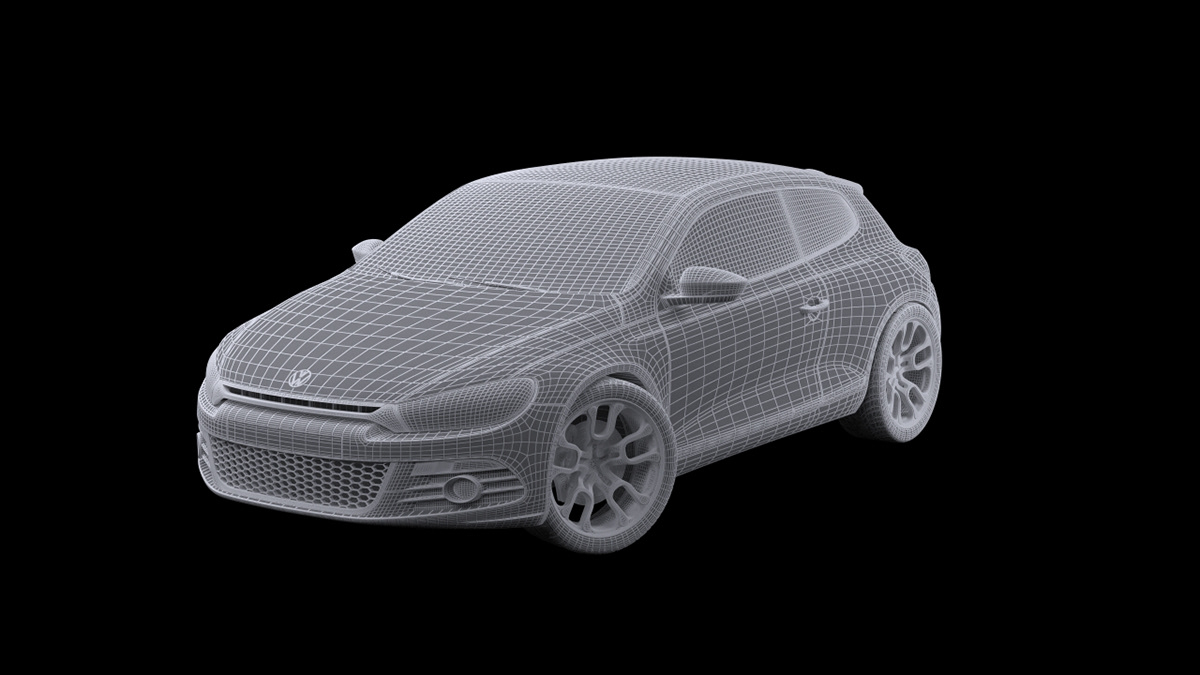
Most of the modeling was just poly-modeling, some NURBS hereand there. I have followed the blueprints just to get the overall shape andproportions right, after that it is all just reference images and freestylemodeling with some own artistic twist. However all the changes done to the carwere minimal and I wanted to preserve the original look of the car.

As rendering engine I used trusty Vray v 2.0. All materialsare created Vray mtl as a base and then just building from there, testingdifferent options and solutions till I was pleased with the result.
Before I jumped into full texturing phase, I wanted to see how light setup thatI had in mind is going to affect materials, especially car paint, glass etc. Sofor this purpose I created small studio setup with “speed shape” for the carwhere I can fast enough change setup, adjust materials and see the result.
Before I jumped into full texturing phase, I wanted to see how light setup thatI had in mind is going to affect materials, especially car paint, glass etc. Sofor this purpose I created small studio setup with “speed shape” for the carwhere I can fast enough change setup, adjust materials and see the result.


As I mentioned before, at the very beginning I did extensive research regarding studio lightingIn real-world scenarios. Based on this I created my own studio rig that I couldadjust and change as needed. All of the lights are Vray plane lights with ownsettings. These lights are than attached to own soft-boxes with a VrayLightMtlassigned to a plane:
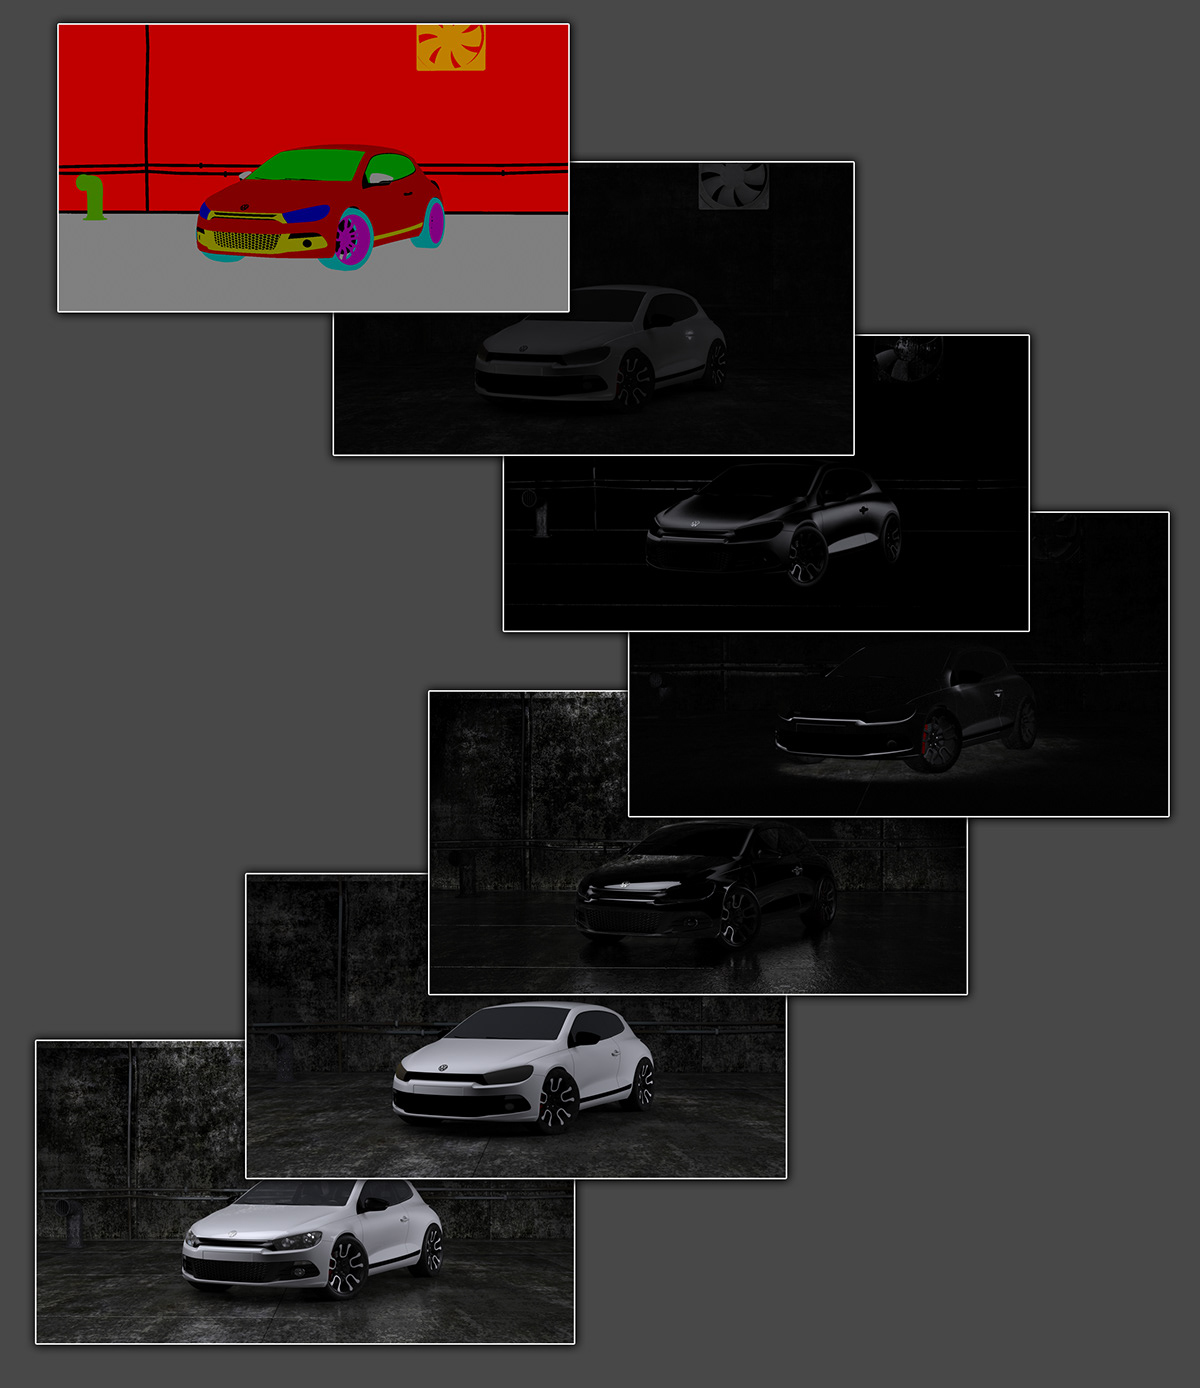
When working with static images as a result I tend to renderway to many different passes, but this time I tried to restrict myself to thefollowing:
VrayGlobalIllumination
VrayLighting
ObjectID
VrayReflection
Refraction
Specular
ZDepth
VrayGlobalIllumination
VrayLighting
ObjectID
VrayReflection
Refraction
Specular
ZDepth

Compositing work was done between Photoshop, AfterEffectsand BulletLooks.
Inside Photoshop I started process by importing pure RGB pass. After that GIpass was added on top, than Reflection, Refraction, Specular and Shadows.ObjectID pass was added last and using the same trough Selection – Color Range,I made separate copies of back wall, floor, car shell, tires etc. This way Iwas able to control each segment separately as I wanted. Some color correctionwas done but mostly levels and Color range. Using custom brushes I did somecorrections on walls and floor adding some more grunge-feeling to it. Also did somesmall retouch to spec and reflection passes.
Inside Photoshop I started process by importing pure RGB pass. After that GIpass was added on top, than Reflection, Refraction, Specular and Shadows.ObjectID pass was added last and using the same trough Selection – Color Range,I made separate copies of back wall, floor, car shell, tires etc. This way Iwas able to control each segment separately as I wanted. Some color correctionwas done but mostly levels and Color range. Using custom brushes I did somecorrections on walls and floor adding some more grunge-feeling to it. Also did somesmall retouch to spec and reflection passes.

Next step was AfterEffects where Frischluft DOF plugin comesin handy. It uses ZDepth map and applies DOF effect using luminance value foreach pass in-between. DOF effect israther small I just wanted some difference between foreground and background asit would be in real-life example.


I hope that this simple “making of” gave you some newperspective on how to approach this type of project. There are many ways toachieve good results but as always, it requires some time, patience and otherknowledge than knowing software itself.Keep practicing, keep doing it. Please feel free to ask any questions thatcomes to your mind or just simply send some comments. You can find some moreworks by visiting www.erorrijus.com andalso www.facebook.com/erorrijusThanks for reading!
