Photorealistic Render Challenge
C4DCafe Challenge Entry
C4DCafe Challenge Entry
In early 2011, I participated in a competition on the C4Dcafe. The aim of the competition was to see who could best duplicate a studio quality photograph using solely Cinema 4D and material/lighting/render settings manipulation. All participants were provided with a reference Image, shown below, taken in a professional studio setting by a professional photographer. We were then all provided with a basic scene with objects and some other shots of the studio and individual shots of items for texture reference. We were not permitted to use post-processing on our images, everything had to be done within C4D before rendering.
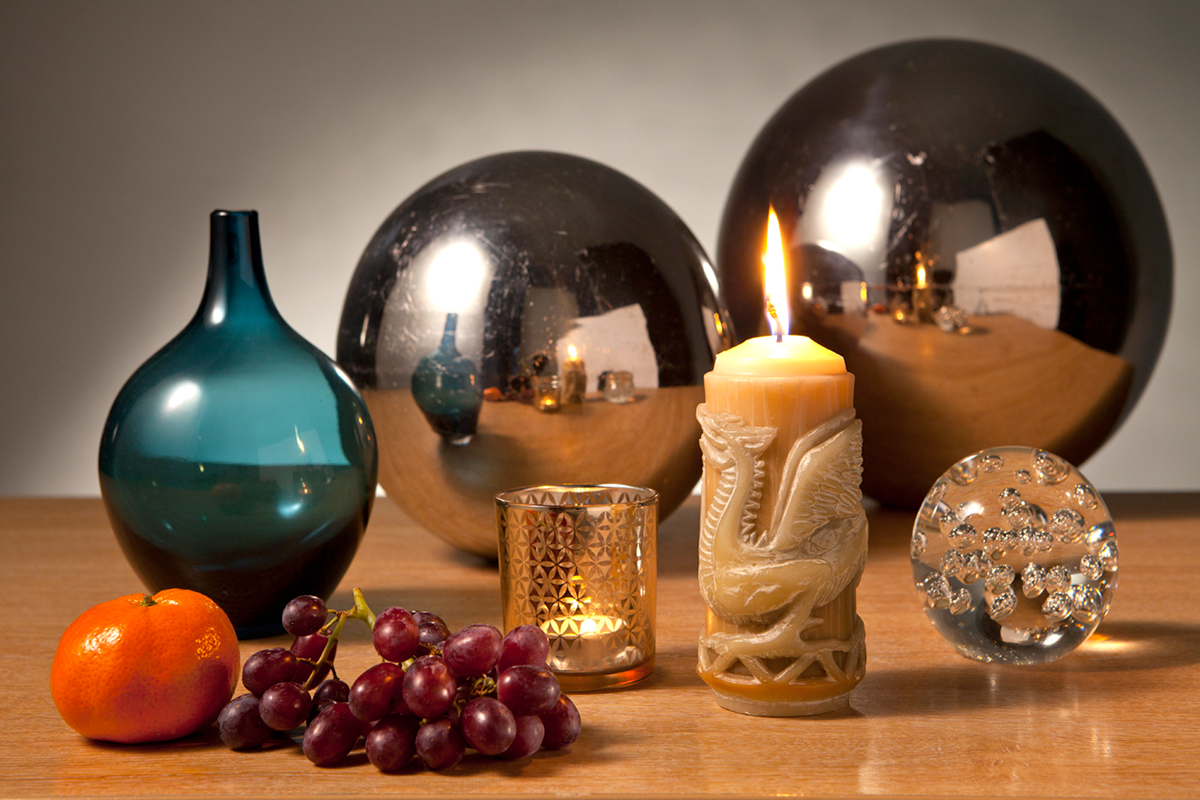
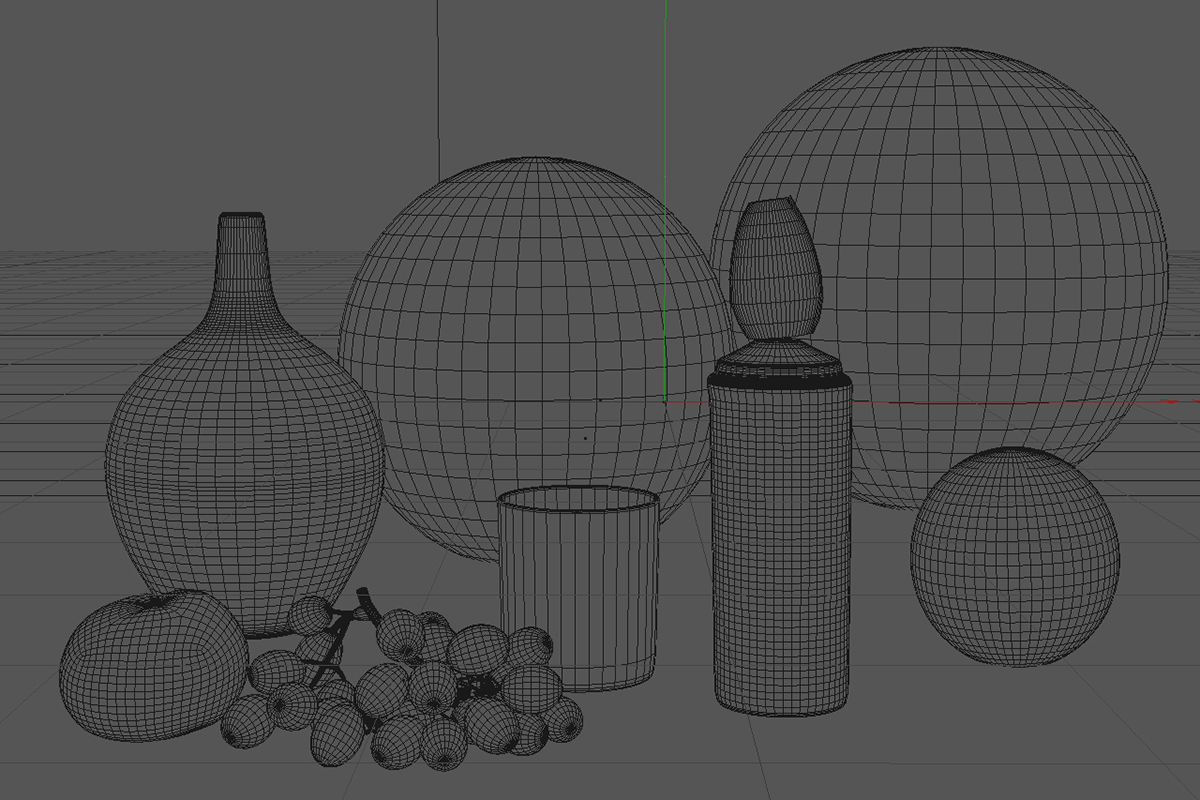
The studio shot was done by forum member Dhpdigital, using a Canon 5DmkII. Below is a wireframe of the basic scene geometry visible from the camera's POV. I reworked some of the geometry in the scene so that it aligned perfectly with the objects in the photograph.
Another shot below showing some of the lighting setup. Some photorealistic effects had to be cheated using light setups. Caustics and Subsurface scattering in particular are always difficult to get right, so I didn't even bother trying to achieve them with GI or more complicated effects, I simply created light rigs specifically for each effect. You can see two spotlights aimed at the sphere on the center right below. These two lights were used to approximate the caustics caused by the main key light coming through the glass sphere. You can also see a light and a plane at the bottom right, which in the photograph was used to bounce back some light into the foreground. Here I also used a soft spotlight to simulate some bounce.

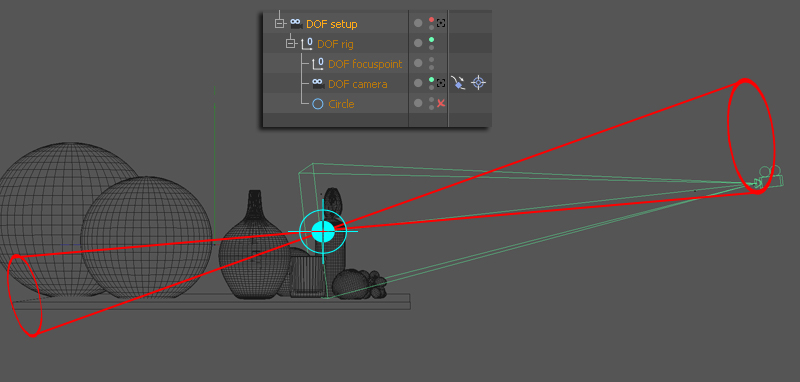
I decided with this entry that I was going to try to find a way to create depth of field blur in AR3 without using its integrated solution, which isn't a physical solution and doesn't take into consideration alphas, transparency, or reflections. We weren't allowed to use post-processing, which would be the fastest and most obvious way to do it considering AR3's limitations.
I already knew that I was going to be using a pretty well known technique for rendering QMC GI with minimal artifacting and good antialiasing. It involves using AR3's brute force solution for motionblur: sub-frame sampling. The renderer basically just combines many passes of the same image, while allowing for camera movement. When the X number of passes are combined, you get motion blur.
I figured that I could use this to also do depth of field, if I animated a camera along a small circular spline (facing foward in the z-axis), targeted at a focal point. The radius of the circle would determine the radius of the blur. Heres a rough, exaggerated visualization of the setup:
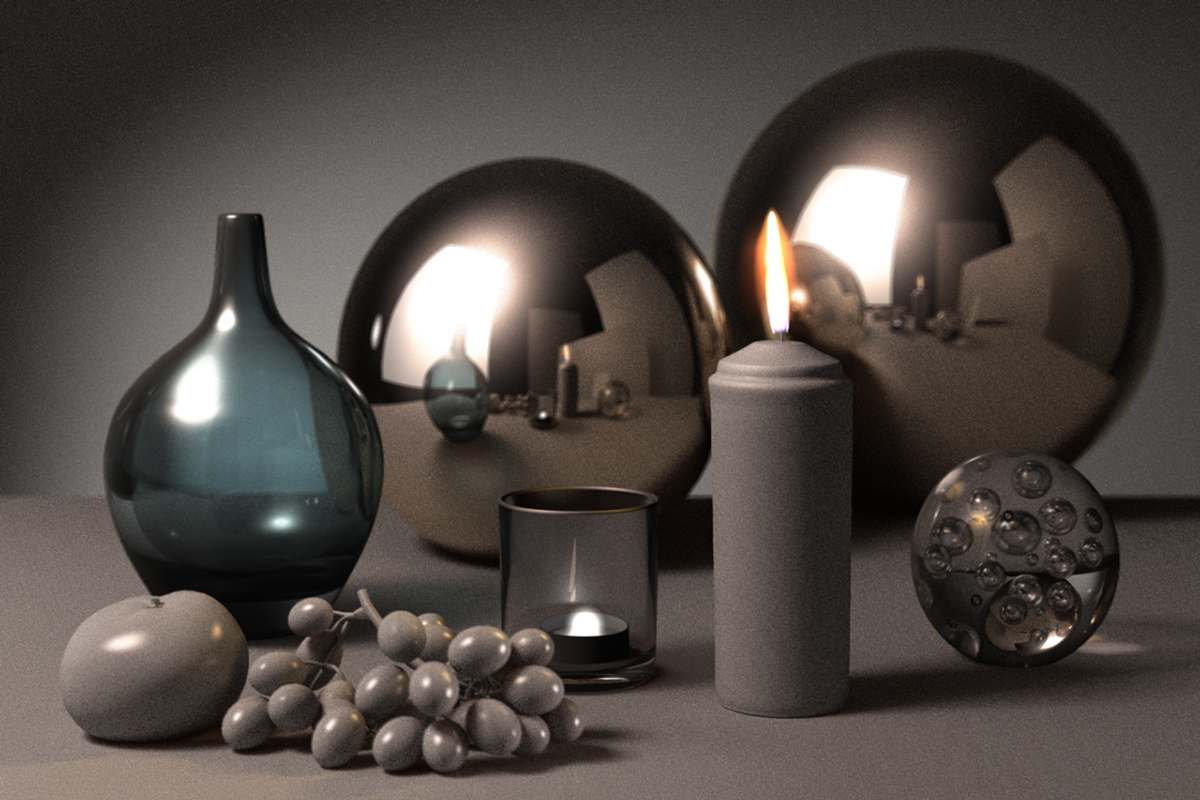
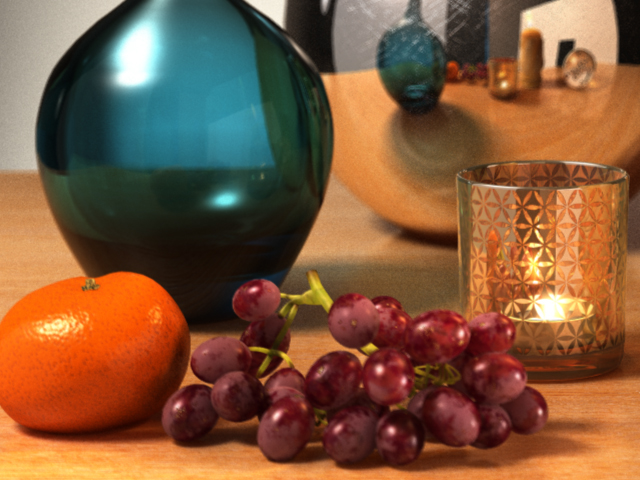
Below is a early lighting and material render test. You can see in the reflections that I've placed some bounce cards behind the camera just like in the photograph.
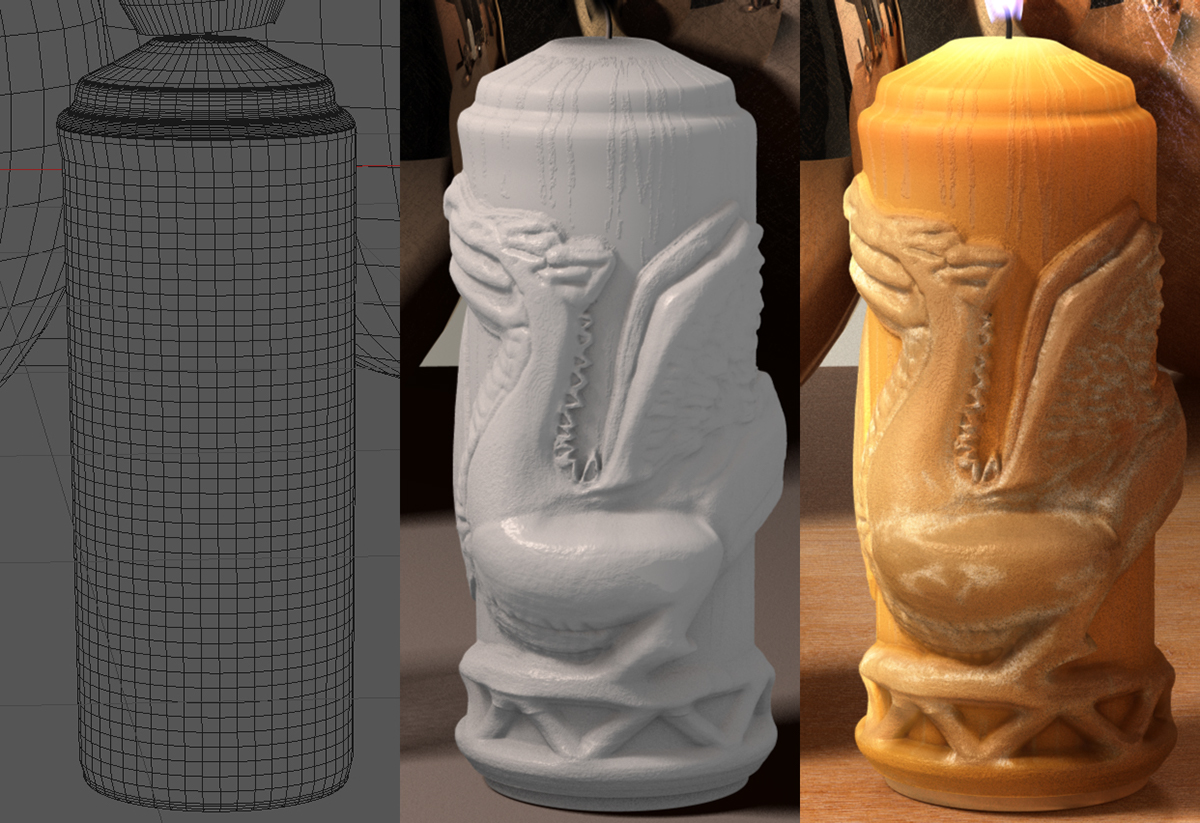
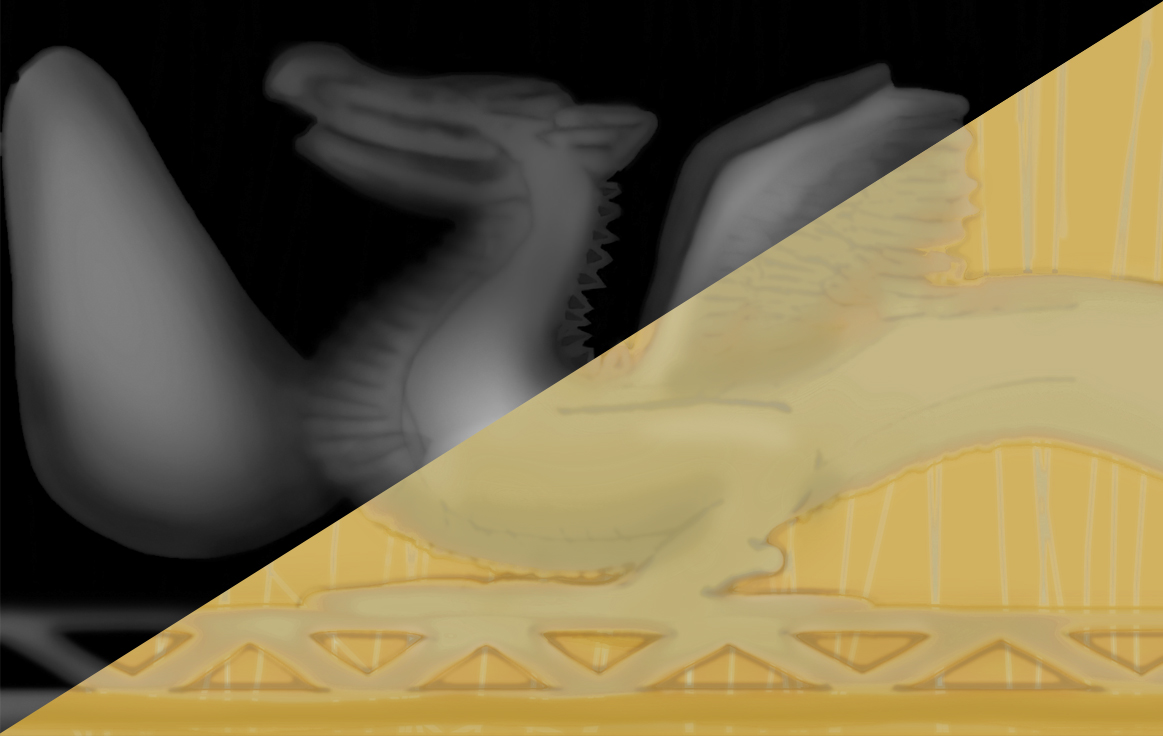
I knew that one of the materials that would be hardest to get right was going to be the large wax candle with the dragon molding on it. We had to make it using a displacement map. Here you can see a progression, and below the two maps that I painted in photoshop. I first did the displacement map, and used it with sub-poly displacement to create the physical shape (with SPD the candle had about 4 million polygons). The second map shows some of the diffuse color that I had to create both for the color channel and for the luminance channel (to be used in conjunction with the subsurface scattering shader).
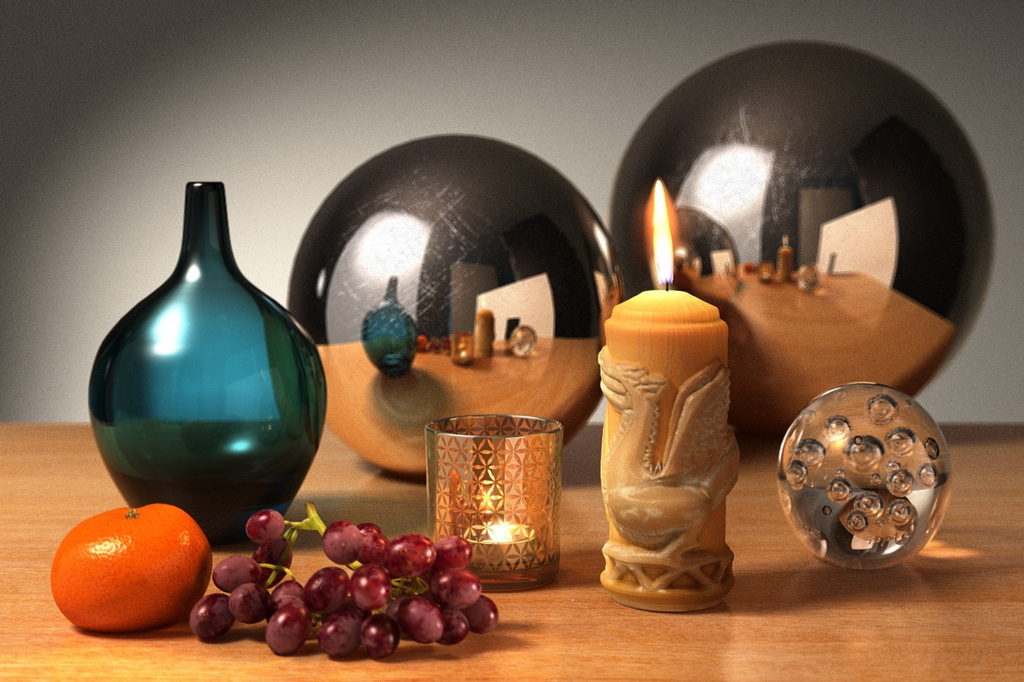
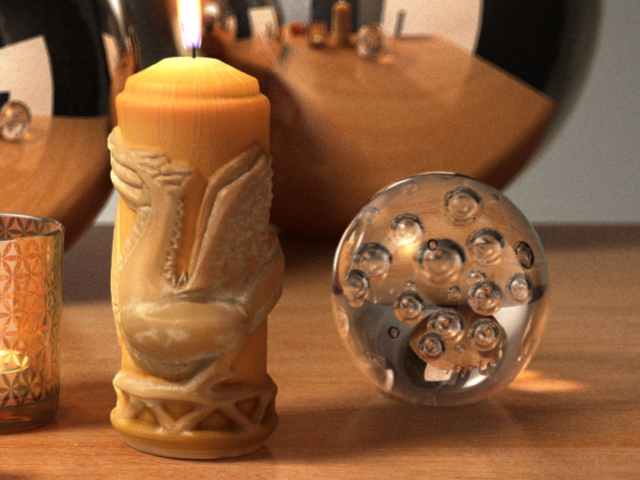
Below is the final render and some close ups of the detail. It won first place in the challenge :)
Here's a comparison between the photograph and the final render.


