A lot of people have asked me if I have tutorials involving drawing cars. Since there’s a demand I have decided to make one. This tutorial will mostly explore traditional techniques. Sure it’s easier with 3d software to illustrate a car but I’ll be drawing with good old paper and pencil. It’s still a lot of fun. I will be using Adobe Photoshop to retouch and clean up my pencil sketch.
Here I needed a drawing pencil, colored pencils, eraser (who wouldn’t), French curves and a t-square. Of course a table is necessary (where on Earth am I gonna draw).
Please be informed that this is how I draw. It’s not how everyone should draw.

Let’s begin.
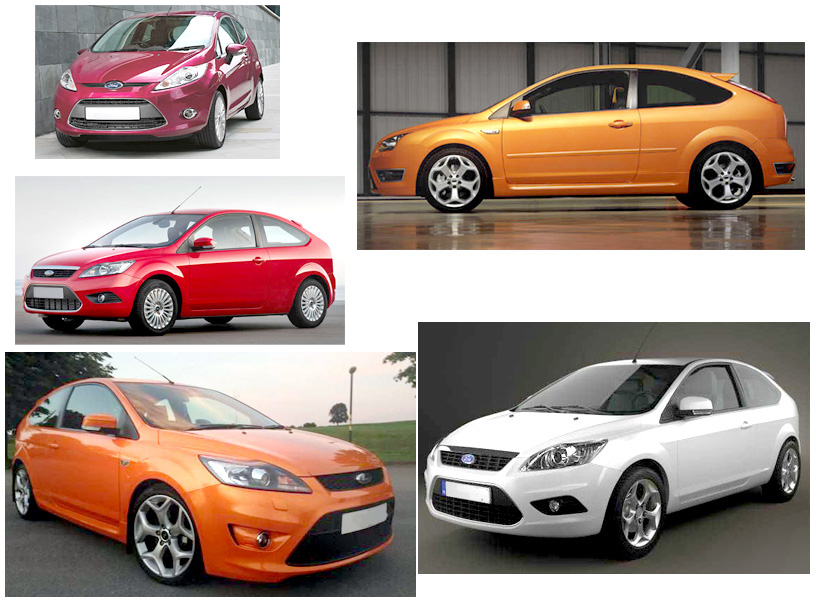
I thought it would be cool if I draw a 2008 2-door Ford Fiesta. I won’t be designing my own car since someone might steal my design. First I look for photo references.
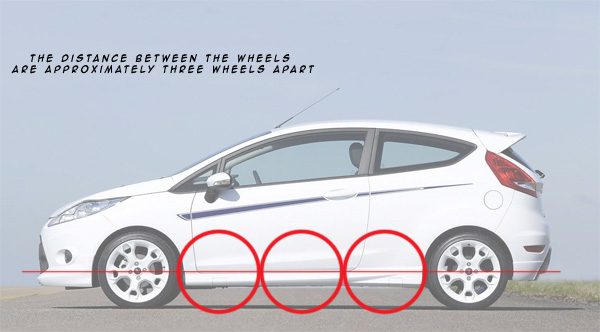
I have learned to measure proportions of the human anatomy. In the case of vehicles, cars usually have their wheels at a distance of 3 wheels apart. I will use that to keep my car at the right proportion.
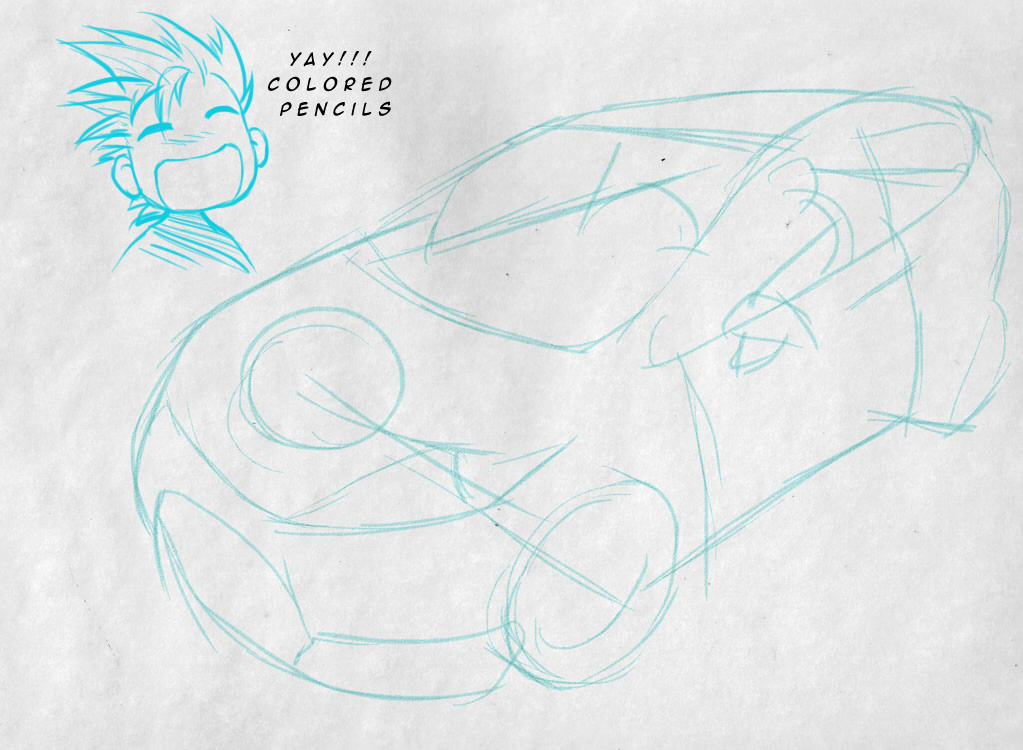
The first loose sketch I make is in light green pencil. I sketch the car even if the perspective is off. In my case the perspective is very way off.
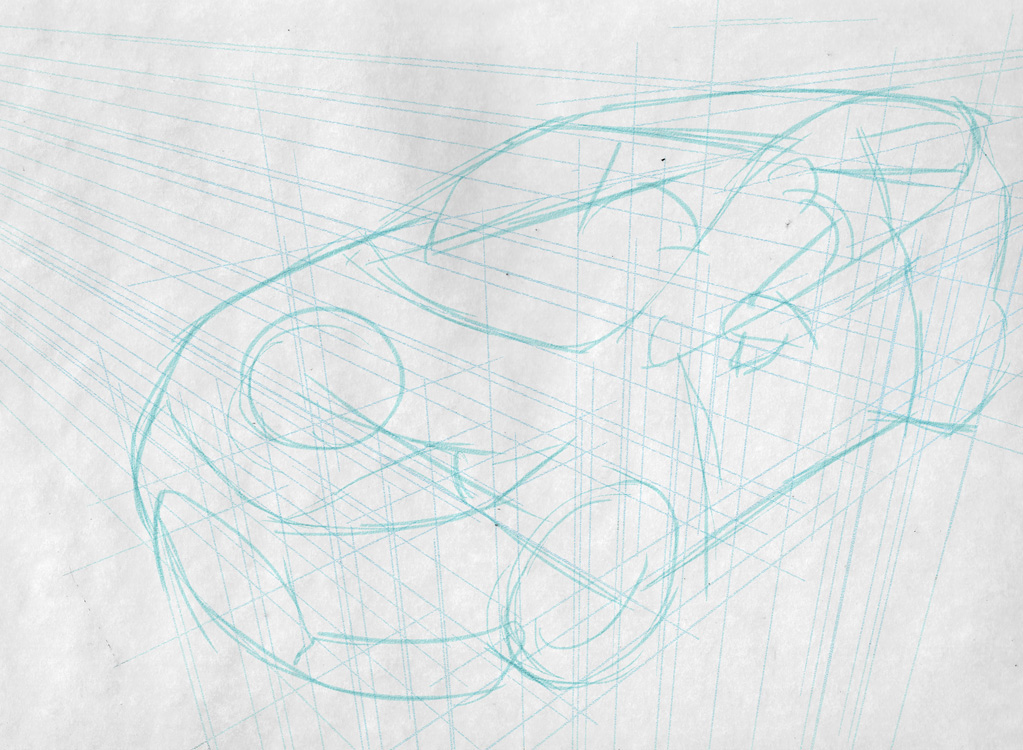
Next, using the t-square I draw the perspective lines or convergence lines with a light blue colored pencil. I used a three-point perspective for this angle. Using a two-point perspective for this angle will result in a distorted sketch.
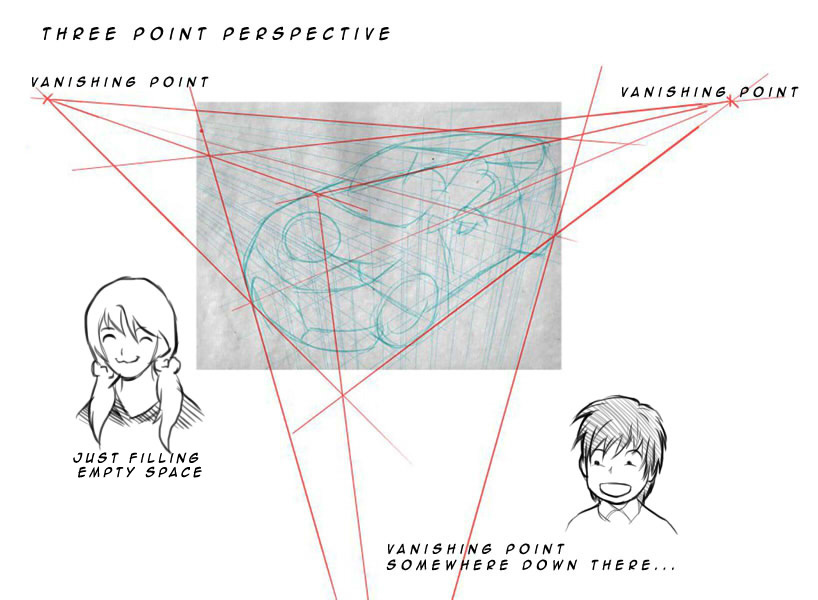
Since I can’t scan my whole table, I will show the sketch zoomed out so we can see the vanishing points. The third vanishing point seems to have disappeared from existence.
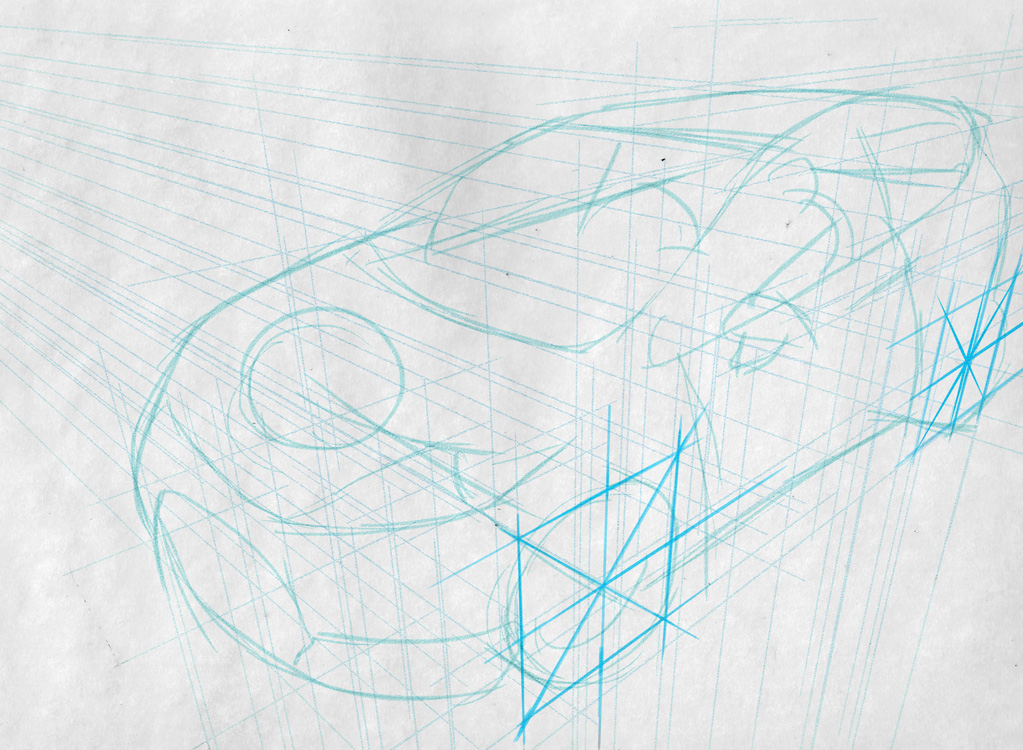
I always start at the wheels. This is where the wheel proportions will come into play. Remember the two wheels are approximately three wheels apart.

Learn to draw perspective ellipses. They’ll help you draw the wheels right.
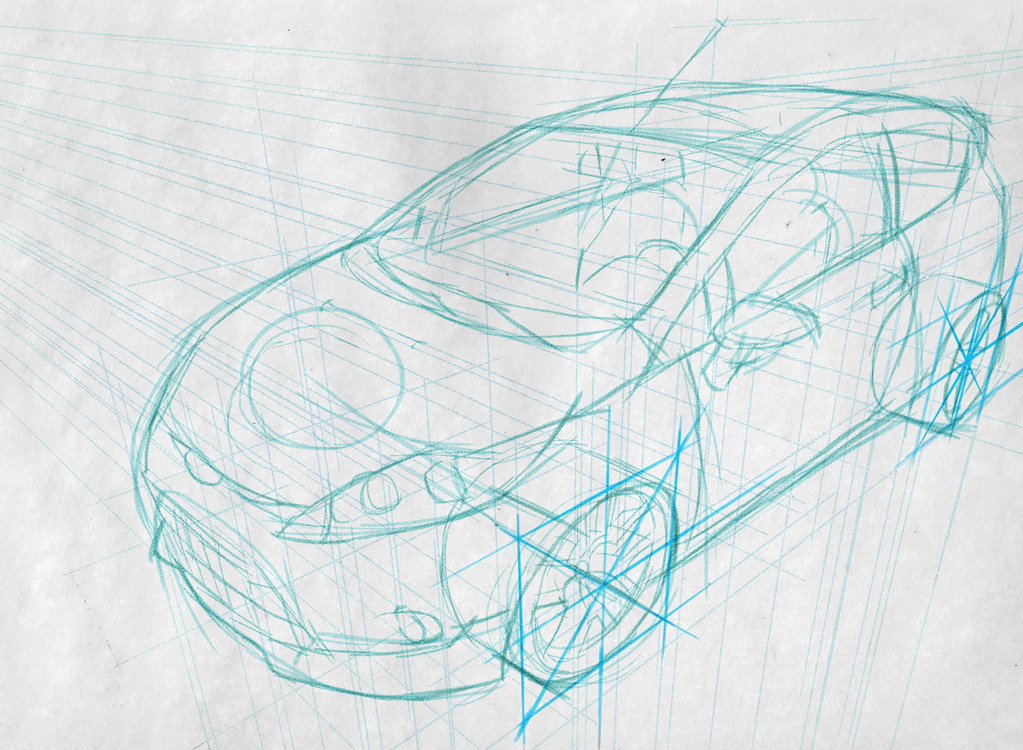
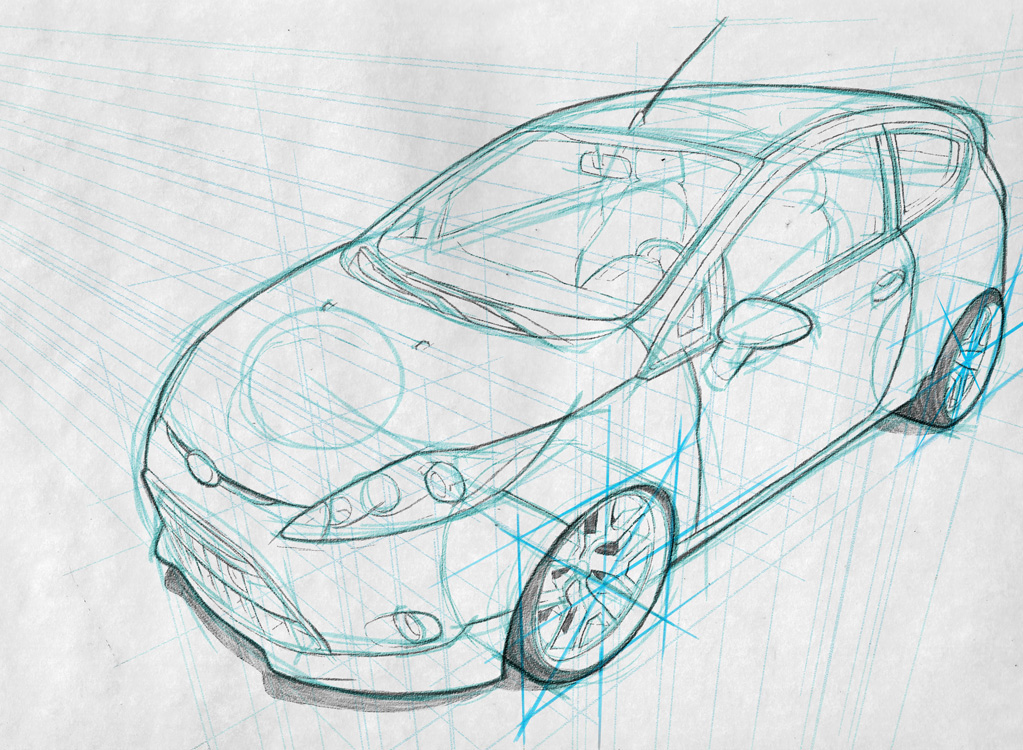
Now that I got the wheels I use a light green colored pencil to sketch the car that‘s right with the perspective. The lines here are a bit tight.
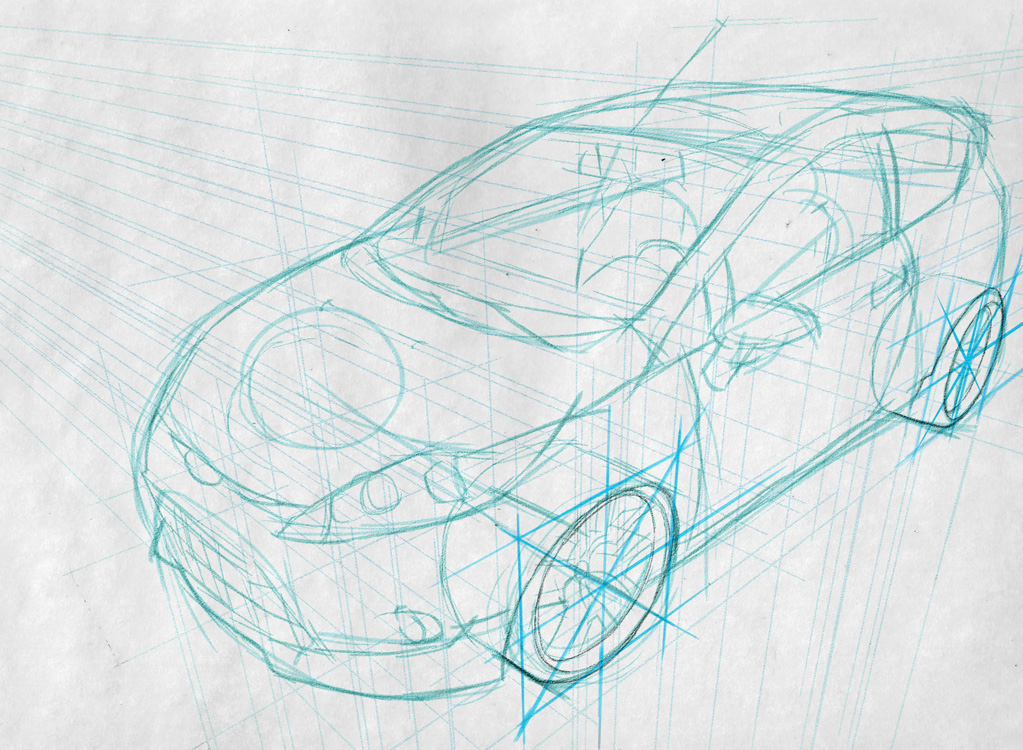
I use tight pencils lines on the wheels. Remember to sharpen your pencil often.

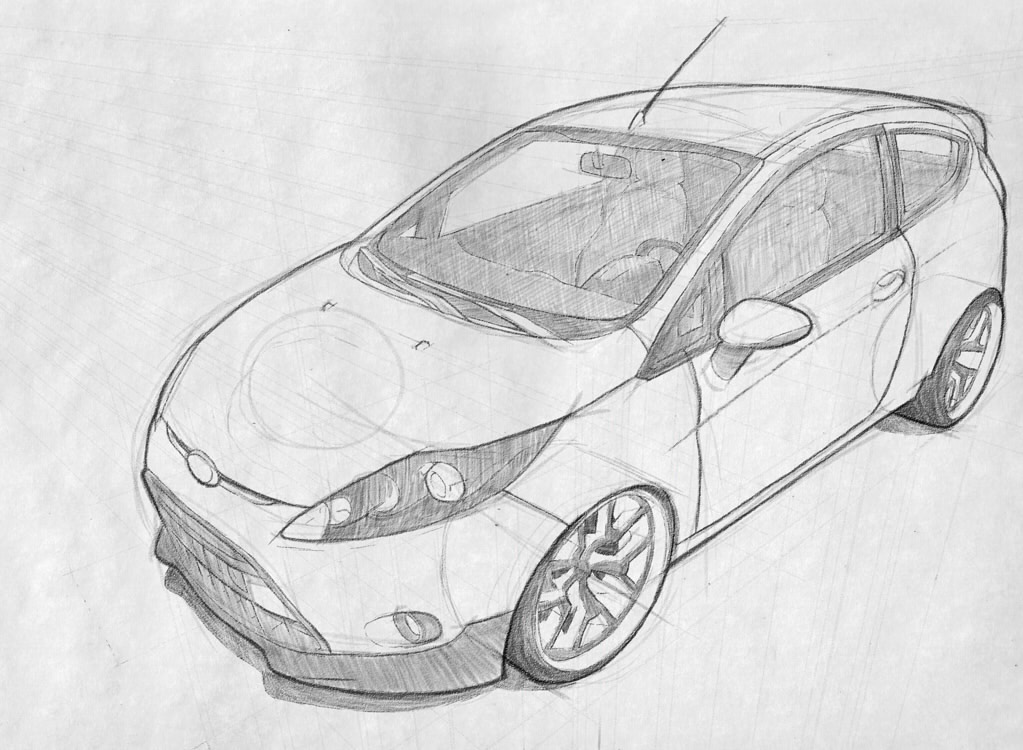
Work on the outline with tight pencils. The outlines should have thicker lines. You can use French curves to help you tighten your lines.
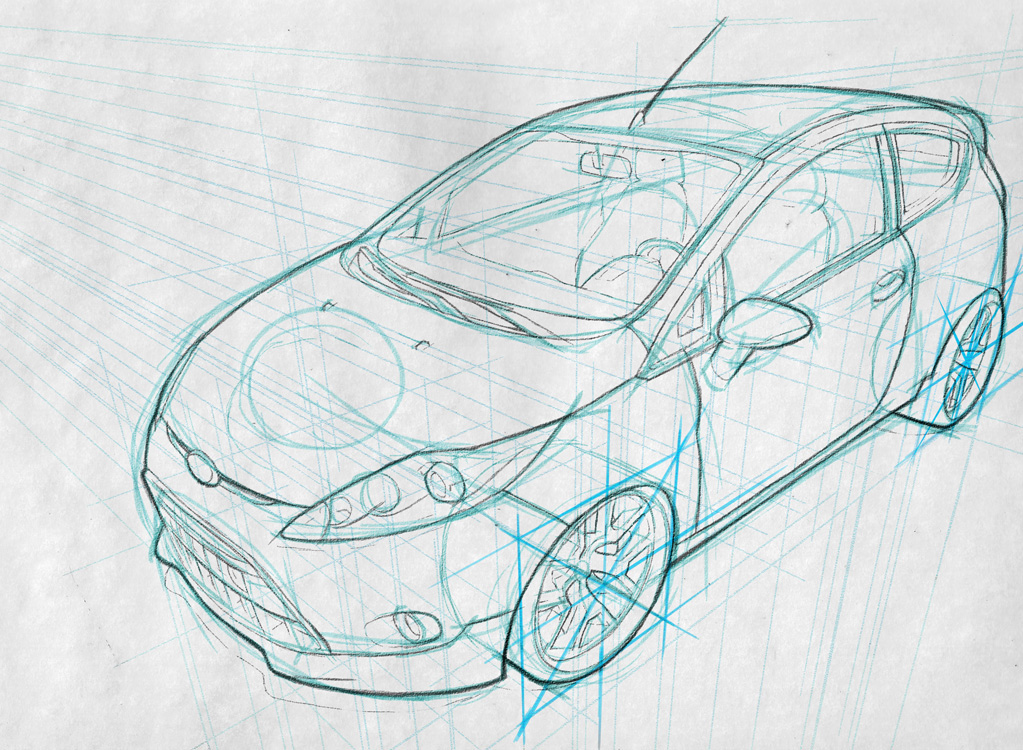
Pencil the details. Make sure the lines are thinner than the outline. This will give the car a bit of depth.
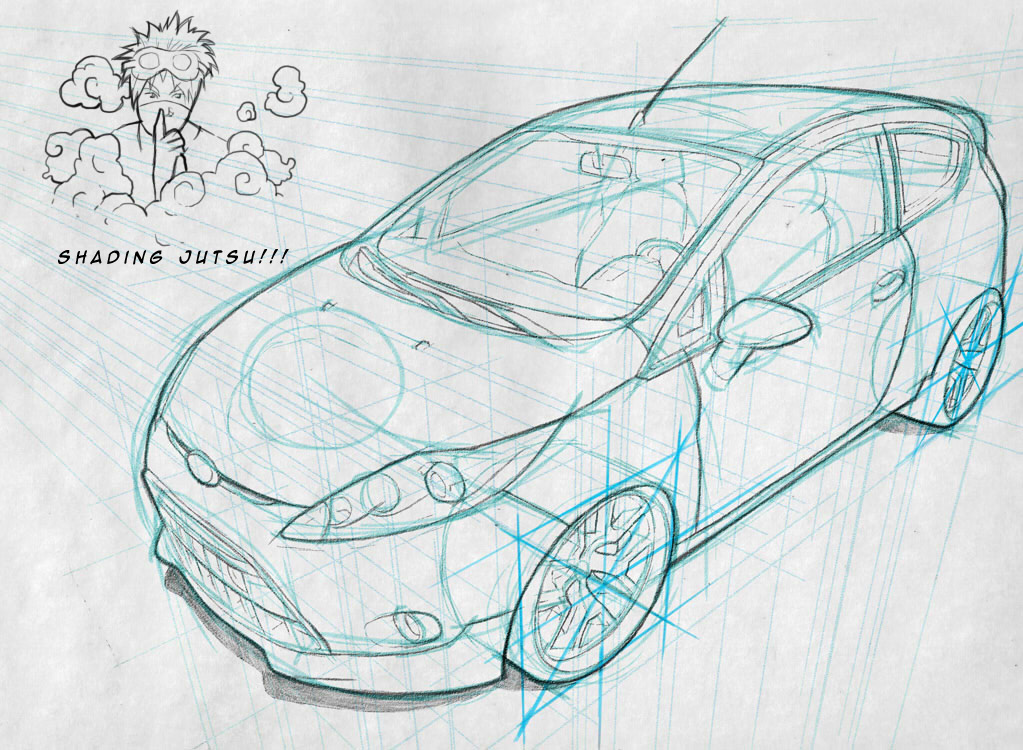
Add a bit shading technique.
Darken the tires.

Put some toning on the car’s darker parts. We see the car coming to life now even without color.
Finally shade the interior behind the windshield and windows.

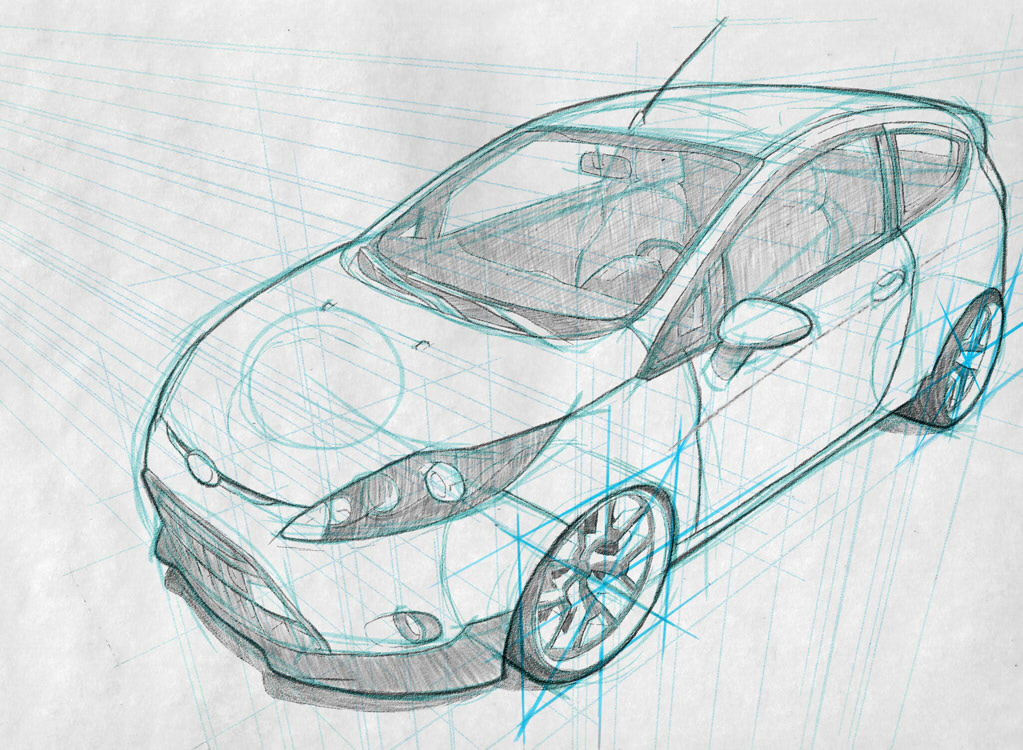
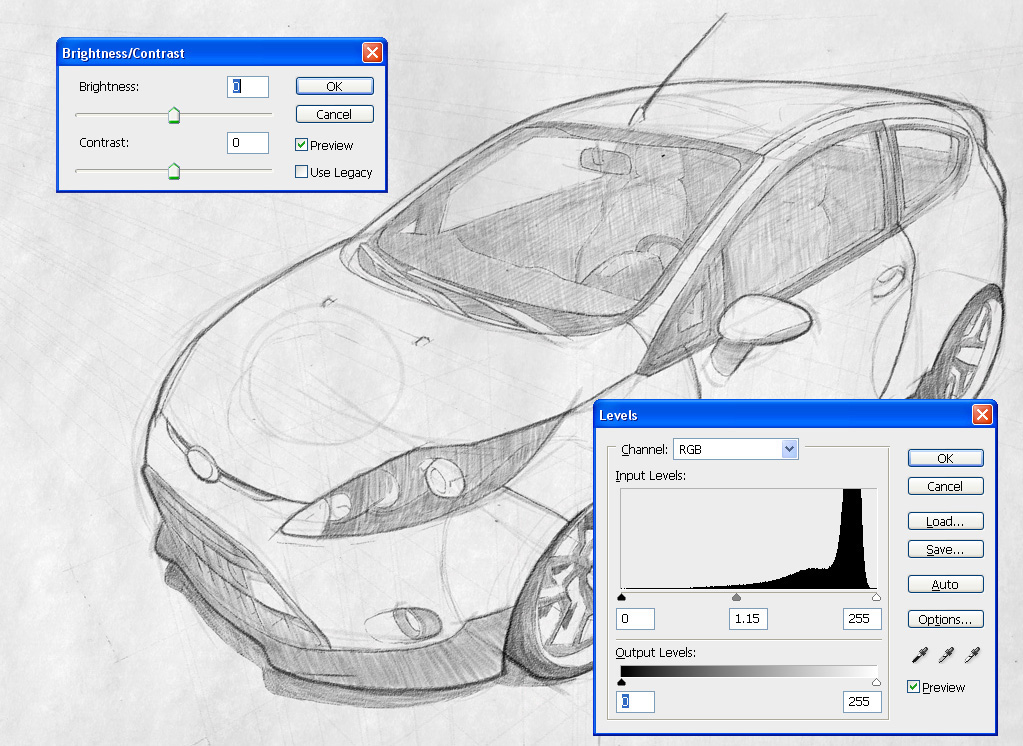
For the eleventh time, I scan the sketch and open it in Photoshop. It’s important to scan in color mode because we’ll be removing the colored pencil lines.
Go to Image>Adjustment>Hue/Saturation. If you want to save the trouble buy a keyboard and press ctrl+U. Keyboards are cheap I was able to buy my first one the other week. Not to mention it helps you with the typing.
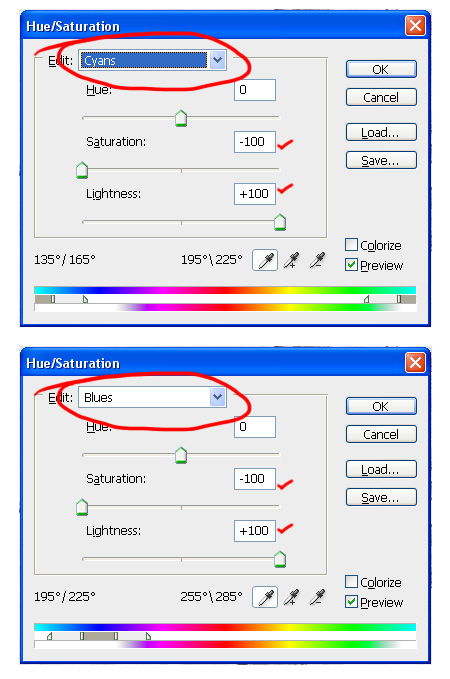
In the Hue/Saturation window click edit and choose Cyans and set the Saturation slider to -100 and the lightness slider to 100. Click edit and choose Blues and follow the same instructions as with the Cyans.
This will get rid of the colored pencils and leave the tight pencils behind.

Let’s clean up the sketch by going using Level and Brightness/Contrast. Play with the settings to clean up the image and darken the pencil lines.
There will be some unwanted pencil lines so just clean them up with the eraser and dodge tools.
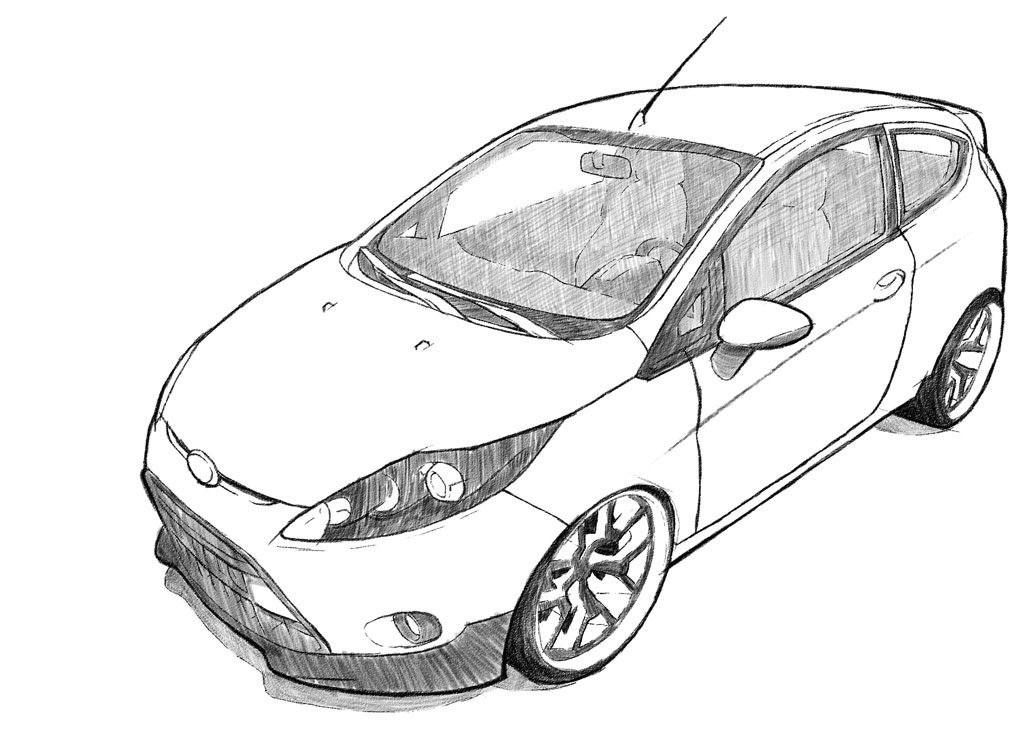
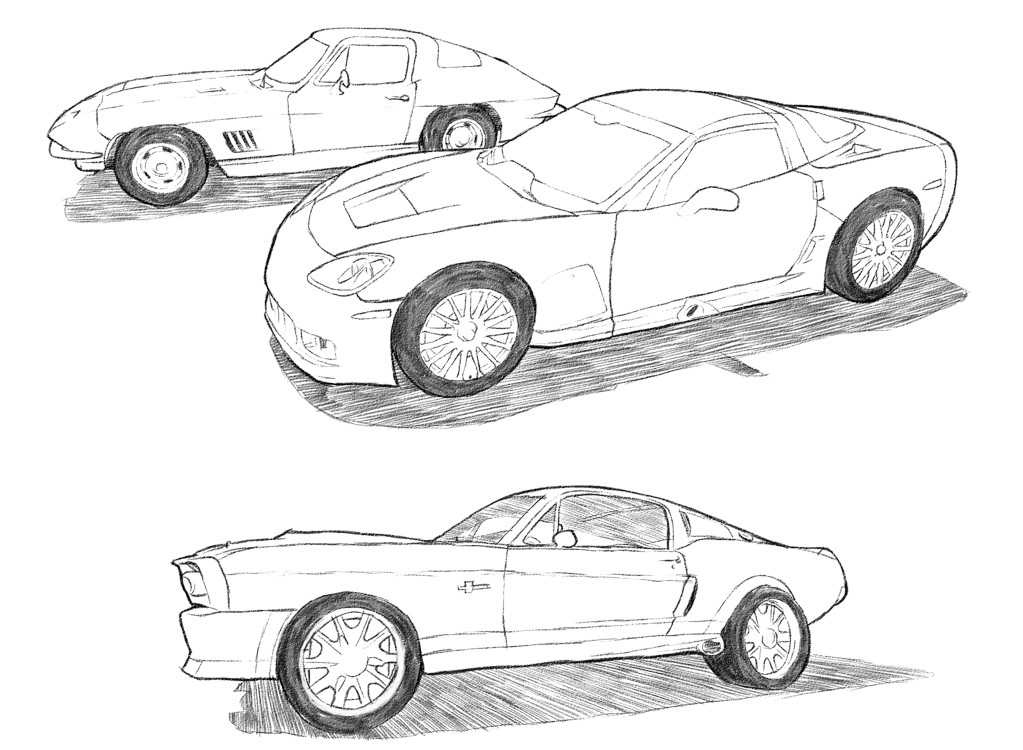
There you have it, my car sketching tutorial. I’m glad to announce that no French curves were harmed during the making of this tutorial…
as compared to my last one.
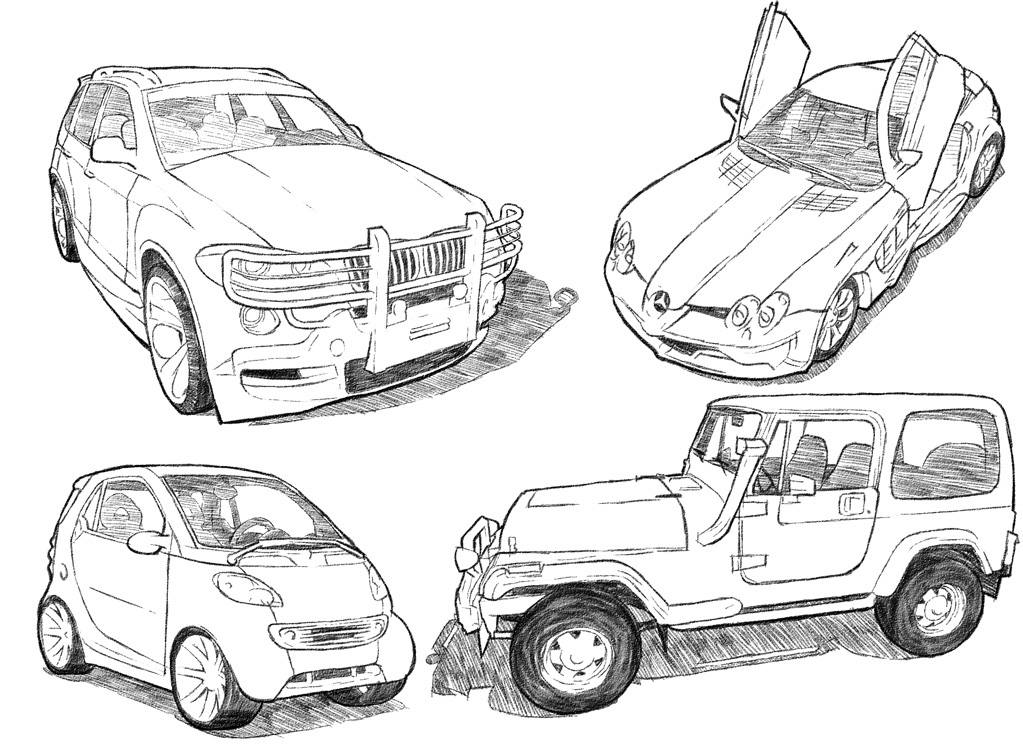
I have updated this project with quick digital sketches below. Enjoy the music.